

Since I replaced the HDD of iMac (21.5-inch, Late 2009), I will explain the procedure at that time in detail with photos.
Models around this time are easy to disassemble, support OS up to 10.13 High Sierra, and hardware performance is not bad, so I recommend them.
Advantages and disadvantages (risks) of replacing the iMac internal HDD
Advantages
- Even if the HDD breaks down, you can repair it yourself at low cost.
- It can be replaced with a recent HDD that has a larger capacity, lower heat generation, and less noise than the originally built-in HDD.
- If you replace it with SSD, the operation speed will be faster and the number of failures will be less than HDD.
- Although not explained on this page, you can replace the CD / DVD drive with an HDD / SSD to create a 2-drive configuration.
Disadvantages (risks)
- Disassembly work is moderately difficult (it may take about 30 minutes to open for the first time)
- It takes a lot of force to lift the LCD display, so it’s better to work with two people if possible.
- The magnet on the iMac that holds the LCD display is strong, so you need to prevent it from sticking to the magnet when removing or installing the screws.
Target iMac models
This is a list of iMac models that can replace HDD / SSD by the method explained on this page.
What they have in common in appearance is the silver aluminum body.
Also, they are all Intel Macs.
| Introduced | Model | Min OS | Max OS |
| 2009 | iMac (21.5-inch, Late 2009) | 10.6.1 | 10.13.6 |
| 2009 | iMac (27-inch, Late 2009) | 10.6.1 | 10.13.6 |
| 2010 | iMac (21.5-inch, Mid 2010) | 10.6.3 | 10.13.6 |
| 2010 | iMac (27-inch, Mid 2010) | 10.6.3 | 10.13.6 |
| 2011 | iMac (21.5-inch, Mid 2011) | 10.6.6 | 10.13.6 |
| 2011 | iMac (27-inch, Mid 2011) | 10.6.6 | 10.13.6 |
| 2011 | iMac (21.5-inch, Late 2011) | 10.7 | 10.13.6 |
Regarding how to check the model, if you have OS X 10.7 Lion or later, you can display it from “About this Mac” in the Apple menu.
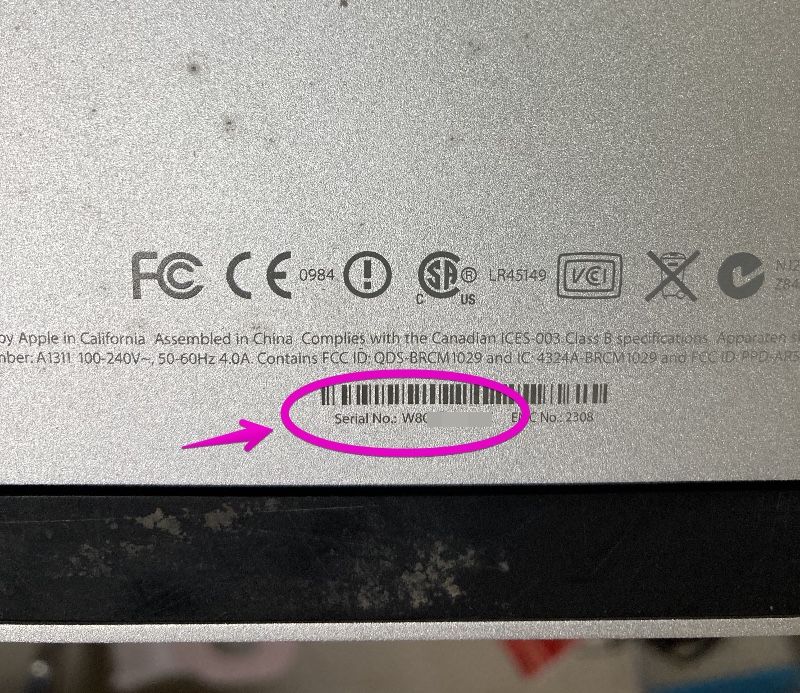
Or, since the serial number is written directly under the stand of the iMac main unit, you can search for the model at the following site based on it.

Predetermine how to restore the OS
For the iMac models introduced on this page, from 2009 Late to 2011 Late, some models come with recovery discs, while others do not have discs for Internet recovery.
Therefore, when installing the OS after replacing the HDD, it is necessary to perform a new installation using a recovery disk or Internet recovery, or prepare a separate installation disk or USB memory.
As a separate installation disc, you can purchase an OS X 10.6.3 disc from Amazon.com.
On the other hand, for OS X 10.7 Lion, you can either purchase a USB stick for installation from Apple.com or download the installation program yourself to create a USB stick.
USB memory can be purchased from the following Apple official website.


In addition, if you want to make your own USB memory, the following article will introduce the procedure.
Please also refer to it if you want to install 10.9 Mavericks or later OS.

About data backup
It is strongly recommended to back up your data in case the HDD replacement work fails.
As for the method, Time Machine, which is a standard Mac function, is easy and recommended.

In addition, you can see several other backup methods introduced from the following articles.

Required tools
Essential tools
The following three are essential because you can’t work without them.
- T8 torx screwdriver
- Vacuum lifter
- Staples
The final “staples” is described in the heading “About the HDD temperature sensor cable“.
Below is a description of each tool.
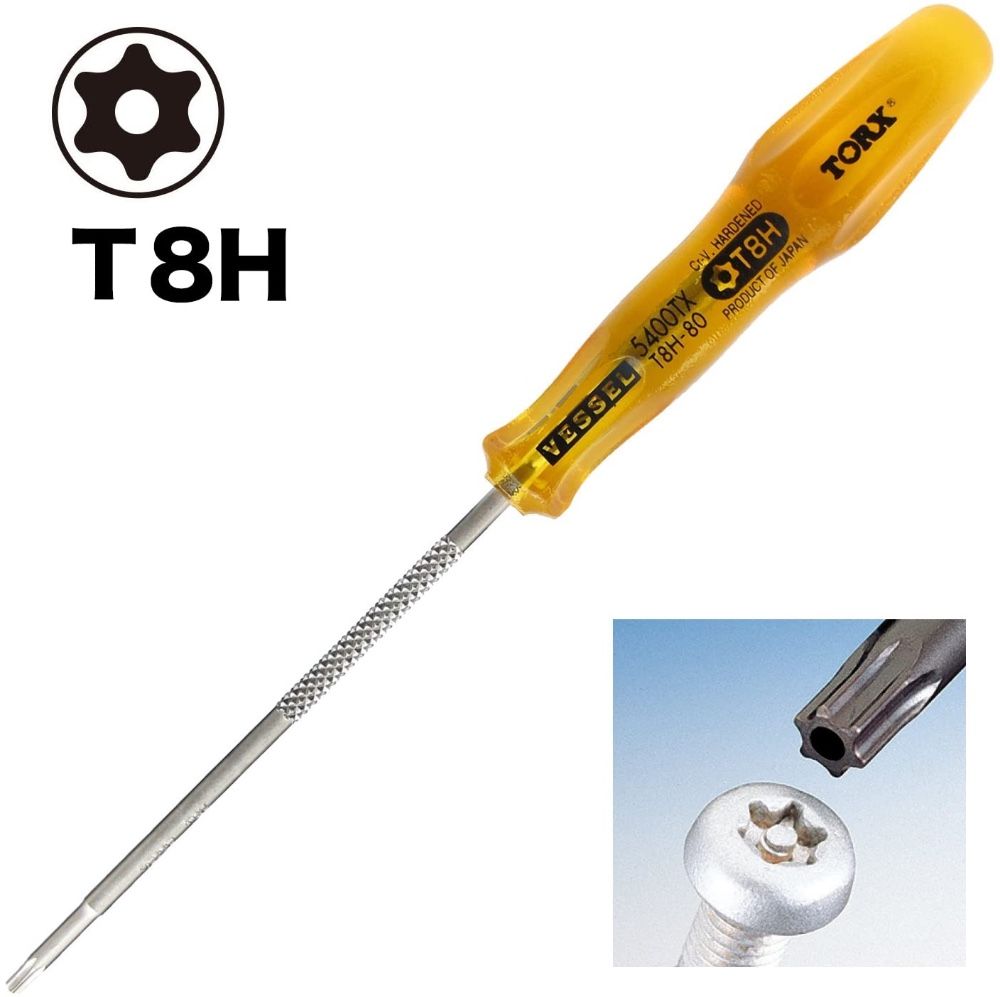
T8 torx screwdriver
The T8 Torx screwdrivers, which probably few people have, are special screwdrivers with a star-shaped tip.
The name “Torx” is a registered trademark and is sometimes referred to as the “hex lobe”, but it is actually the same.
It is available at home improvement stores and Amazon.com.
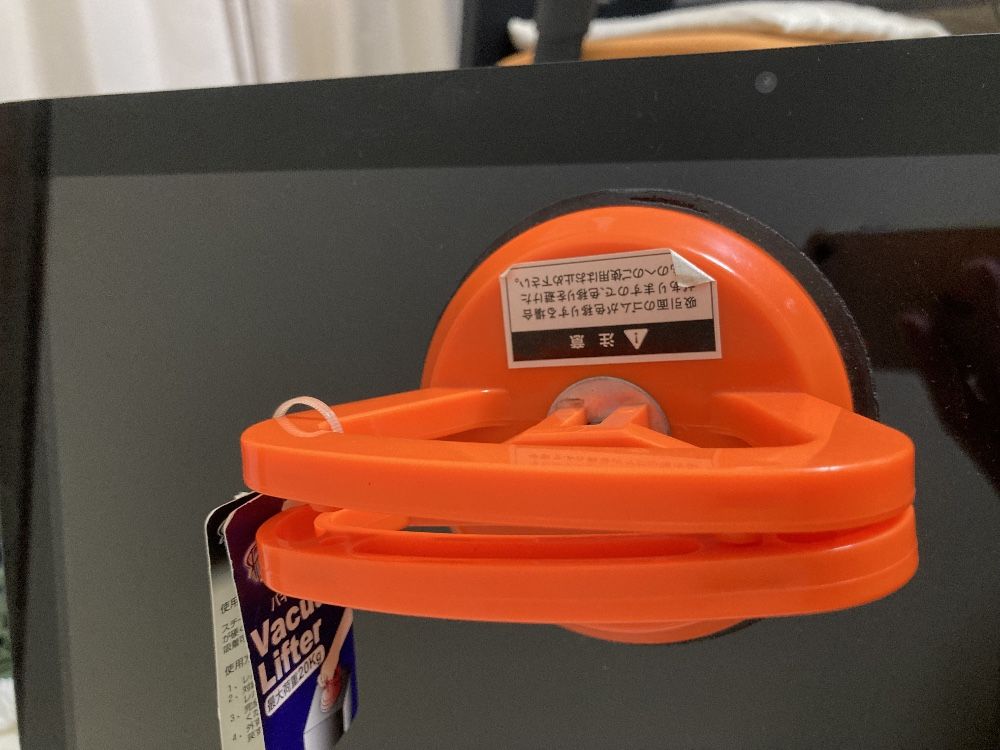
Vacuum lifter
The glass panel on the front of the iMac is attached to the iMac itself with a strong magnet.
It won’t come off gently, so use a suction cup to pull it.
Almost essential tools
There are a number of strong magnets attached near the screws that hold the iMac’s display in place, which makes it very difficult to work with when removing or installing the screws.
Therefore, if you have a tool such as tweezers or needle-nose pliers that can hold screws, it will be easier to work, so it is almost essential.
Tweezers
Tools that are not required, but should be prepared if available
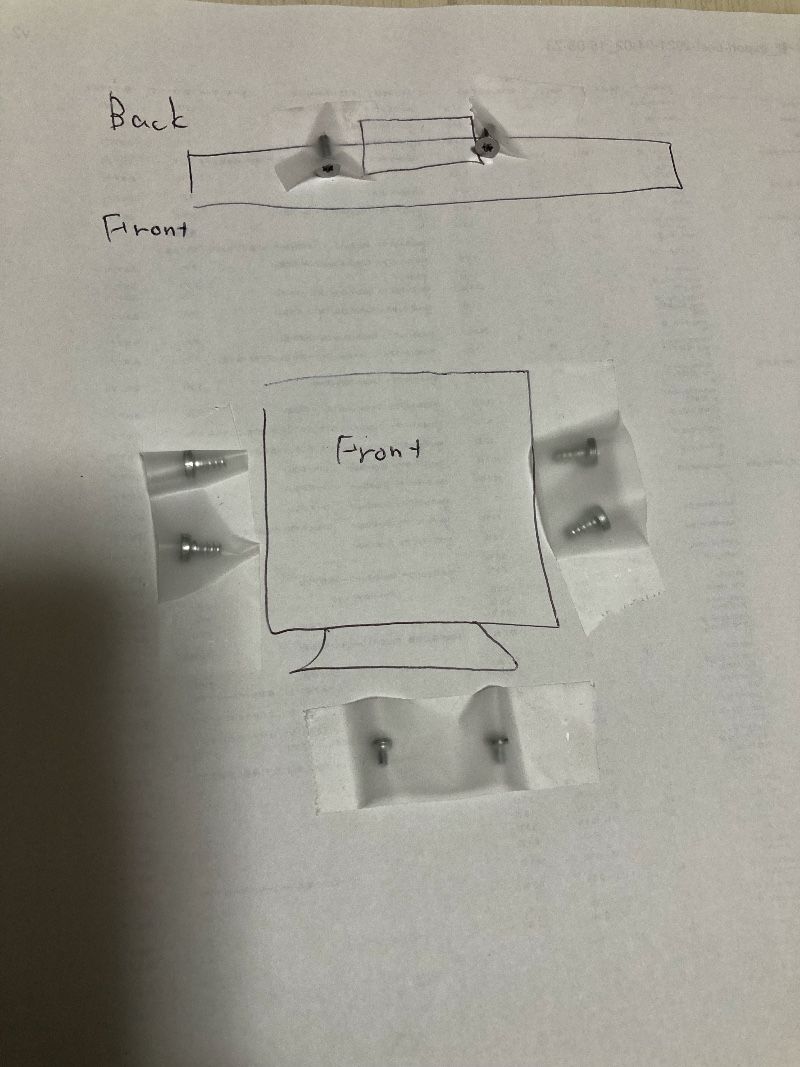
A piece of paper, writing utensils, cellophane tape
It’s not a tool, but I’ll remove a number of similar screws, so prepare a piece of paper such as letter size, writing utensils, and cellophane tape so that you can see the original location, and make illustrations and memos. It is recommended to tape it while drawing.
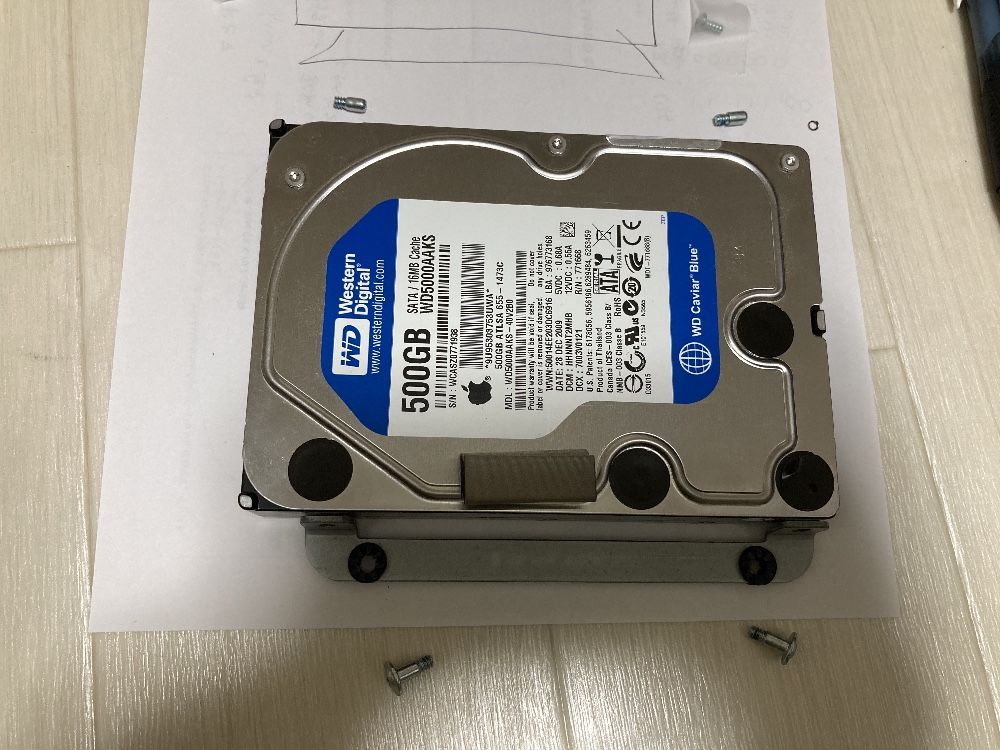
Usable HDD and SSD
As a replacement HDD or SSD, you can use a SATA format 3.5-inch or 2.5-inch drive.
When using HDDs, we often choose 3.5 inches, which has a large capacity and good cost performance, but SSDs have almost only 2.5 inches.
In the case of 2.5 inches, attach a part called “mounter” and install it in a format similar to a 3.5 inch drive.
The following are recommended products.
3.5 inch HDD
2.5 inch SSD
Mounter
Procedure for disassembling iMac and replacing HDD
The iMac models used in the explanations below are as follows.
- iMac (21.5-inch, Late 2009)
You can do this for other models in much the same way, but please note that there are some differences.
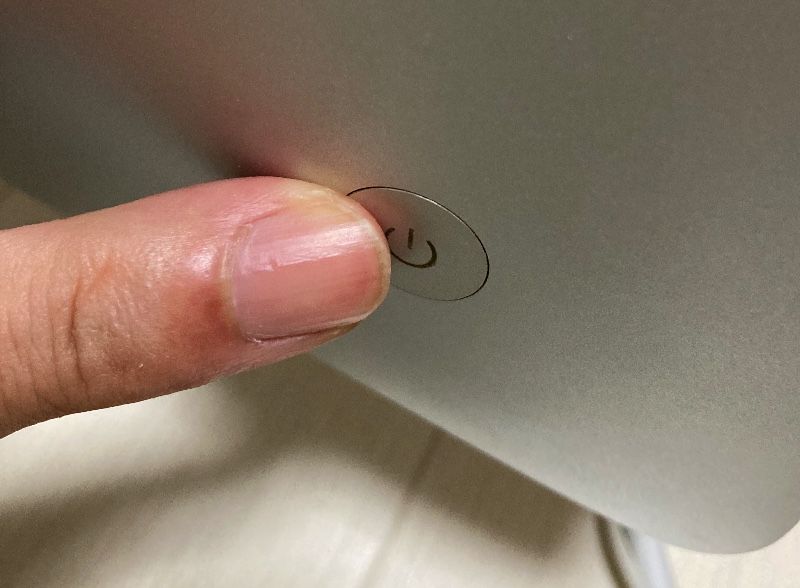
▶︎ Unplug the power cable from your iMac and press the power switch on the back 5-6 times.
This is to prevent you from getting an electric shock from the current remaining inside the iMac when you disassemble it, or shorting the board when you roll the screws.
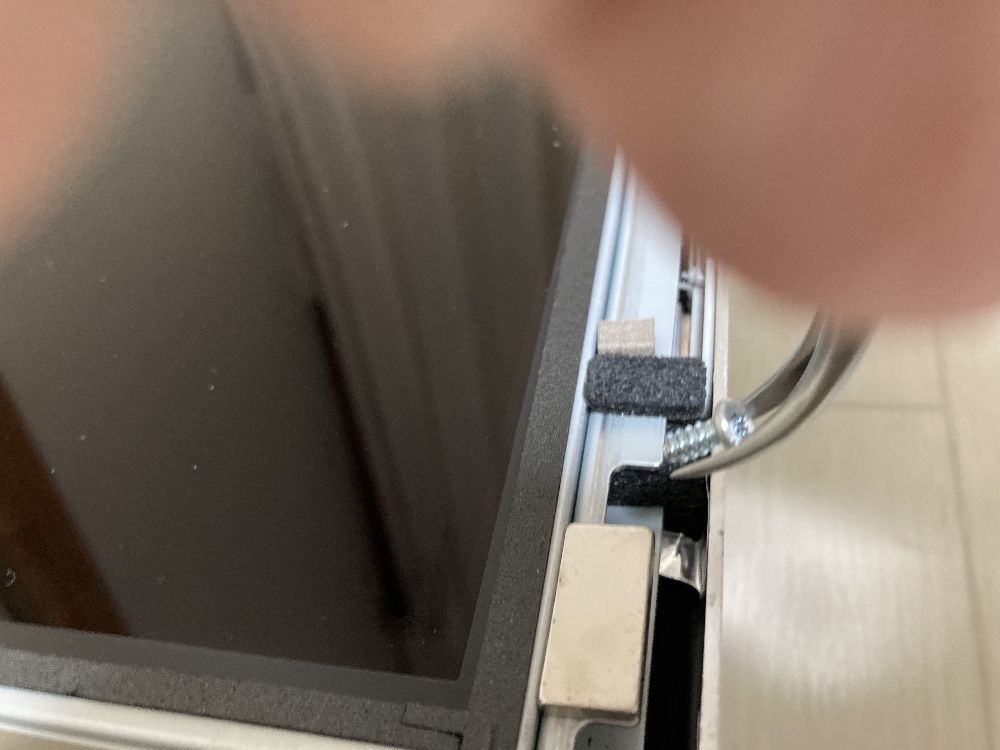
▶ With the iMac upright, attach the vacuum lifter to the front glass panel and pull to remove it.
This glass panel is attached to the iMac itself with many strong magnets, so it won’t come off without a lot of effort.
The trick is to stick it near the top edge of the glass panel, pull it little by little, and if you get a slight gap, stick your finger in and prevent it from sticking again with the magnet.
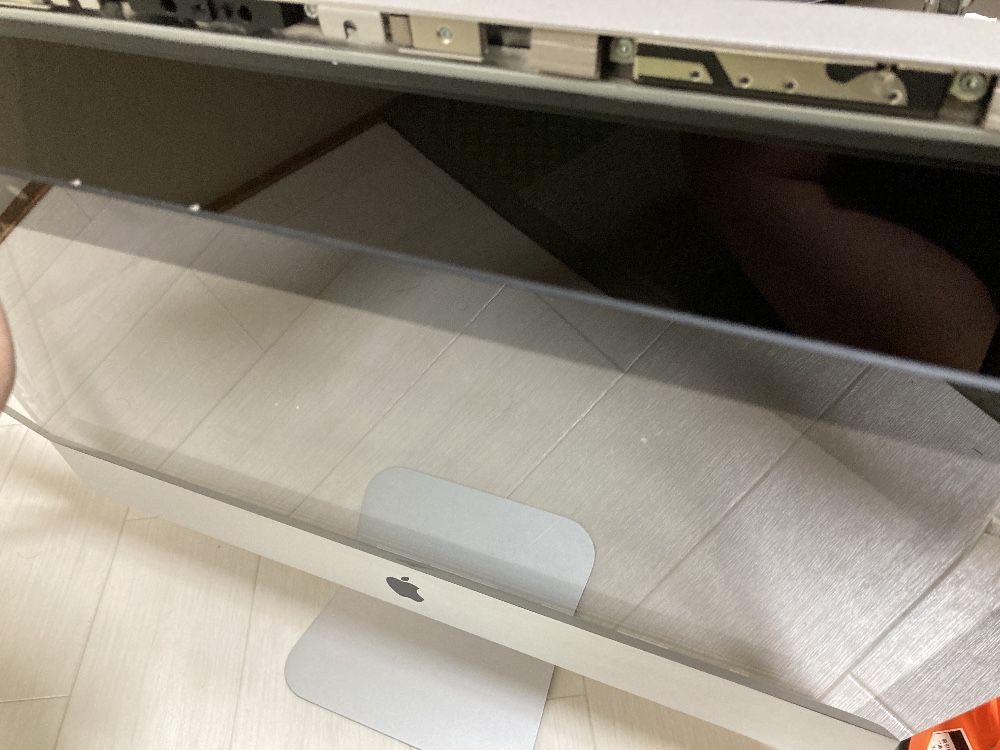
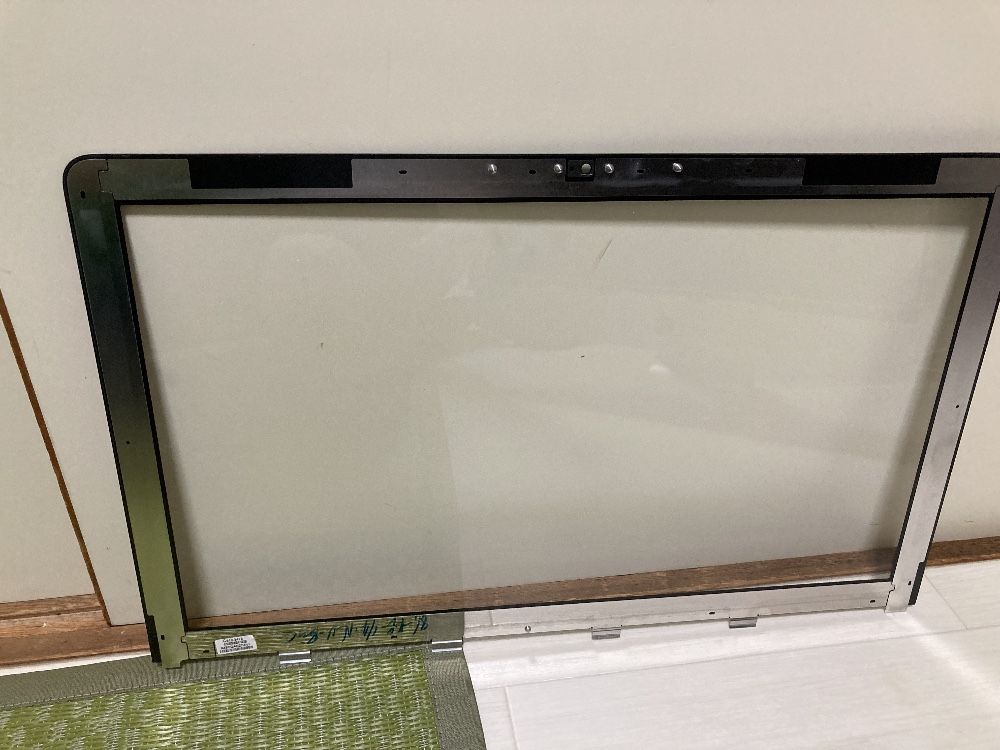
▶ After removing the front glass panel, lean it in a suitable place.
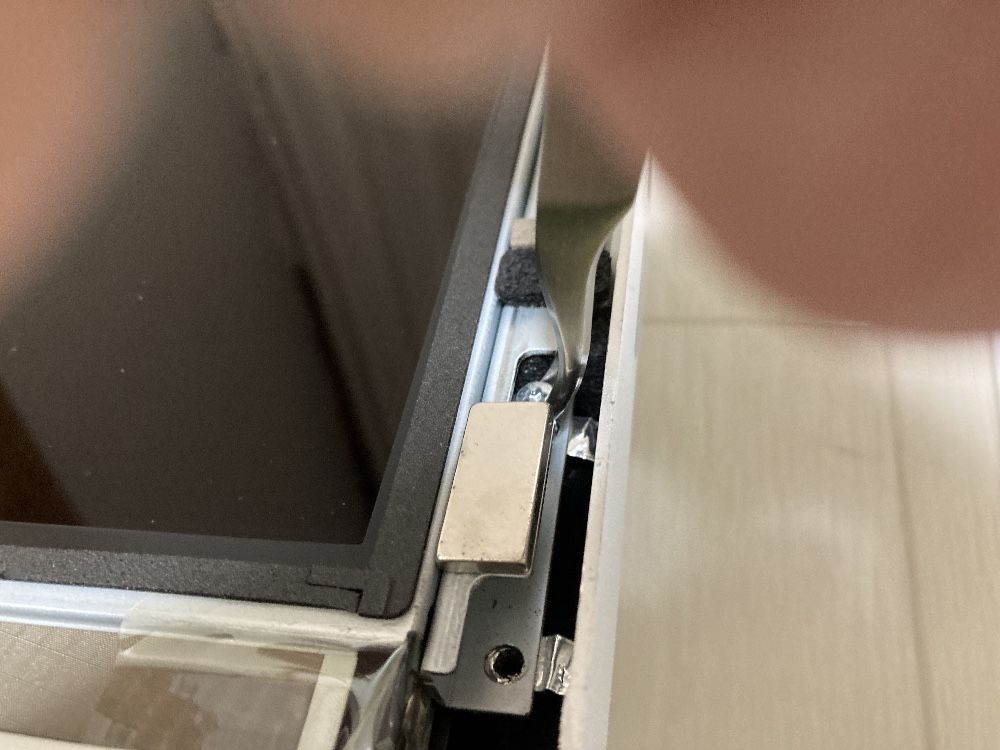
▶ With the front glass panel removed, lay the iMac on its side and remove the T8 Torx screws that hold the LCD display in place.
▶ As for how to remove the screws, there are some strong magnets nearby, so if you can remove it in a little while, you should pick it up with tweezers or needle-nose pliers.
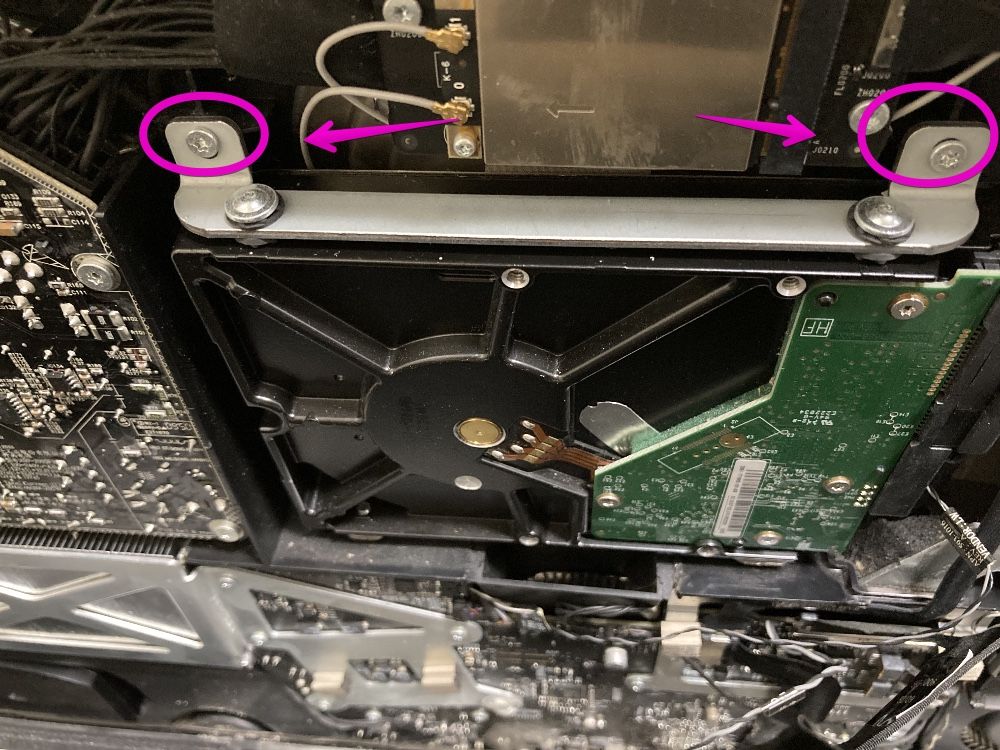
▶ After removing the screws, remove the HDD inside the iMac while tilting the LCD display forward, keeping the iMac upright and taking care not to tip it over.
Remove the two T8 Torx screws shown by the arrows in the figure.
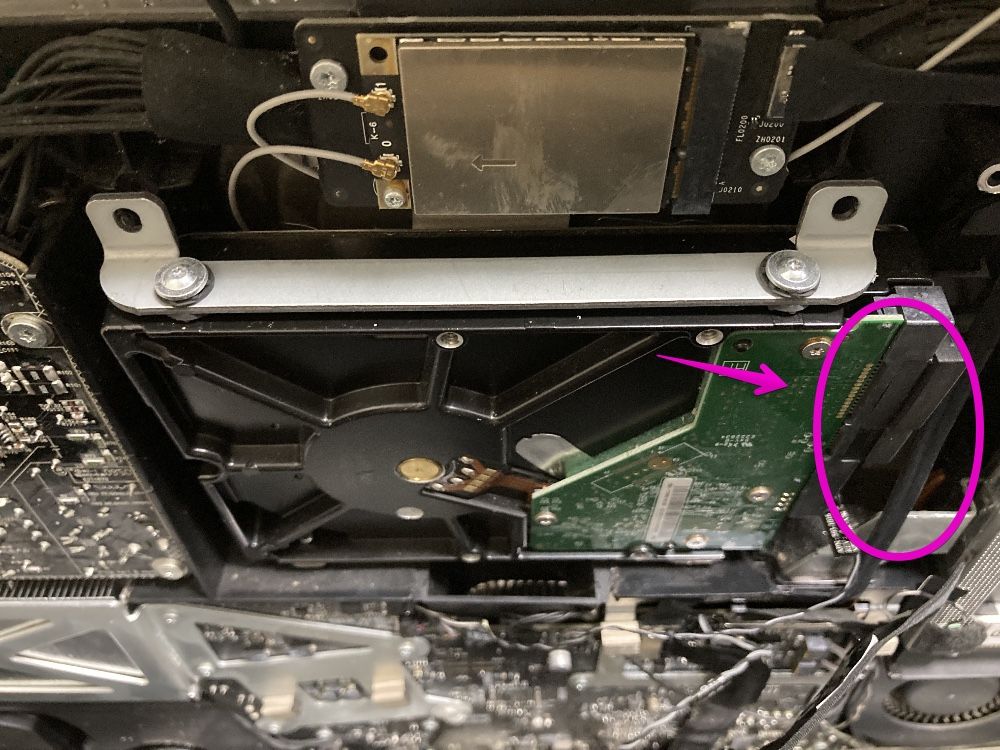
▶ After removing the screws, remove the HDD while removing all the cables connected around the arrows in the figure.
Although it is difficult to see in the figure, there are three types: SATA signal cable, power cable, and temperature sensor cable. (Some iMa models do not have a temperature sensor cable)
▶︎ After removing the HDD, remove the T8 Torx screws and parts on both sides.
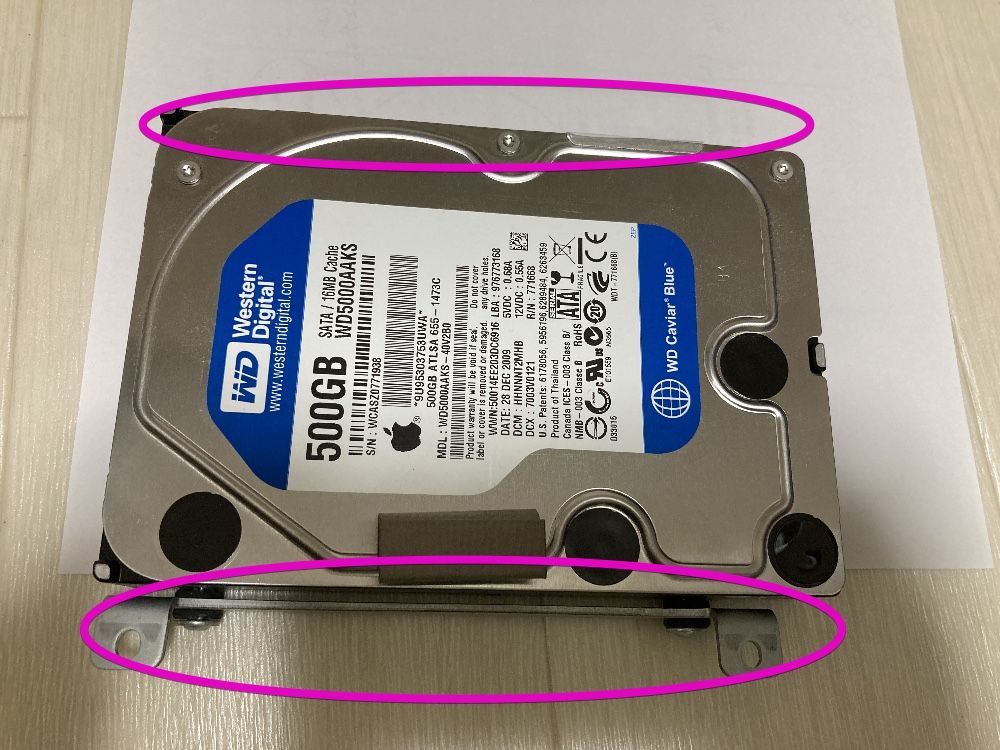
▶︎ The HDD was completely removed.
▶ To assemble an iMac with a replacement HDD, follow the reverse procedure up to this point.
However, if the HDD has a temperature sensor cable, read the following “About the HDD temperature sensor cable” and take the necessary measures.
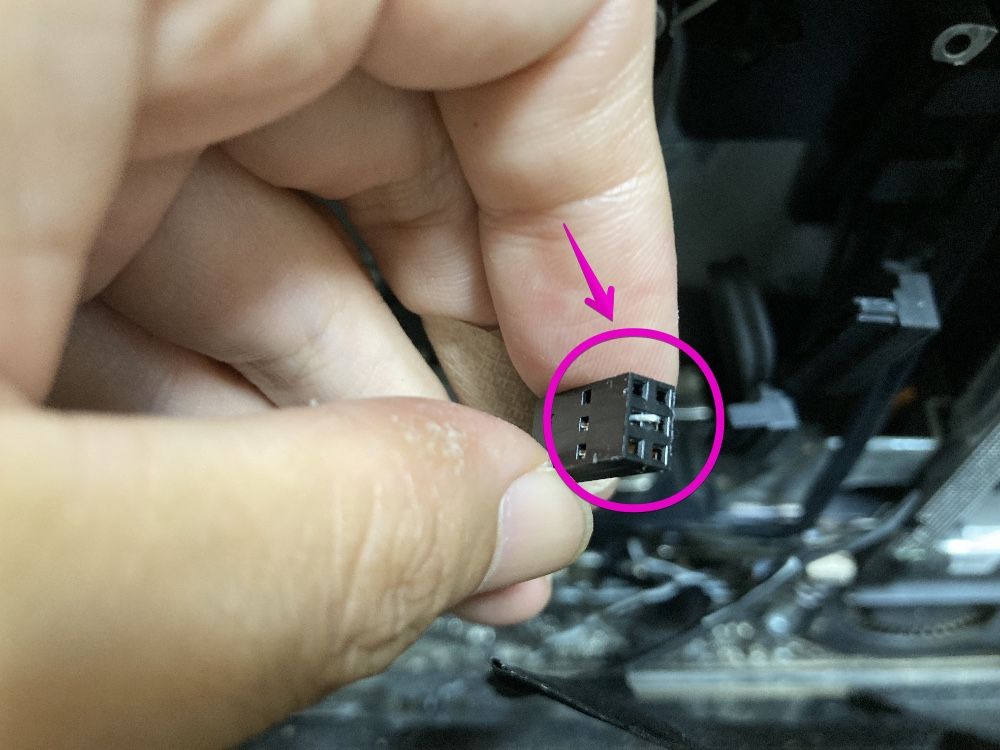
About HDD temperature sensor cable
Depending on the iMac model, a sensor cable that detects the temperature of the HDD may be connected.
The HDD in this case is an Apple-only product, and it is difficult to obtain an HDD with a terminal for connecting a sensor cable like this, so you will need to use a general product.
In that case, it has been reported that the cooling fan of the iMac will rotate at full throttle unless the tip of the temperature sensor cable originally connected to the HDD is short-circuited and disabled.
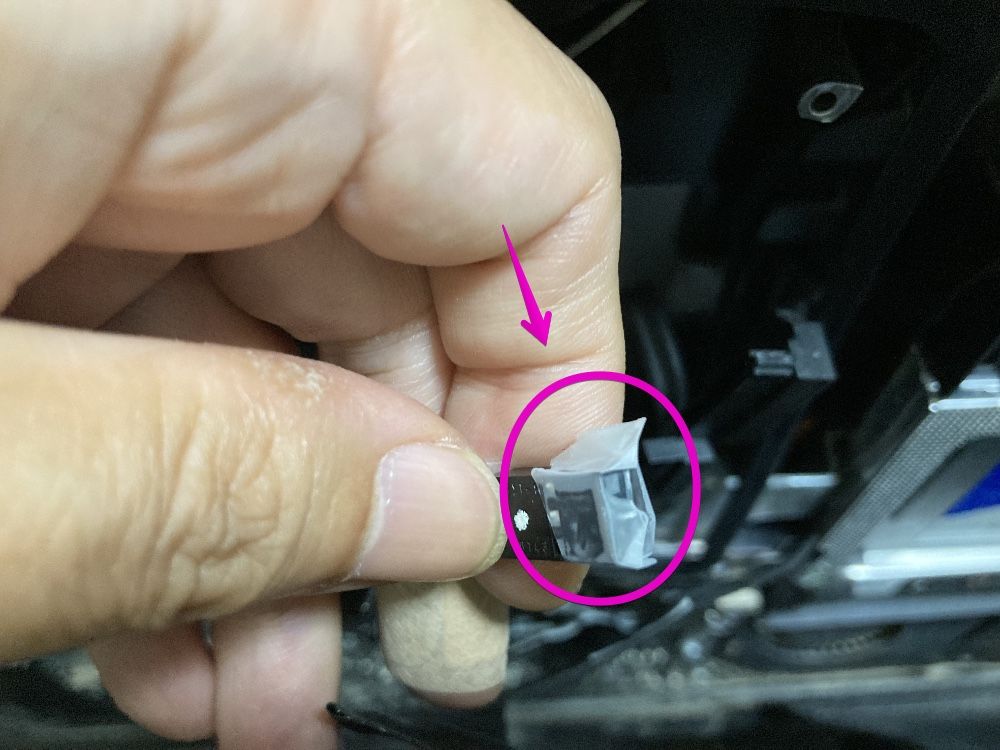
In the figure below, the staples of the stapler are bent and inserted into the middle part of the terminal to make a short circuit.
If it is left as it is, the staples of the stapler may come off or short-circuit with other parts, so cellophane tape is wrapped around it.
Conclusion
As I wrote at the beginning, iMacs from Late 2009 to Late 2011 are easier to disassemble than iMacs of other times, support up to macOS 10.13 High Sierra, CPU is equipped with Core i5 and i7, memory is up to 16GB It can be used, and even as of 2021, it is a “usable model”.
If you are not using it because it does not start due to HDD failure, or if you can get it cheaply, please refer to this page and replace the HDD or SSD and reuse it.


コメント