

Since I replaced the HDD of iMac 2006, I will explain the procedure at that time in detail with photos.
I will also explain the advantages and disadvantages of HDD / SSD replacement, the necessary tools and types of HDDs that can be used, and precautions when disassembling the iMac.
Advantages and disadvantages (risks) of replacing the iMac internal HDD
Advantages
- Even if the HDD breaks down, you can repair it yourself at low cost.
- It can be replaced with a recent HDD that has a larger capacity, lower heat generation, and less noise than the originally built-in HDD.
- If you replace it with SSD, the operation speed will be faster and the number of failures will be less than HDD.
- Although not explained on this page, you can replace the CD / DVD drive with an HDD / SSD to create a 2-drive configuration.
Disadvantages (risks)
- Difficulty of disassembly work (it may take about 1 hour to open for the first time)
- It often requires detailed and careful work, and there is a risk of screws falling inside the iMac or damaging the connecting cables.
Target iMac models
This is a list of iMac models that can replace HDD / SSD by the method explained on this page.
What they have in common in appearance is the body of white polycarbonate (reinforced plastic).
Also, they are all Intel Macs.
| Introduced | Model | Min OS | Max OS |
| 2006 | iMac (24-inch) | 10.4.7 | 10.7.5 |
| 2006 | iMac (20-inch Late 2006) | 10.4.7 | 10.7.5 |
| 2006 | iMac (17-inch Late 2006) | 10.4.7 | 10.7.5 |
| 2006 | iMac (17-inch Late 2006 CD) | 10.4.7 | 10.7.5 |
| 2006 | iMac (Mid 2006 17-inch) | 10.4.6 | 10.6.8 |
| 2006 | iMac (Early 2006 20-inch) | 10.4.4 | 10.6.8 |
| 2006 | iMac (Early 2006 17-inch) | 10.4.4 | 10.6.8 |
| End of list |
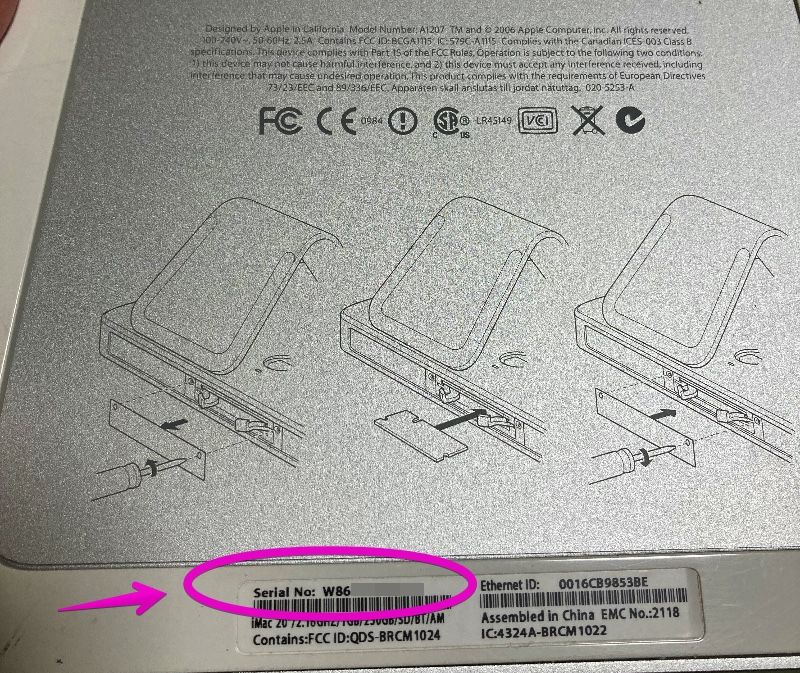
Regarding how to check the model, if you have OS X 10.7 Lion or later, you can display it from “About this Mac” in the Apple menu.
Or, since the serial number is written directly under the stand of the iMac main unit, you can search for the model at the following site based on it.

Predetermine how to restore the OS
All 2006 iMacs featured on this page come with recovery discs.
After replacing the HDD, you need to use the recovery disc for a new installation, or prepare a separate installation disc or USB memory.
As a separate installation disc, you can purchase an OS X 10.6.3 disc from Amazon.com.
On the other hand, for OS X 10.7 Lion, you can either purchase a USB stick for installation from Apple.com or download the installation program yourself to create a USB stick.
USB memory can be purchased from the following Apple official website.

In addition, if you want to make your own USB memory, the following article will introduce the procedure.

About data backup
It is strongly recommended to back up your data in case the HDD replacement work fails.
As for the method, Time Machine, which is a standard Mac function, is easy and recommended.

In addition, you can see several other backup methods introduced from the following articles.

Required tools
Essential tools
The following three are essential because you can’t work without them.
- Phillips screwdriver
- T6 torx screwdriver
- T8 torx screwdriver
A Phillips screwdriver can be an ordinary screwdriver you have, but you don’t know the size that fits the screw, so if possible, prepare two or three sizes.
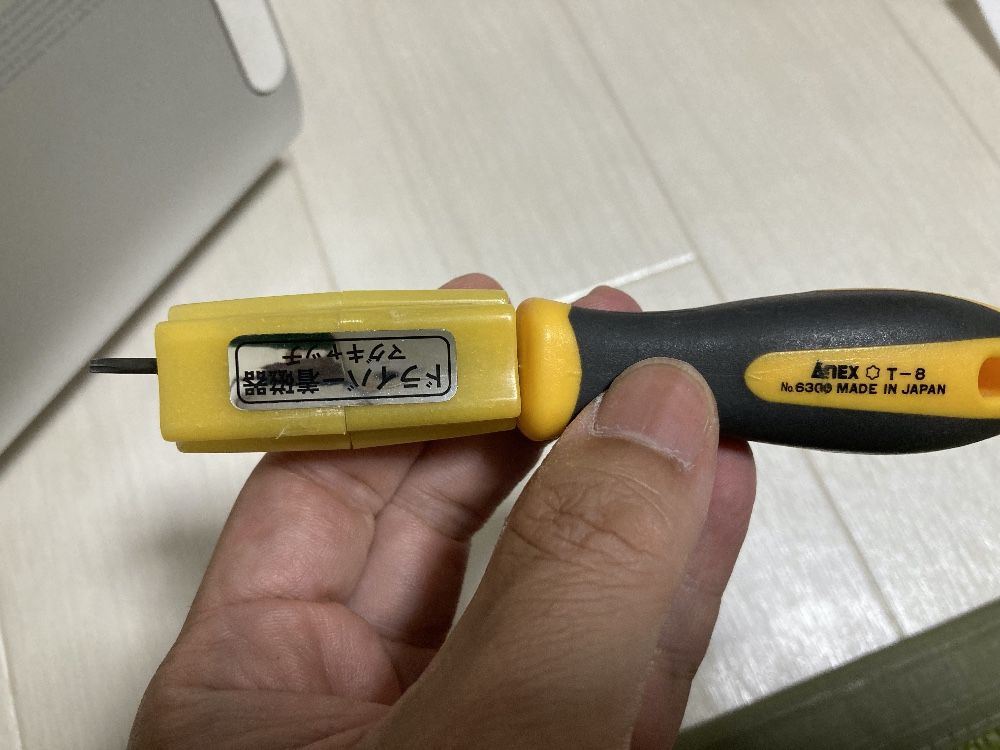
The T6 and T8 Torx screwdrivers, which probably few people have, are special screwdrivers with a star-shaped tip.
The name “Torx” is a registered trademark and is sometimes referred to as the “hex lobe”, but it is actually the same.
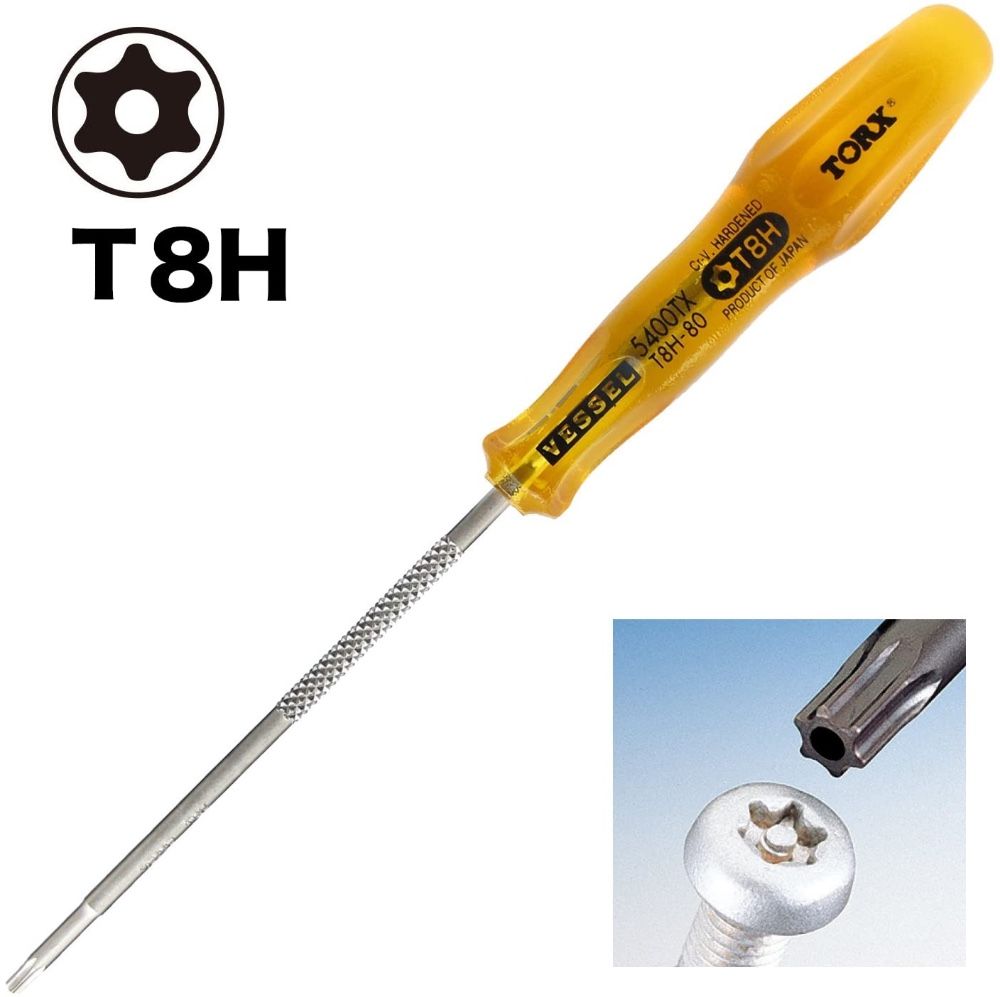
It is available at home improvement stores and Amazon.com.
T6 torx scrrewdriver
T8 torx screwdriver
Almost essential tools
The following tools can be used without them, but they are almost indispensable because they make the work easier and less likely to fail.
Magnetizer
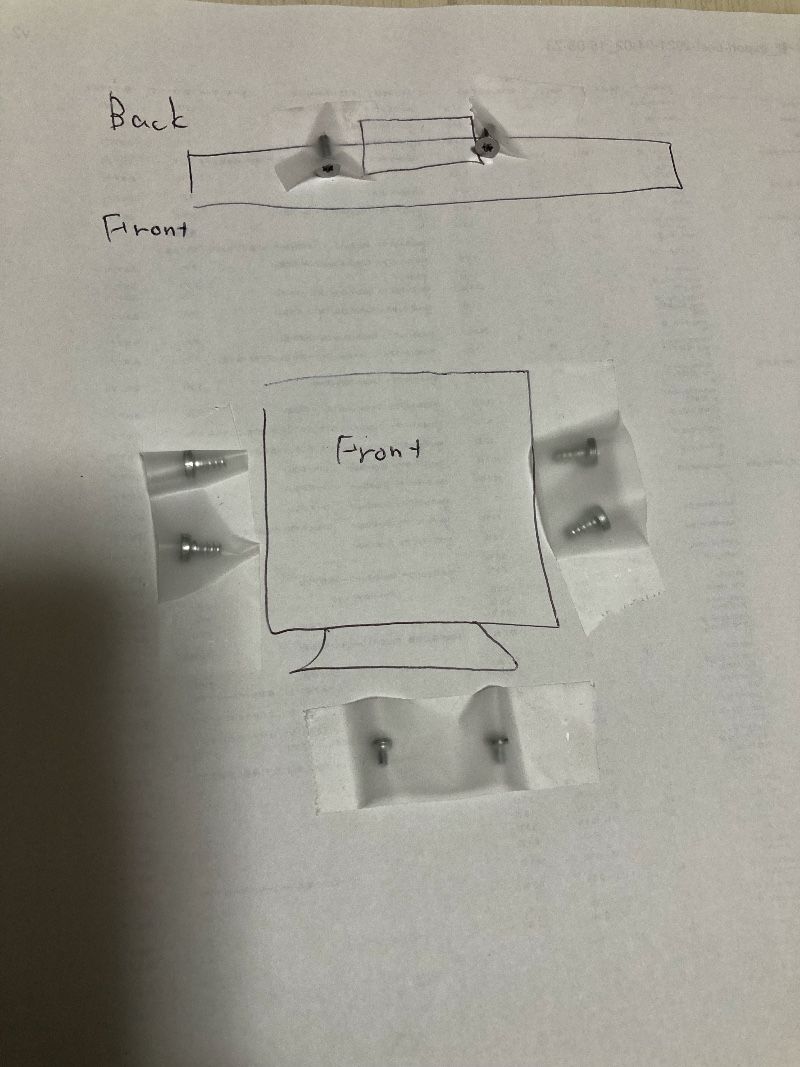
Also, although it is not a tool, you will remove several similar screws, so prepare suitable paper such as A4 size, writing utensils, cellophane tape so that you can see the original location, and make illustrations It is recommended to tape it while drawing a memo.
Tools that are not essential, but you want to have them if you have them
You’ll want to have tweezers when you pick up the screws you’ve removed, as you’ll be removing the screws in the narrow space inside the iMac.
Personally, I think it’s easier to work by making full use of the “driver magnet magnet” rather than tweezers.
Tweezers
Usable HDD and SSD
As a replacement HDD or SSD, you can use a SATA format 3.5-inch or 2.5-inch drive.
When using HDDs, we often choose 3.5 inches, which has a large capacity and good cost performance, but SSDs have almost only 2.5 inches.
In the case of 2.5 inches, attach a part called “mounter” and install it in a format similar to a 3.5 inch drive.
The following are recommended products.
3.5 inch HDD
2.5 inch SSD
Mounter
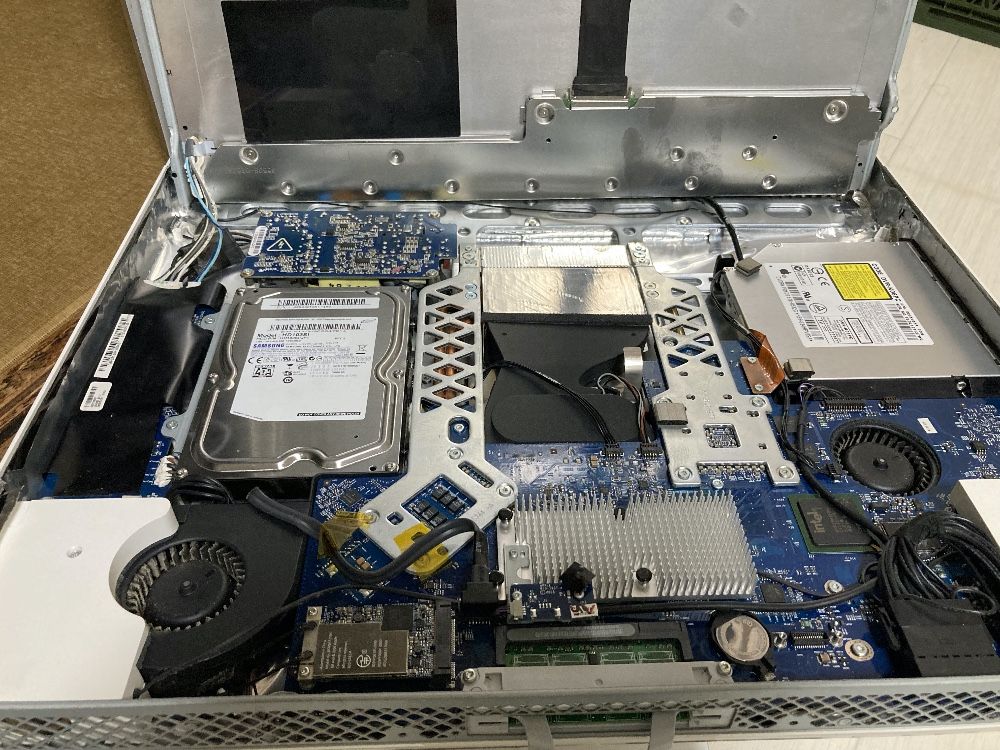
Procedure for disassembling iMac and replacing HDD
The iMac models used in the explanations below are as follows.
- iMac (20-inch, Late 2006)
You can do this for other models in much the same way, but please note that there are some differences.
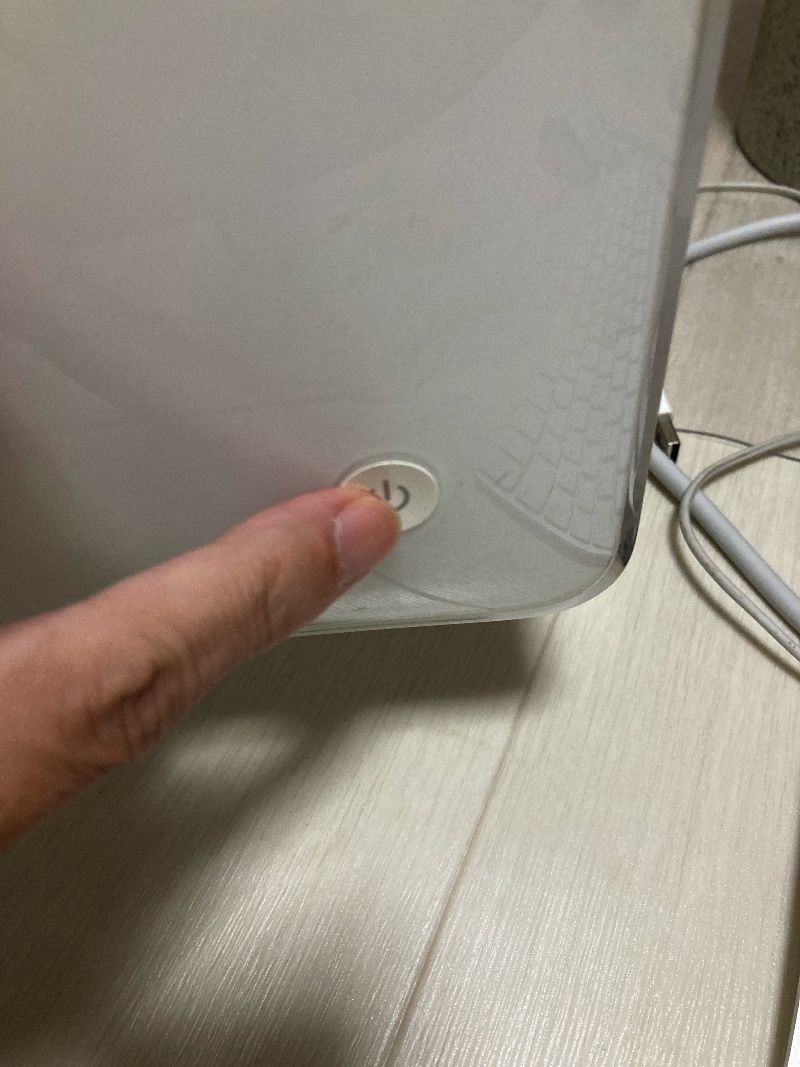
▶︎Unplug the power cable from your iMac and press the power switch on the back 5-6 times.
This is to prevent you from getting an electric shock from the current remaining inside the iMac when you disassemble it, or shorting the board when you roll the screws.
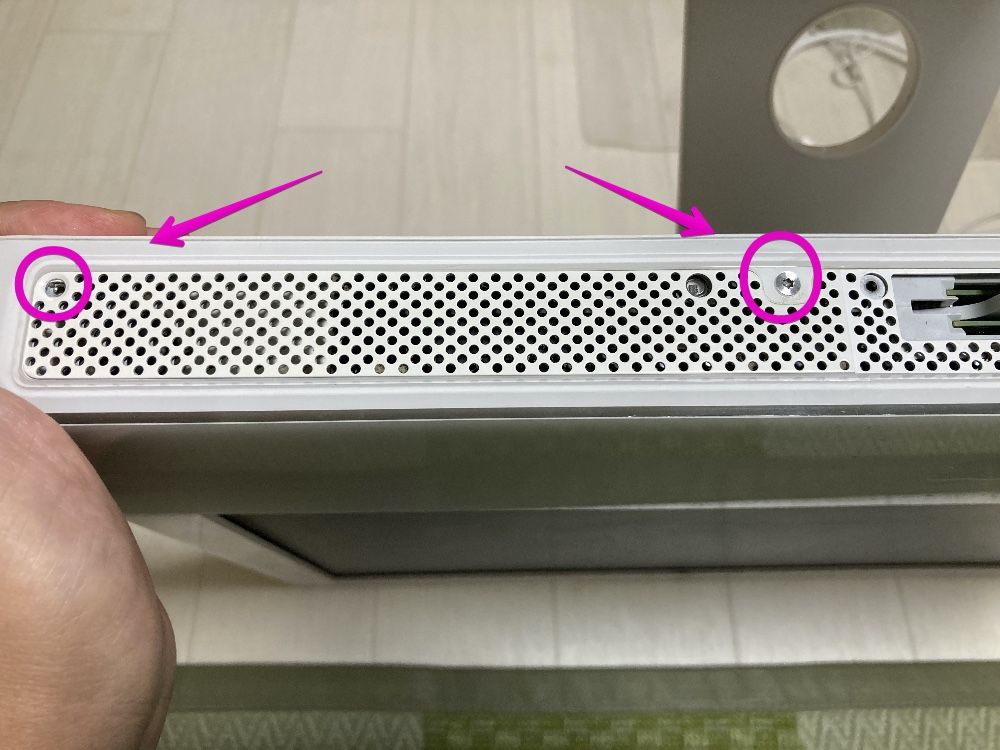
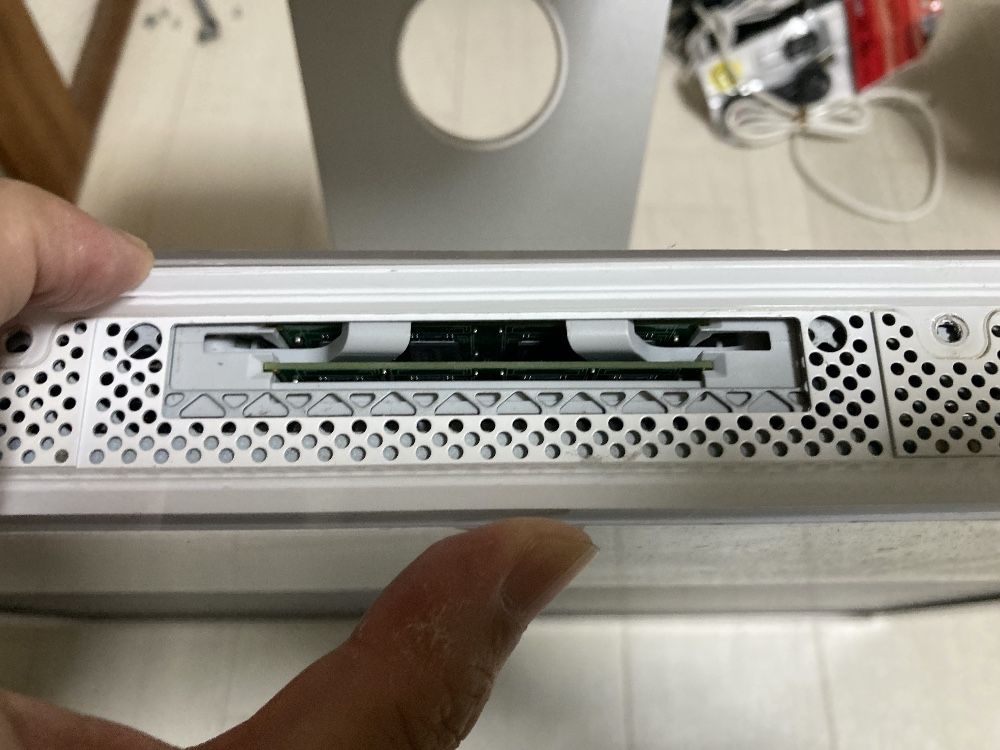
▶︎ Use a Phillips screwdriver to remove the memory expansion lid at the bottom of the iMac display.
▶︎ After removing the memory expansion lid, remove the T8 Torx screw at the bottom of the display in the same way.
At this time, it is important to note that the length of the screw differs depending on the location, so you must be careful not to make a mistake when you put it back.
▶ It is recommended that you write a diagram or memo on the appropriate paper that you have prepared so that you can see where the screws are, and tape them with cellophane tape.
▶︎ Once you’ve removed the screws so far, carefully stand the iMac up, remove the memory expansion lid, and carefully push in the claws that pop out, pulling the bottom of the display frame toward you.
If all goes well, the bottom of the display frame will be completely off.
▶︎ Remove the top of the frame from the iMac as if you were lifting the display frame from bottom to top.
The upper part of the frame is attached with double-sided tape, so remove it by peeling it off while applying force little by little.
▶︎ Once the frame is removed, slowly lay the iMac on its side so that the frame leans somewhere.

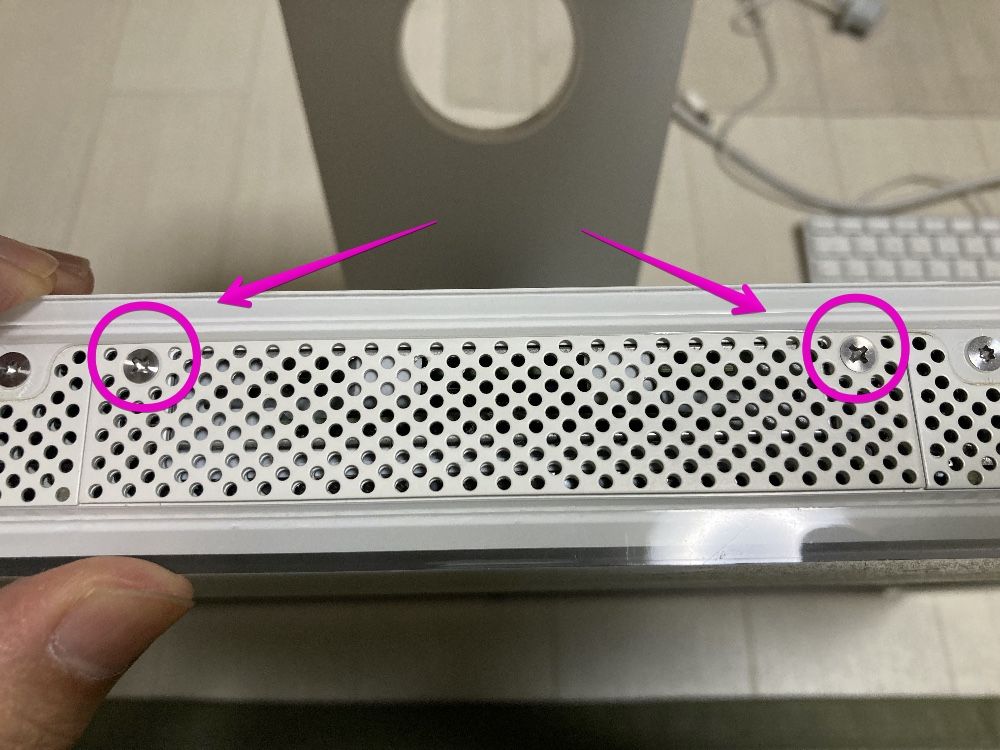
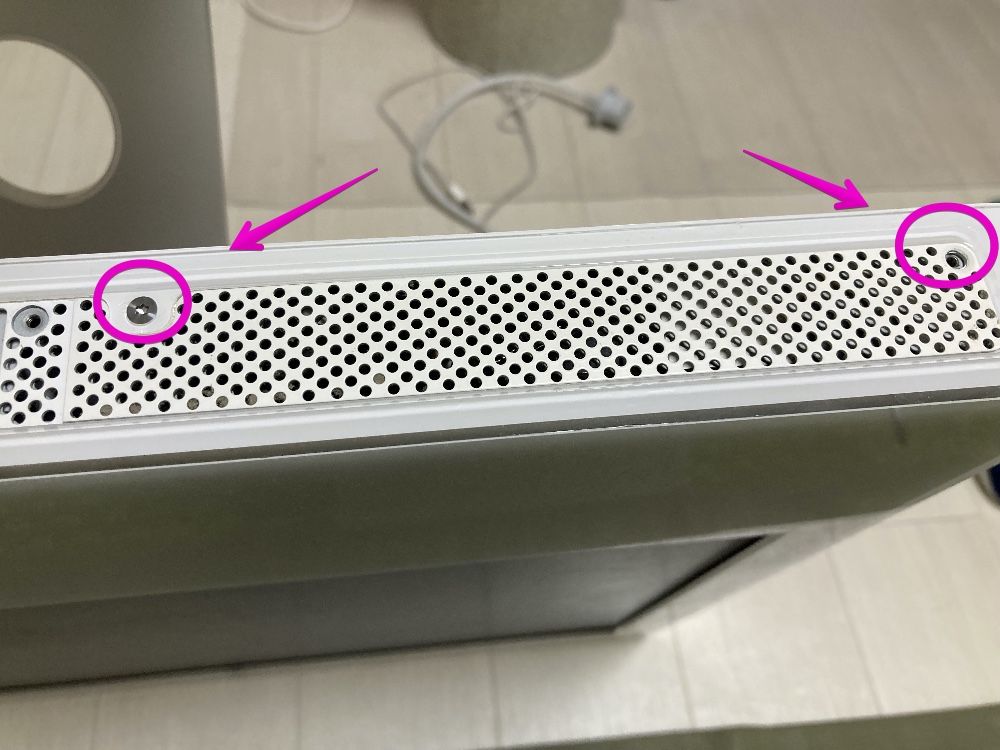
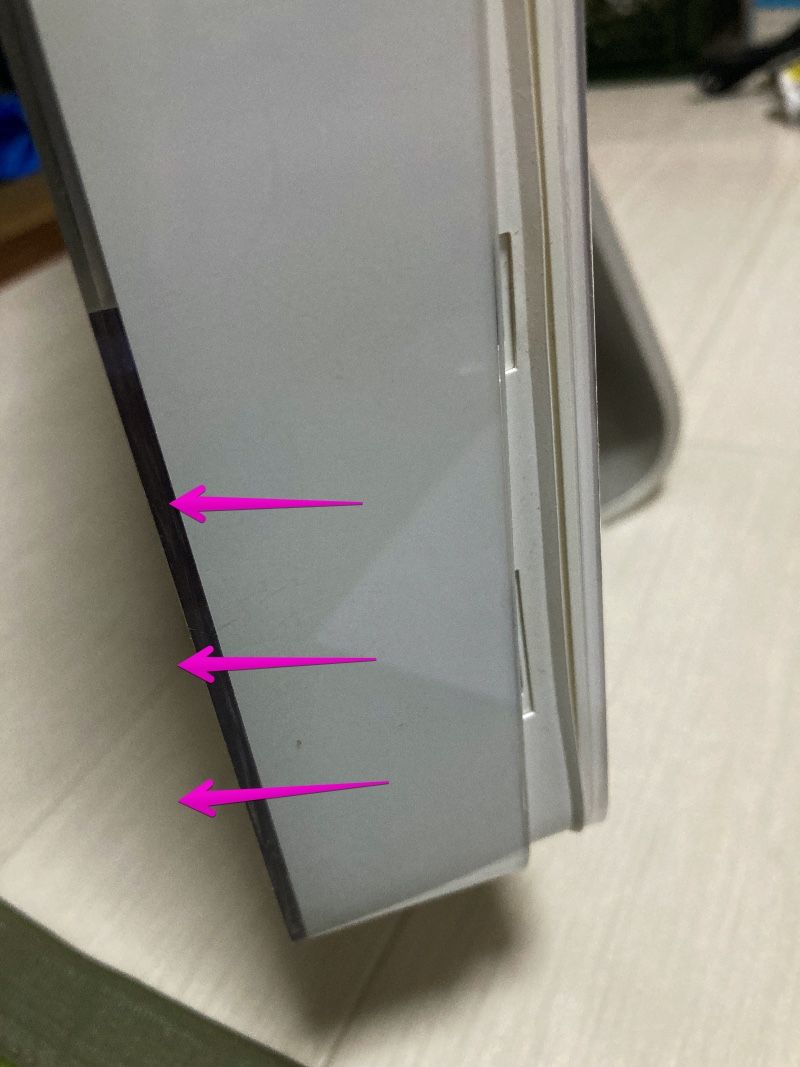
▶︎ When the iMac’s frame is unframed, remove the T8 Torx screws that hold the display in place.
I will explain how to remove it later, but the screw is at the back of the arrow in the figure.
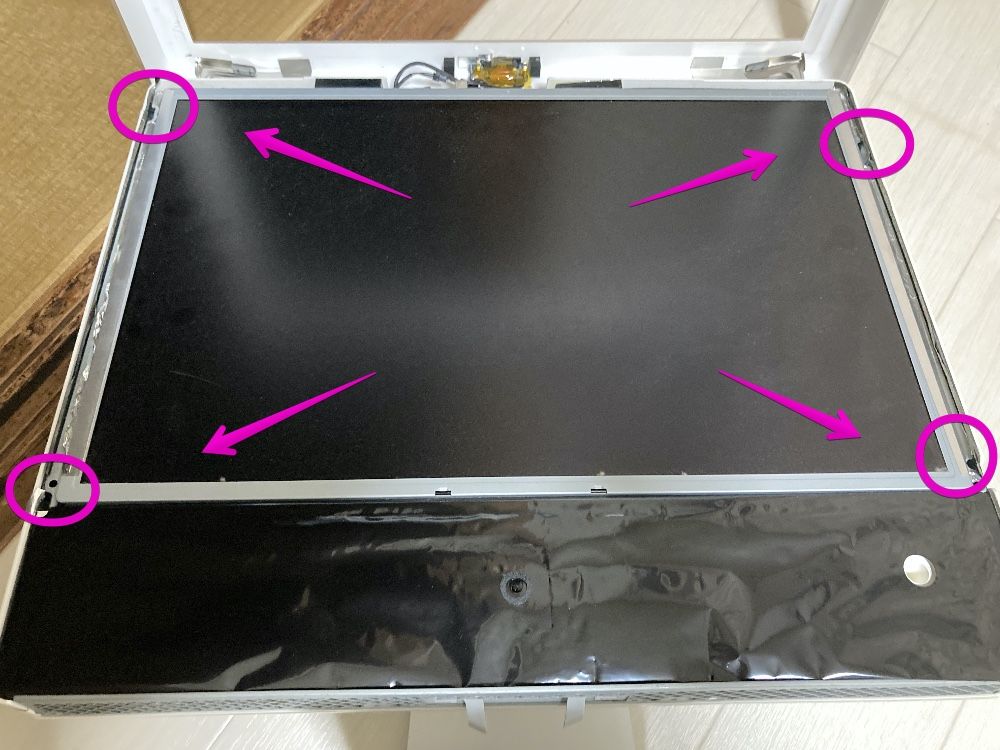
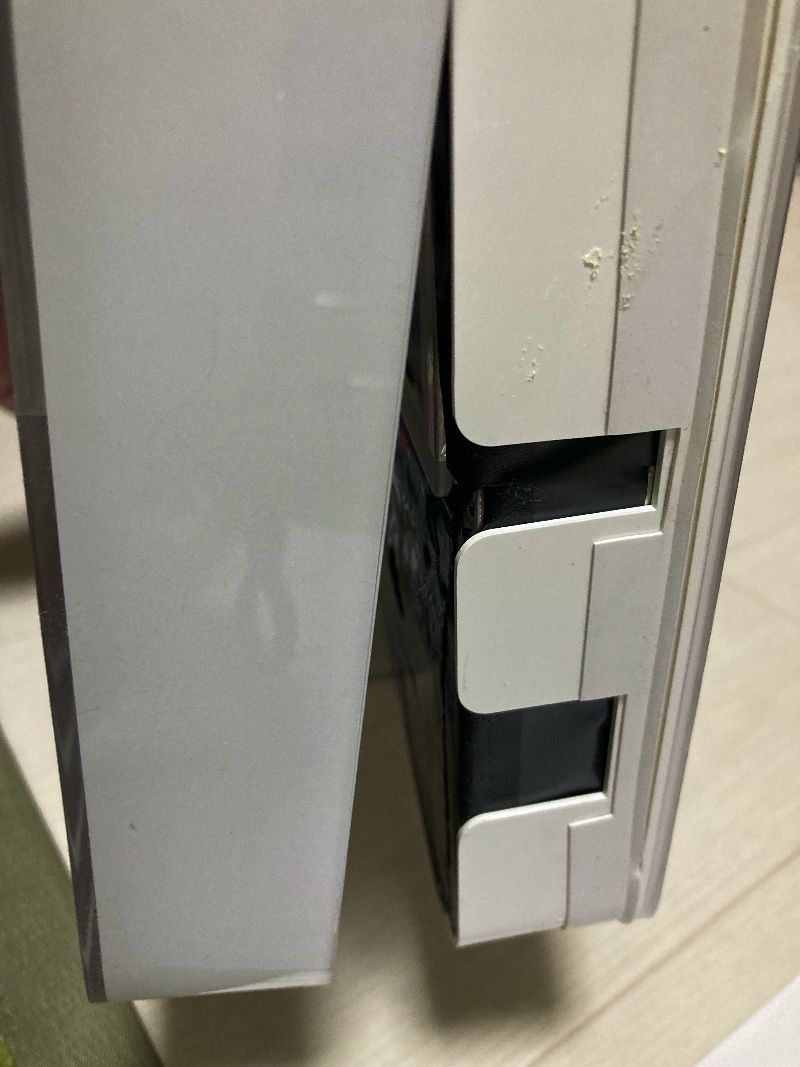
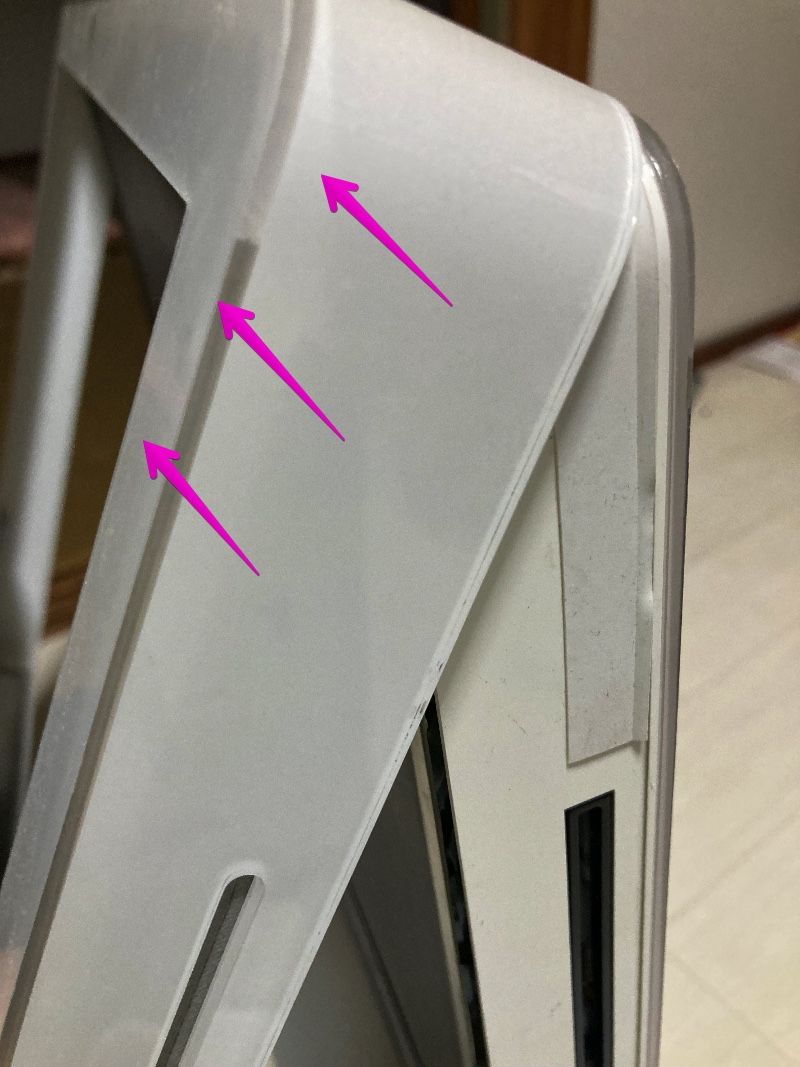
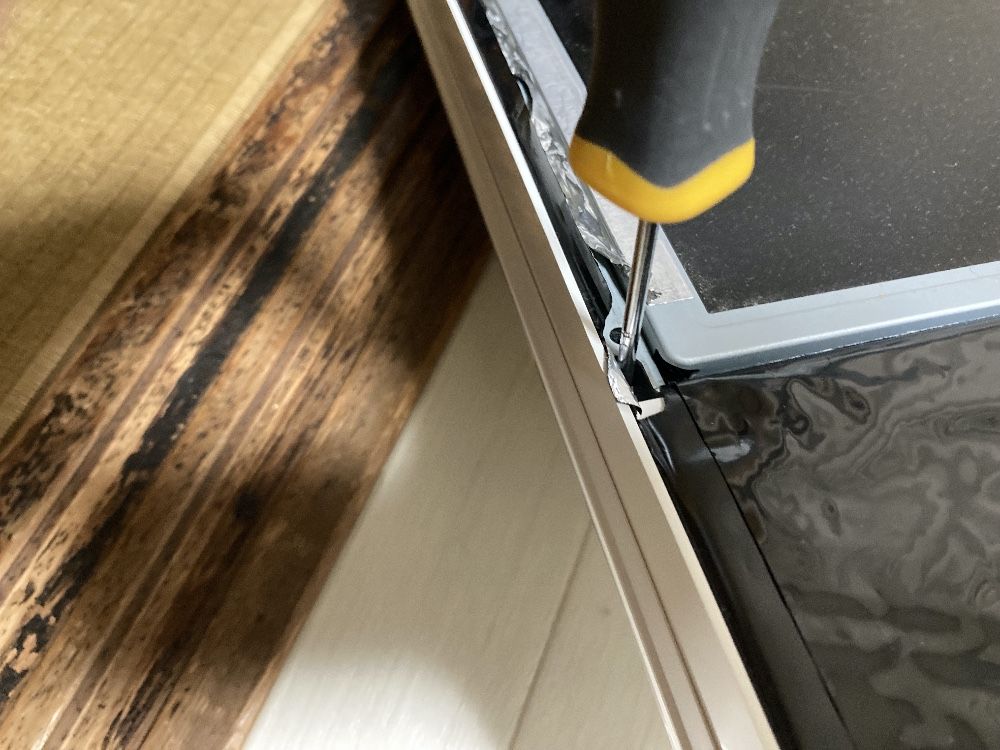
▶From here, it’s the biggest challenge of disassembling the iMac.
The screws are between the display and the frame, and there’s a magnet near them, so you need to be careful not to drop them inside your iMac or stick them to the magnets when you remove them.
To do this, magnetize the screwdriver sufficiently with a magnetizing magnet, or remove the screws while using tweezers.
Since it is too narrow to work with tweezers, I think it is easier to use a magnetized magnet.
▶︎ After removing the screws, slowly remove them, being careful not to break the black sheet that covers the lower half of the main unit.
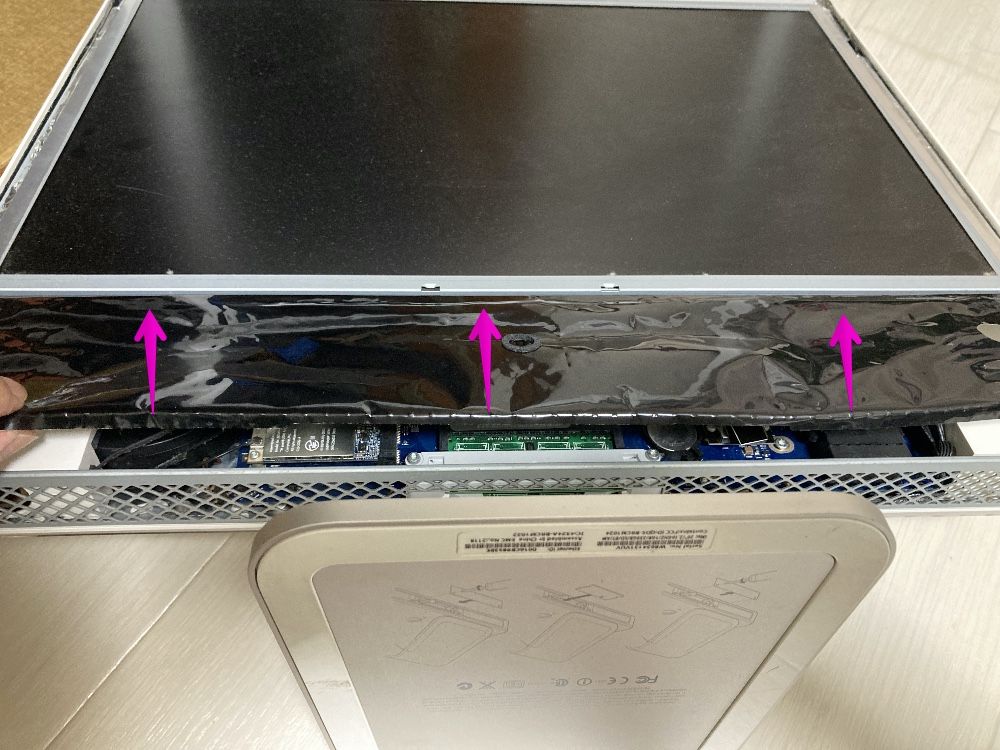
▶︎ After removing the black sheet, unscrew the T6 Torx that holds the display and logic board.
This is the only T6 Torx screw.
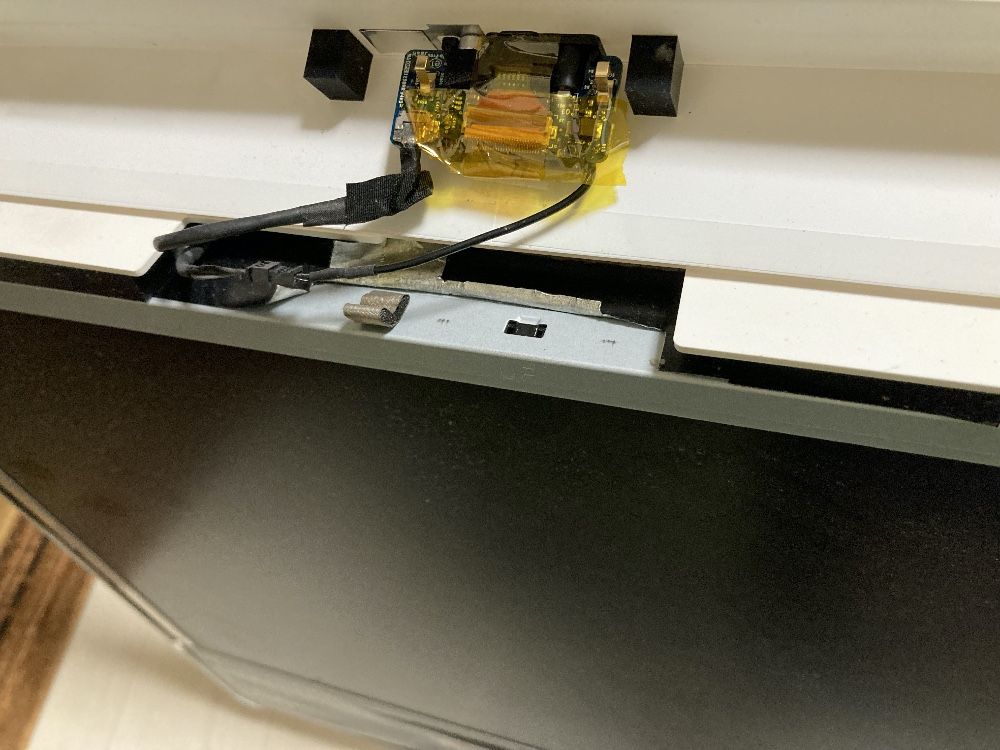
▶︎ After removing the screws, slowly lift the tape up and disconnect the cable, shifting the tape slightly to the left and right.
▶︎ Disconnect the connector-type cable that connects the display and the logic board, carefully shifting the connector instead of the cable.
Pulling the cable may hurt it, so use the connector to disconnect it.
▶︎ When you’re done, slowly lift the metal parts on either side of the display and lean it against the frame you’re already leaning against.
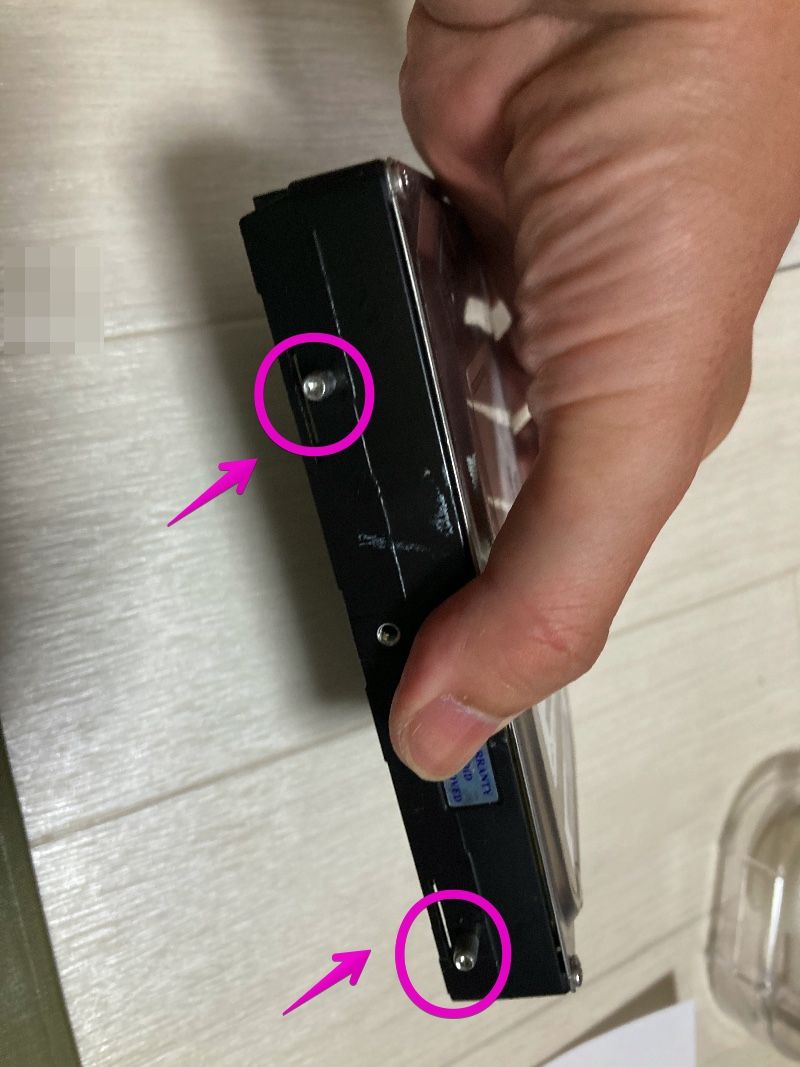
▶︎ Remove the T8 Torx screw that holds the HDD in place.
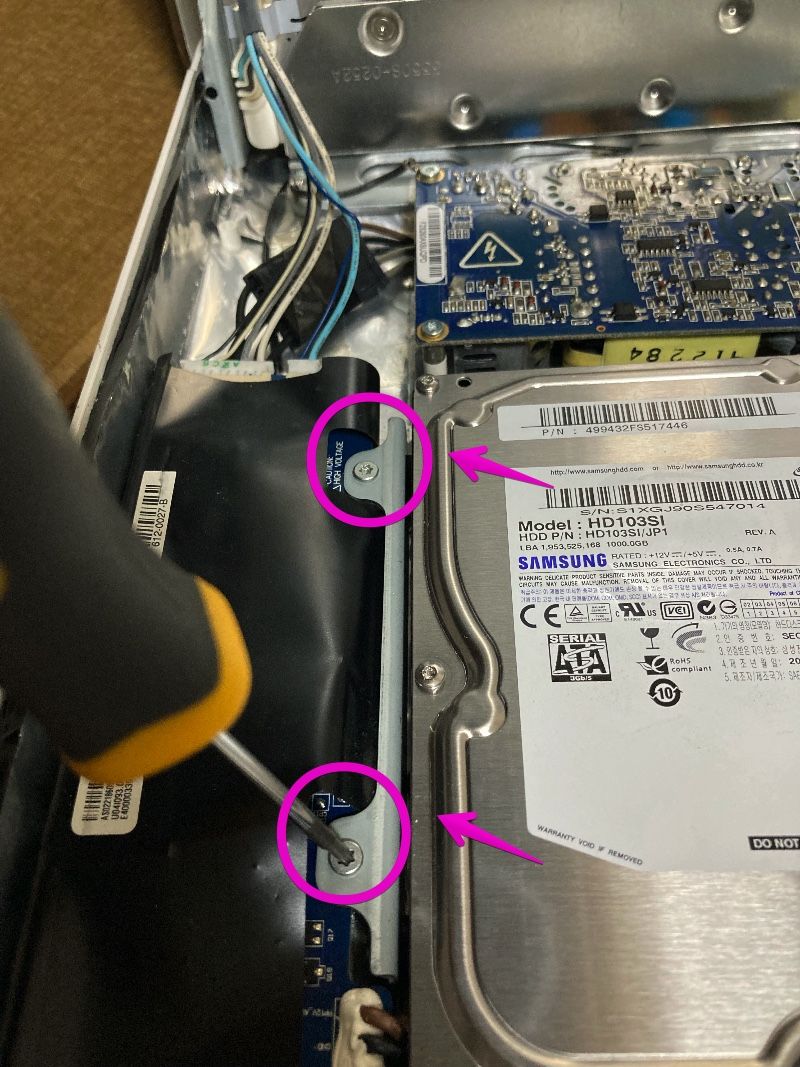
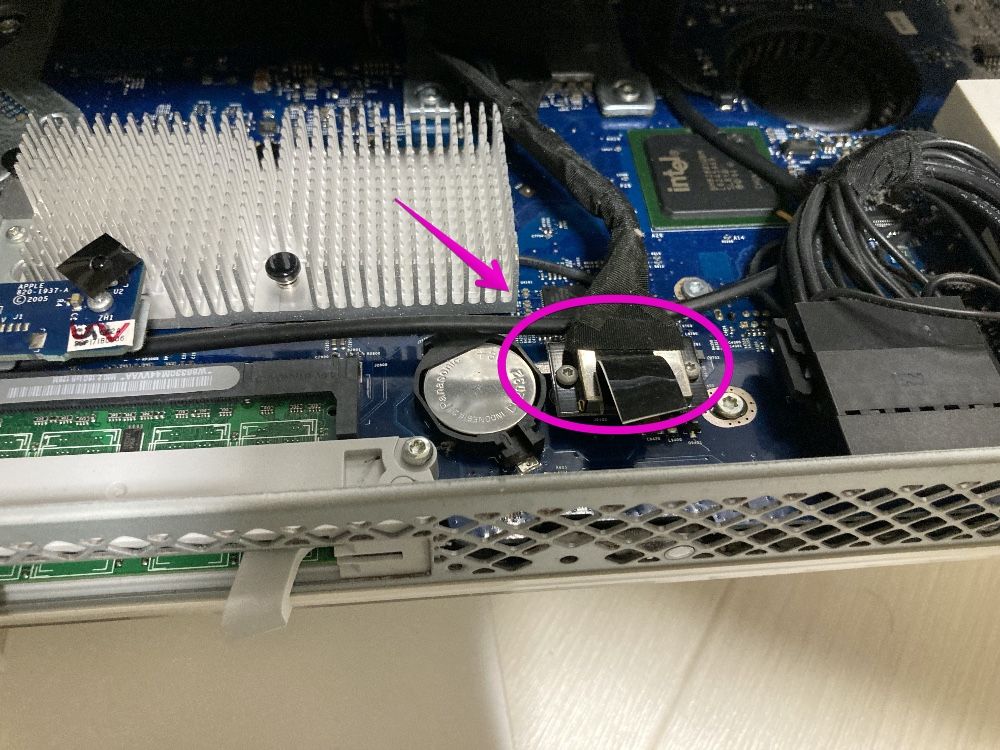
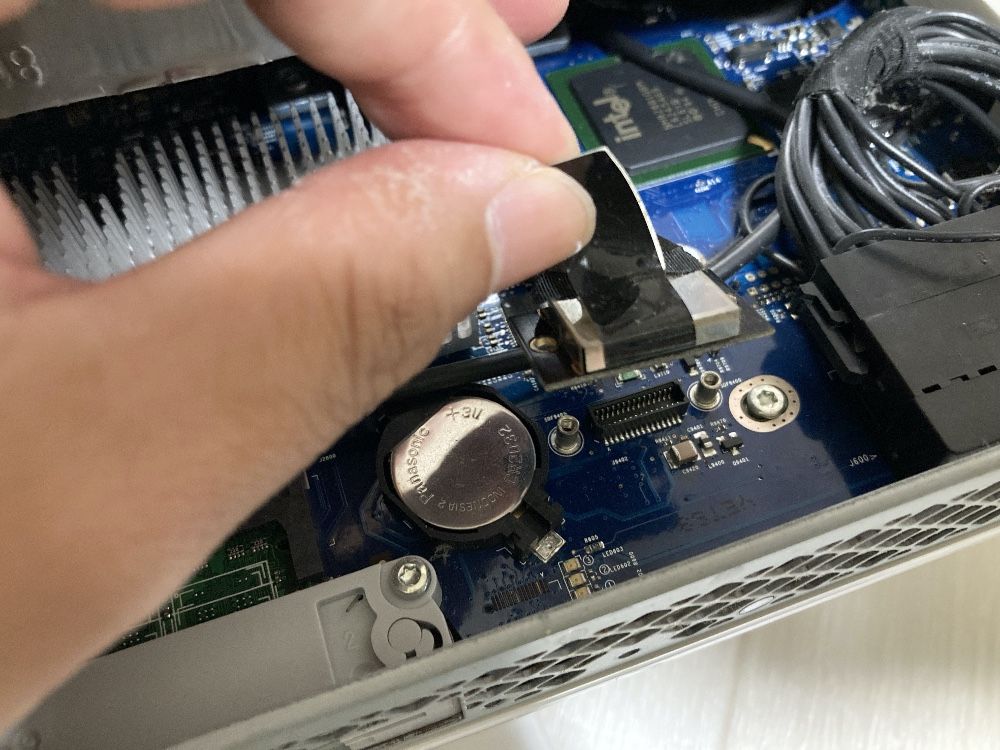
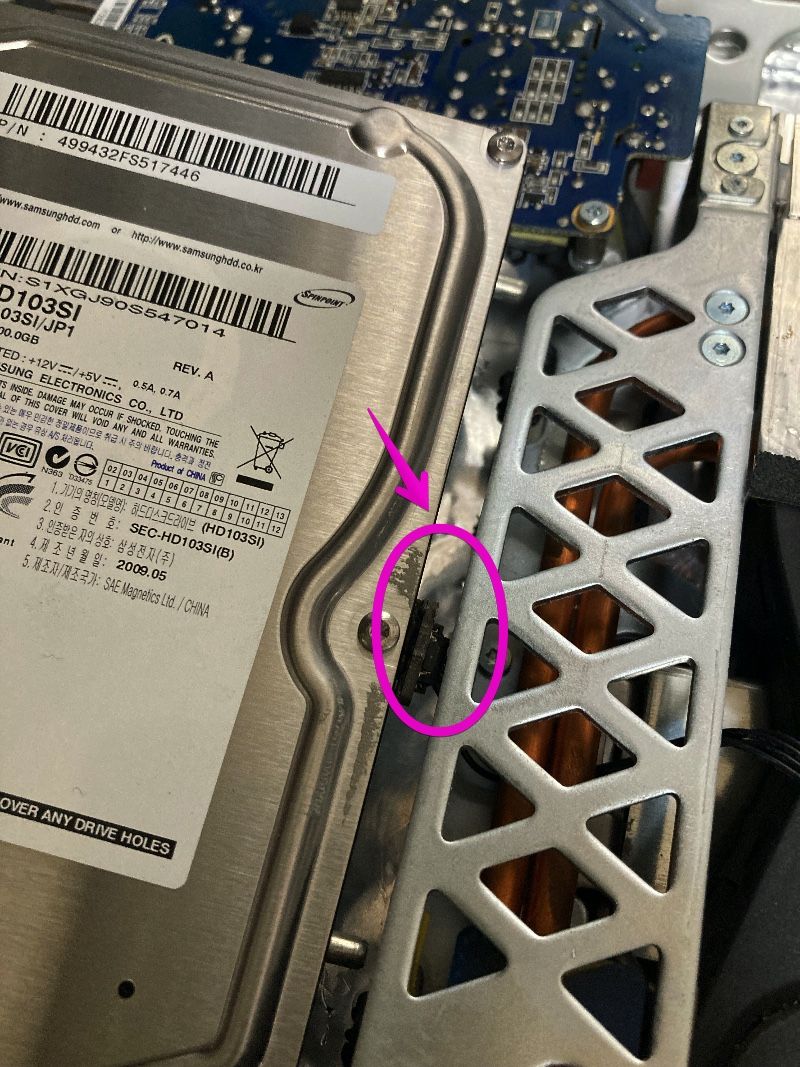
▶︎ While lifting the HDD, carefully peel off the temperature sensor attached to the right side with double-sided tape.
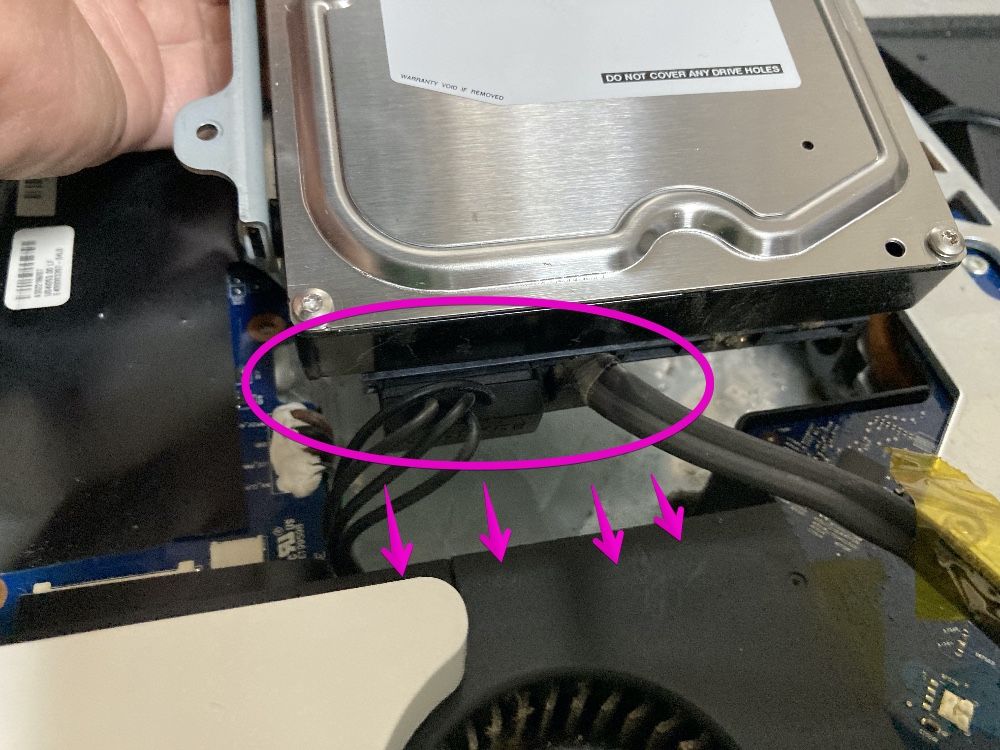
▶︎ Remove the power cable and SATA cable connected to the HDD.
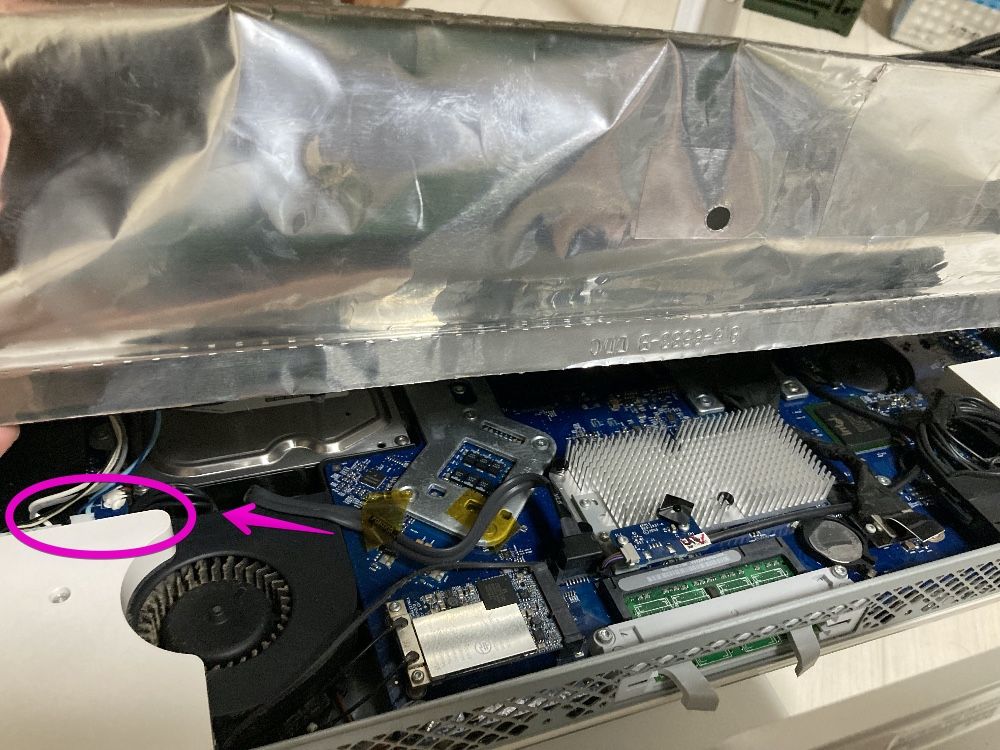
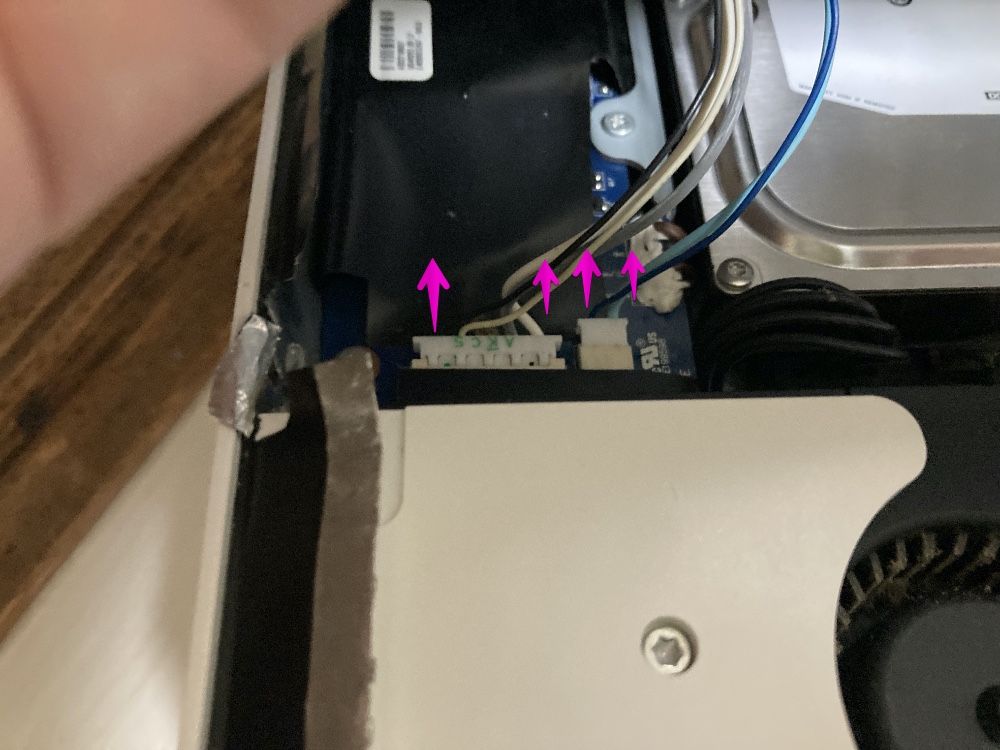
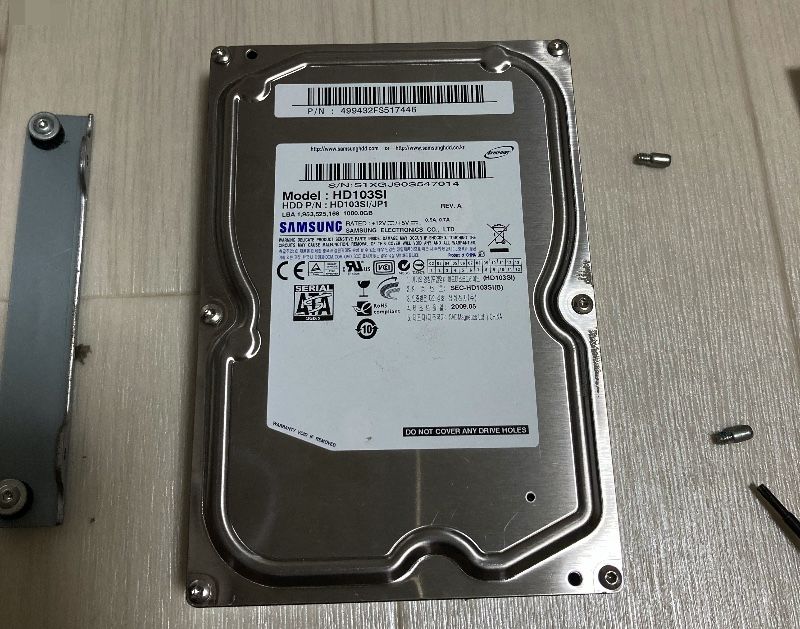
▶︎ After removing the HDD, remove the T8 Torx screws and parts on both sides.
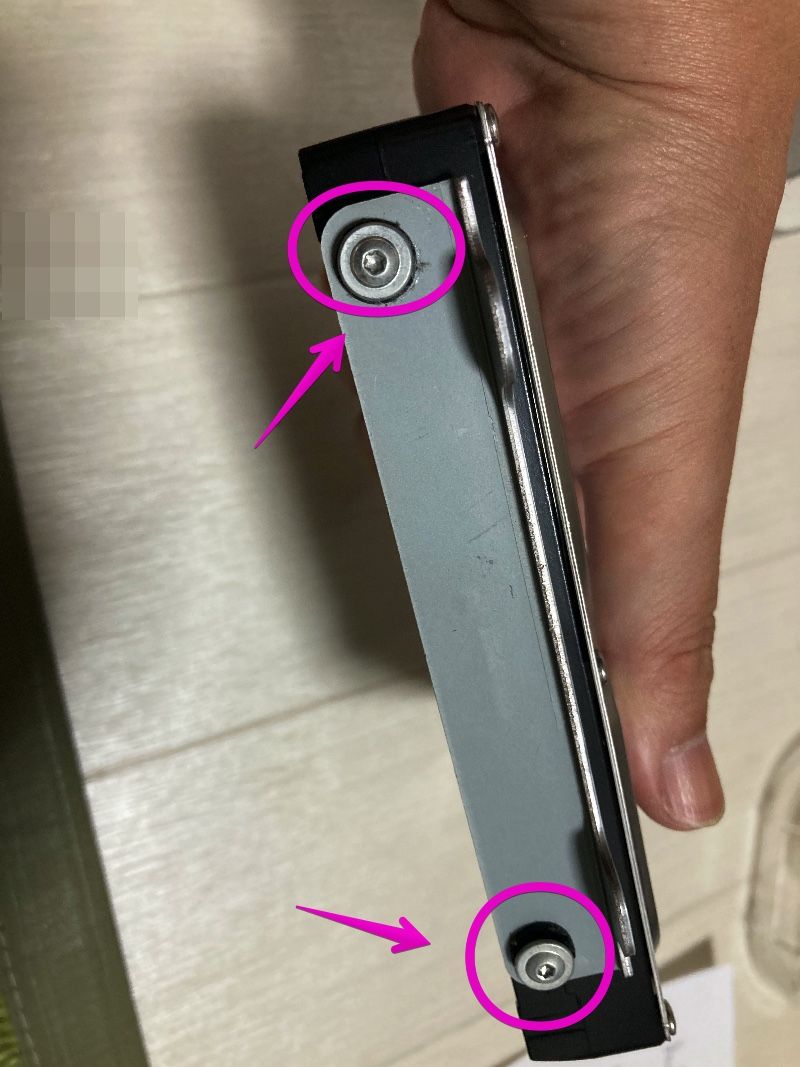
▶︎ The HDD was completely removed.
▶ To assemble an iMac with a replacement HDD, follow the reverse procedure up to this point.
Conclusion
It was an explanation of how to disassemble iMac 2006 and replace HDD / SSD.
Intel Mac’s earliest iMac, with low specs and tough for normal use, but if you need an older OS (10.6 Snow Leopard or 10.7 Lion), give it a try.

コメント