
I will explain the migration procedure from LastPass to Bitwarden on this page.
They are the password management services for PCs and smartphones, but LastPass has changed terms Mar 2021, I think many people searching for alternatives for LastPass.
This page show you that a data migration method, extension function, and application installation method.
What kind of apps / services are Bitwarden?
Roughly speaking, Bitwarden is a LastPass compatible app service.
There are minor differences, but those who have used LastPass can make the transition without any discomfort.
Thare is also LastPass compatible apps and services that named 1Password.
Although, while LastPass and 1Password have only paid plans to use on PCs and smartphones, Bitwarden has a free plan.
This time, the idea is to switch to this Bitwarden free plan.
① How to export LastPass data as CSV format
- ①
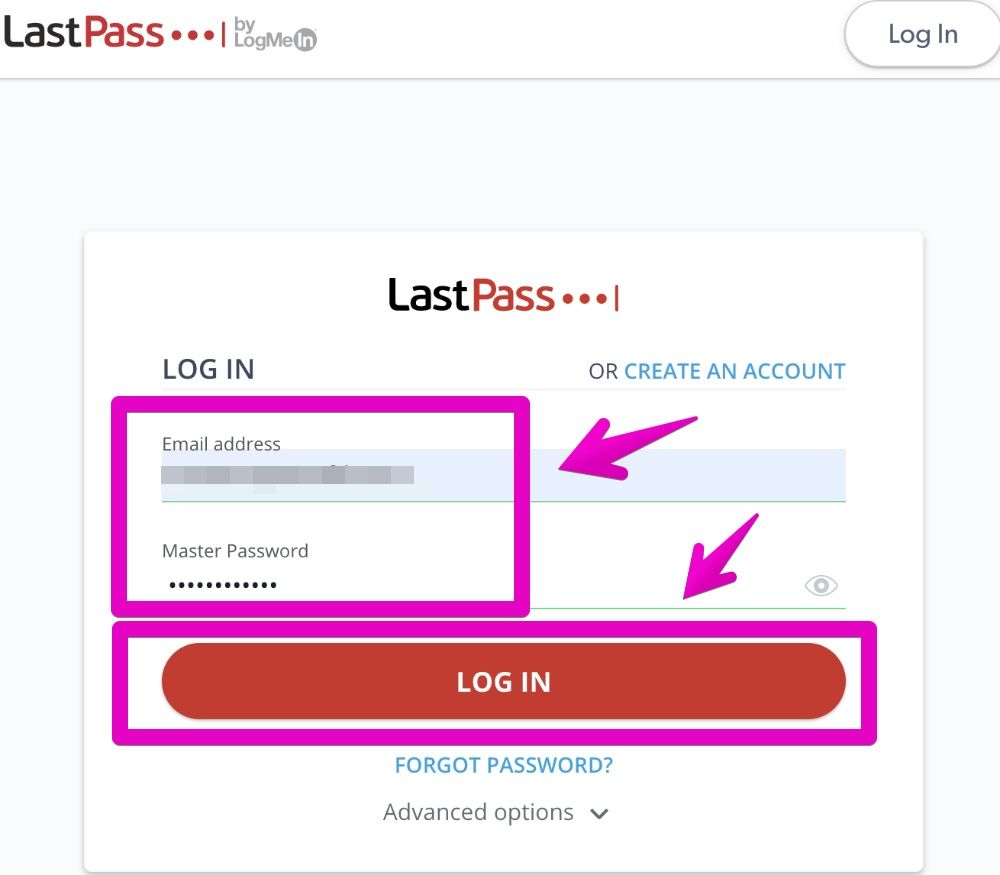
Click the link below to open the login screen for LastPass’s official website.
LastPass - Sign Inlastpass.com - ②
When the login screen opens, enter the registered email address and password as shown below and click “LOG IN”.
- ③
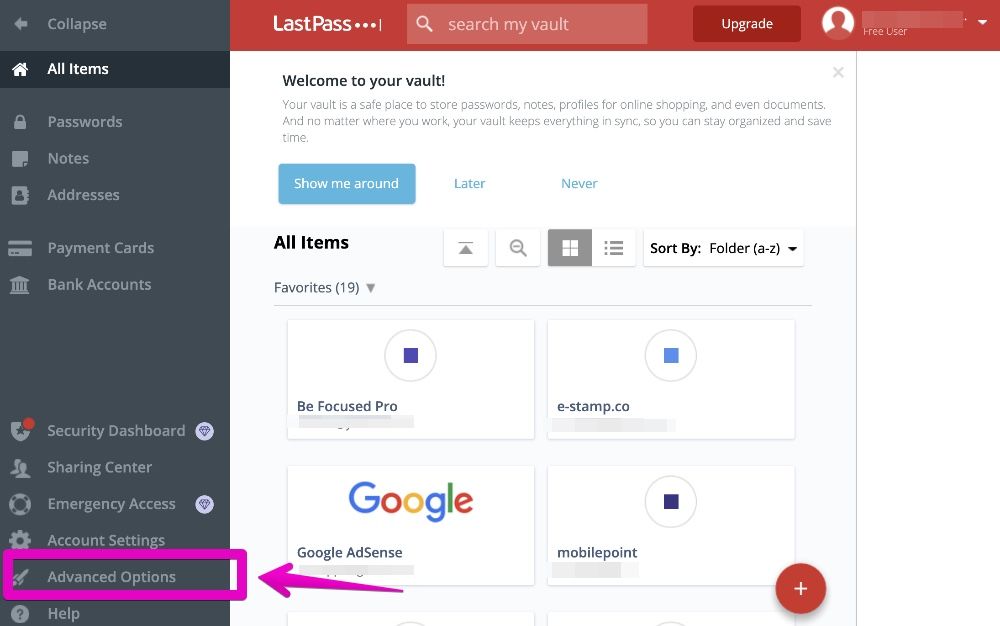
After logging in to LastPass as shown below, click “Advanced Options” at the bottom left of the screen.
- ④
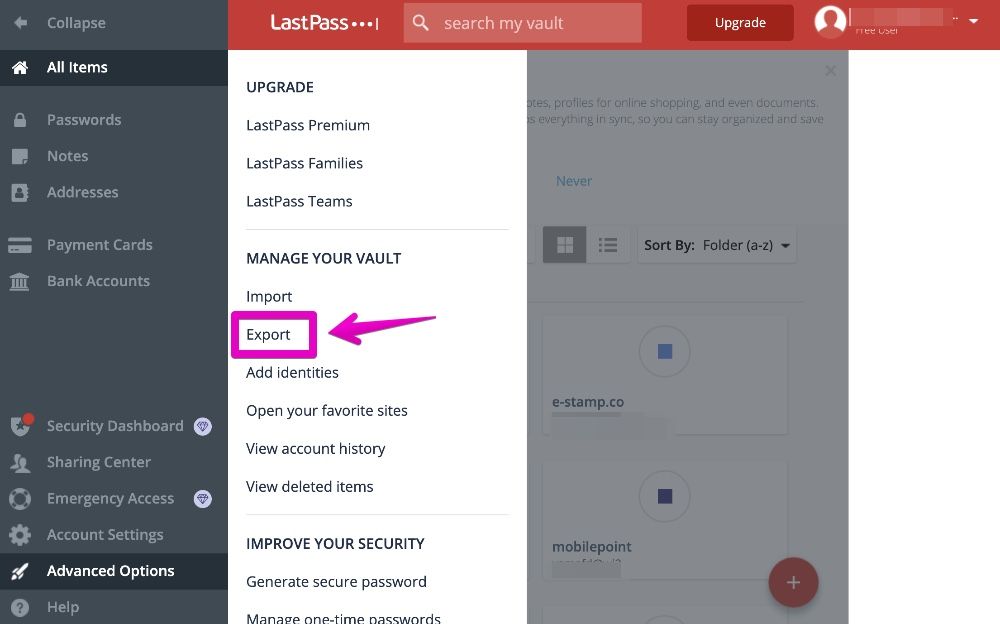
Click “Export” as shown below.
- ⑤
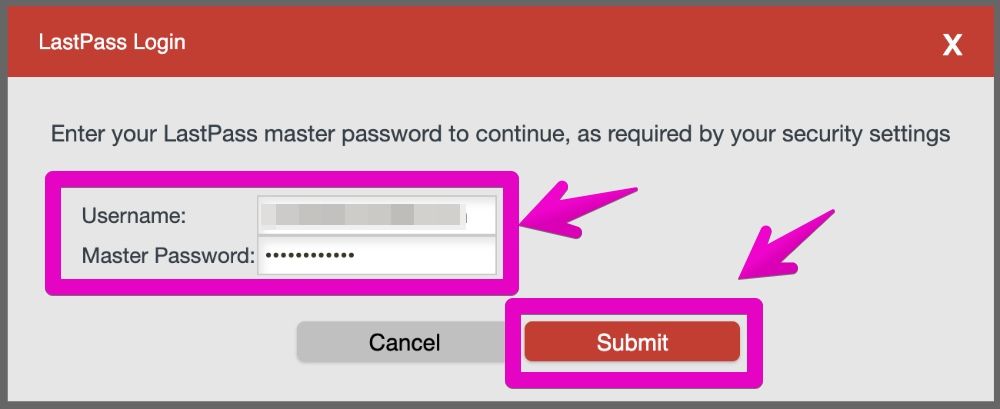
When the screen for entering the “Username” and “Master Password” opens as shown below, enter the same them as when you logged in to LastPass, and then click “Submit”.
- ⑥
The registration information will be displayed in CSV format on the full screen as shown below.
When it appears, start a suitable text editor, copy and paste data and save it.
- Mac:Text editor such as default macOS app “TextEdit”
- Windows:Text editor such as default Windows app “Notepad”


② How to create a new account & import CSV with Bitwarden
- ①
Click the link below to open the official Bitwarden website.
Bitwarden Password Manager Pricing & Plans | BitwardenCheck out the Bitwarden Password Manager pricing and sign up for a Free Trial to get access to all t...bitwarden.com - ②
When the official website opens, click “Create Free Account” as shown below.

- ③
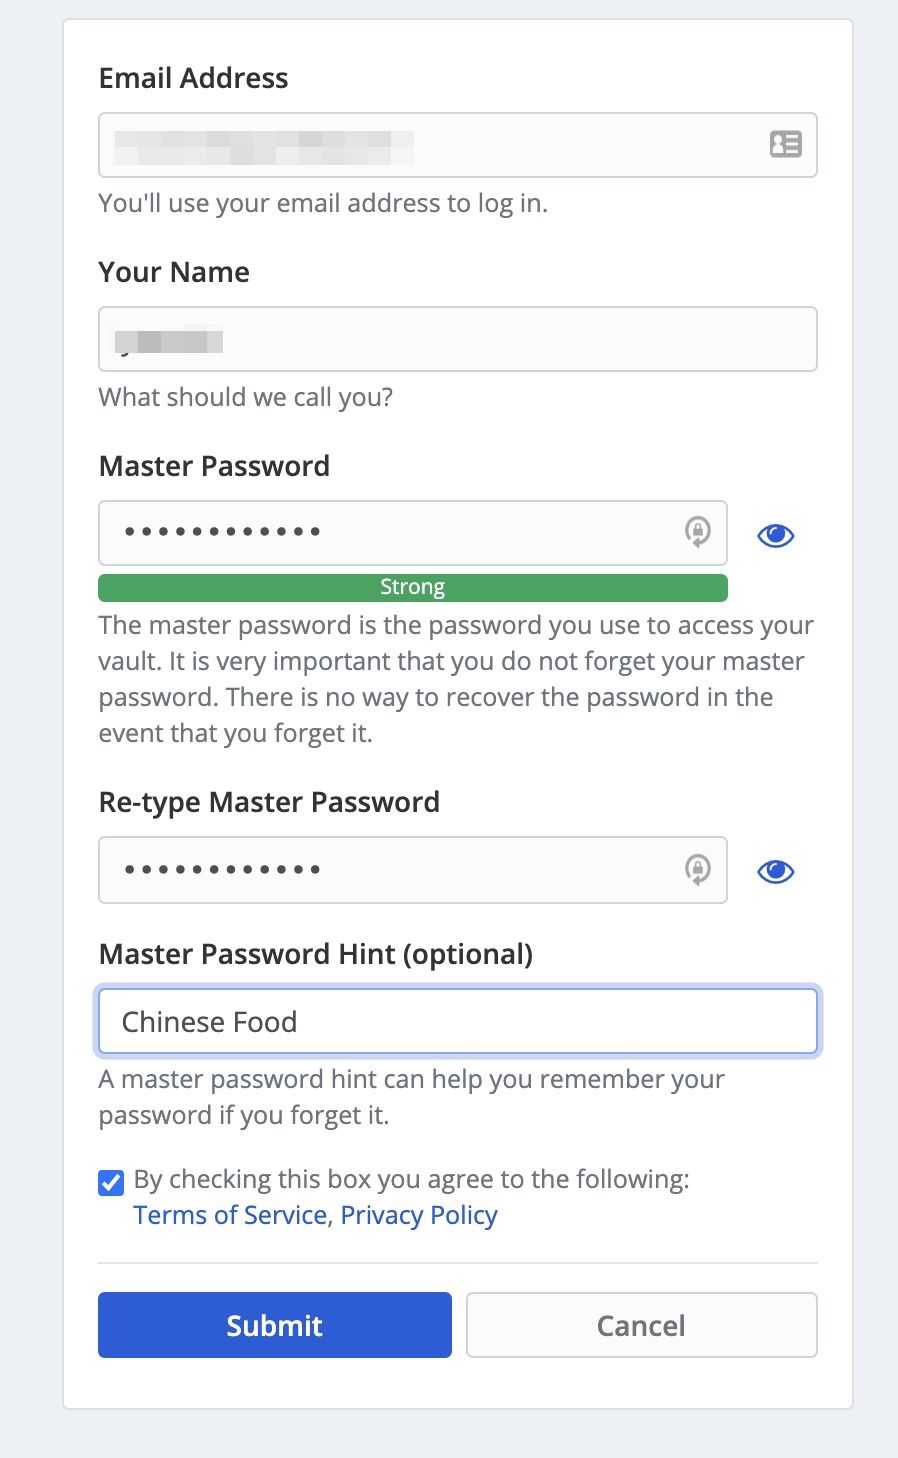
When the account creation screen is displayed as shown below, enter each item.
- Email Address:This is the email address used when logging in.
- Your Name:Please enter it appropriately.
- Master Password:This is the password you use to log in.
- Re-type Master Password:Enter the same as the Master Password.
- Master Password Hint:Give a hint if you forget your Master Password.
- By checking this box you agree to the following〜:You need to agree, so check it.
After entering each item, click “Submit”.
- ④
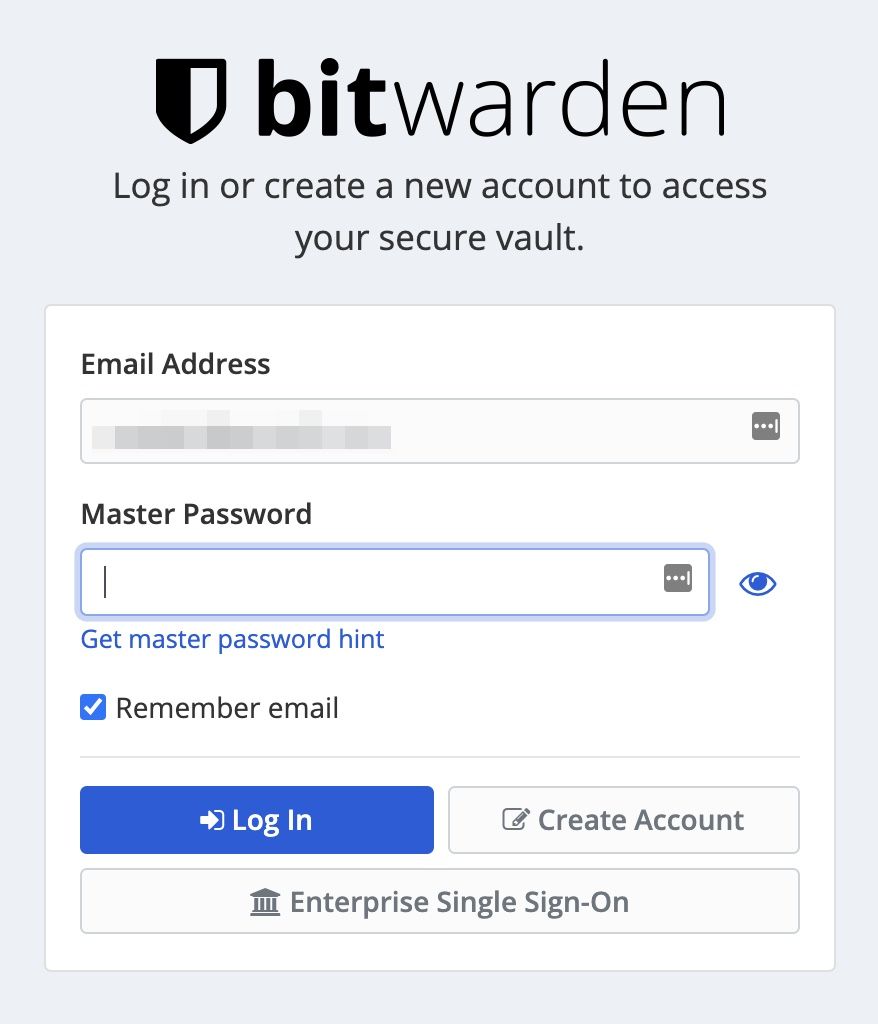
If the account is created successfully, the login screen will be displayed as shown below.
When displayed, enter the “Email Address” and “master Password” that you registered earlier, and then click “Log In”.
- ⑤
After logging in to Bitwarden as shown below, click “Tools” at the top left of the screen.
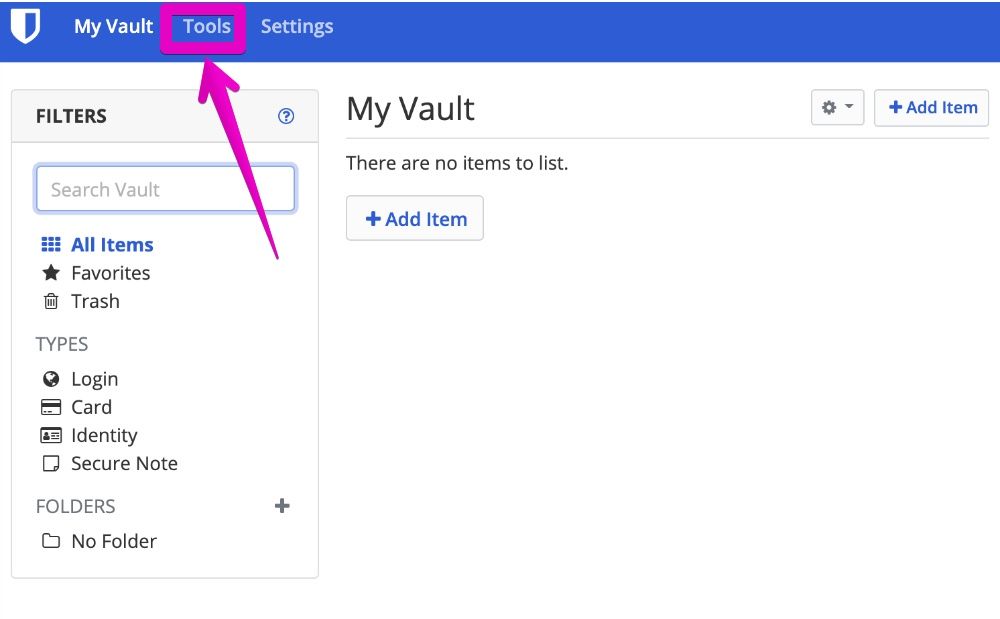
- ⑥
When the “Tools” screen appears as shown below, click “Import Data” from the left column.
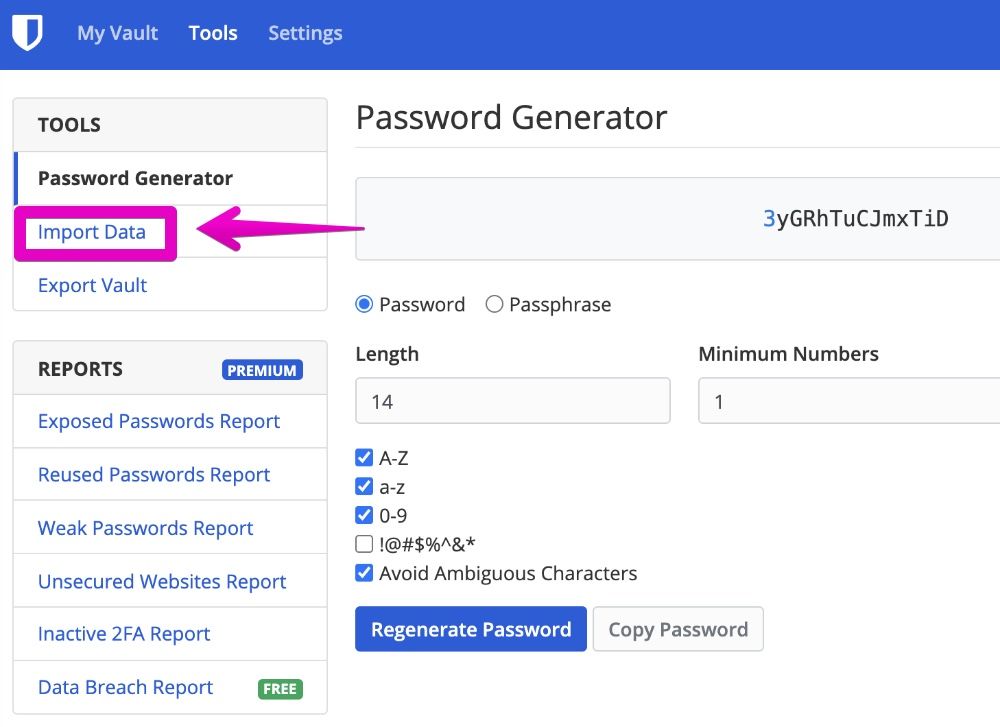
- ⑦
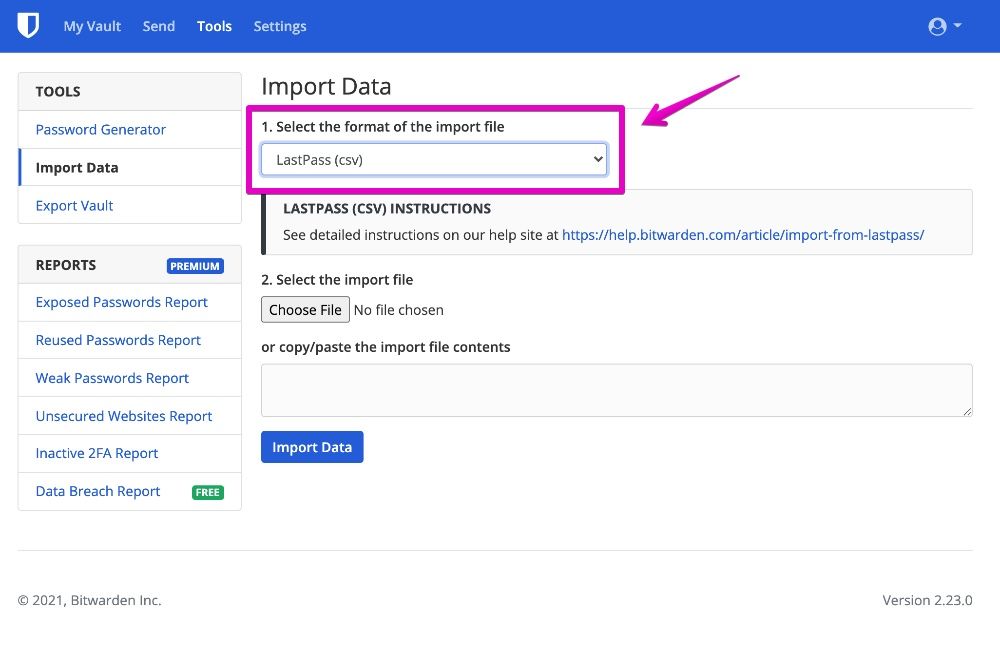
When the “Import Data” screen appears as shown below, select “LastPass (csv)” from the pull-down menu for the data format setting indicated by the arrow.
- ⑧
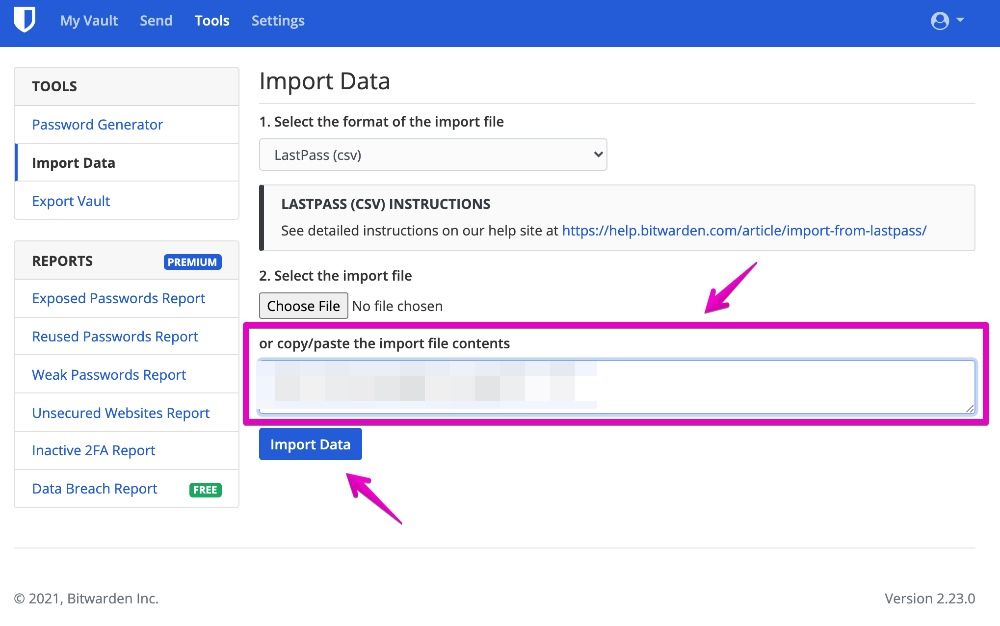
Copy and paste the csv data you exported with LastPass into the square indicated by the arrow below, then click the button “Import Data”.
- ⑨
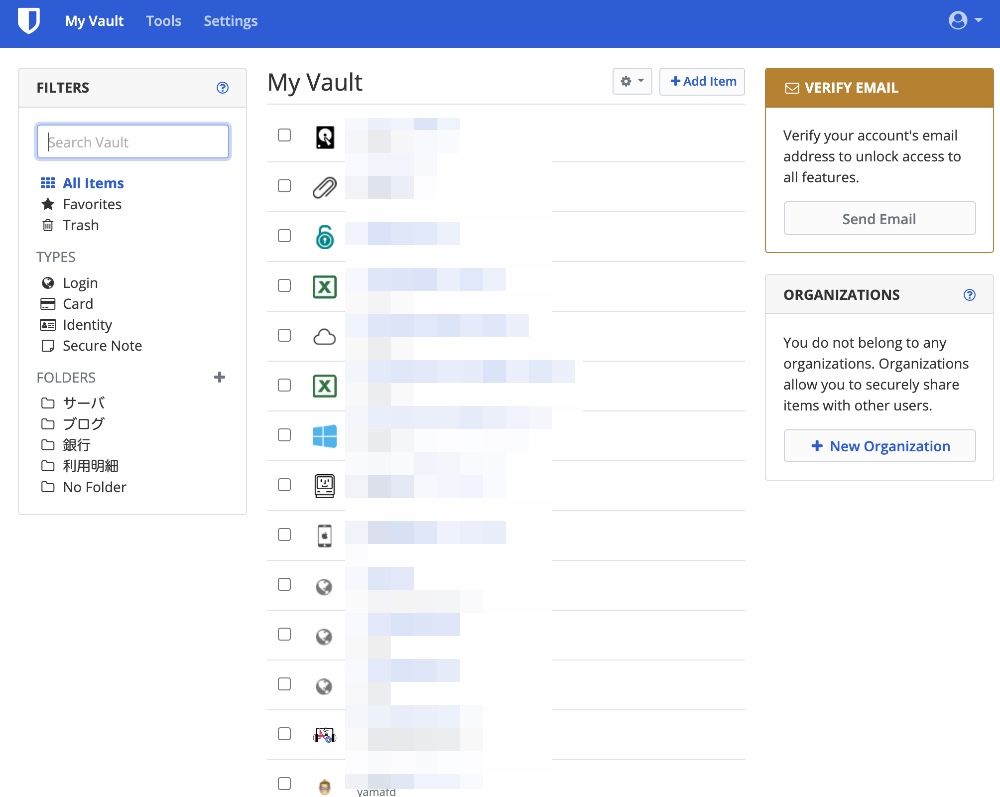
When the password information list is displayed at “My Vault” area as shown below, the import preocedure is complete.

③ How to install web browser extension
After importing the information up to the previous section, install the extension for Bitwarden in your web browser (Safari / Google Chrome / Firefox / Microfost Edge, etc).
In addition, you may install apps for iPhone and iPad as needed.
Google Chrome Extension(Mac / Windows)
Install the extension from the link below.

Safari Extension(Mac)
Install the Mac app and the Safari Extension from the link below.

Web browser automatic display settings
In the Web browser default settings, the user name and password are not automatically displayed when the web is displayed.
To display, set the following.
The following explanations are given in Safari on Mac, but the procedure is almost same in other web browsers.
- ①
Click the Bitwarden icon at the top of your browser and enter your email address and password to log in.
In the figure, Safari on Mac is used, but click the Bitwarden icon in other web browsers (Google Chrome, etc.) as well.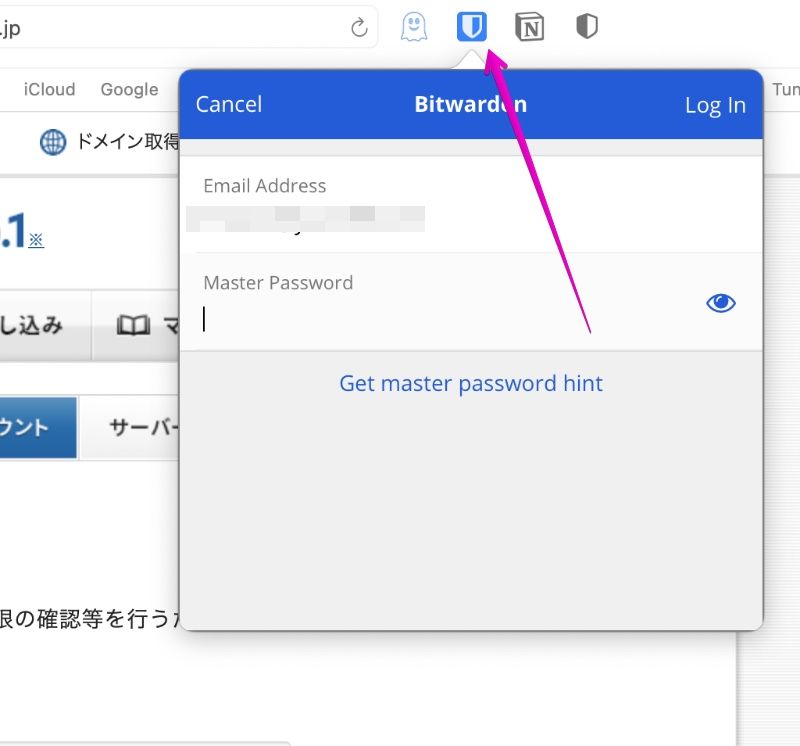
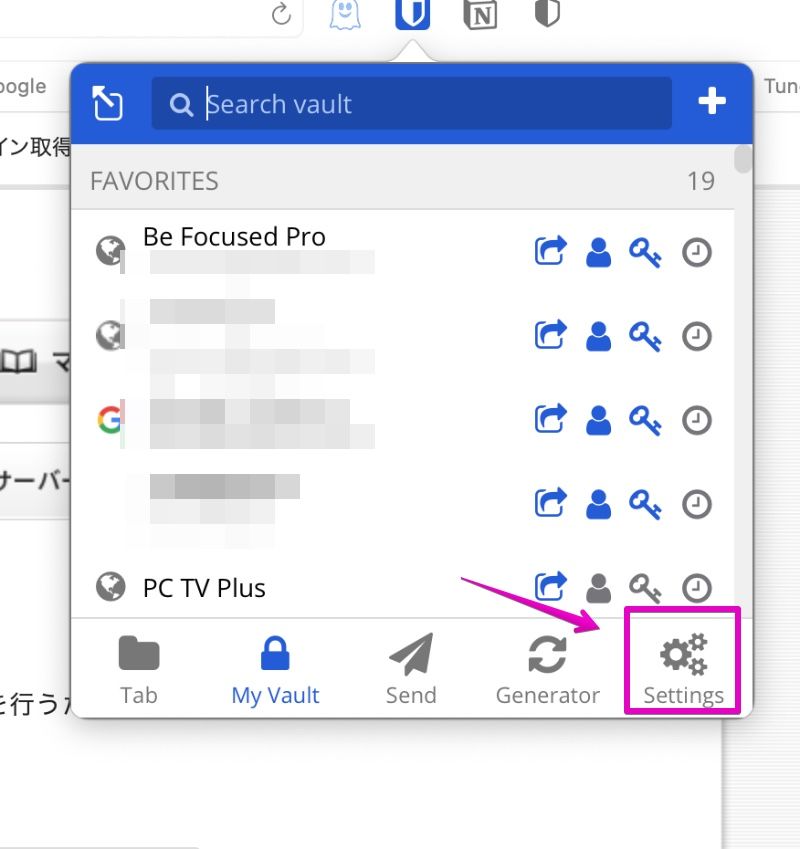
- ②
Click “Settings”, which is indicated by the arrow in the figure.
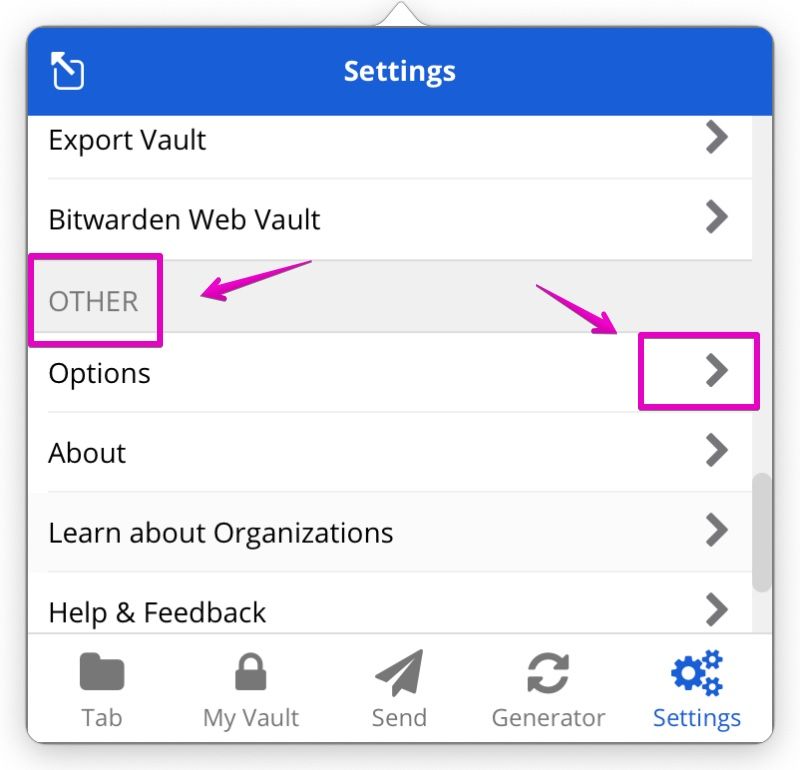
- ③
Click “OTHER” – “Options” as shown.
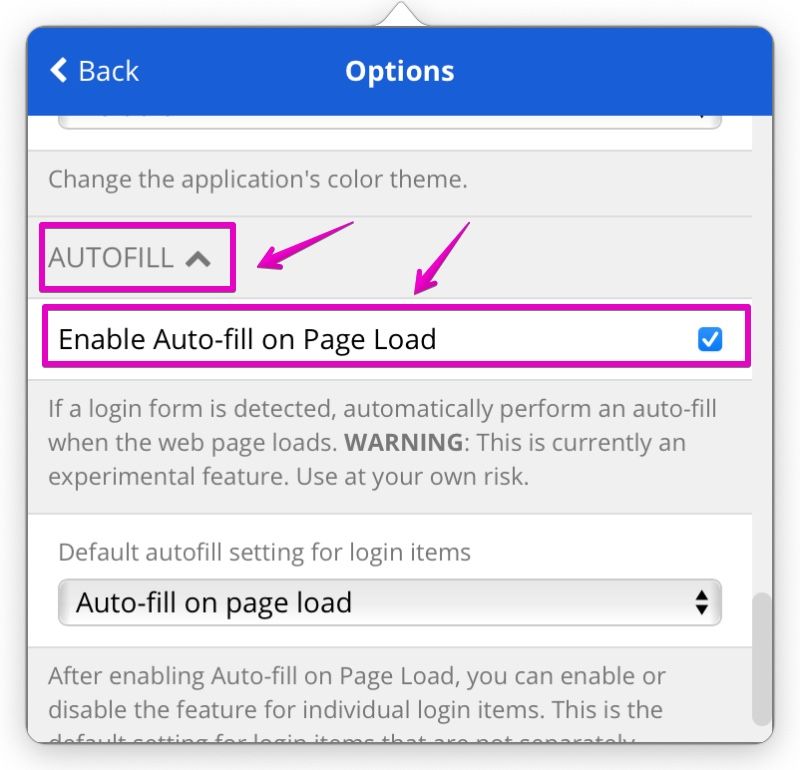
- ④
Check “AUTOFILL” – “Enable Auto-fill on Page Load” as shown.
④ How to install iPhone / iPad app
You can install the iPhone / iPad app from the link below.

In the default settings, the user name and password are not automatically displayed when the web is displayed.
To display, set the following.
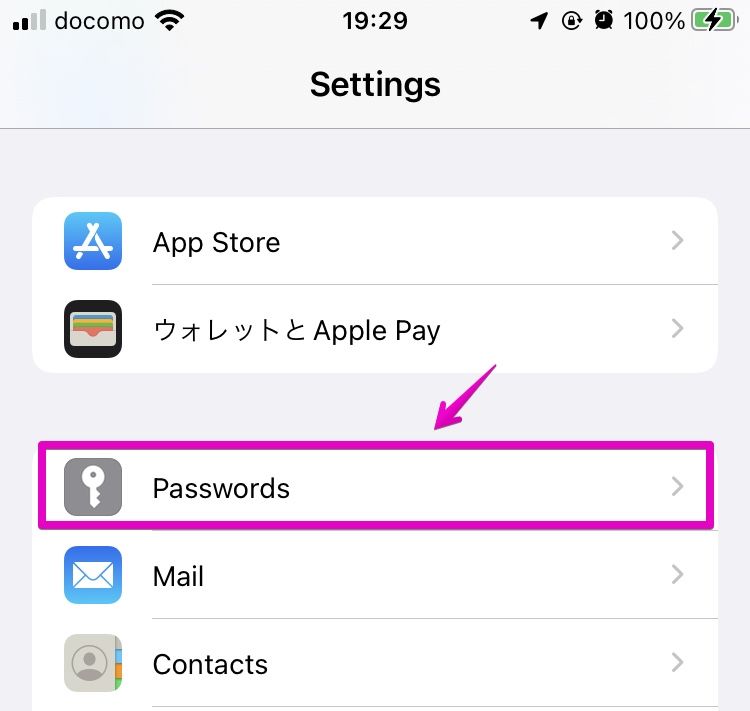
- ①
Launch “Settings” app on your iPhone / iPad.

- ②
When “Settings” opens as shown, tap “Passwords”.
- ③
When “Passwords” opens as shown, tap “AutoFill Passwords”.
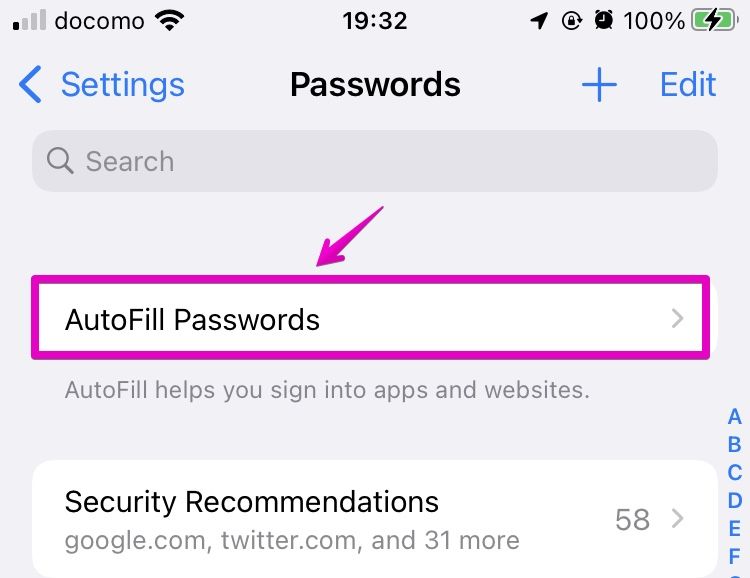
- ④
When “AutoFill Passwords” opens as shown, make sure “AutoFill Passwords” is turned on, and then tap “Bitwarden” from the “ALLOW FILLING FROM:” section.
If you do so, you will be prompted to enter the password, you need to follow the on-screen instructions.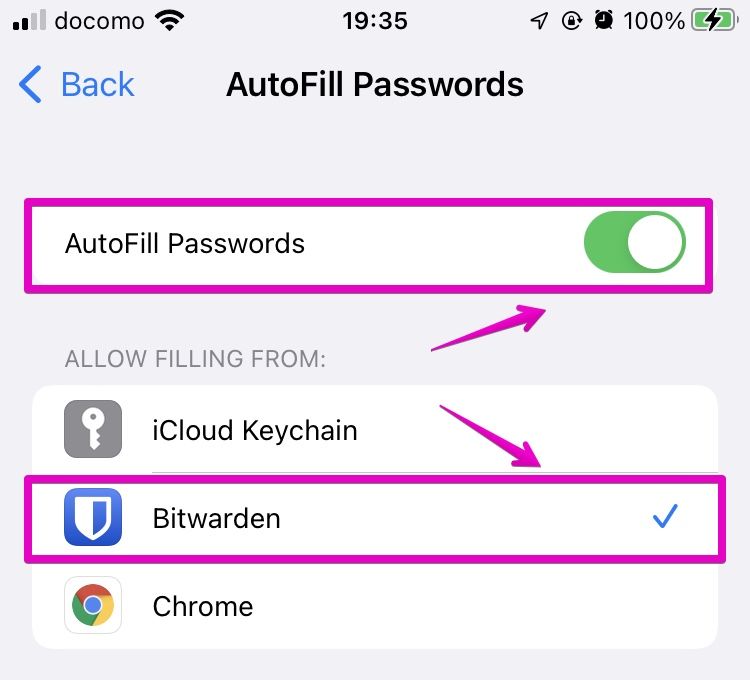
If you have an iPhone / iPad with Touch ID or Face ID, you can also use them to enter your password.
The following is the setting method for Touch ID.
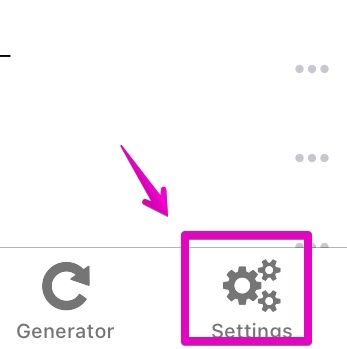
- ①
Launch the app “Bitwarden” and tap “Settings” at the bottom right of the screen.
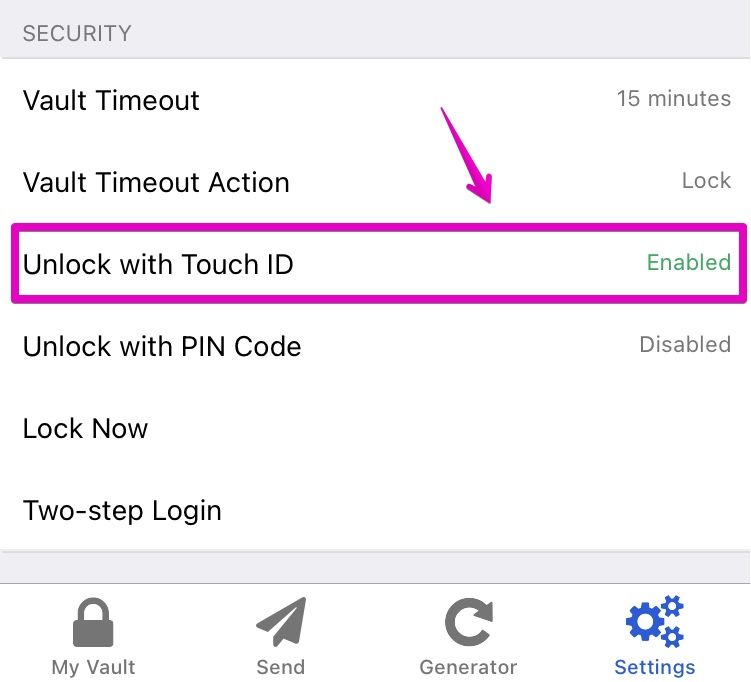
- ②
When “Settings” opens as shown, tap “Unlock with Touch ID” to change it to “Enabled”.
This is the end of the article on this page.

コメント