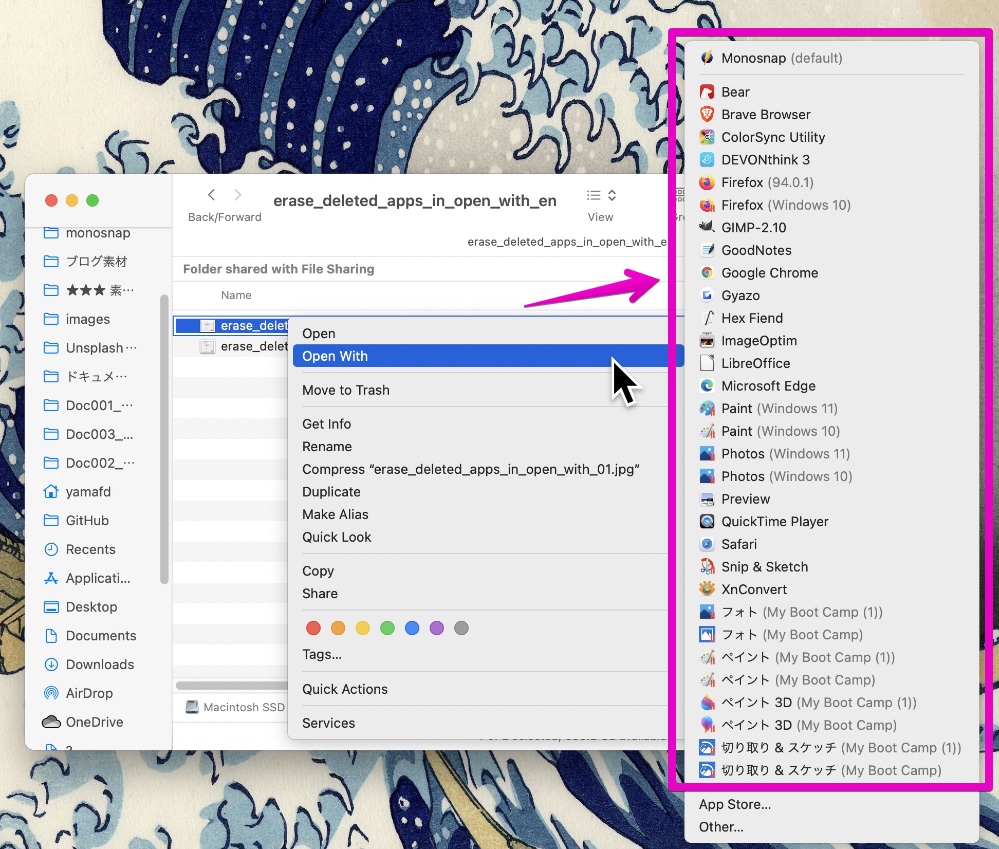
If you right-click a file on your Mac, “Open With” will be displayed and you can open it with your favorite app, but in rare cases, the removed (uninstalled) app may be displayed.
I will explain to you the causes of this problem and how to solve it.
Why are sometimes deleted apps displayed?
In macOS, there is a function of the OS called “Launch Services”.
“Lunch services” has the following functions.
- Manage the types of files that your app can open
- ex : jpg -> “Preview.app”, “Safari.app” and “Chrome.app” can open it.
- From the above, manage the apps that you prefer to use
- ex : jpg -> Priority is given to open with “Preview.app”
If you right-click a file in Finder, “Open With” will be displayed as shown in the screen below, and a list of apps that can be opened and the apps that open by default will be displayed.
This content refers to the “Lunch Services” database.
However, this database can get corrupted at some point.
If this happens, problems such as deleted apps being displayed or installed apps not being displayed will occur.
To fix this corrupted database, you need to collect the latest information about the apps you have installed on your Mac and recreate the database.
All the workarounds on this page are instructions on how to remake this.

Was it a little difficult to explain?
Well, it’s ok that you think there is such a thing!
Advantages and disadvantages of each method
Before explaining each method, I will explain the advantages and disadvantages.
| Method | Advantages | Disadvantages |
|---|---|---|
| ① Execute command from “Terminal.app” | ・No additional software required | ・It may seem difficult to those who are new to the “Terminal.app” |
| ② Free app “Onyx” | ・Free ・The classic app with a long history ・Multifunctional | ・Need to install |
| ③ Paid app “Cocktail” | ・Not as famous as Onyx, but also a historic app | ・Need to install ・Paid app (Can be tried up to 10 times) ・Little information |

I know there are many methods, but which one is recommended?

Basically, ① is enough.

If you try to use ③ continuously, it will cost you money and there is not much information on the internet, so please try it when neither ① nor ② goes well.
① Execute command from “Terminal.app”
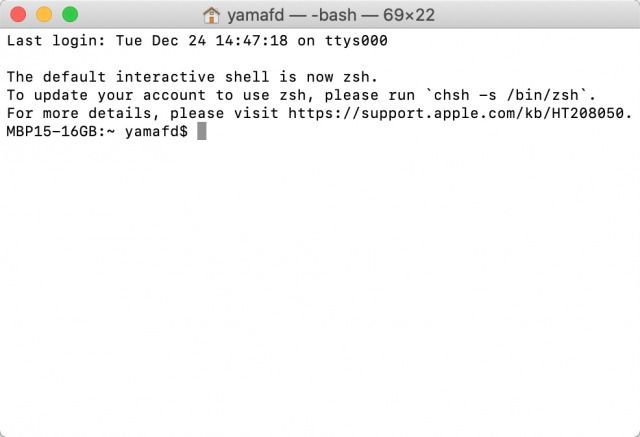
▶ Open the folder “Applications” -> “Utilities” in Finder, and then double-click “Terminal.app” to launch.
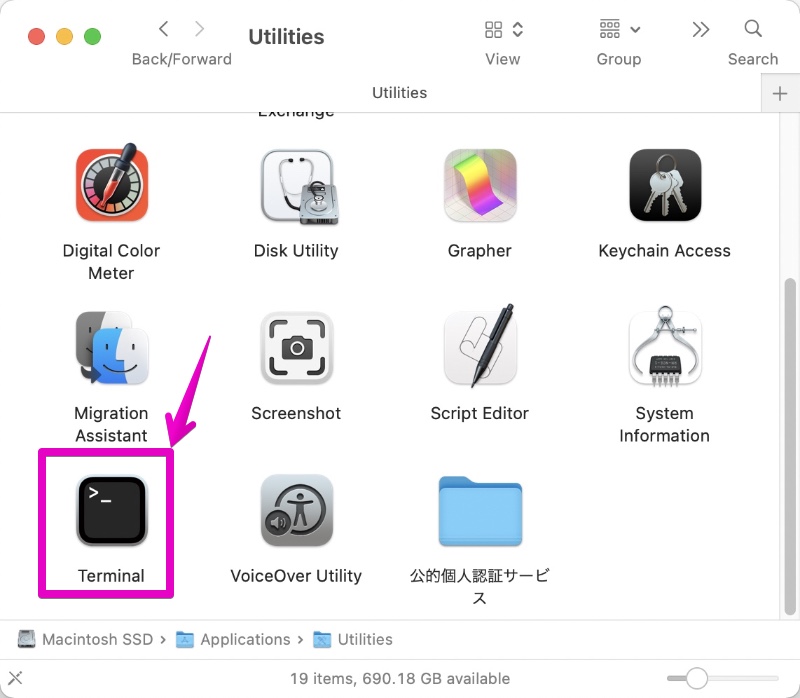
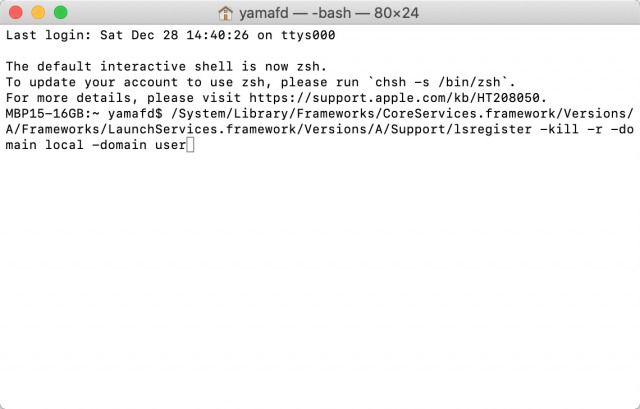
▶ When the “Terminal.app” starts, copy and paste the following command.
I think the command will be executed just by copying and pasting, but if it is not, press return on your keyboard to execute it.
The command may take tens of seconds to minutes to complete, so wait for it to finish.
/System/Library/Frameworks/CoreServices.framework/Versions/A/Frameworks/LaunchServices.framework/Versions/A/Support/lsregister -kill -r -domain local -domain user
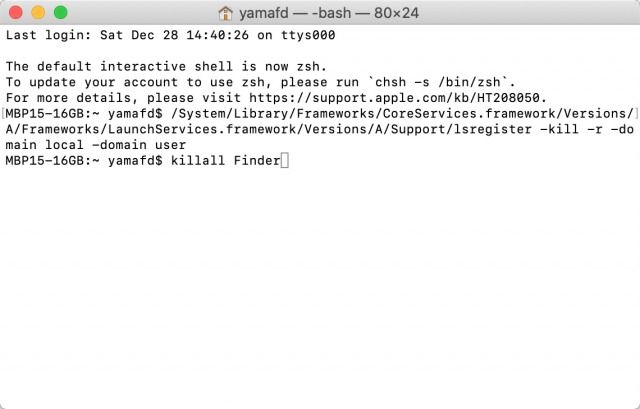
▶ When the command is complete, copy and paste the following command to restart the Finder.
I think the command will be executed just by copying and pasting, but if it is not, press return on your keyboard to execute it.
After executing the command, the Finder will be restarted and the desktop icon will disappear temporarily, so wait until it finishes.
It may take a few seconds to a few tens of seconds.
killall Finder

This is the end of the explanation, “① Execute command from Terminal.app”.
② Free app “Onyx”
②-1 How to install “Onyx”
The standard Mac maintenance app “Onyx” can be downloaded from the official website below.
The version of Onyx differs depending on the version of macOS, so please download and install it according to the Mac you are using.
If you are not sure about installing Onyx, please refer to the following articles.
②-2 How to use “Onyx”
From here, I will show you how to use Onyx to solve the phenomenon that deleted apps are displayed.
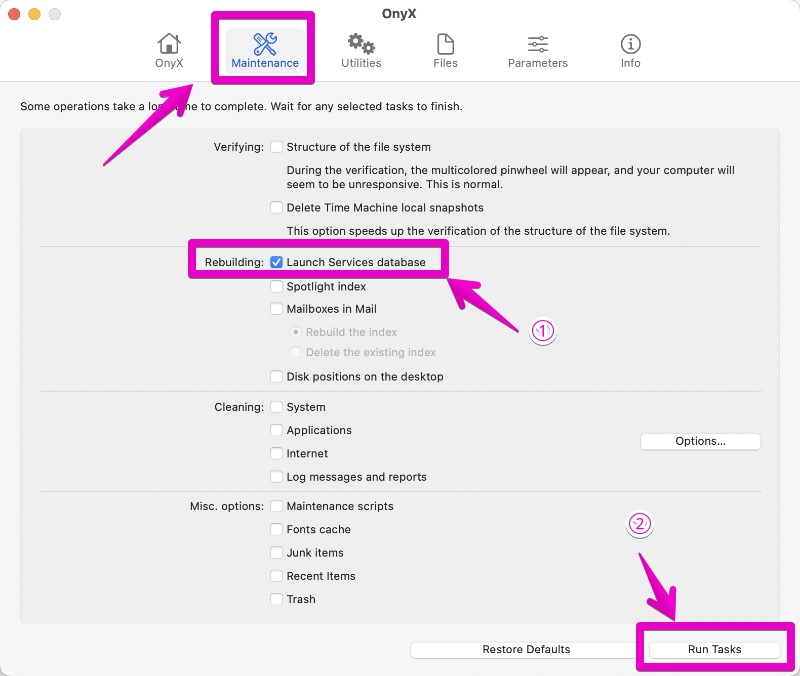
Onyx allows you to “Rebuild Launch Services Database” as shown in the screen below.
By doing this, you can resolve deleted apps.
As a concrete method, start Onyx and then perform the following operations.
- ① Check “Launch Services database” in the “Rebuild” item in the tab “Maintenance”.
- ② Click the “Run Tasks” button.

This is the end of the explanation, “② Free app Onyx”.
③ Paid app “Cocktail” (Can be tried up to 10 times)
It’s not as famous as Onyx and it’s the paid app, but you can also delete the list of moved apps with the app called “Cocktail”.
Here, I will demonstrate installing and using Cocktail on macOS 12 Monterey.
③-1 How to install “Cocktail”
▶ Click the link below to open the official website.
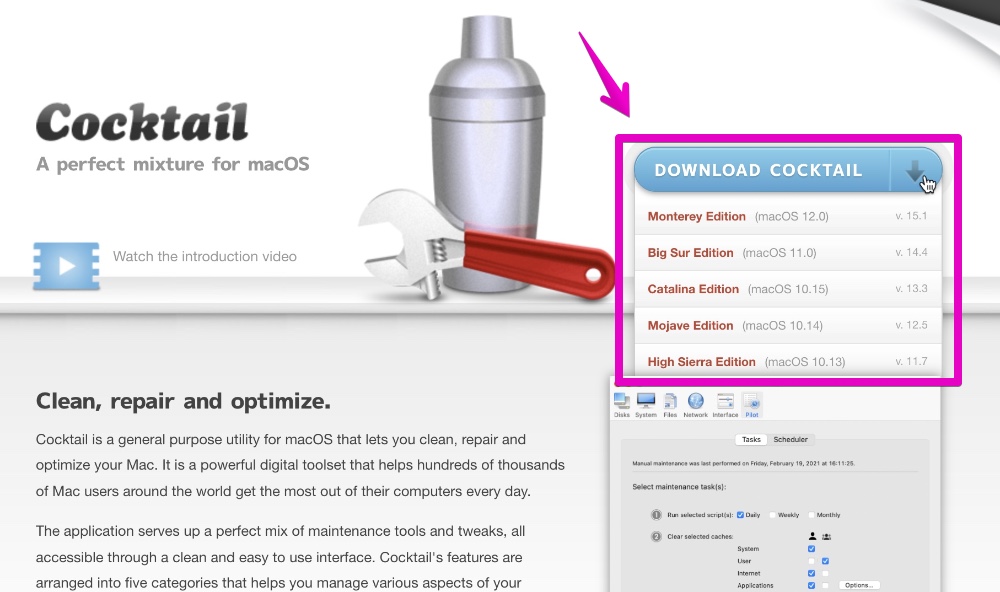
▶ When the official website opens, click the button “DOWNLOAD COCKTAIL” to download the app that matches the version of macOS you want to install.
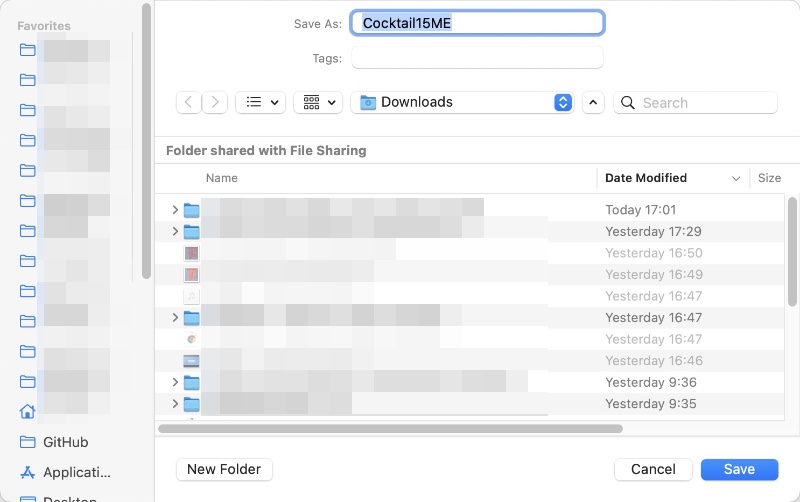
▶ When the file save screen is displayed, specify an appropriate save destination such as the folder “Downloads” and save (download) the file.
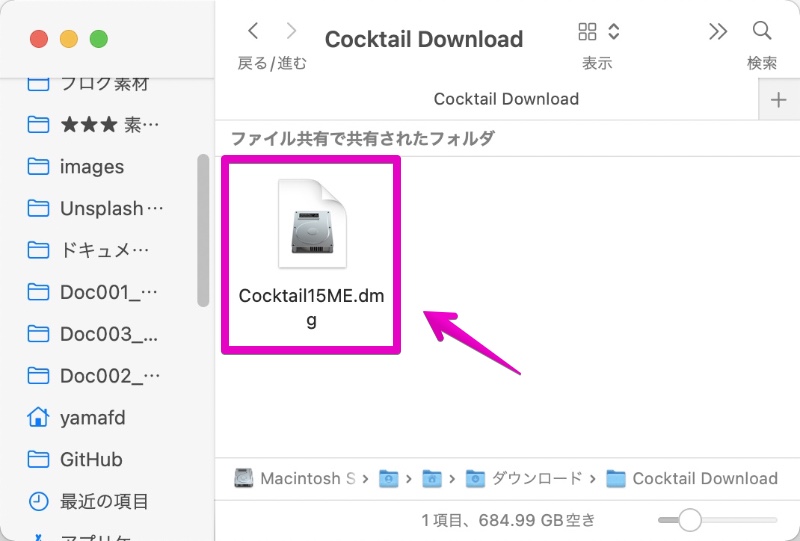
▶ Once the file is downloaded, it is compressed in dmg format, so double-click it to mount it.
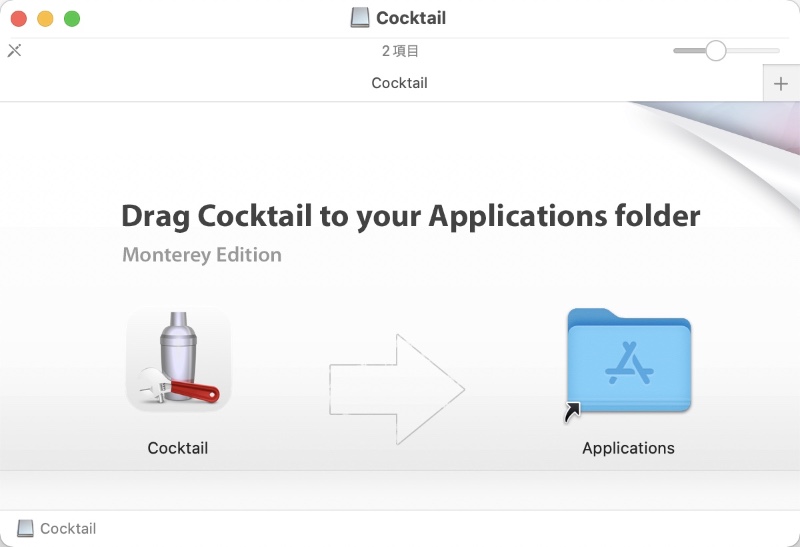
▶ Once mounted, the “Cocktail” icon will appear as shown, so drag and drop it into the folder “Applications”.
③-2 How to set “Cocktail” at the first launch
Only when you use Cocktail for the first time, you need to set access settings.
The procedure is from the following, but please skip this part in the second and subsequent launch the app.
▶ Double-click “Cocktail.app” in the “Applications” folder of the Finder to start it.
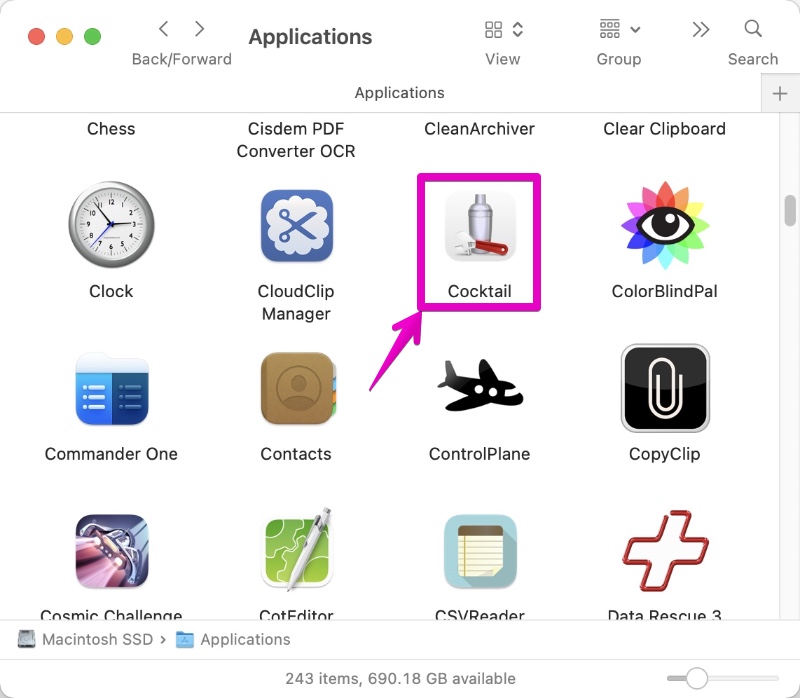
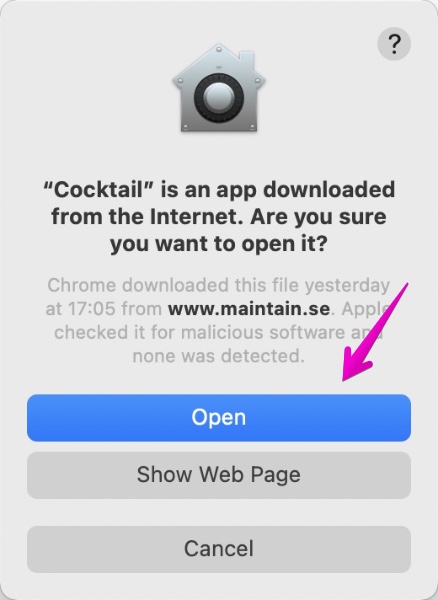
▶ At the first launch, the following confirmation screen for application execution may be displayed.
When it displayed, click the “OK” button.
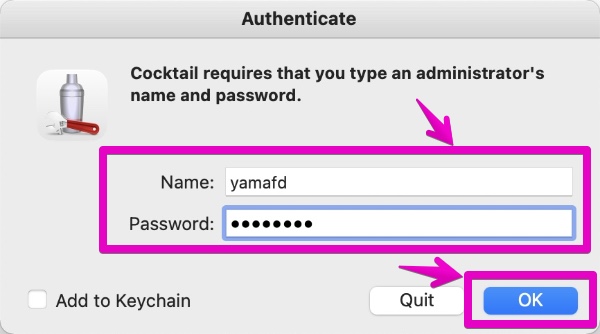
▶ At the first launch, the following user name and password input screen may be displayed.
When displayed, enter the user name and password used to log in to your Mac or install apps, and click the “OK” button.
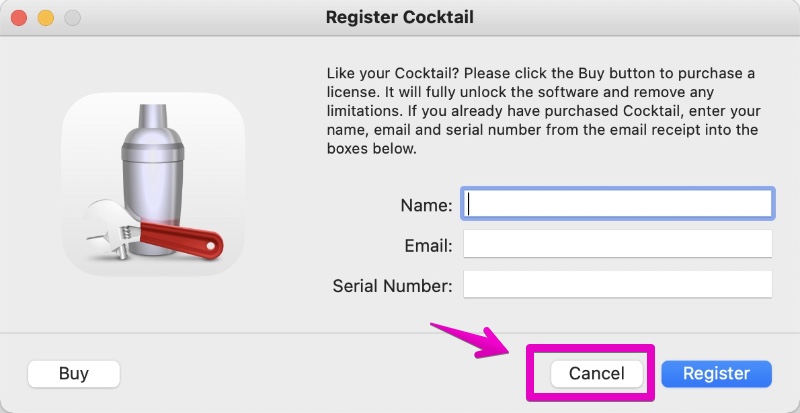
▶ When the screen “Register Cocktail” is displayed as shown in the figure, this is the screen for purchasing the app or registering the license after purchase, so click the “Cancel” button to close it.
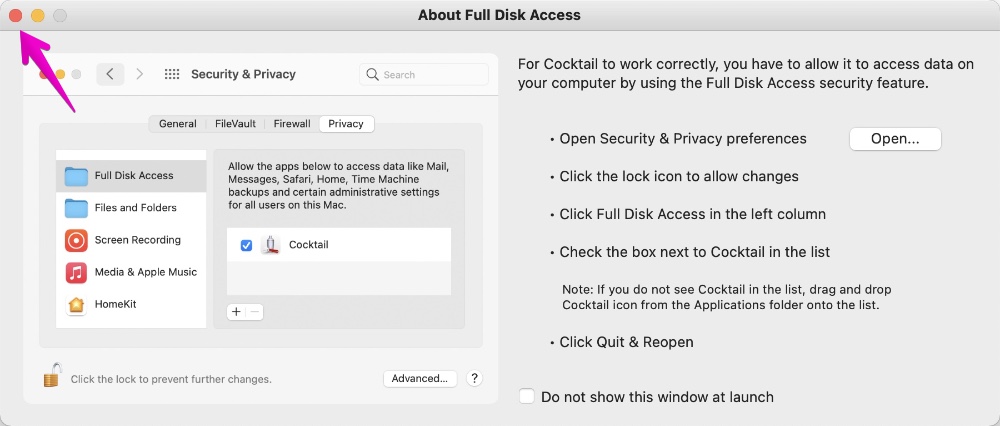
▶ At the first launch, the “About Full Disk Access” screen as shown in the figure may be displayed.
When it is displayed, you need to make settings according to the contents of the screen, but for the time being, click the red button on the upper left to close it.
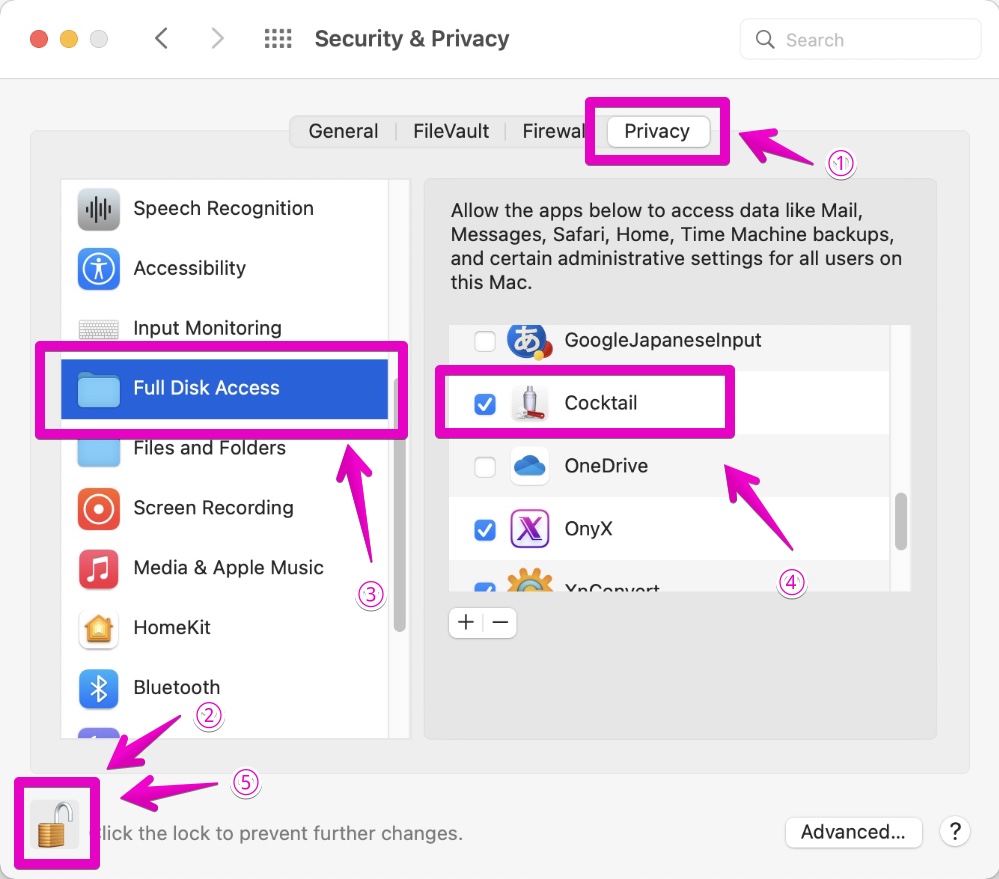
▶ To set up full disk access, open “System Preferences” -> “Security & Privacy” and follow steps ① to ⑤ in order.
- ① Select “Privacy” on the top tab
- ② Click the padlock icon at the bottom left to unlock
- ③ Select “Full Disk Access” from the left column、
- ④ Add “Cocktail.app” to the apps you want to access
- You can add apps by clicking the + button below the app list
- ⑤ Finally click the padlock icon to lock
Once you have made the above settings, you can close “System Preferences”.
③-3 How to use “Cocktail”
The following is an explanation of the procedure for “rebuilding the lunch service database” in Cocktail.
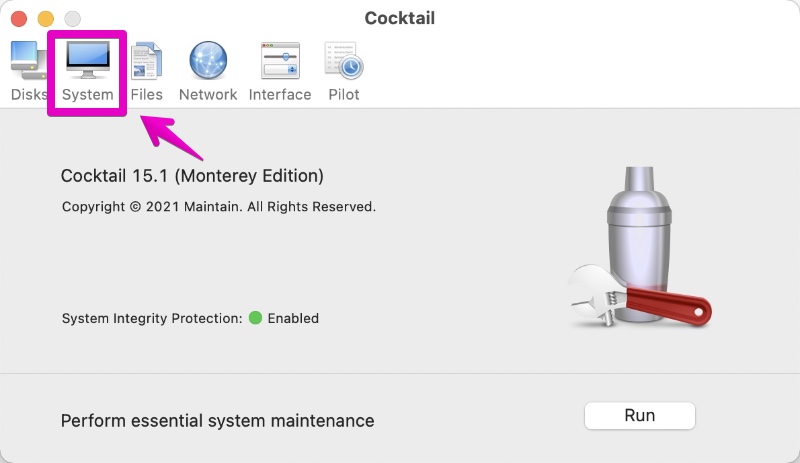
▶ Double-click “Cocktail.app” to start it in the “Applications” folder of the Finder.

▶ When Cocktail starts, click the tab “System” at the top of the screen.
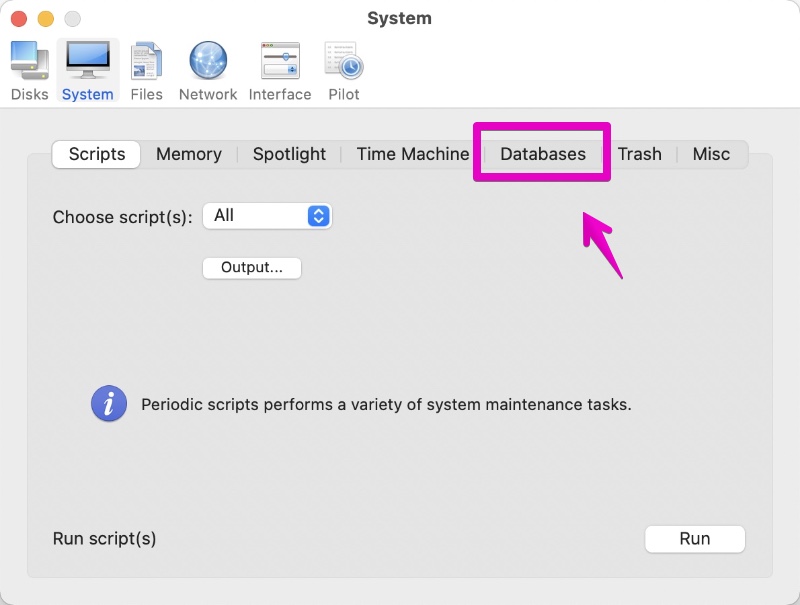
▶ When the screen switches to “System”, click the tab “Databases” in the middle of the screen.
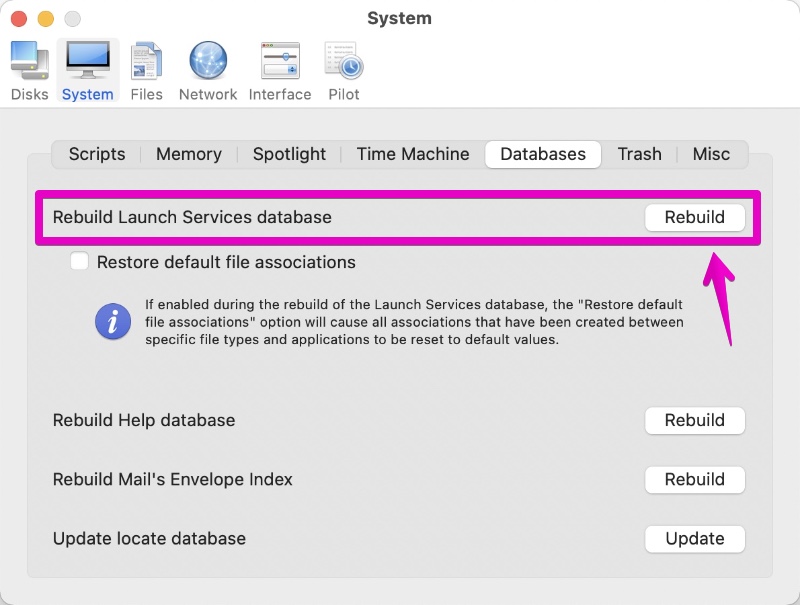
▶ When the screen changes, click the button “Rebuild” on the right side of the item “Rebuild Launch Services database”.
If you click the button, rebuilding database will start.
▶ Below is the running screen, which will take a few minutes to complete.
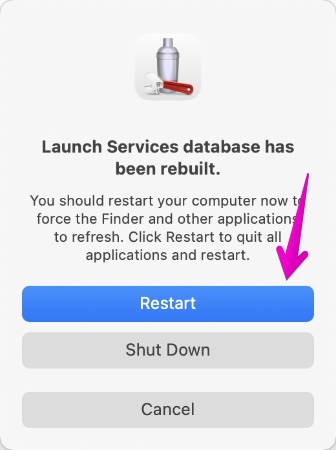
▶ When completed, you will be prompted to restart or shut down as shown in the screen below.
After saving the data etc., restart your Mac.

This is the end of the explanation, “③ Paid app Cocktail”.
Reference information
Below is a description of how to rebuild the LaunchServices in your Mac “Terminal.app”.

The following is the official website of Onyx.

This is the end of this article.





コメント