
I will introduce the slideshow feature available in the Photos app on your Mac.
There are two types: an easy-to-use “Instant slideshow” and a “Slideshow project” that allows detailed settings and video file export.
What is a slideshow?
On Mac, Some apps have a slideshow function, but the “Photos” app has the following three types of slideshows.
You can jump to each operation explanation by clicking the heading below.
The contents of ① and ② are the same, only the difference is whether the slideshow is based on photos or an album.
So, I compared what you can and cannot do in “Instant Slideshow” and “Slideshow Project” below.
| Item | Instant Slideshow | Slideshow Project |
|---|---|---|
| Export to video files | NG | OK |
| Change the order of photos | NG | OK |
| Insert text | NG | OK |
| BGM settings | OK | OK |
| Loop playback | Only loop playback | Loop playback on / off |
| Effect when switching photos | Only 1 type | Select from 7 types |
① Instant slideshow (from photos)
▶ In the Photos app on your Mac, select the photos you want to play in your slideshow from the list of photos in your Library.
The selected photo will change the color of the border of the photo.
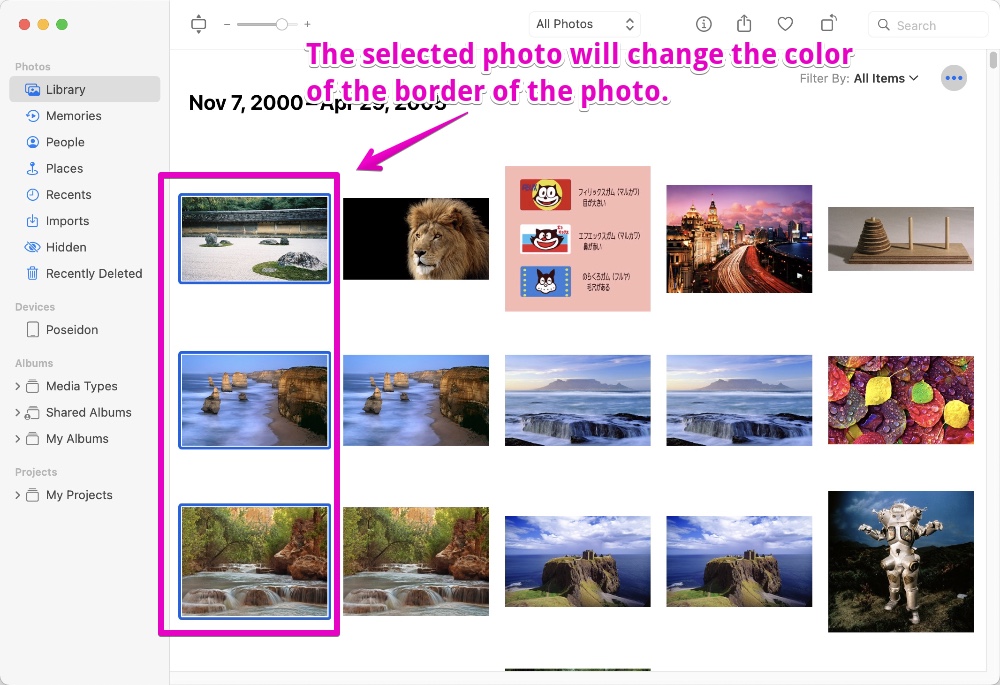
There are the following types of selection methods:
| Method | How to operate |
|---|---|
| Select only one | Click the photos / movies with the mouse or trackpad |
| Select multiple consecutive | Below are the steps: ① Hold down shift key on your keyboard ② Click and hold the margin near the start point with your mouse / trackpad ③ Drag the mouse / trackpad to the end point ④ Take your finger off the keyboard and mouse / trackpad |
| Select multiple non-consecutive | Below are the steps: ① Hold down command ⌘ key on your keyboard ② Click the photos / movies with the mouse or trackpad ③ Take your finger off the keyboard and mouse / trackpad |
| Select all | Press command ⌘ + A keys on your keyboard |
| Deselect all | Click on an empty margin |
▶ After selecting what you want to play, right-click on any of the selected photos to display the menu.
From the right-click menu that appears, select “Play Slideshow”.

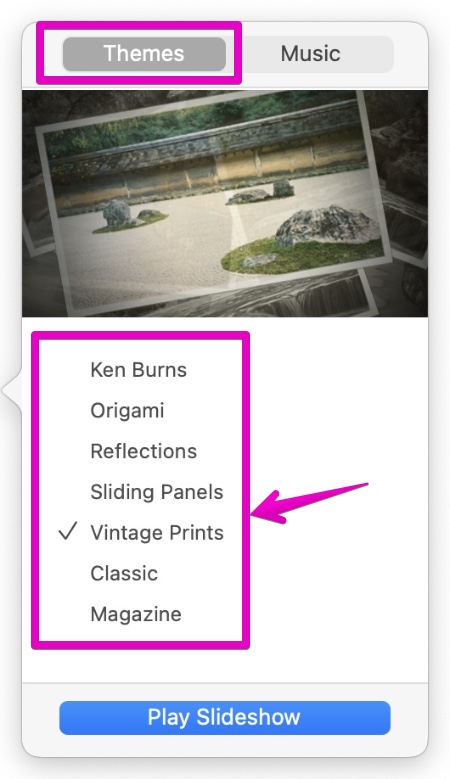
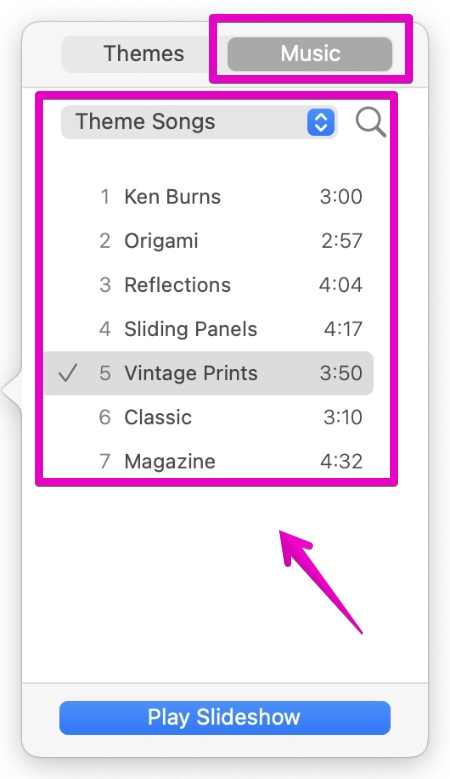
▶ As shown in the figure, the “Theme” and “Music” setting screens are displayed, so set them according to your preferences.
After setting, click the button “Play slideshow”.
▶ The following video shows the slideshow playing.
This is the end of explanation, “① Instant slideshow (from photos)”.
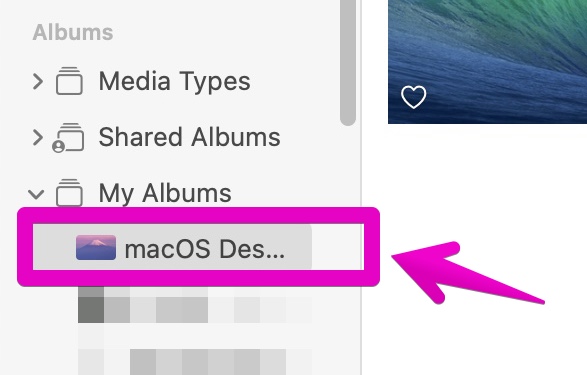
② Instant slideshow (from my album)
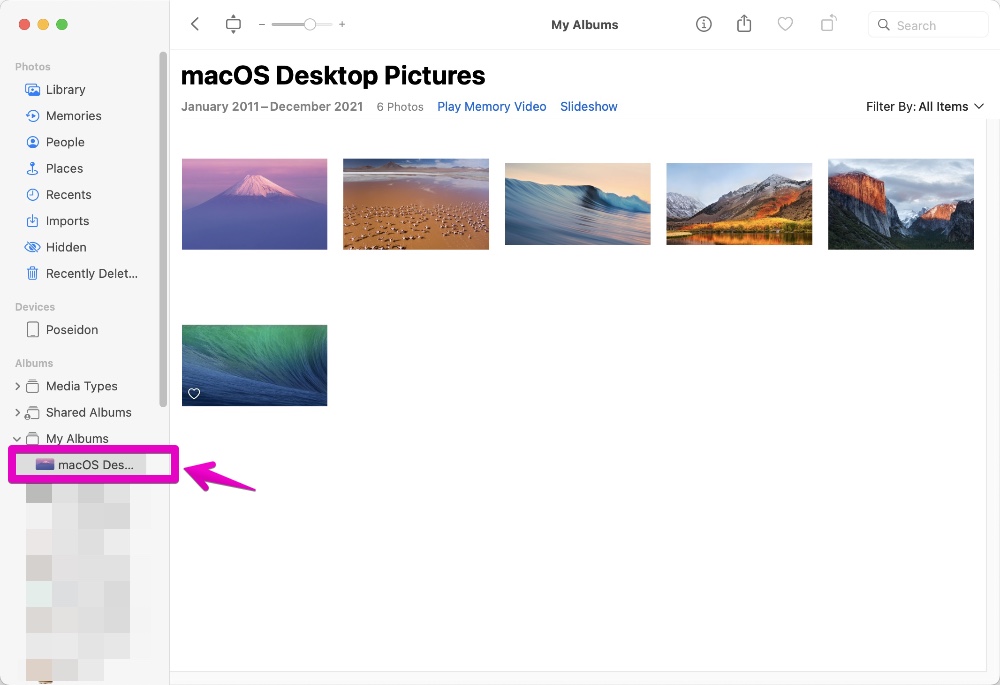
▶ In the Photos app on your Mac, display the album you want to play in the slideshow from the albums in “My Albums”.
The figure below is an enlarged view around the arrow
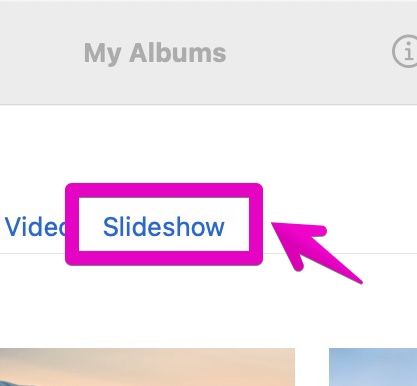
▶ Click on the word “Slideshow” at the top of the album screen。
▶ As shown in the figure, the “Theme” and “Music” setting screens are displayed, so set them according to your preferences.
After setting, click the button “Play slideshow”.
▶ The following video shows the slideshow playing.
This is the end of explanation, “② Instant slideshow (from my album)”
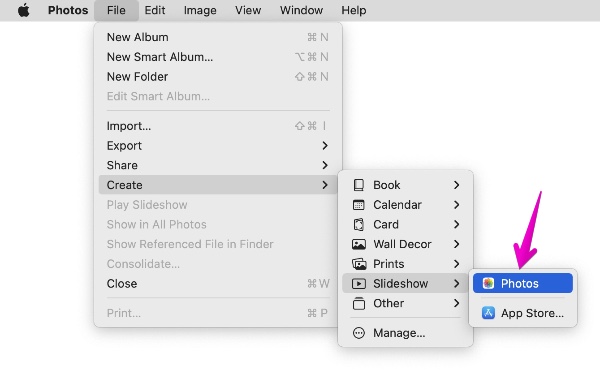
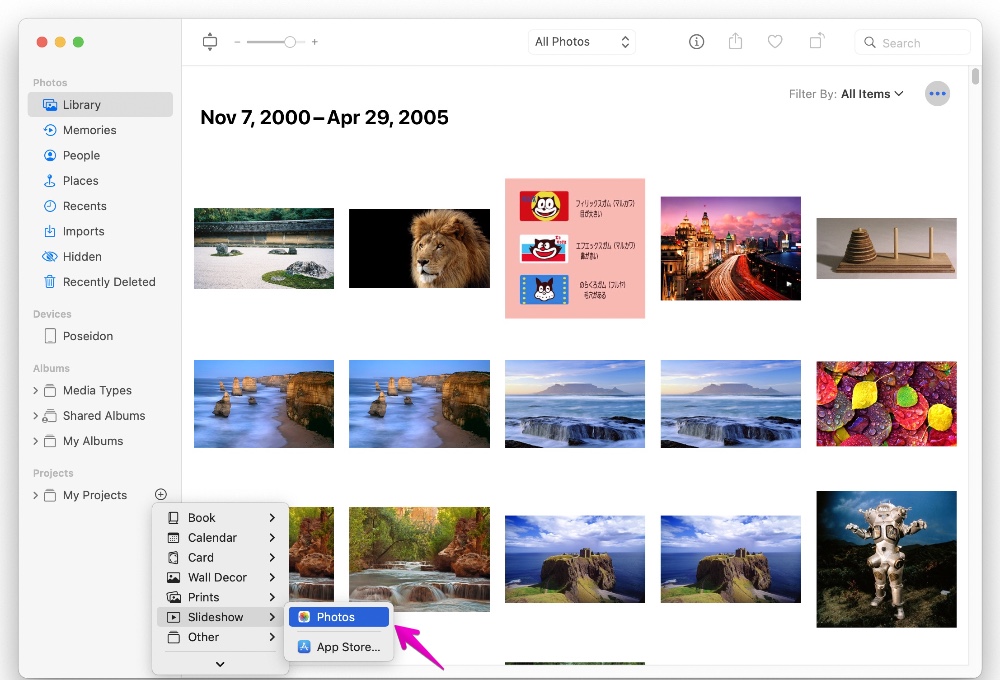
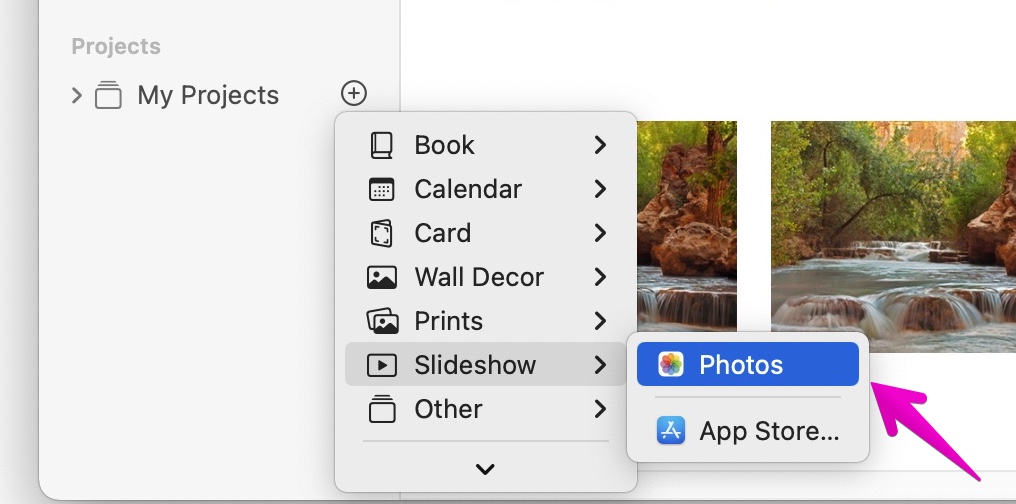
③-1 How to create a new slideshow project
▶ In the Photos app on your Mac, create a new slideshow project in one of two ways:
- a) In the menu bar, select “File” -> “Create” -> “Slideshow” -> “Photos”
- b) In the left column, under “My Projects”, click the + button -> “Slideshow” -> “Photos”
【b) My Projects】
The figure below is an enlarged view around the arrow
③-2 Detailed setting method of slideshow project
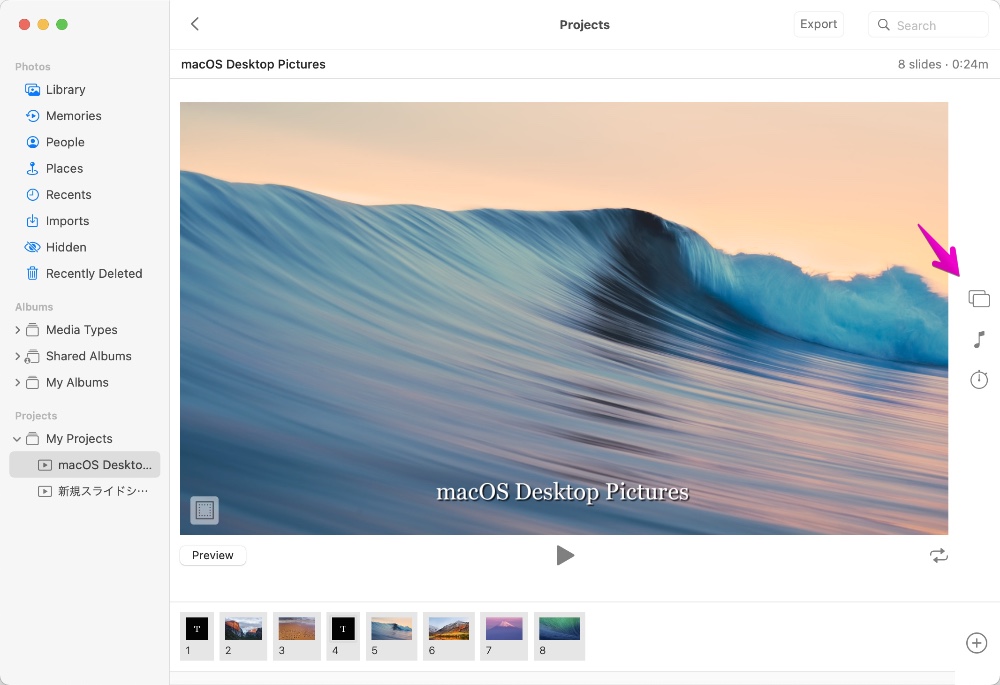
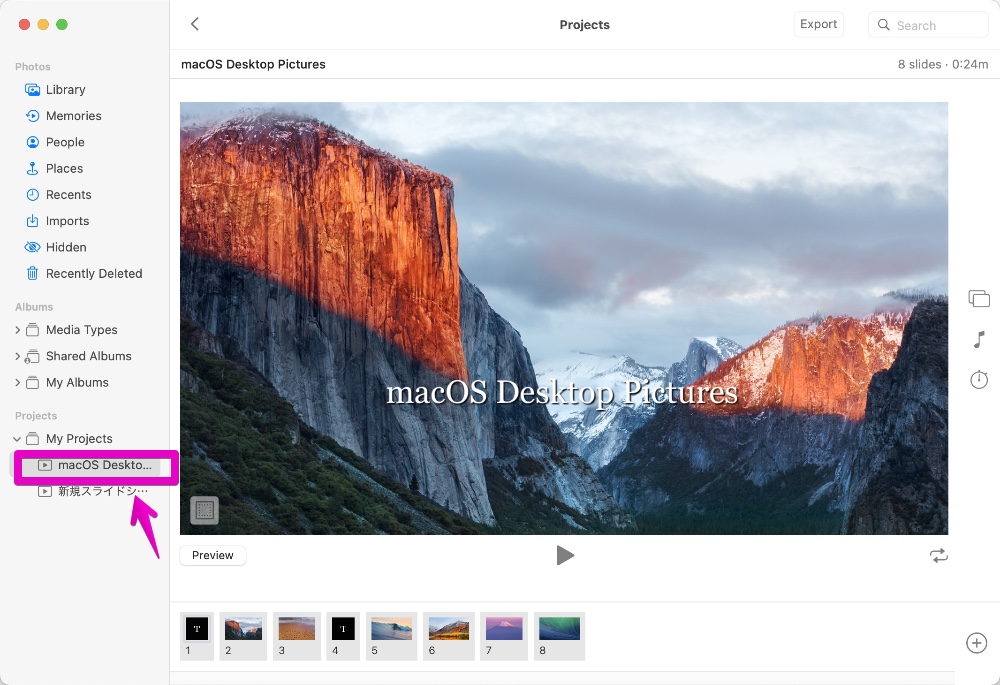
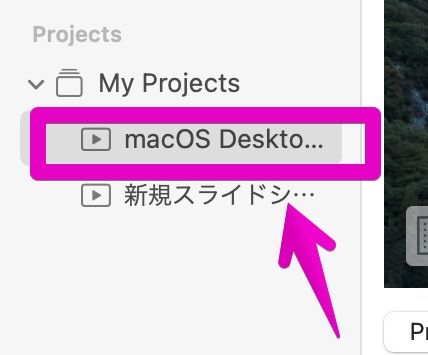
▶ In the Photos app on your Mac, click the slideshow you want to set from the “My Projects” list to display it.
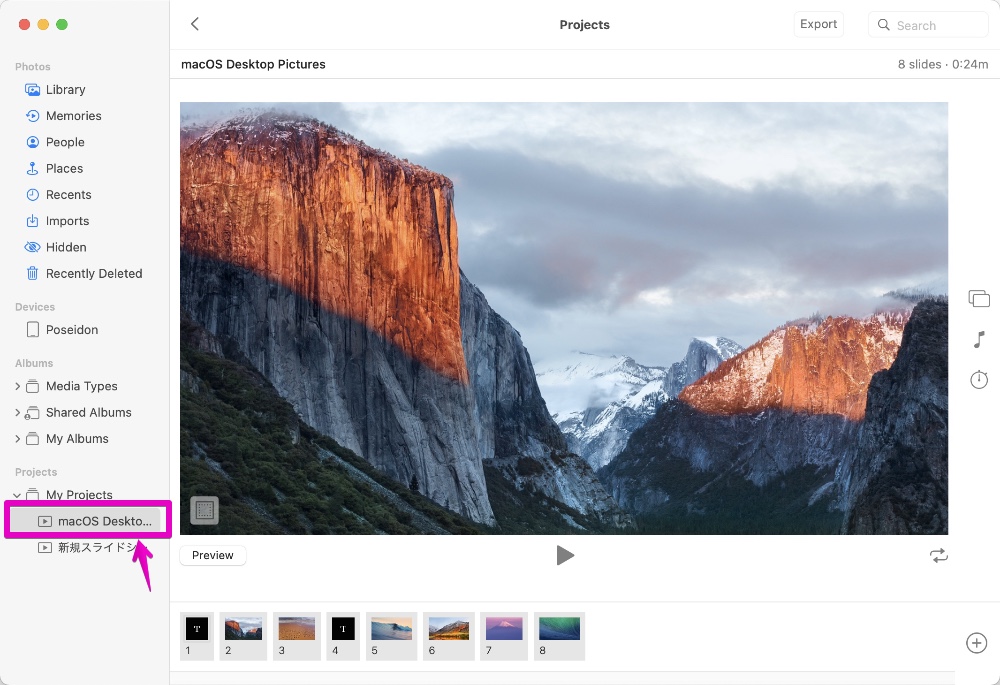
The figure below is an enlarged view around the arrow
▶ There are many items that can be set in the slideshow project.
Each is explained below.
- a) Change the order of images to be displayed
- b) Add / edit / delete text
- c) Change the effect of image switching
- d) Change BGM / music
a) Change the order of images to be displayed
▶ A list of images will be displayed at the bottom of the screen, and you can change the order by drag and drop them.
For details, please see the following video.
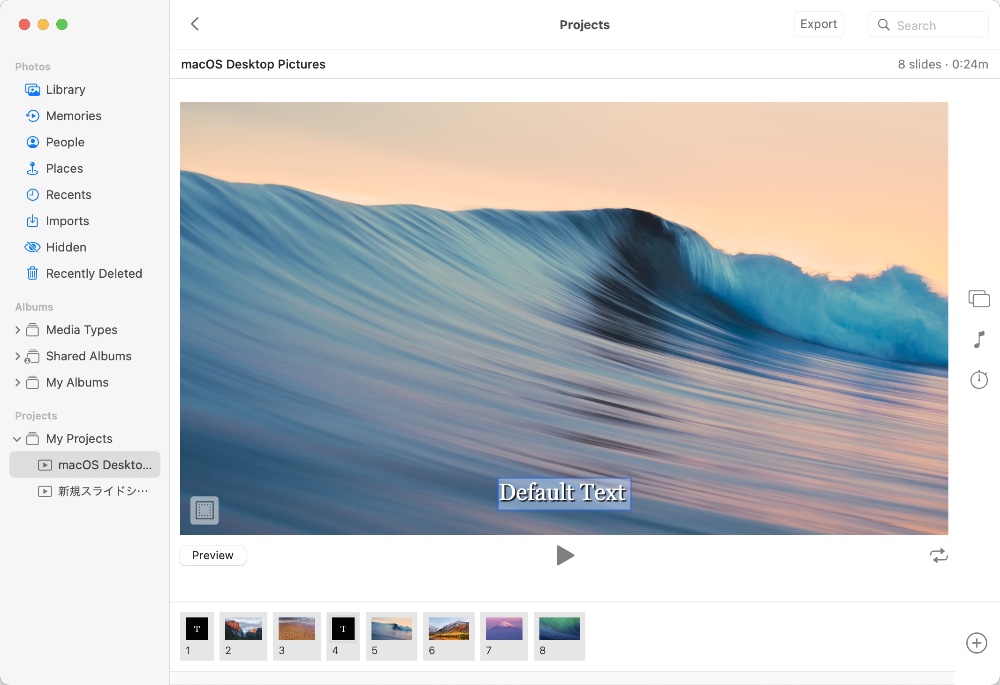
b) Add / edit / delete text
▶ A list of images will be displayed at the bottom of the screen.
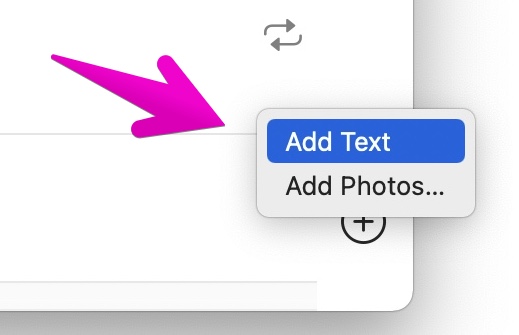
Click the image you want to add a text to, then click the + button at the bottom right of the screen -> select “Add Text”.
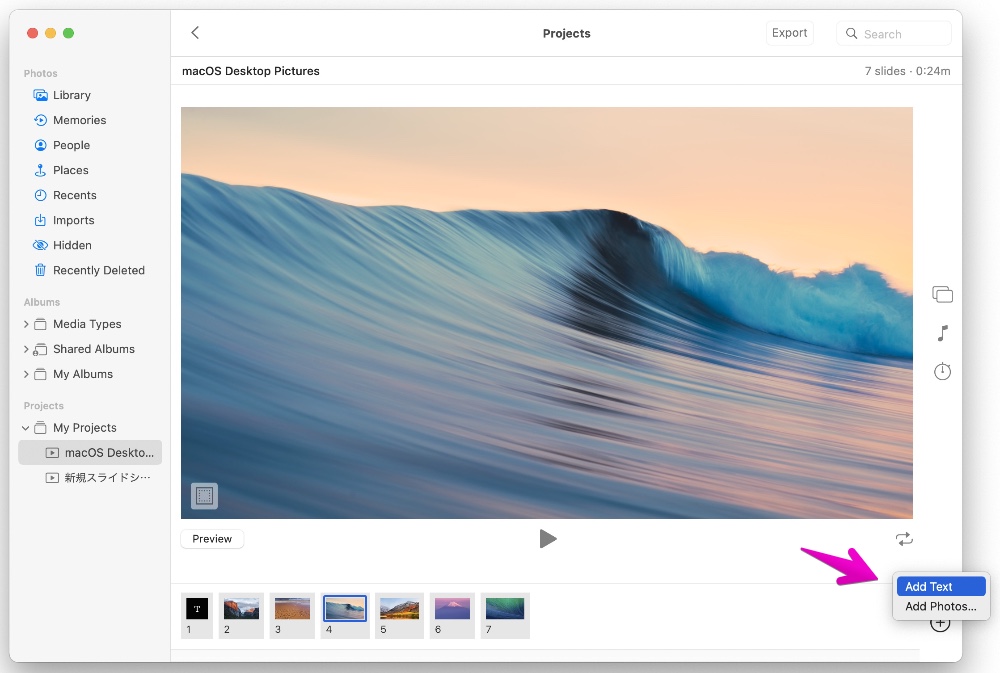
The figure below is an enlarged view around the arrow
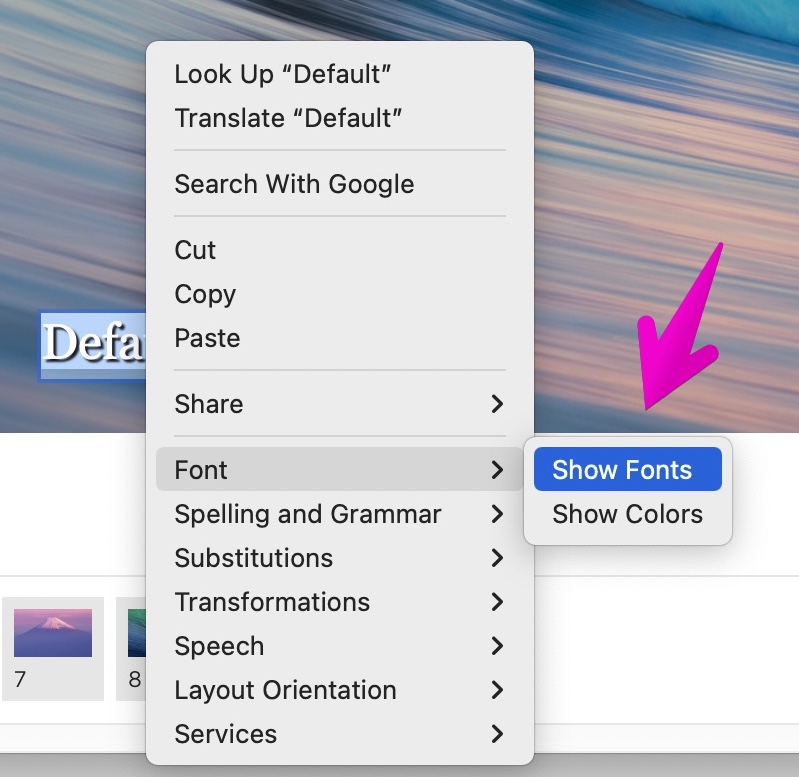
▶ When texts are added as shown in the figure, click them to change to the appropriate characters.
You can also change the font size and type by right-clicking on the characters.
▶ To edit the existing texts, click them on the screen.

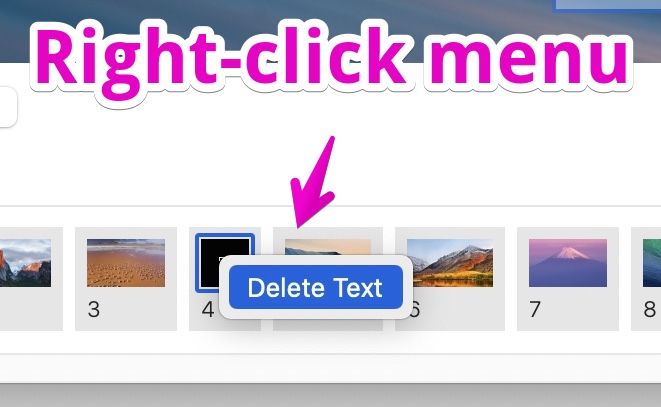
▶ To delete the existing texts, click the image to be deleted from the list of images and texts displayed at the bottom of the screen, then display the right-click menu and select “Delete Text”.
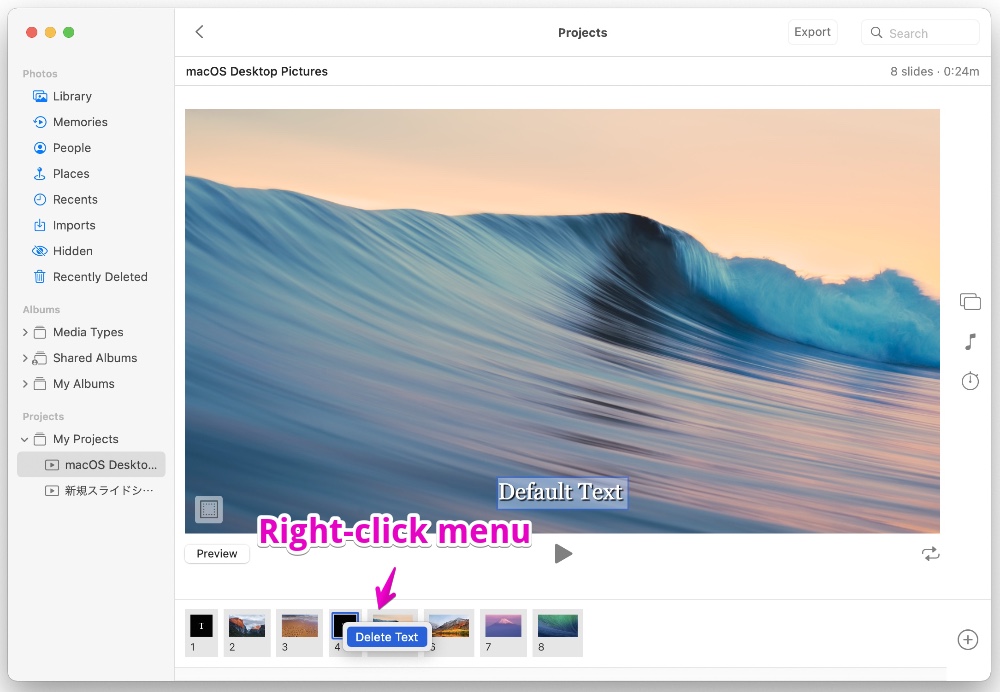
The figure below is an enlarged view around the arrow
c) Change the effect of image switching
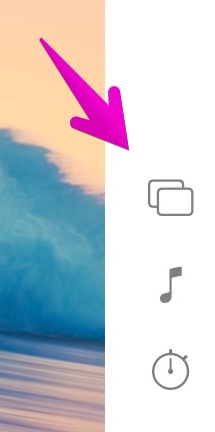
▶ From the icon column on the far right of the screen, click the square icon at the top to display the “Theme Selector” screen.
The figure below is an enlarged view around the arrow
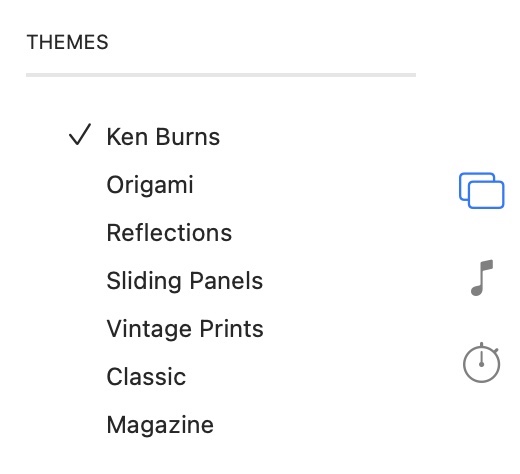
▶ A list of themes is displayed as shown.
Please actually operate and check the effect of specific image switching.
d) Change BGM / music
▶ From the icon column on the far right of the screen, click the note icon in the middle to display the “Music” screen.

The figure below is an enlarged view around the arrow
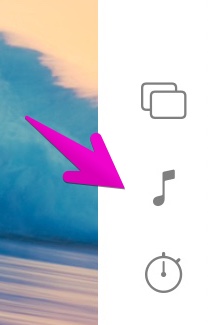
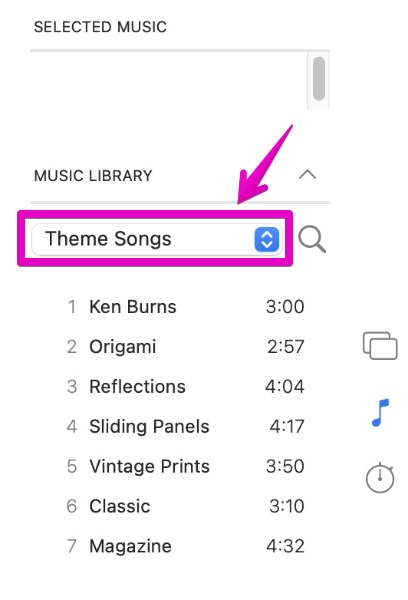
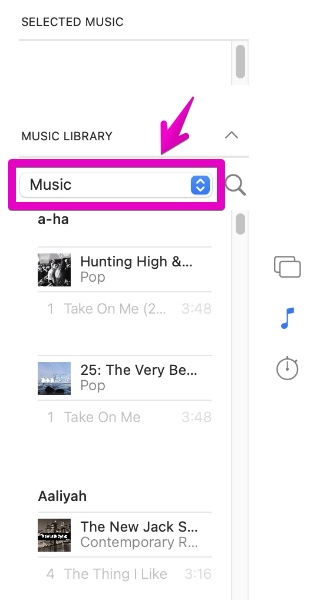
▶ The music setting screen is displayed as shown in the figure.
The following two types of BGM and music can be set.
- Theme Songs: Music with built-in “Photos” app
- Music: Music managed by the “Music (iTunes)” app
【Theme Songs】
【Music】
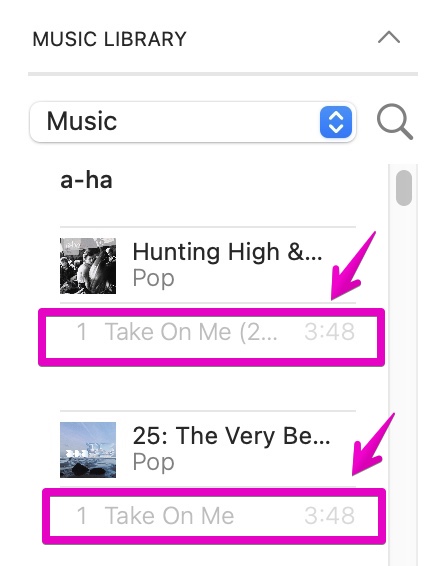
I want to select music in “Music”, but the color of the letters is too light, and can’t click it!
Furthermore, I was wondering if I could select the downloaded music, but I got the following error.
The selected audio track is not supported
DRM-protected audio cannot be used in slideshows.
Choose another audio track.
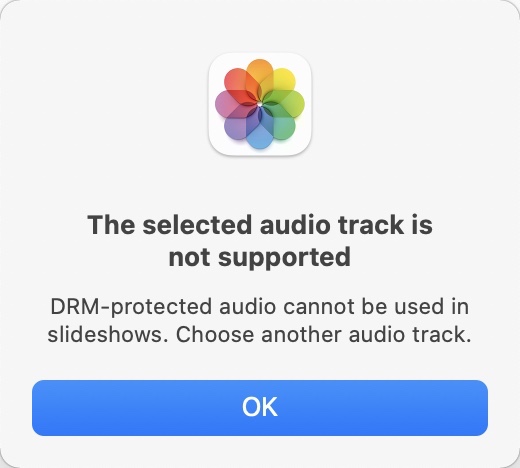
The solution is to download non-DRM protected music files to your Mac.
The specific music files that can and cannot be used are as follows.
| Can | Cannot |
|---|---|
| Music imported from CDs | Music subscripted on Apple Music |
| Music recorded by yourself | Music purchased from iTunes |
Since it is necessary to protect the copyright of music, it would be bad if protected-music was used in slideshows and played in public places.
Also, the music you imported from CDs and uploaded to Apple Music needs to be downloaded to your Mac.
Also, since it cannot be displayed from the “Photos” app immediately after downloading, it can be loaded once the “Photos” app is restarted.
This is the end of explanation, “③-2 Detailed setting method of slideshow project”.
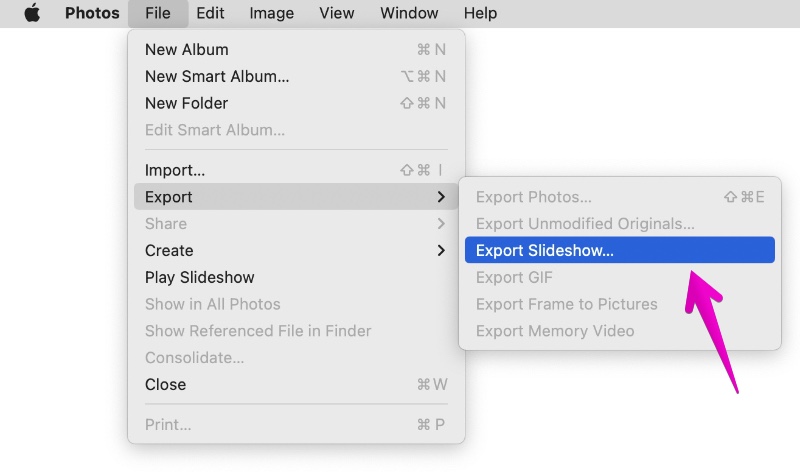
③-3 How to export slideshow projects
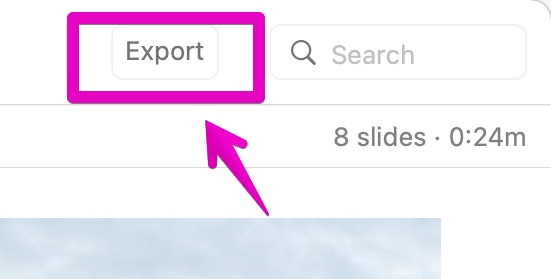
▶ In the Photos app on your Mac, click the slideshow you want to export from the “My Projects” list to display it.
The figure below is an enlarged view around the arrow
▶ When the slideshow project you want to export is displayed, export it using one of the following two methods.
- a) In the toolbar, click the “Export” button
- b) In the menu bar, select “File” -> “Export” -> “Export Slideshow…”
【a) Toolbar】

The figure below is an enlarged view around the arrow
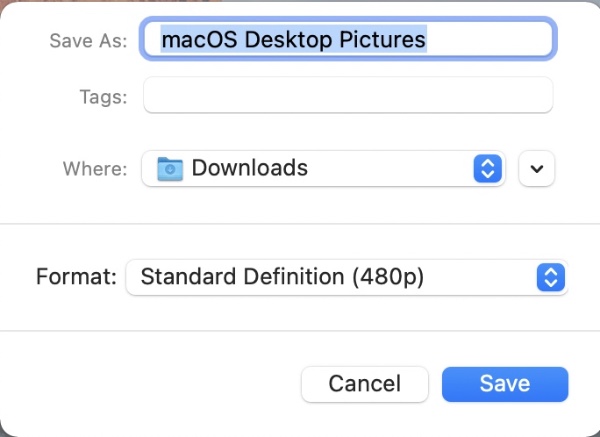
▶ When the file save setting screen is displayed as shown in the figure, set the name, location, and format, and then click the “Save” button.
You can select the following three types of format settings.
| Format | Description | Guide |
|---|---|---|
| Standard Definition (480p) | DVD quality | Used for embedding blogs, etc. |
| High Definition (720p) | High Vison quality | |
| High Definition (1080p) | Full High Vision quality | Used when playing on a large screen or when image quality is prioritized |
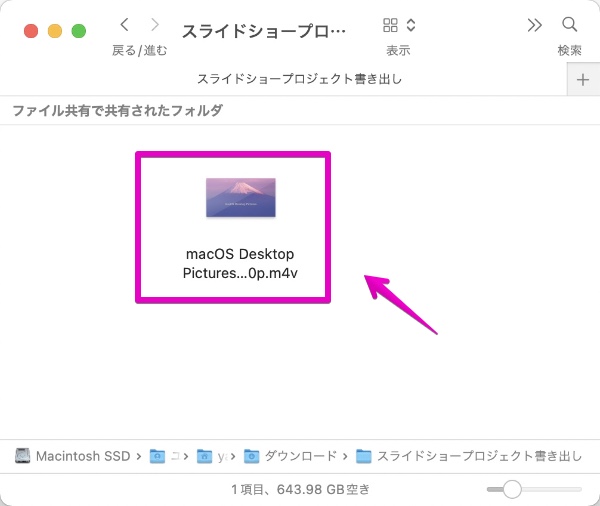
▶ When the file is saved in the export destination, the export work is completed.
This is the end of explanation, “③-3 How to export slideshow projects”.
Reference information
This is an article about how to make a slide show with the Photos app on Apple’s official website.

This is the end of this article.

コメント