
You can use the shared album function in the Photos app on your Mac to share your photos and videos with others.
On this page, I will explain in detail how to use the shared album function using screenshots.
- Conditions for using the shared albums in Photos app
- Advantages and disadvantages of the two sharing targets
- ① How to enable shared albums function
- ② How to create a shared album
- ③ How to create a shared album from the existing album
- ④ How to add / remove photos / movies in shared albums
- ⑤ How to delete photos / videos from shared albums
- ⑥ How to change the targets (and other settings) for the shared albums
- ⑦ How to delete shared albums
- Reference information
Conditions for using the shared albums in Photos app
| Item | Description |
|---|---|
| macOS versions |
the name of the app will be different as follows. |
| iCloud account | |
| Shared album option |
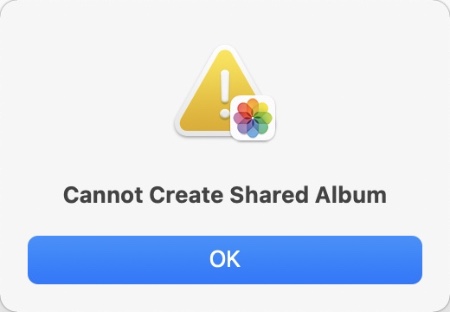
The third “Shared album option” may be disabled by default.
If you think you can’t use shared albums, check it out here!
How to enable shared albums is explained in the next section.
By the way, if you can’t use shared albums, you’ll get the following error:
Advantages and disadvantages of the two sharing targets
If you use the album sharing function in the Photos app on your Mac, you can set the following two types of sharing range.
- a) Share with specific persons (Only iCloud users)
- b) Share with unspecified persons (Not only iCloud users)
The following is a summary of the advantages and disadvantages of each.
| Target | Advantage | Disadvantage |
|---|---|---|
| a) Specific persons | as sharing is limited to the owner of the iCloud account photos and videos | must also have an iCloud account |
| b) Unspecific persons | doesn’t need to have an iCloud account to the whole world | when handling private photos. can’t add comments can’t add photos NG |
For a), it seems that you can share the albums with your friends, add comments, upload photos and videos, and so on.
I agree.
b) has the advantage that it can be viewed even if they are not iCloud users, so it would be nice to open the albums to people who are not familiar with you.
a) is convenient and has high security, so it looks good, but isn’t the condition that iCloud account is required strict?
But well, most iPhone users have an iCloud account, right?
If you don’t have an iCloud account, you can’t install apps or back up iCloud, right?
Come to think of it!
With that in mind, I felt like a) is also nice!
① How to enable shared albums function
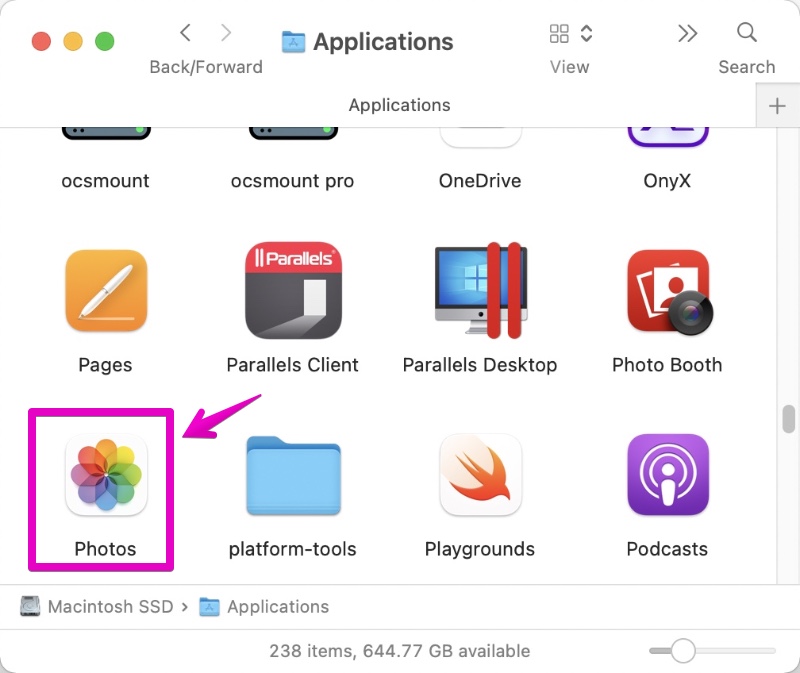
▶ In Finder, launch the “Photos” app in the “Applications” folder.
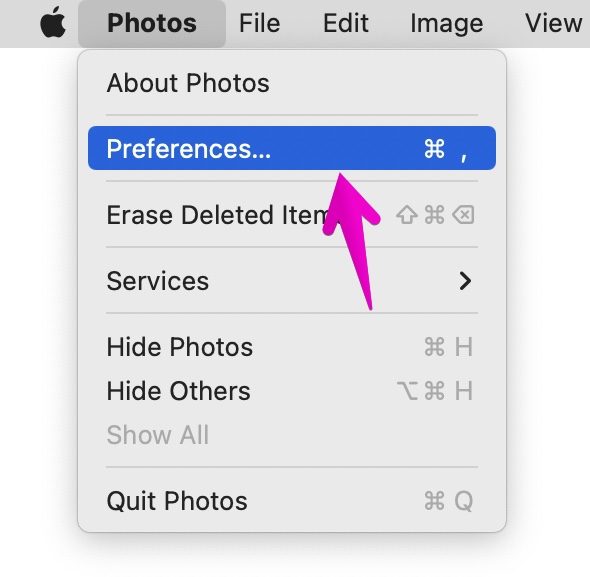
▶ When the “Photos” app starts, select “Photos” -> “Preferences…” from the menu bar.
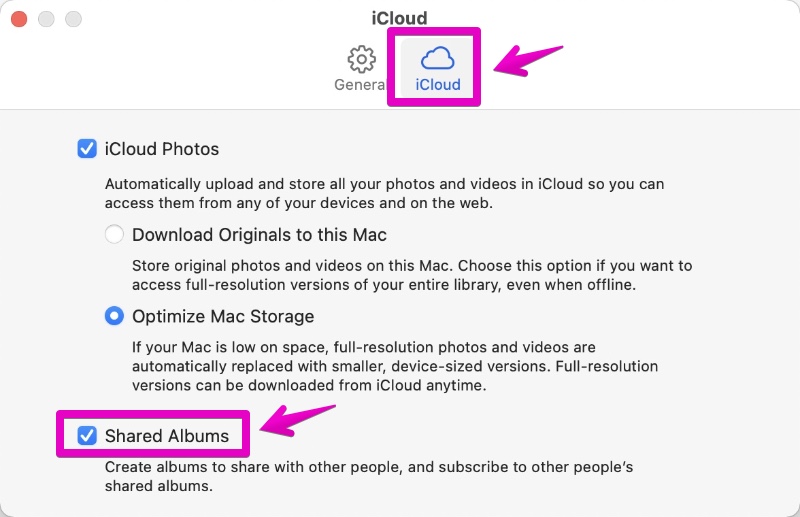
▶ When the “Preferences” screen is displayed, click the tab “iCloud” at the top of the screen and check “Shared Albums” to enable it.
This is the end of the explanation, “① How to enable shared albums function”.
② How to create a shared album
The method introduced here is to create an empty shared album.
If you create a shared album this way, it doesn’t contain any photos or videos at first, so you’ll need to register them later.
Apart from that, please refer to the following items for how to create a shared album from the existing album.
Here’s how to create a new empty shared album.
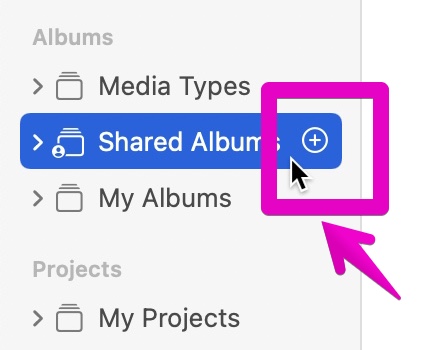
▶ Launch the “Photos” app and click the + button to the right of the “Shared Albums” folder / name in the left column.
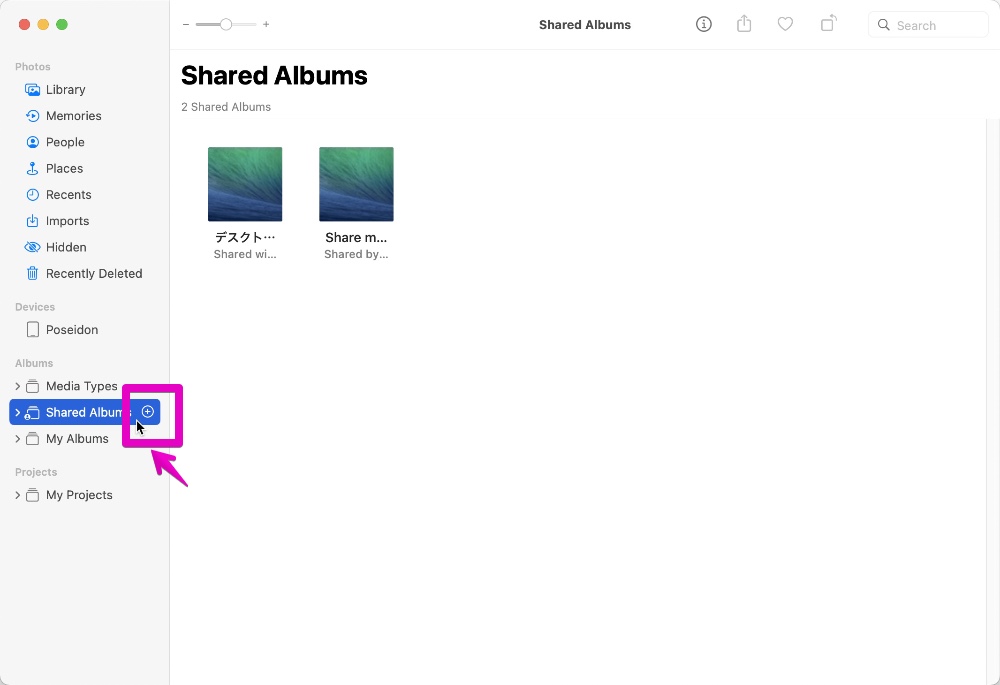
The figure below is an enlarged view around the arrow
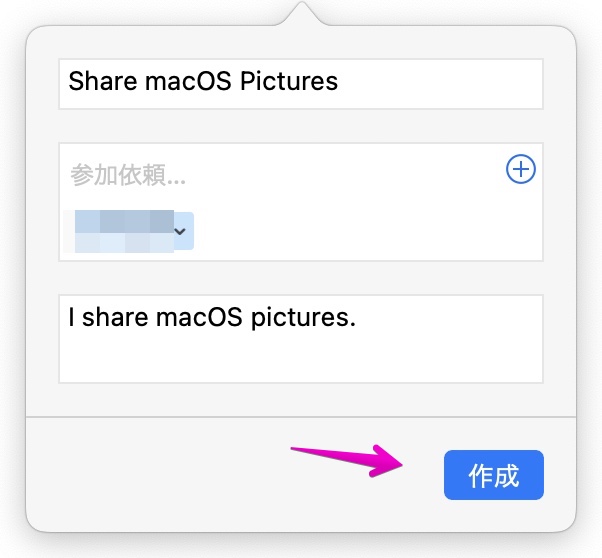
▶ When the album setting screen opens as shown, set each item.
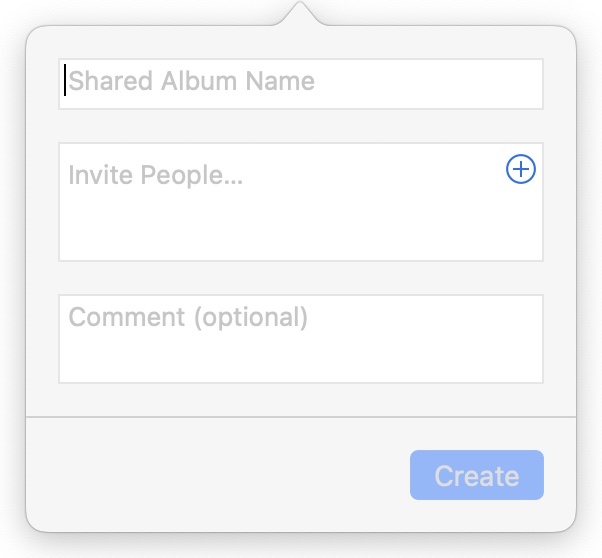
| Item | Description |
|---|---|
| Shared Album Name | but give it a name that is easy for others to understand |
| Invite People… | for someone with an iCloud account
|
| Comment (optional) |
If you want to share with “a) Specific persons”, set “Shared Album Name” and “Invite People”!
If you want to share with “b) Unspecific persons”, set “Shared Album Name”!
After that, make a shared album, and then change the sharing target to “Unspecified Persons” while referring to the following items.
▶ After setting each item, click the “Create” button at the bottom right.

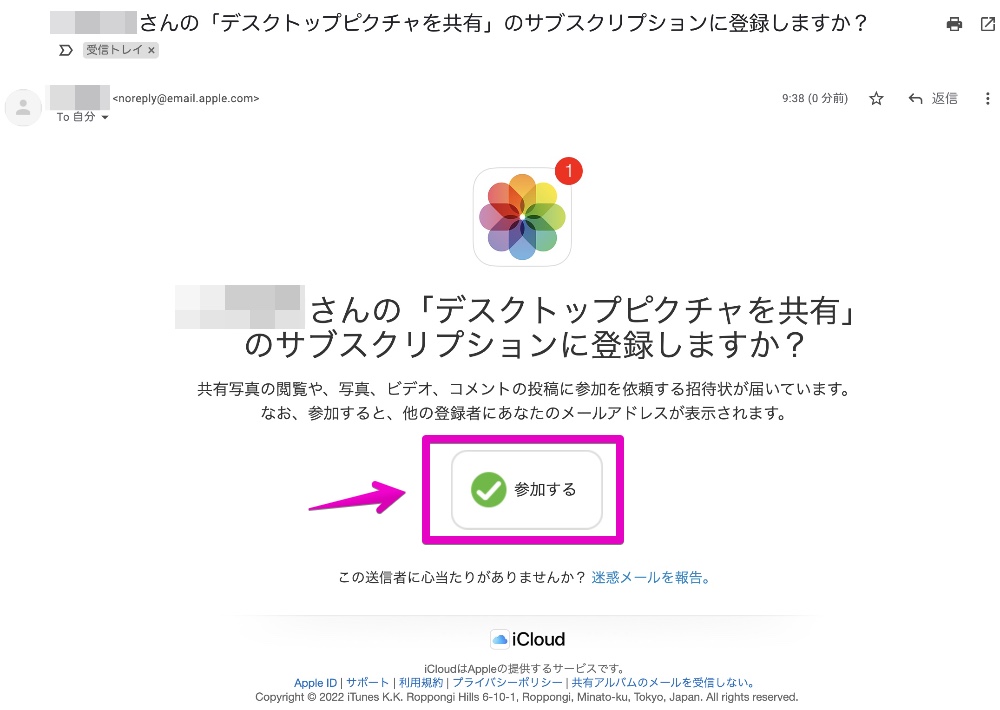
▶ If setting “Invite People…”, the invited persons will receive an email as shown in the figure below.
Click the “Join” button in the body of the email to display the shared album in your web browser.
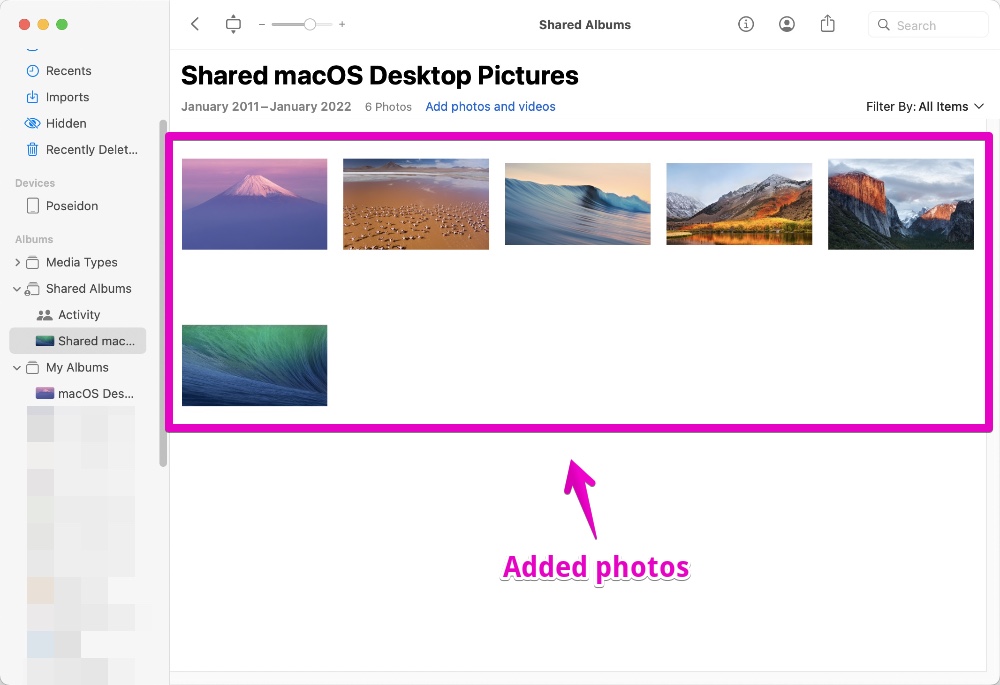
▶ The shared album is displayed in the web browser as shown.
However, at the moment, no photos or videos are added, so nothing is displayed.
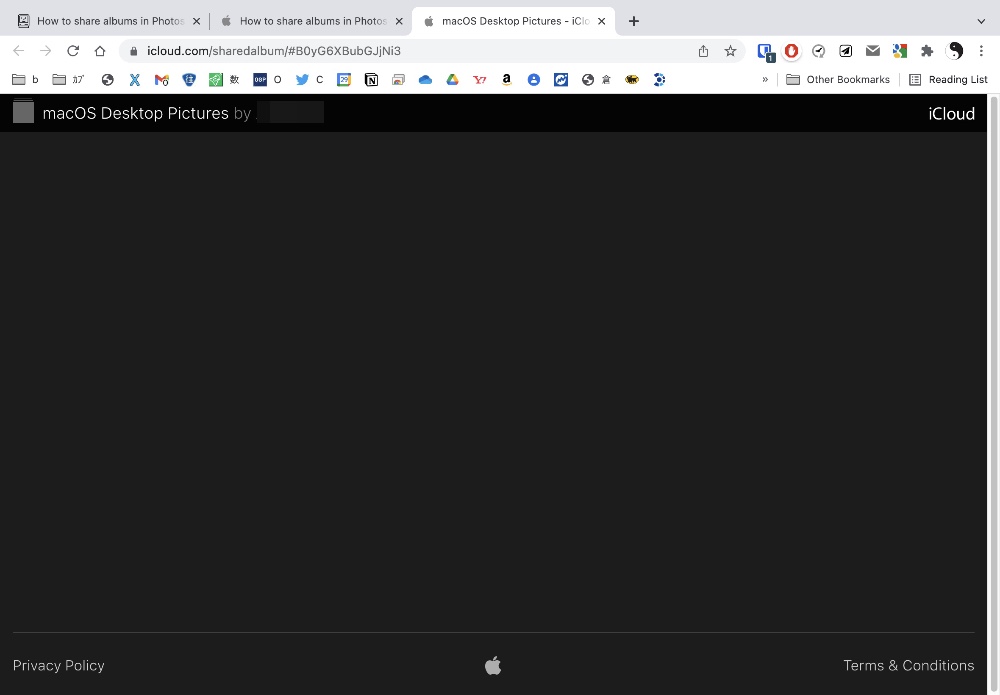
To add the photos and videos you want to display, proceed to the following items.
This is the end of the explanation, “② How to create a shared album”.
③ How to create a shared album from the existing album
▶ Launch the “Photos” app and click the album for which you want to create a shared album from the “My Albums” list in the left column.
In the figure below, “macOS Desktop Pictures” is clicked as a sample.
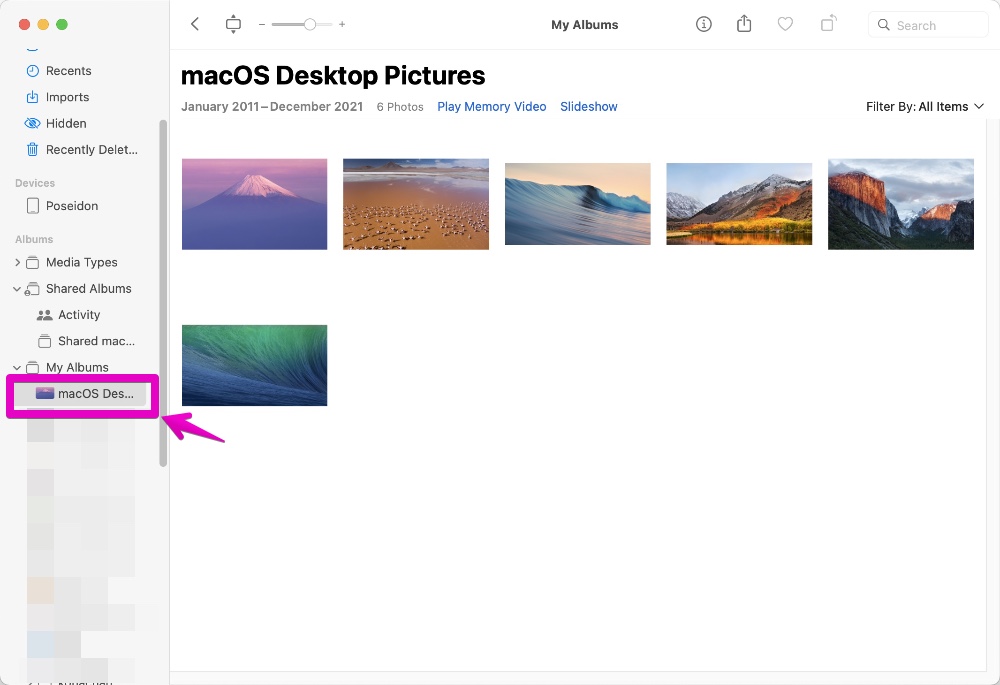
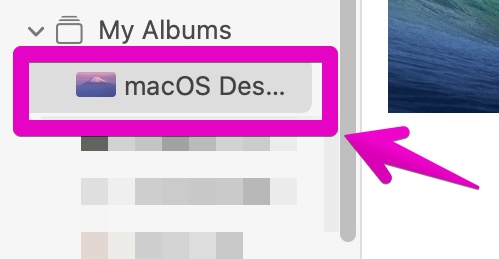
The figure below is an enlarged view around the arrow
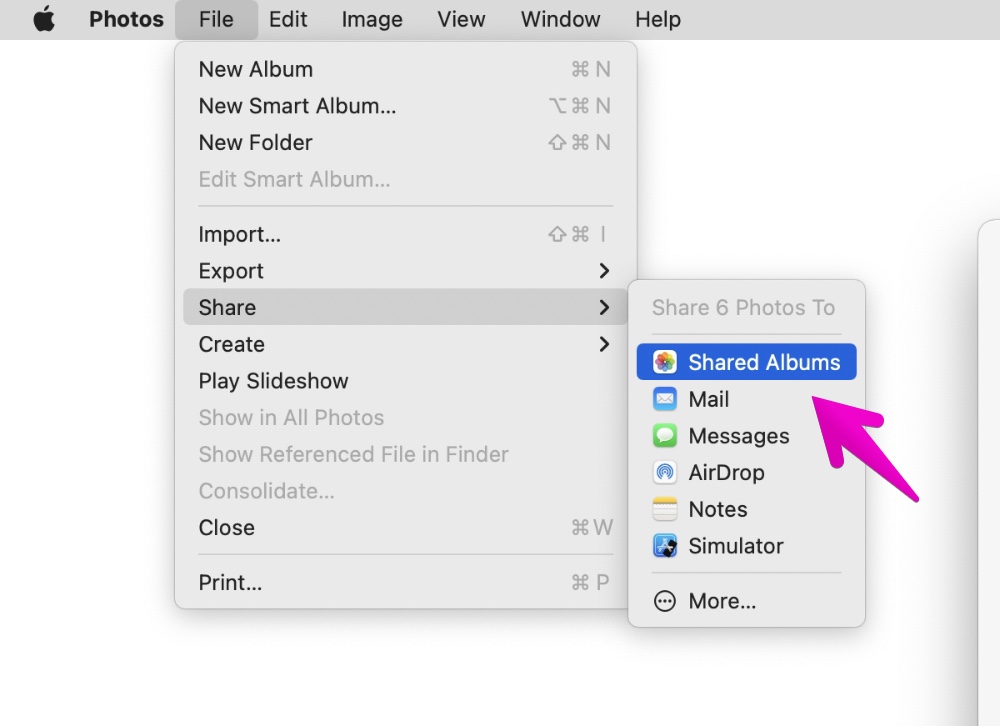
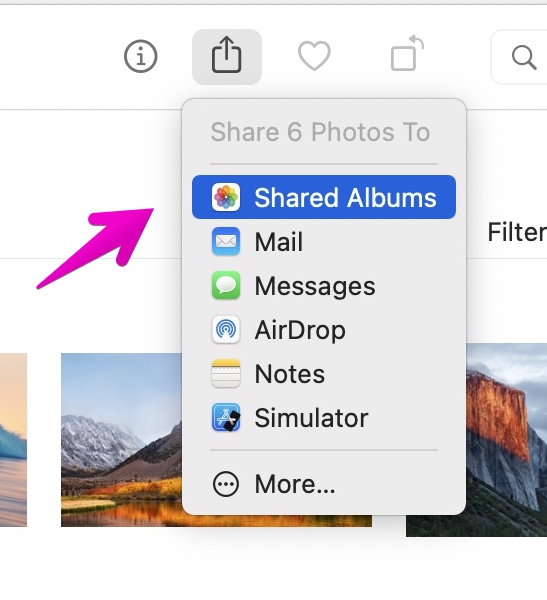
▶ To create a shared album from an existing selected album, do one of the following:
- a) In the menu bar, select “File” -> “Share” -> “Shared Albums”
- b) In the toolbar, select the “Share” icon -> “Shared Albums”
【a) Menu bar】
【b) Toolbar】

The figure below is an enlarged view around the arrow
▶ When the “Add to Shared album” screen is displayed as shown in the figure, set each item.
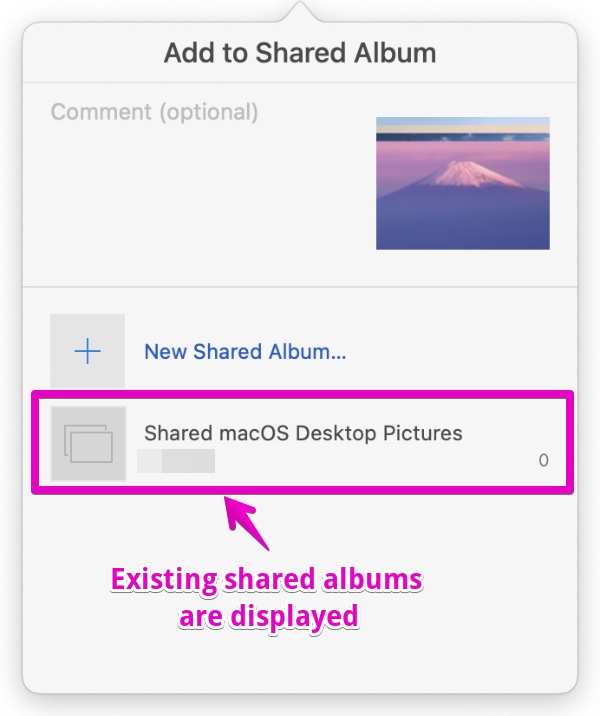
| Item | Description |
|---|---|
| Commnent (optional) | |
| New Shared Album… | a new shared album |
| Existing Shared Albums | to the existing shared albums |
▶ If you select “New Shared Album”, the setting method is the same as the following items, so please refer to that.
【New Shared Album】
▶ On the other hand, if you click “Existing Shared Albums”, photos and videos will be added to the existing shared albums immediately.
This is the end of the explanation, “③ How to create a shared album from the existing album”.
④ How to add / remove photos / movies in shared albums
Please refer to the following items for how to add the entire contents of an existing album to the shared album.
Here’s how to add individual photos and videos to your shared albums.
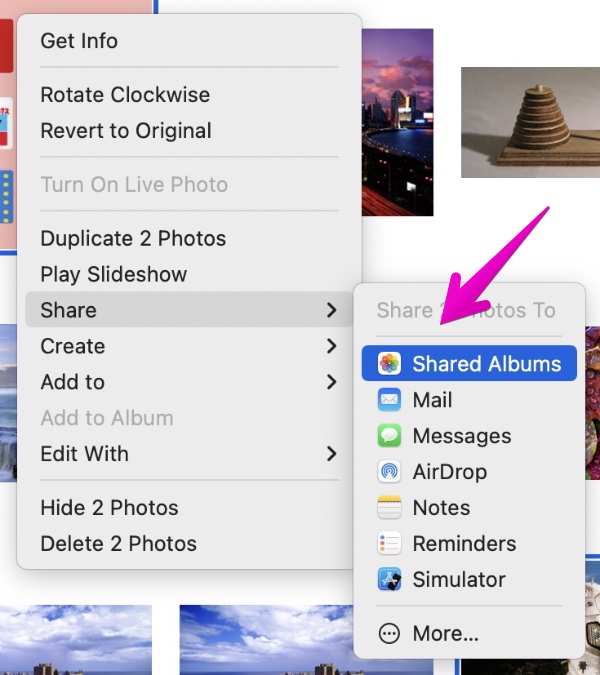
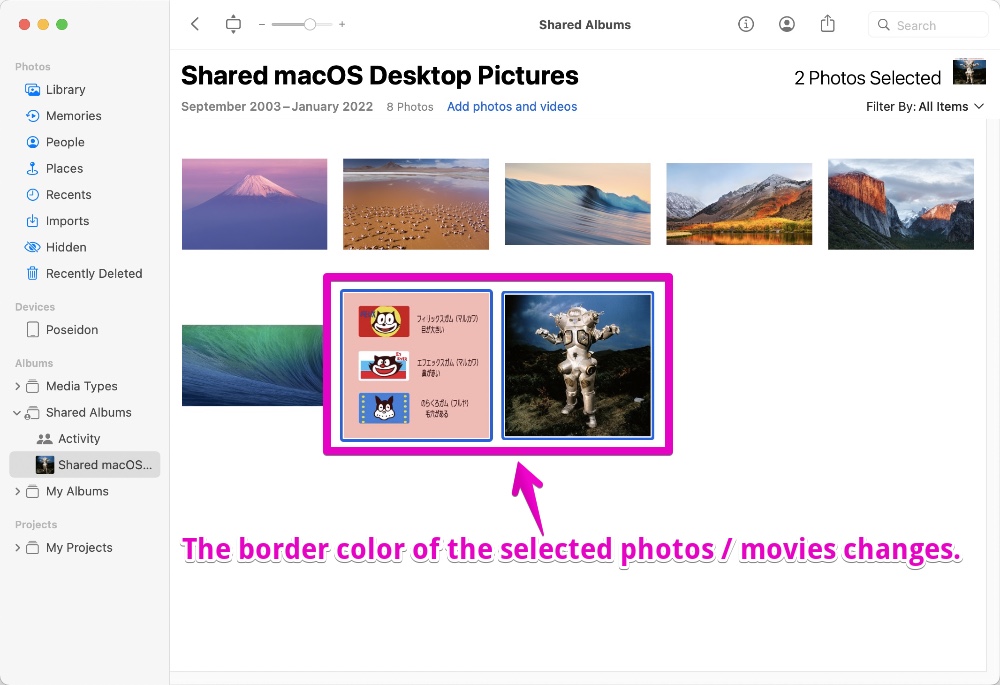
▶ In the Photos app, select the photos / videos you want to add to your shared album.
The selected photos / videos will change the color of the borders of them.
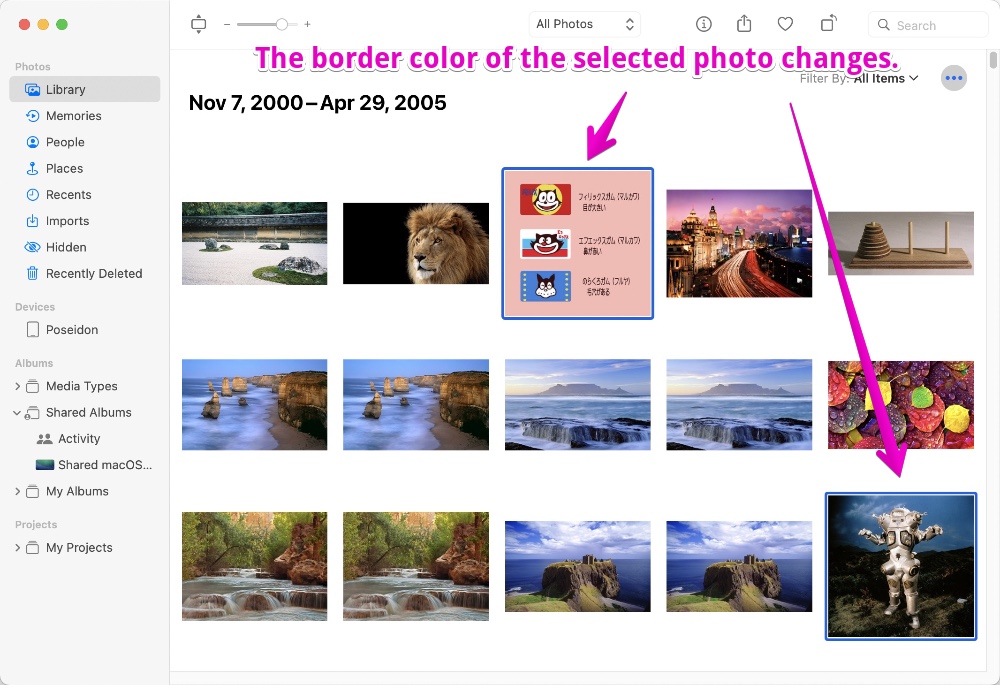
There are the following types of selection methods:
| Method | How to operate |
|---|---|
| Select only one | Click the photos / movies with the mouse or trackpad |
| Select multiple consecutive | Below are the steps: ① Hold down shift key on your keyboard ② Click and hold the margin near the start point with your mouse / trackpad ③ Drag the mouse / trackpad to the end point ④ Take your finger off the keyboard and mouse / trackpad |
| Select multiple non-consecutive | Below are the steps: ① Hold down command ⌘ key on your keyboard ② Click the photos / movies with the mouse or trackpad ③ Take your finger off the keyboard and mouse / trackpad |
| Select all | Press command ⌘ + A keys on your keyboard |
| Deselect all | Click on an empty margin |
▶ After selecting the addition targets, do one of the following operations.
- a) In the menu bar, select “File” -> “Share” -> “Shared Albums”
- b) In the toolbar, select the “Share” icon -> “Shared Albums”
- c) In the right-click menu, select “Share” -> “Shared Albums”
- d) Using drag and drop, add to the album list in the left column of the “Photos” app
【a) Menu bar】
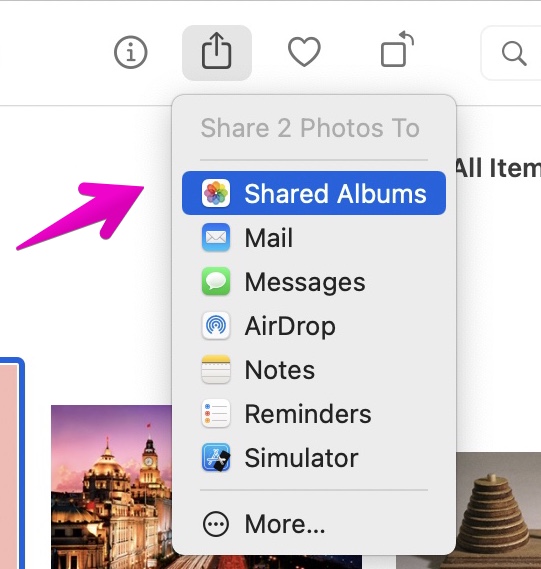
【b) Toolbar】
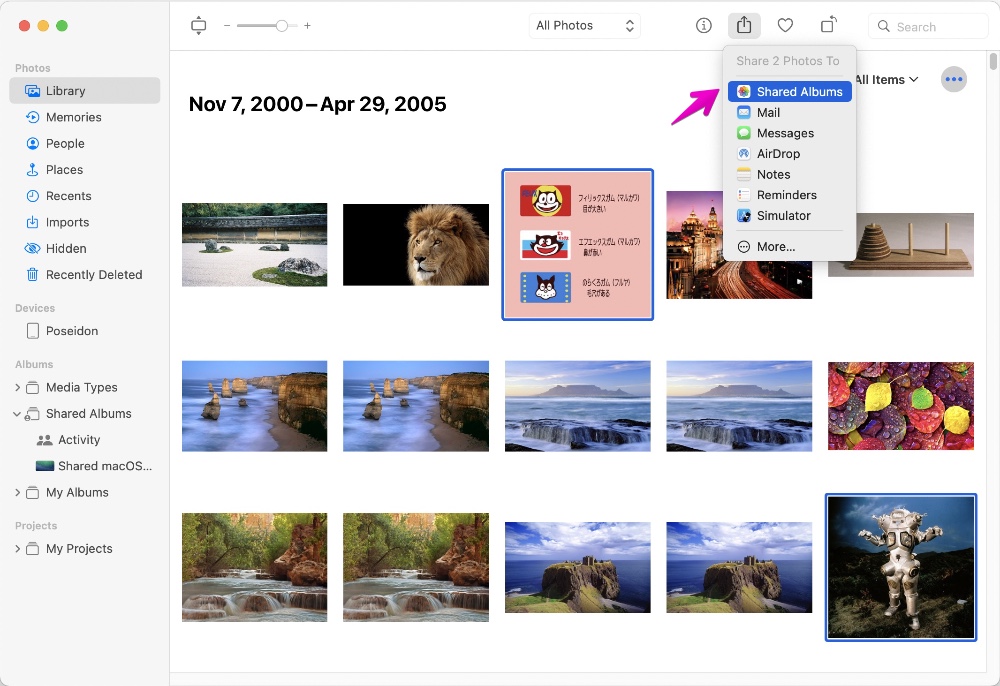
The figure below is an enlarged view around the arrow
【c) Right-click menu】
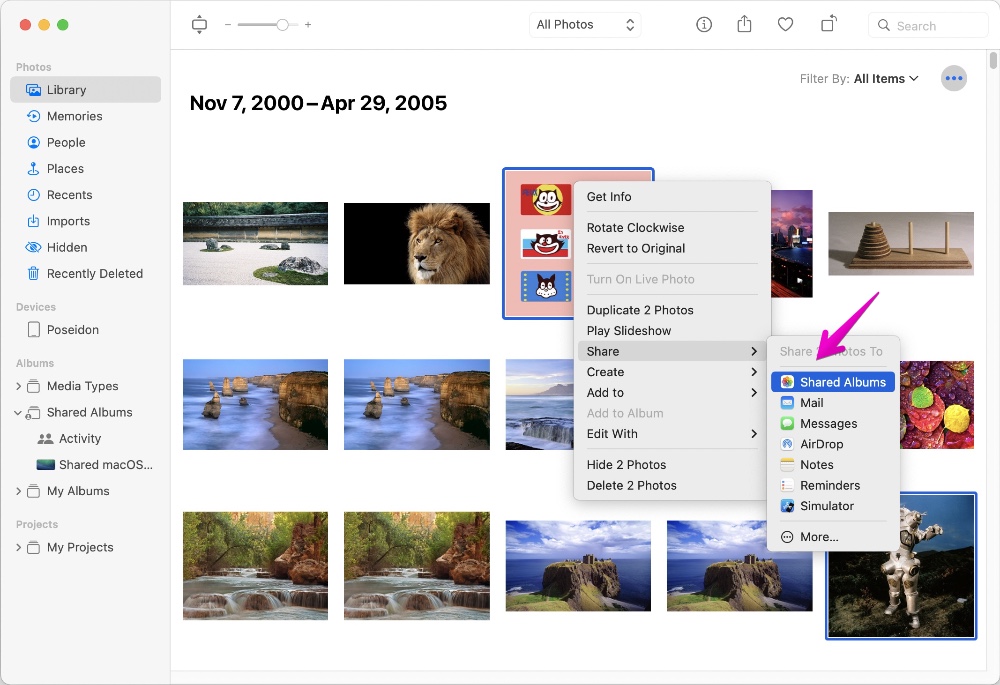
The figure below is an enlarged view around the arrow
【d) Drag and Drop】
Reference video
This is the end of explanation, “④ How to add / remove photos / movies in shared albums”.
⑤ How to delete photos / videos from shared albums
Deleting photos / videos from shared albums don’t remove them from the Photos app.
Therefore, all you have to do is select the targets you want to delete in “Shared Albums” and delete them.
The following is an explanation of the actual operation method.
▶ In the Photos app, select the photos / videos you want to remove from the shared albums.
The selected photos / videos will change the color of the border of them.
There are the following types of selection methods:
| Method | How to operate |
|---|---|
| Select only one | Click the photos / movies with the mouse or trackpad |
| Select multiple consecutive | Below are the steps: ① Hold down shift key on your keyboard ② Click and hold the margin near the start point with your mouse / trackpad ③ Drag the mouse / trackpad to the end point ④ Take your finger off the keyboard and mouse / trackpad |
| Select multiple non-consecutive | Below are the steps: ① Hold down command ⌘ key on your keyboard ② Click the photos / movies with the mouse or trackpad ③ Take your finger off the keyboard and mouse / trackpad |
| Select all | Press command ⌘ + A keys on your keyboard |
| Deselect all | Click on an empty margin |
▶ After selecting the delete targets, do one of the following operations.
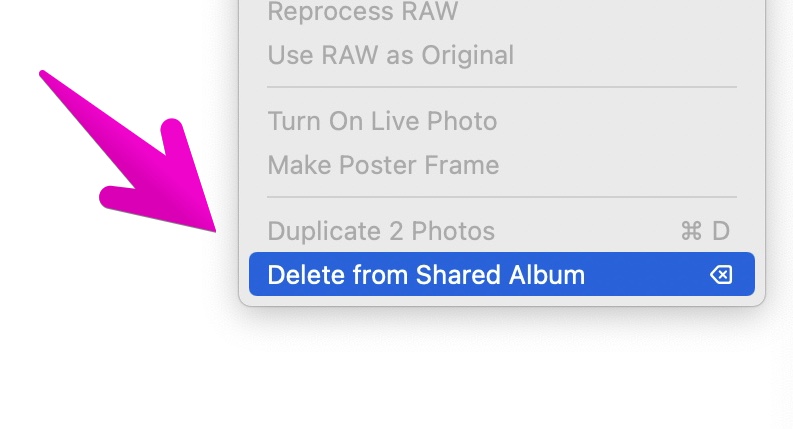
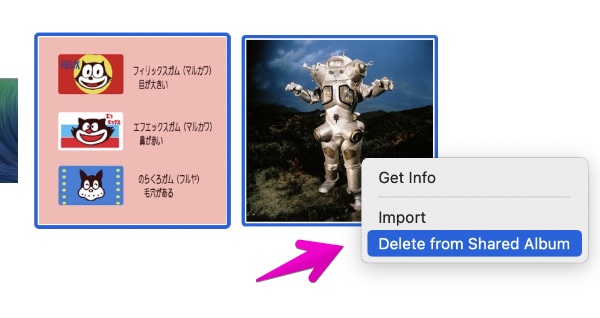
- a) In the menu bar, select “Image” -> “Share” -> “Delete from Shared Album”
- b) In the right-click menu, select “Share” -> “Delete from Shared Album”
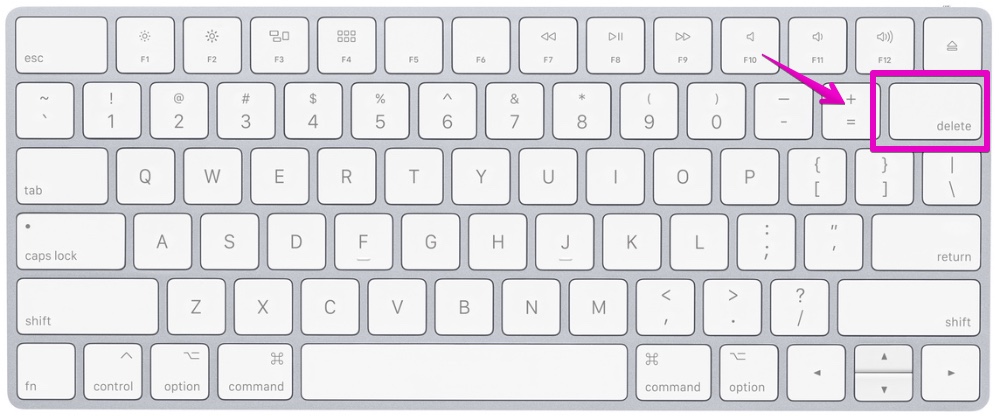
- d) On your keyboard, press delete ⌫ key
【a) Menu bar】
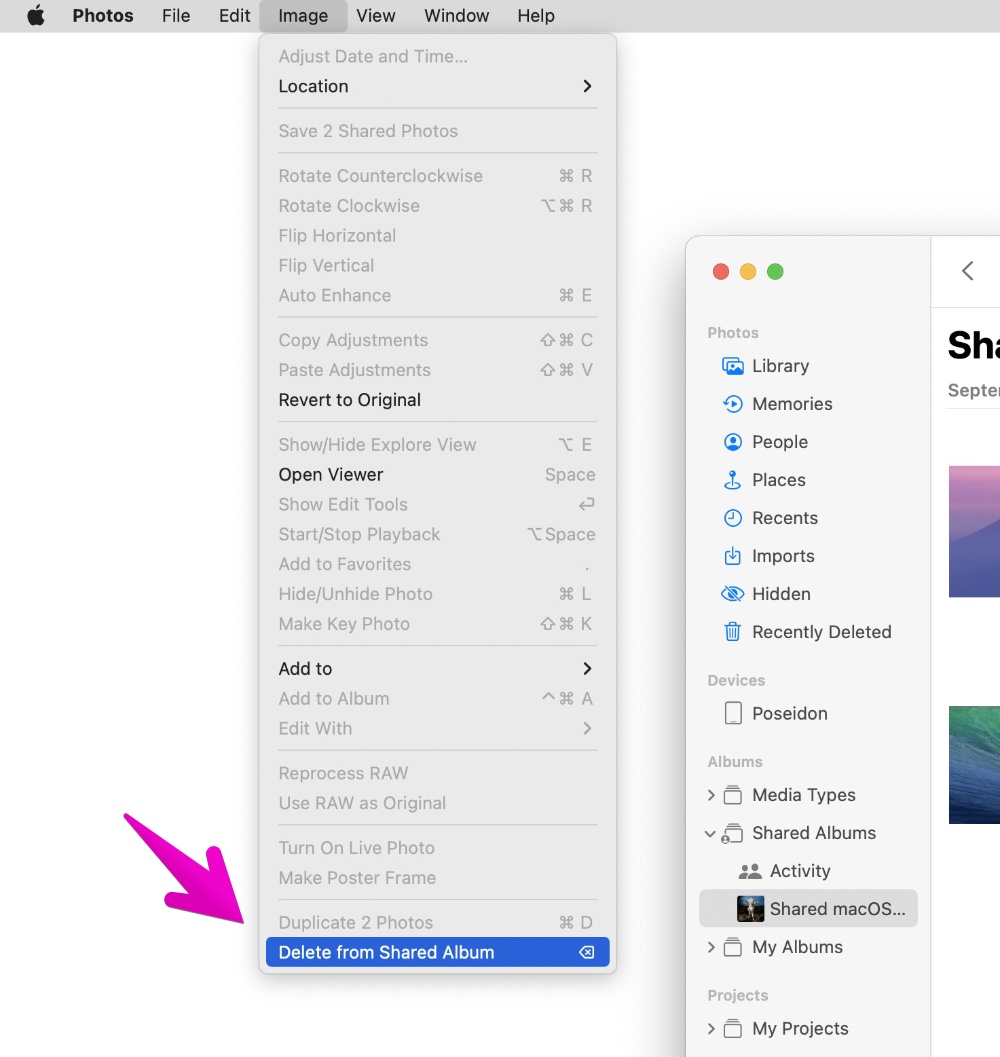
The figure below is an enlarged view around the arrow
【b) Right-click menu】
【c) Keyboard】
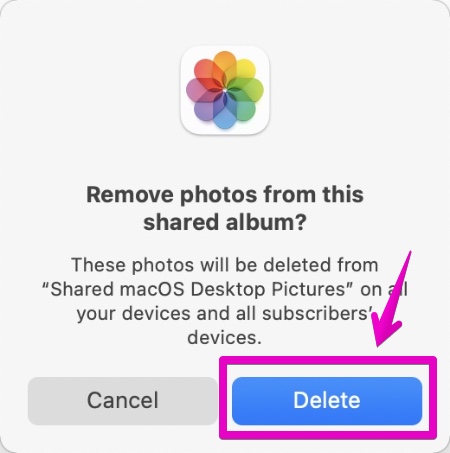
▶ When the deletion confirmation screen is displayed as shown in the figure, click the “Delete” button.
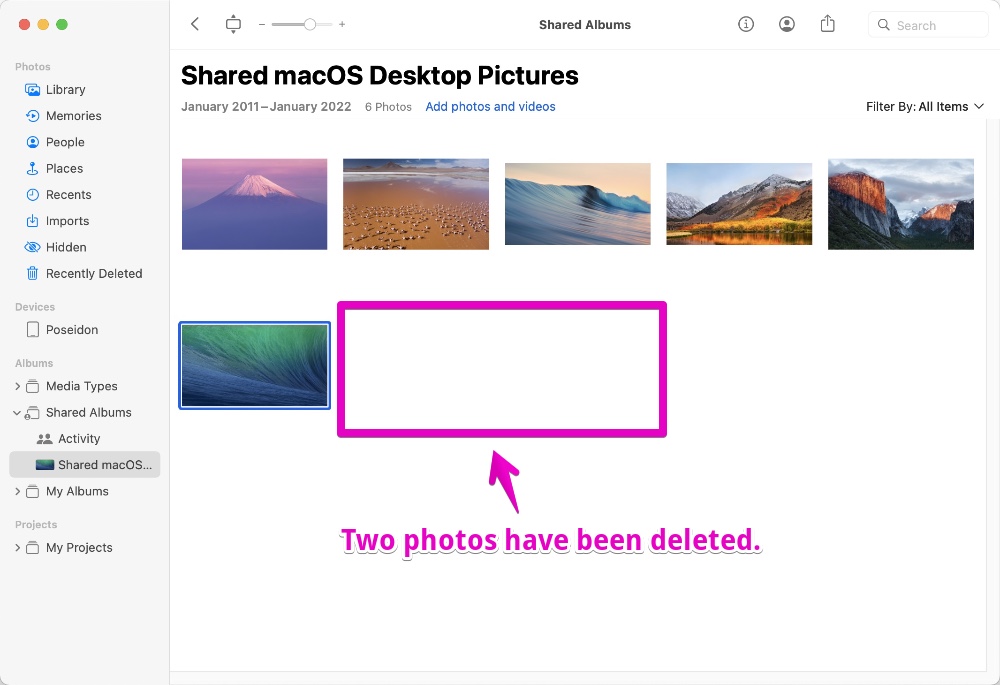
▶ When they are removed from the shared album, that’s done.
This is the end of the explanation, “⑤ How to delete photos / videos from shared albums”.
⑥ How to change the targets (and other settings) for the shared albums
The method of changing the sharing targets (and other settings) when creating a shared album is explained in the following items.
This section describes how to change the sharing targets (and other settings) for the shared albums that has already been created.
▶ In the “Photos” app, select the shared album for which you want to change the settings.
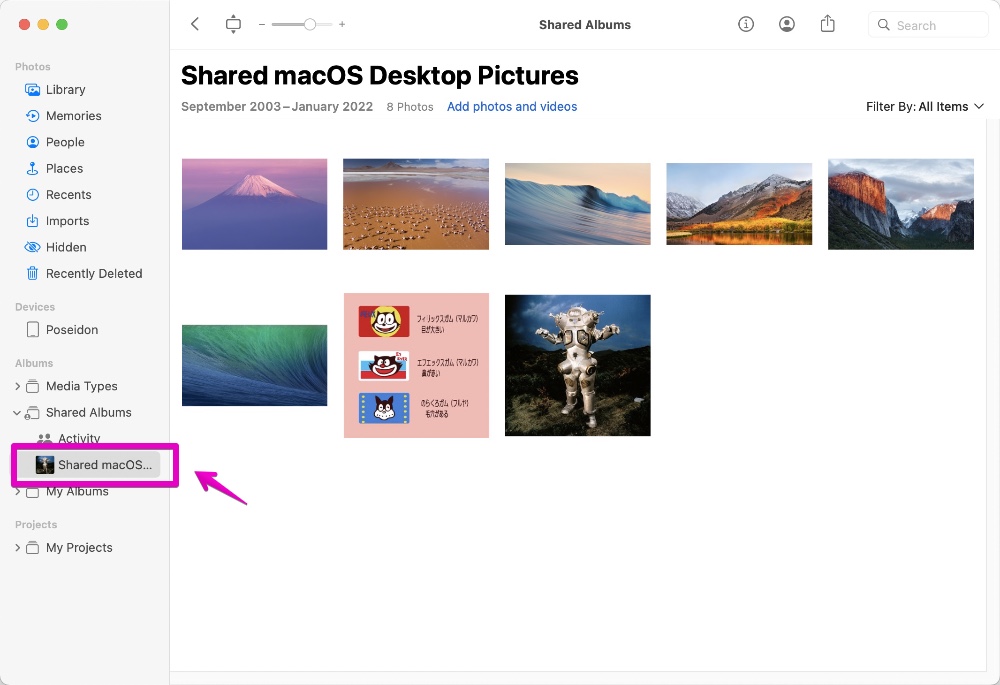
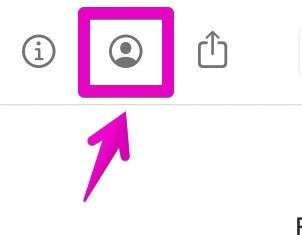
▶ From the toolbar on the top right, click the human-shaped “Member” icon.

The figure below is an enlarged view around the arrow
▶ When the sharing setting screen is displayed as shown in the figure, set each item.
After completing the settings, click an appropriate location that is not within the settings screen to save the settings and close the settings screen.
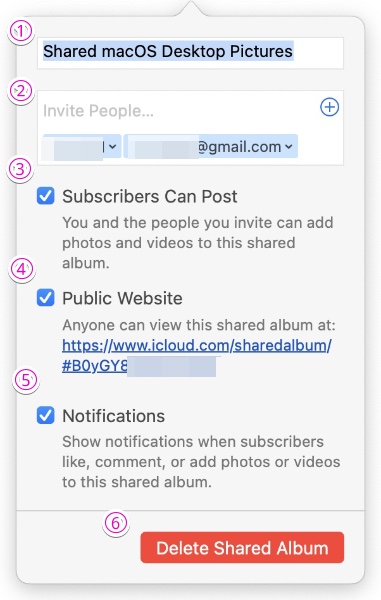
| 項目 | 説明 |
|---|---|
| ① Shared Album Name | but give it a name that is easy for others to understand |
| ② Invite People… | following information for someone with an iCloud account
|
| ③ Subscribers Can Post | |
| ④ Public Website |
|
| ⑤ Notifications | when comments, photos, etc. are added |
| ⑥ Delete Shared Album |
For the differences between the two sharing targets and the advantages and disadvantages, refer to the following items introduced at the beginning!
This is the end of the explanation, “⑥ How to change the targets (and other settings) for the shared albums”.
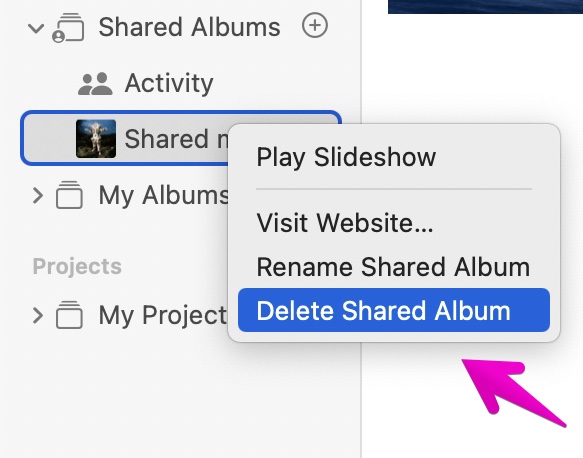
⑦ How to delete shared albums
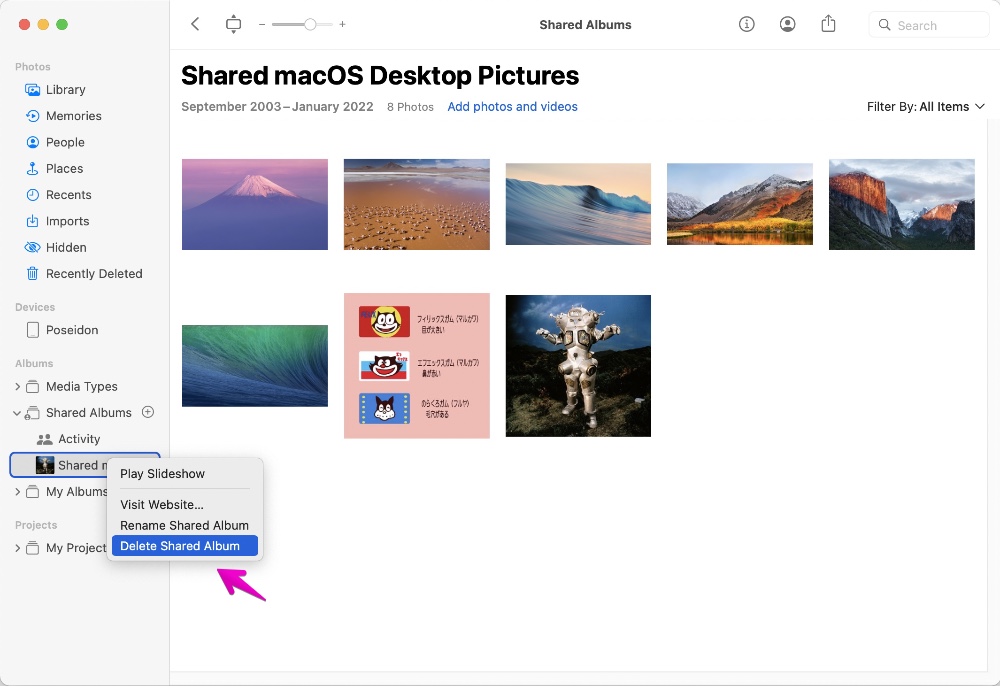
▶ In the “Photos” app, select the shared album for which you want to delete.
▶ After selecting it, do one of the following operations.
- a) In the right-click menu, select “Delete Shared Album”
- b) On your keyboard, press delete ⌫ key
- c) In the toolbar, select “Member” -> “Delete Shared Album”
【a) Right-click menu】
The figure below is an enlarged view around the arrow
【b) Keyboard】
【c) Toolbar】
The figure below is an enlarged view around the arrow

▶ When the deletion confirmation screen is displayed as shown in the figure, click the “Delete” button.
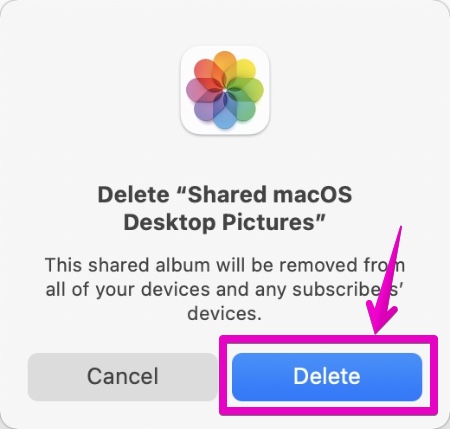
▶ When the shared album is deleted from the shared albums, that’s done.
This is the end of explanation, “⑦ How to delete shared albums”.
Reference information

This is the end of this article.
コメント