

I will introduce 3 ways to change the save destination when you take a screenshot on Mac.
Each method has its advantages and disadvantages, so I will explain them as well.
List of ways and comparison of advantages and disadvantages
If you are a macOS 10.14 Mojave or later user and want to change only the location where screenshots are saved, I recommend ① below.
Of the three ways, ① is the easiest.
Furthermore, if you want to change the file format in addition to the save location, or if you are using macOS 10.13 High Sierra or earlier, select ② or ③.
② uses the Mac genuine app “Terminal.app”, but it may be a little difficult for some people because it requires command input.
③ uses a free app and is easy to operate, but you need to install the app.
You can jump to each explanation by clicking the title of the ways below.
| Method | Advantages | Disadvantages |
|---|---|---|
| ① Mac genuine app “Screenshot.app” | ・Mac standard function ・Easy to use | ・Only available on macOS 10.14 Mojave or later ・Only the save location can be changed, the file format cannot be changed |
| ② Mac genuine app “Terminal.app” | ・Mac standard function ・Compatible with all macOS versions ・Both save location and file format can be set | ・It may be hard for who are not familiar with “Terminal.app” |
| ③ Free app “Onyx” | ・Compatible with all macOS OS X 10.2 Jaguar and later (Compatible with M1 Mac) ・Both save location and file format can be set ・Easy to use | ・Cannot be used at companies or schools where free app is prohibited ・Requires a different “Onyx” for each macOS version |
① Mac genuine app “Screenshot.app”
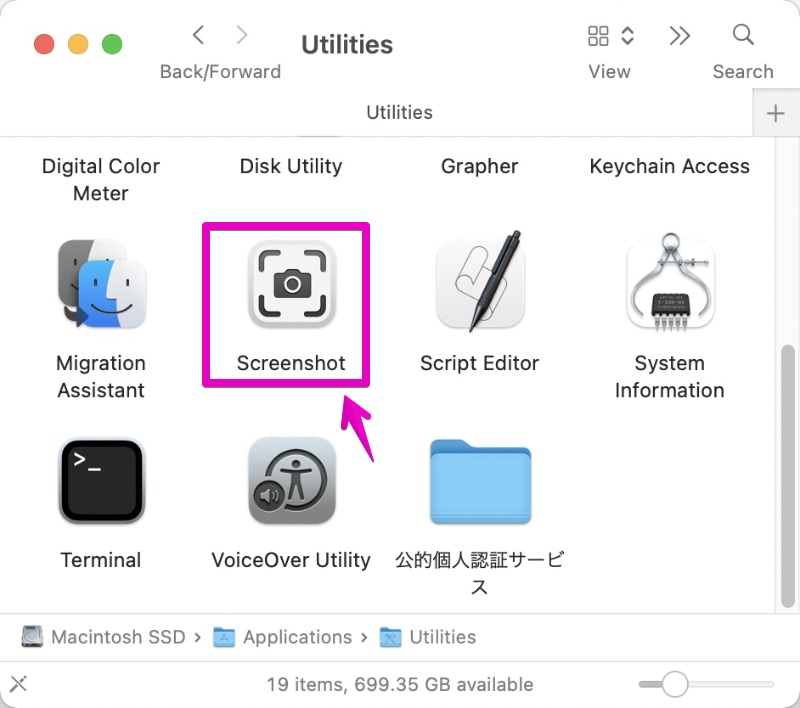
▶ Open the “Applications” -> “Utilities” folder in the Finder and double-click the app “Screenshot.app” to start.
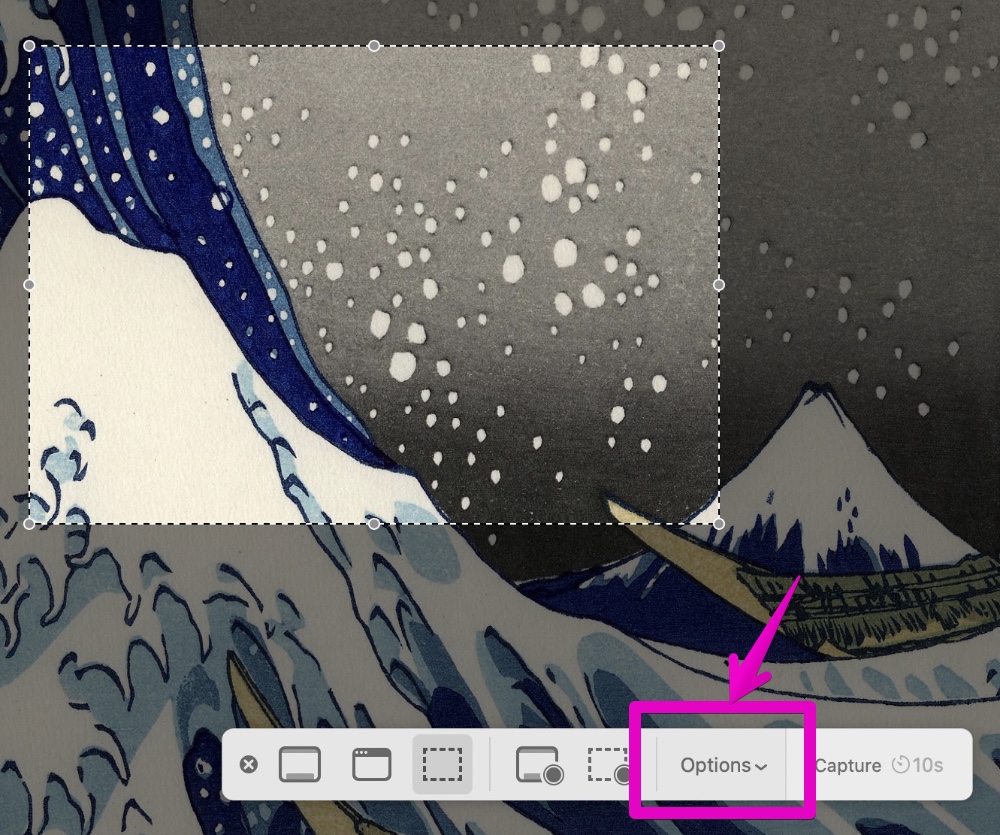
▶ When “Screenshot.app” starts up as shown in the screen below, click “Options” in which the menu icons at the bottom of the screen are lined up horizontally.
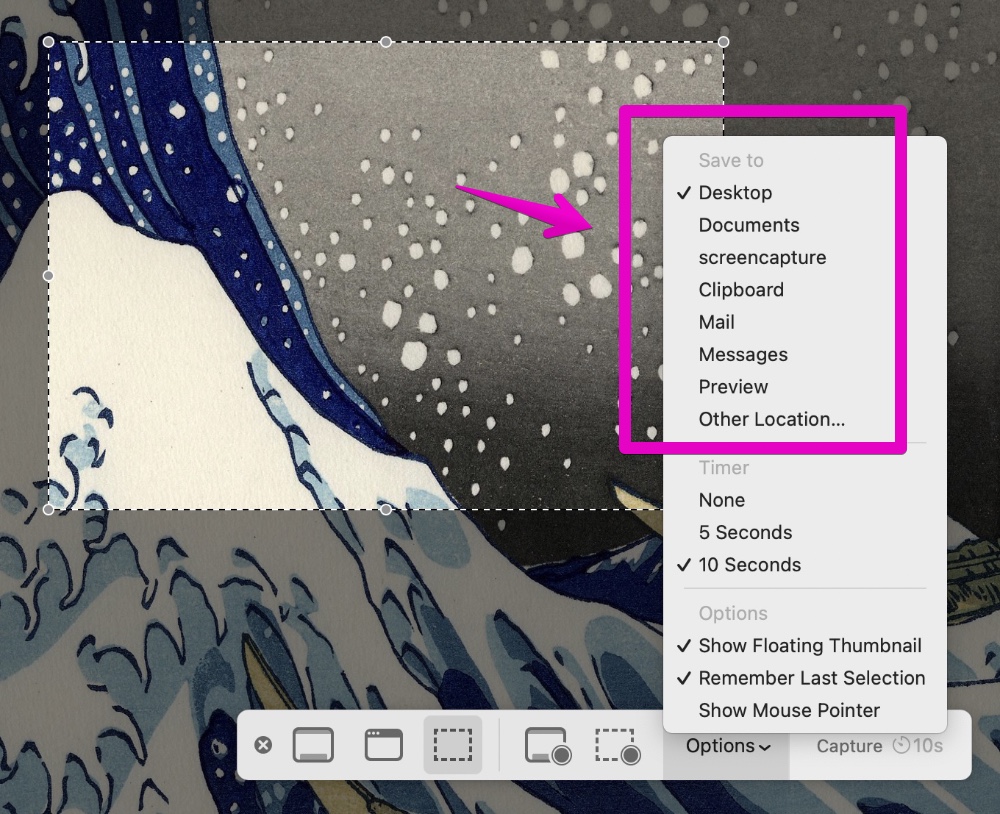
▶ When you open “Options”, the following menu will be displayed, but the part surrounded by red is the specification of the save destination of the screenshot, so set the location you like.
In addition to the pre-displayed locations such as “Desktop” and “Documents”, you can also click “Other Locations…” to set locations that are not displayed here.
▶ After changing the settings, click the x icon at the bottom left or press esc key on your keyboard to close the menu icon and complete the settings.

This is the end of the explanation, “① Mac genuine app Screenshot.app”.
② Mac genuine app “Terminal.app”
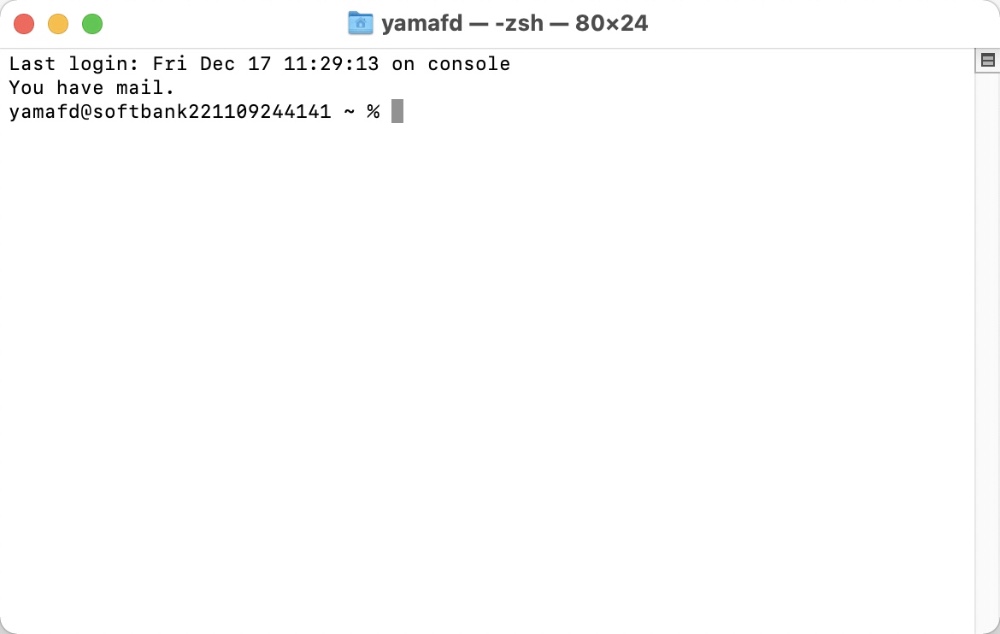
▶ Open the “Applications” -> “Utilities” folder in the Finder and double-click the app “Terminal.app” to start.

▶ When “Terminal” starts, proceed to each setting from the “List of items that can be set” after this.
- List of items that can be set
- a) Save location, change / restore (Default setting is “Desktop”)
- b) File format, change / restore (Default setting is “PNG”)
- c) File name, change / restore (Default setting is “Screen Shot”)
- d) Add date to end of file, change / restore (Default setting is “Add”)
a) Save location, change / restore
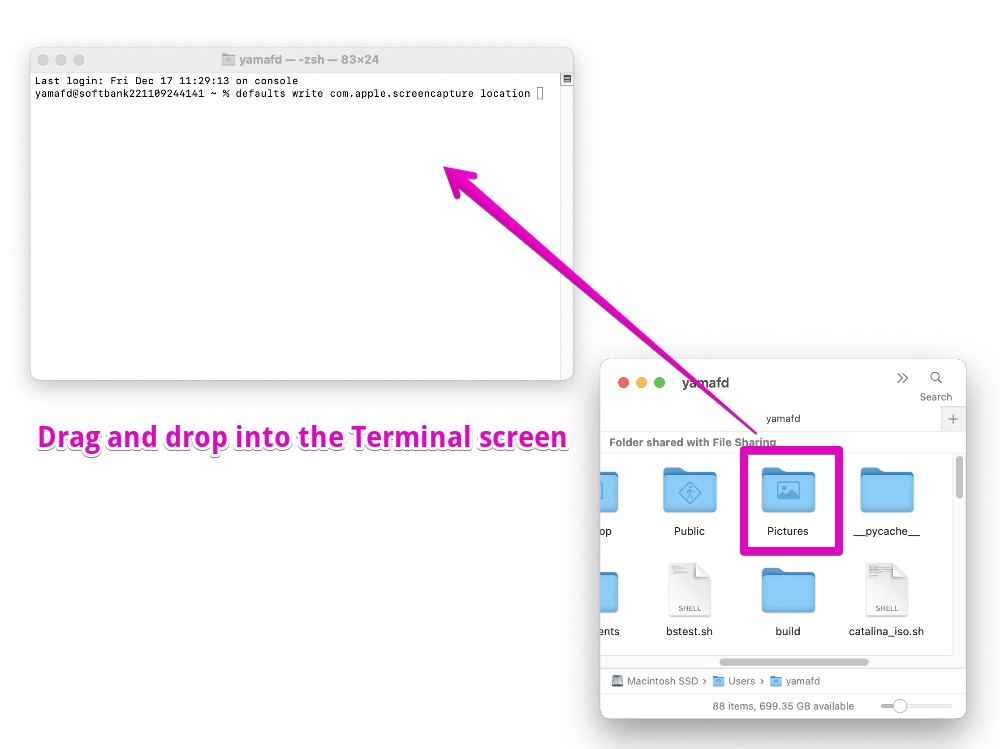
▶ Copy and paste the following command to the “Terminal.app”.
In addition, add a half-width space at the end.
defaults write com.apple.screencapture location As a result of copying and pasting, the following screen will be displayed in “Terminal.app”.

▶ Bring the Finder to the front and drag and drop the folder you want to save to into the “Terminal.app” screen.
In the screen below, “Picture” is specified as an example.
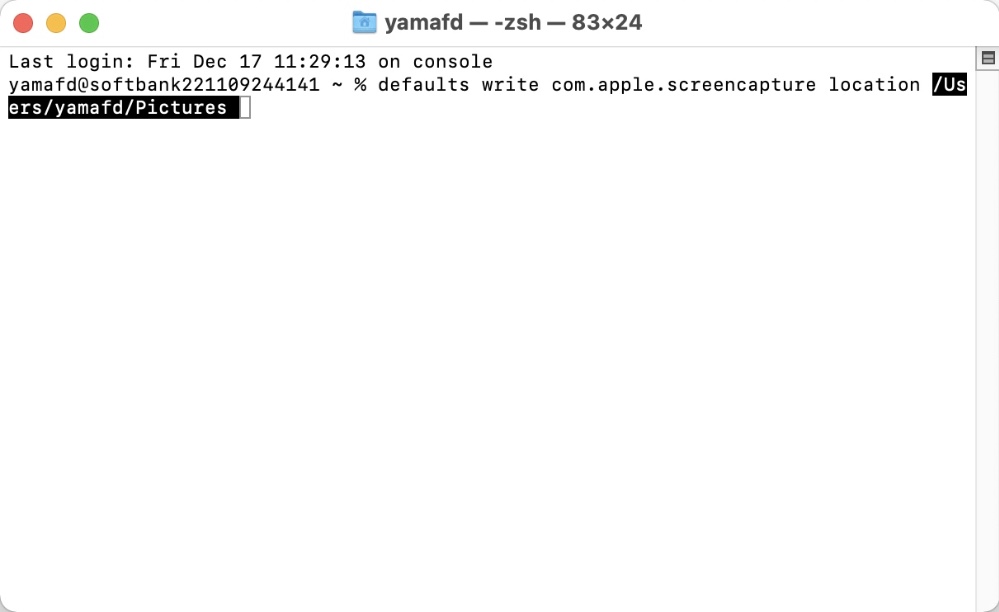
▶ When the command is completed as shown in the figure, press return key on your keyboard to execute the command.
▶ After executing the commands so far, copy and paste the following command and press return key to execute it in order to reflect the settings.
This command is the command to restart the Finder.
killall SystemUIServer▶ To restore setting, copy one of the following two commands into the terminal and press return key to execute it.
defaults write com.apple.screencapture location ~/Desktopdefaults delete com.apple.screencapture location▶ After executing the restore command, copy and paste the following command and press return key to execute the same command as when you changed it.
killall SystemUIServerb) File format, change / restore
▶ Copy and paste one of the following 11 commands into the “Terminal.app”.
After copying and pasting, press return to execute.
| Format | Command |
|---|---|
| PNG | |
| JPEG | Or |
| |
| GIF | |
| TIFF | Or |
| BMP | |
| PSD | |
| JPEG 2000 | |
| TGA | |
| PICT | |
| SGI | |
▶ After executing the commands so far, copy and paste the following command and press return key to execute it in order to reflect the settings.
This command is the command to restart the Finder.
killall SystemUIServer▶ To restore setting, copy one of the following two commands into the terminal and press return key to execute it.
defaults write com.apple.screencapture type pngdefaults delete com.apple.screencapture type▶ To restore setting, copy one of the following two commands into the terminal and press return key to execute it.
killall SystemUIServerc) File name, change / restore
▶ Copy and paste the following command to the “Terminal.app”.
Change the part of the dummy that has “ScreenShot” as the file name if necessary.
After pasting and renaming the file, press return to execute.
defaults write com.apple.screencapture name "ScreenShot"▶ After executing the commands so far, copy and paste the following command and press return key to execute it in order to reflect the settings.
This command is the command to restart the Finder.
killall SystemUIServer▶ To restore setting, copy one of the following two commands into the terminal and press return key to execute it.
defaults write com.apple.screencapture name "ScreenShot"defaults delete com.apple.screencapture name▶ To restore setting, copy one of the following two commands into the terminal and press return key to execute it.
killall SystemUIServerd) Add date to end of file, change / restore
▶ Copy and paste the following command to the “Terminal.app”.
After copying and pasting, press return to execute.
defaults write com.apple.screencapture include-date -bool false▶ After executing the commands so far, copy and paste the following command and press return key to execute it in order to reflect the settings.
This command is the command to restart the Finder.
killall SystemUIServer▶ To restore setting, copy one of the following two commands into the terminal and press return key to execute it.
defaults write com.apple.screencapture include-date -bool truedefaults delete com.apple.screencapture include-date▶ To restore setting, copy one of the following two commands into the terminal and press return key to execute it.
killall SystemUIServerThis is the end of the explanation, “② Mac genuine app Terminal.app”.
③ Free app “OnyX”
Please download and install “Onyx” according to the version of macOS from the link below.

If you are not sure how to install and configure Onyx, please refer to the following articles.

The following is an explanation of how to change the location where screenshots are saved, etc., assuming that the installation has been completed.
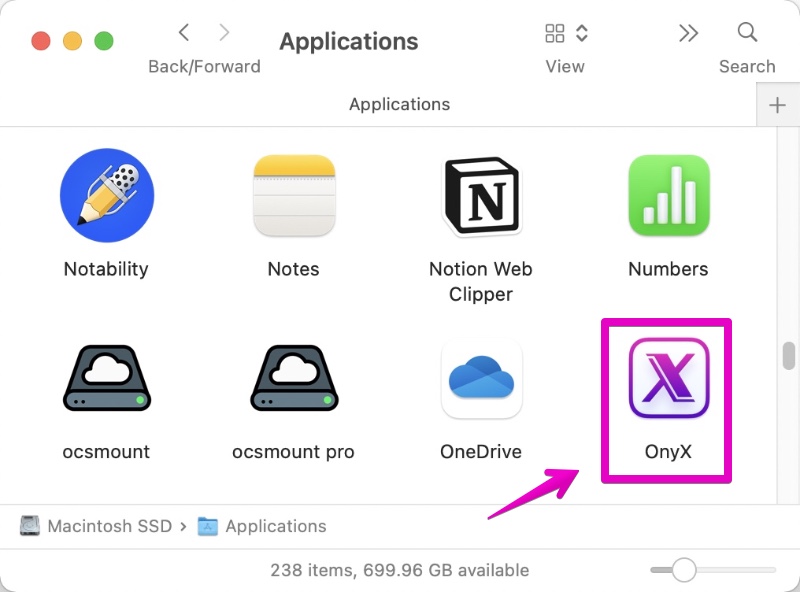
▶ Double-click the “OnyX” icon in the “Applications” folder in the Finder.
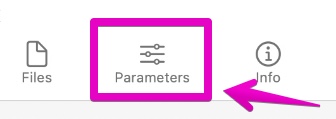
▶ When OnyX starts, click the “Parameters” icon as shown in the figure below.

Below is an enlarged view around the arrow.
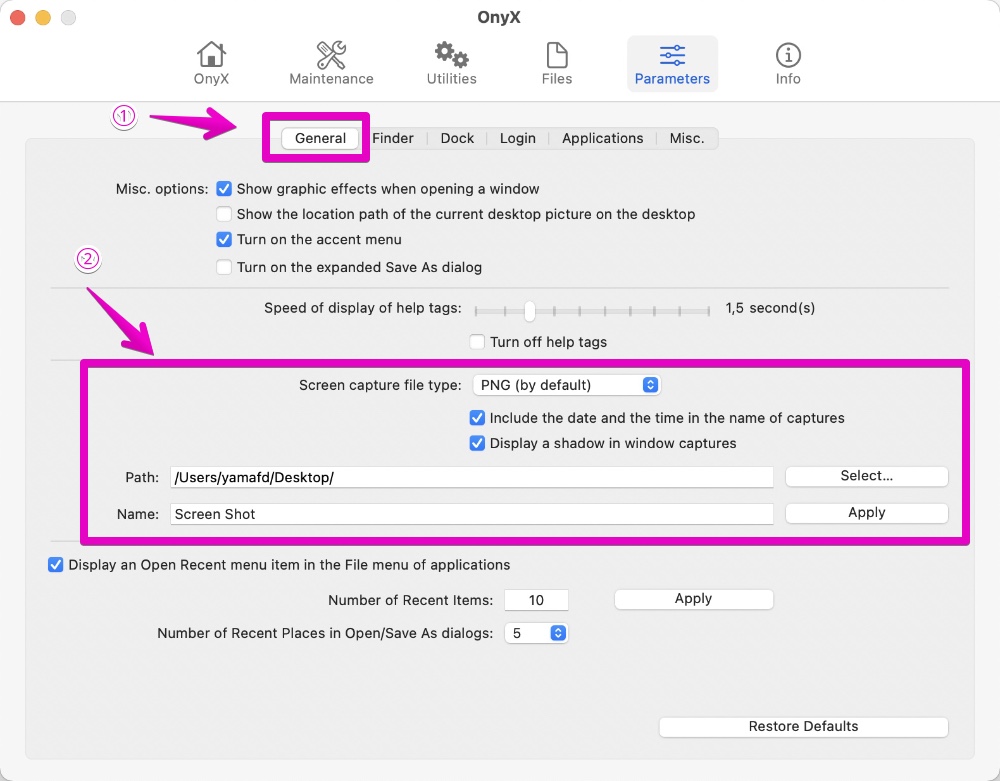
▶ After switching to the “Parameters” screen, click ① “General” and ② change the screenshot settings in the area surrounded by red.
The explanation of each item of ② is described at the bottom of the following screen.
| Item | Description |
|---|---|
| Screen capture file type | ・BMP ・GIF ・JPEG ・JPEG 2000 ・PNG (Default) ・TGA ・TIFF |
| Include the date and the time in the name of capture | Add them to the end of file name |
| Display a shadow in window capture | Add shadow around the screenshot |
| Path | Save location |
| Name | Screenshot file name |
▶ The last item, “Name”, has a few tips, so I’ll add it.
If you want to omit the name, enter “”(two half-width double quotes) in the input field, and then click the” Apply “button.
If you want to return to the default “Screen Shot”, enter “Screen Shot” in the input field and then click the “Apply” button.
Note that if you leave the “Name” blank and press the “Apply” button, an error will occur.
This is the end of explanation, “③ Free app Onyx”.
Conclusion
This page introduced three methods.
Each has its advantages and disadvantages, so please consider which one to use by looking at the “List of ways and comparison of advantages and disadvantages” at the beginning.
Reference information


This is the end of this article.

コメント