
If you use the genuine Mac app “Photos” for a long time, one day your Photos library may suddenly become damaged and you may not be able to open it.
For these occasions, Photos app has a feature called “Repair” for your damaged Photos library.
So, on this page, I will explain how to repair your Photos library and what you should be aware of.
- The default storage location for the photo library in the Photos app
- Check the storage location of the library in the preferences of the “Photos” app
- Precautions before repairing the library (Be sure to back up!)
- How to repair the library
- If it cannot be repaired or cannot be opened even after repairing
- Reference information
The default storage location for the photo library in the Photos app
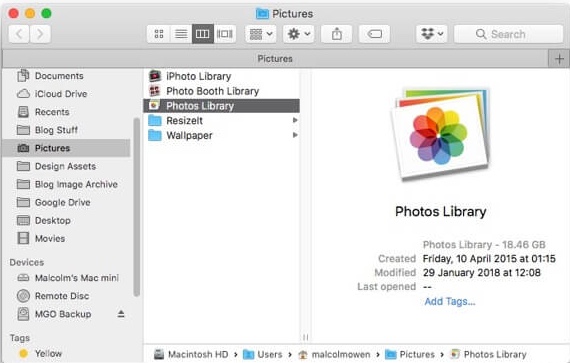
By default, the file named “Photos Library (or Photos Library.photoslibrary)” in the folder “Pictures” is the photo library unless you have changed the settings in the “Photos” app.
Even if you don’t remember changing the library location from the default, just in case, use the following method to check the library location.
Check the storage location of the library in the preferences of the “Photos” app
Below are the steps to check the storage location.
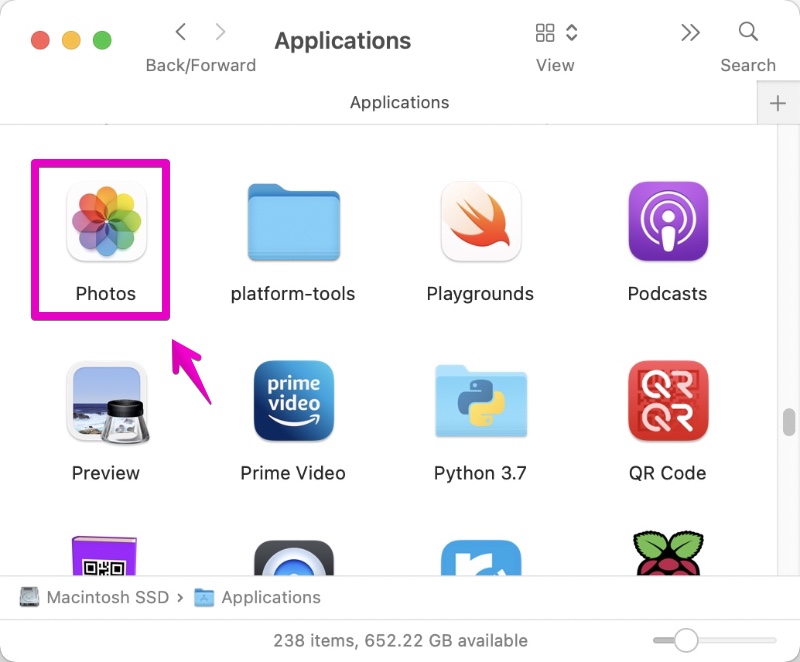
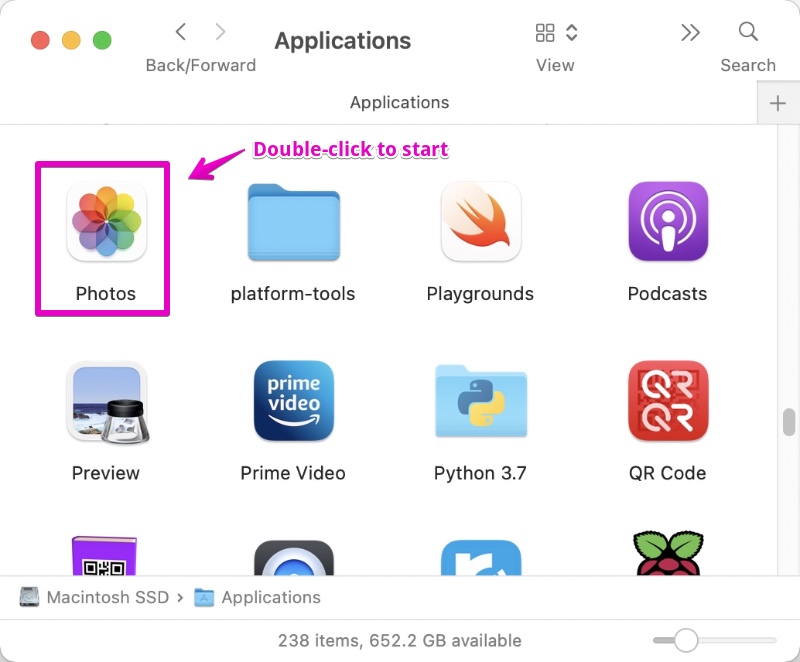
▶ Launch the “Photos” app by double-clicking “Photos” in the “Applications” folder in the Finder.
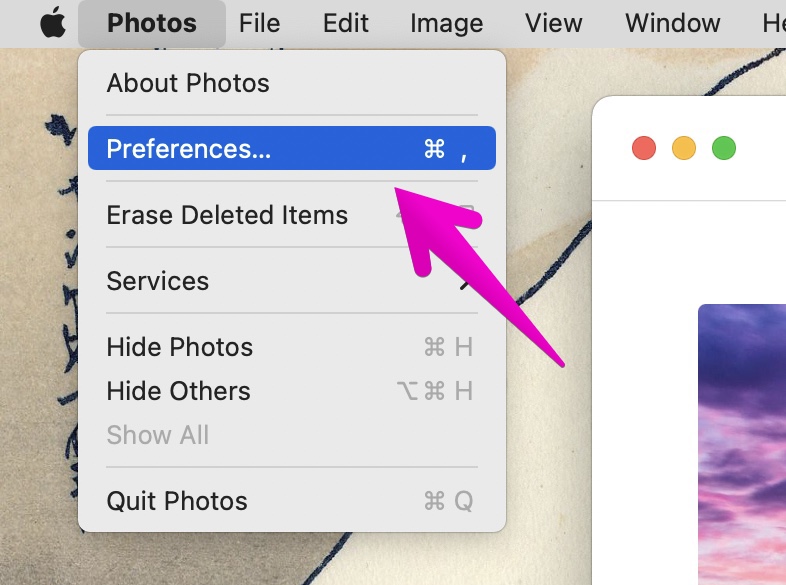
▶ When the “Photos” app starts, select “Photos” -> “Preferences…” from the menu bar.
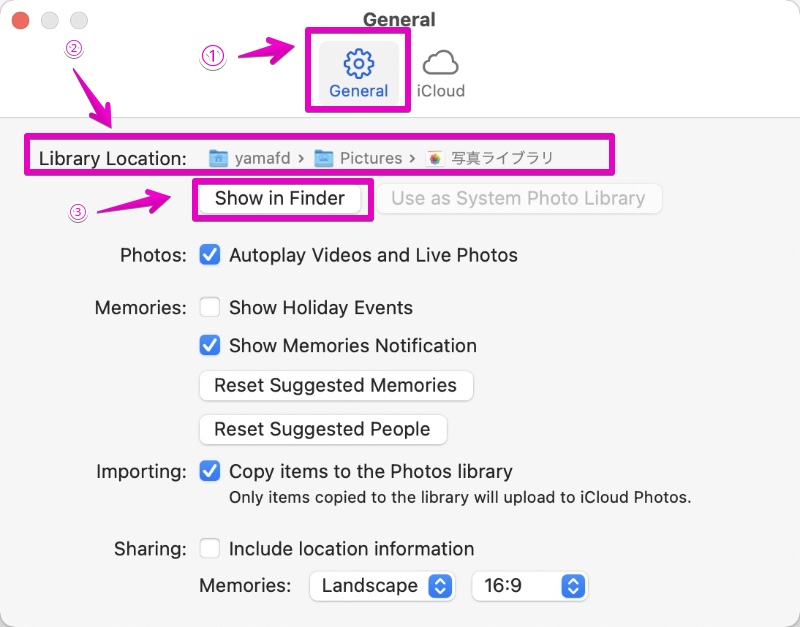
▶ When the “Preferences” screen is displayed, ① select the tab “General” at the top of the screen, and then ② check “Library Location”.
Now that you know the location of your photo library, just in case, click ③ “Show in Finder” to display the files in your library.
▶If it is displayed in the Finder as shown in the figure, it will be used in the subsequent operations, so leave it open as it is.

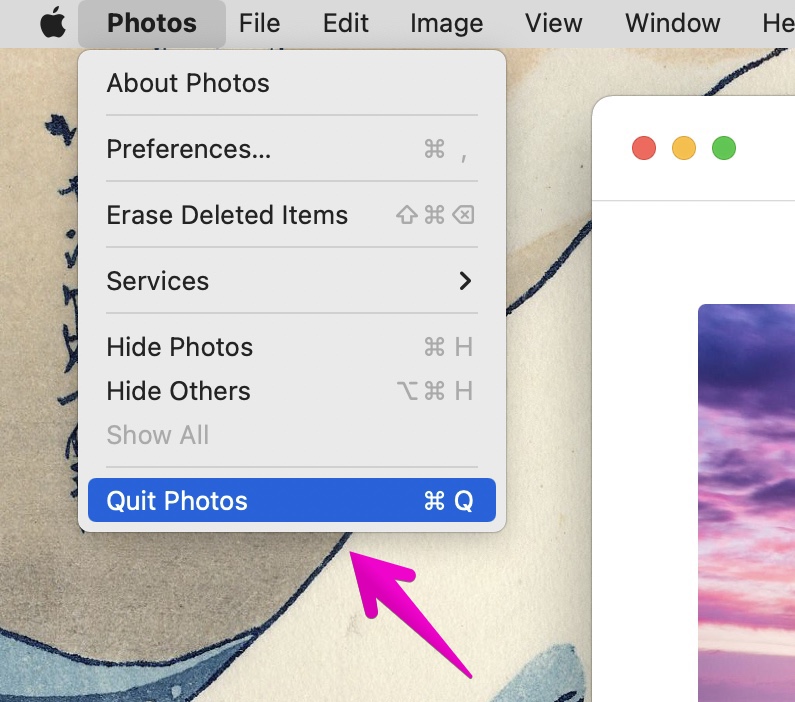
▶ On the other hand, be sure to quit the “Photos” app.
This is because if you do not quit it, you will not be able to repair the photo library after this.
Precautions before repairing the library (Be sure to back up!)
Be sure to make a backup before repairing your photo library.
Repairing a photo library can significantly rewrite the contents of your data.
You can repair it as expected and open the library, but if it fails, it may be worse than before.
Even if the repair fails, you can retrieve the photo data from the library at worst if you have a backup.
As for the backup method, it is recommended to manually create another folder in the internal SSD / HDD with Finder instead of Time Machine and copy it, or copy it to an external SSD / HDD.
The reason is that Time Machine isn’t very easy to use to pinpoint and restore just your photo library.
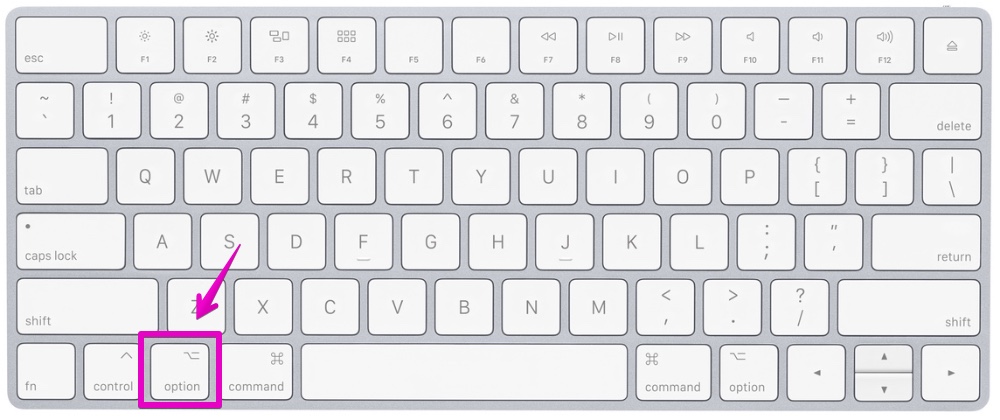
If you want to copy the photo library to another folder on the internal SSD / HDD, hold down the option ⌥ key on your keyboard while dragging and dropping.
Please note that it will be moved if you do not press the option ⌥ key.
How to repair the library
▶ Hold down option ⌥ + command ⌘ on your keyboard to launch the “Photos” app.
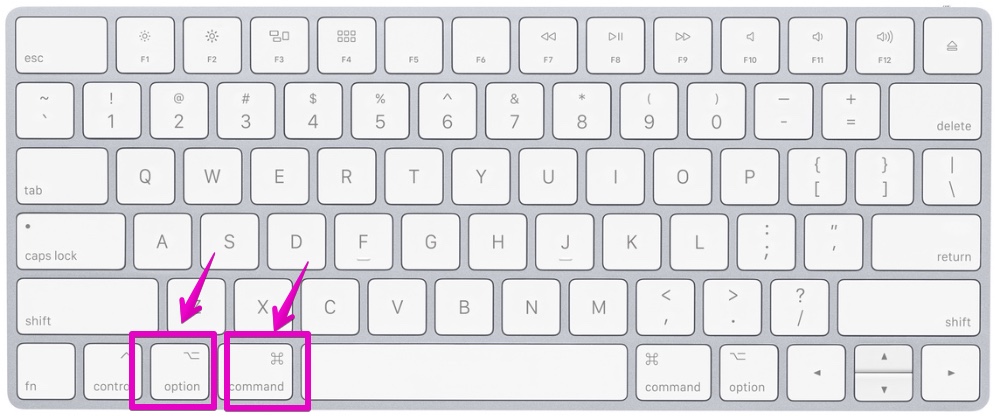
Start the “Photos” app while holding down keys on your keyboard
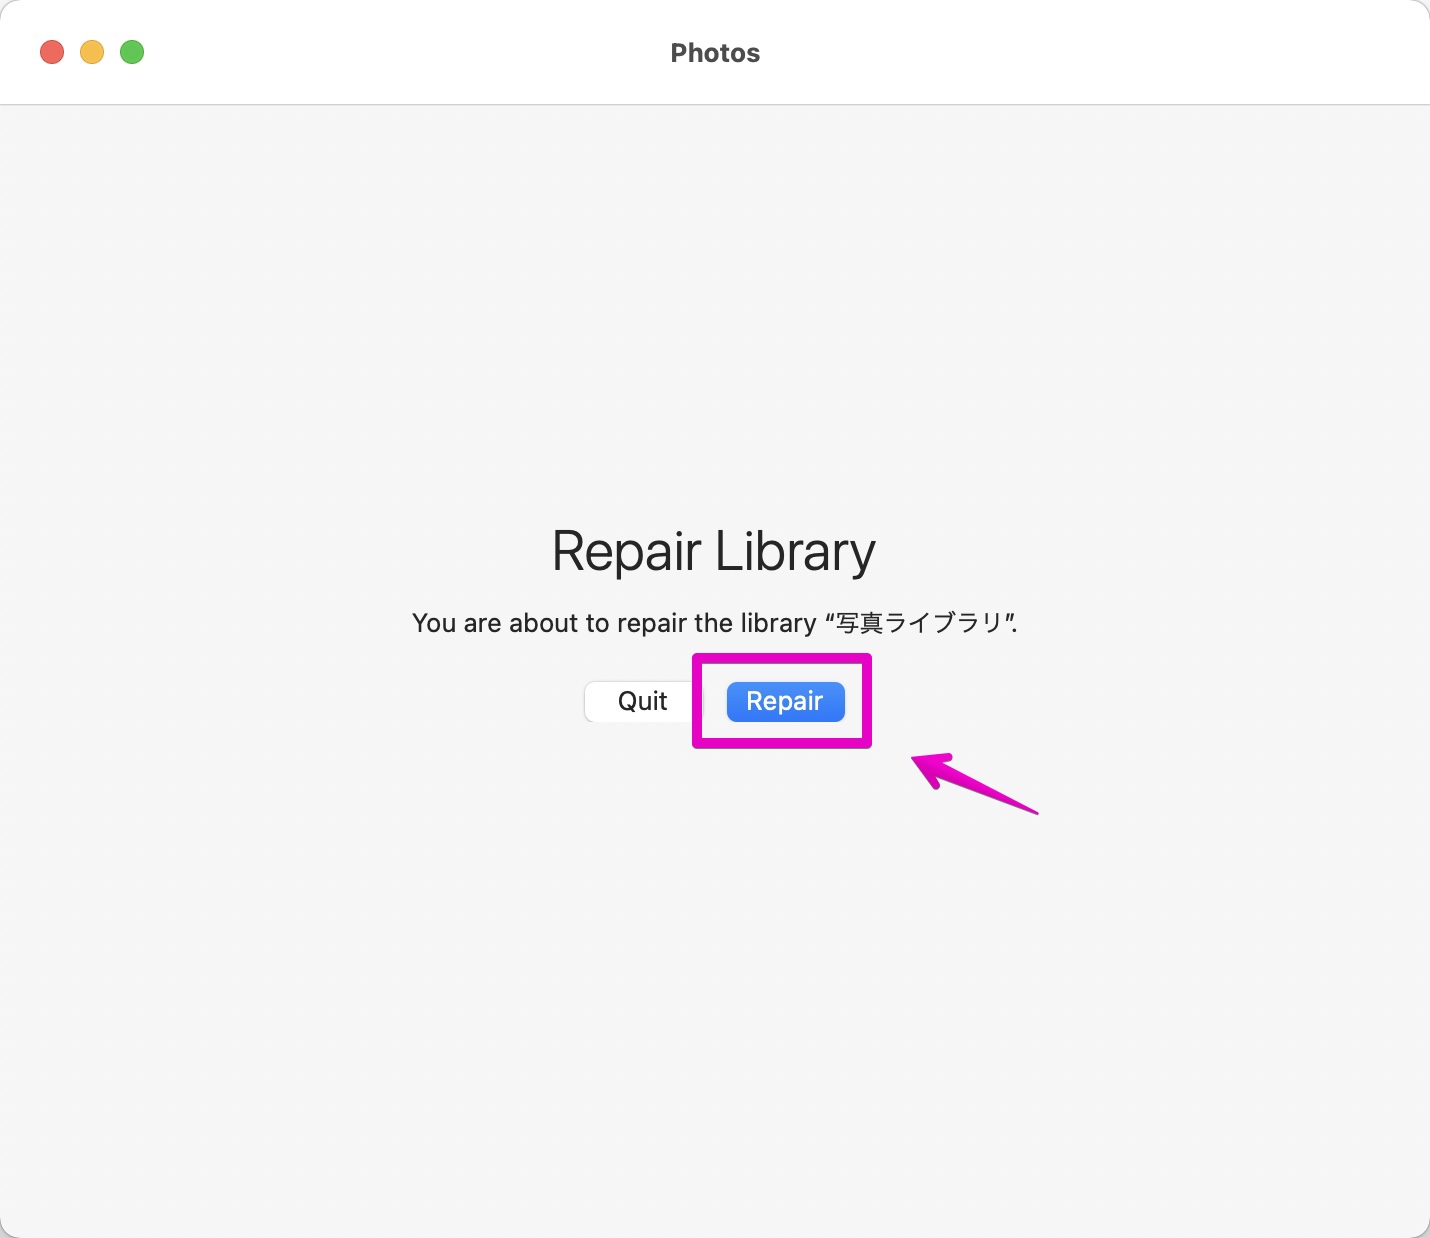
▶ When “Repair Library” is displayed on the screen, click the “Repair” button.
▶ When the password or Touch ID input screen is displayed as shown in the figure, authenticate using either method.

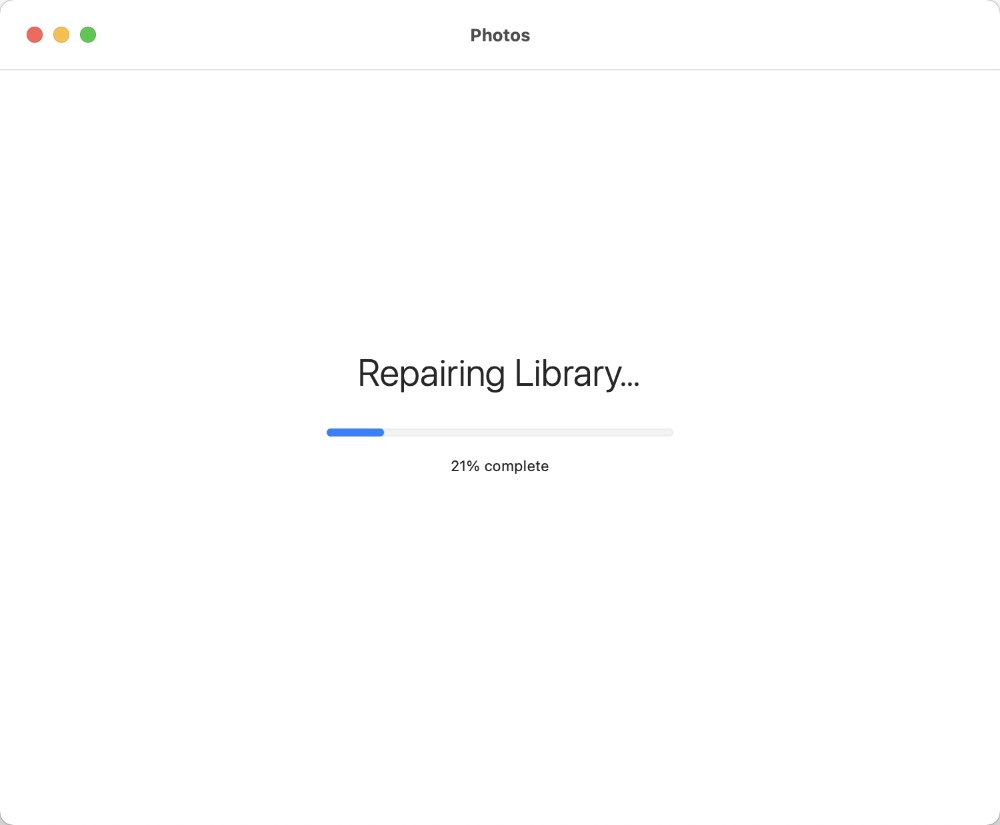
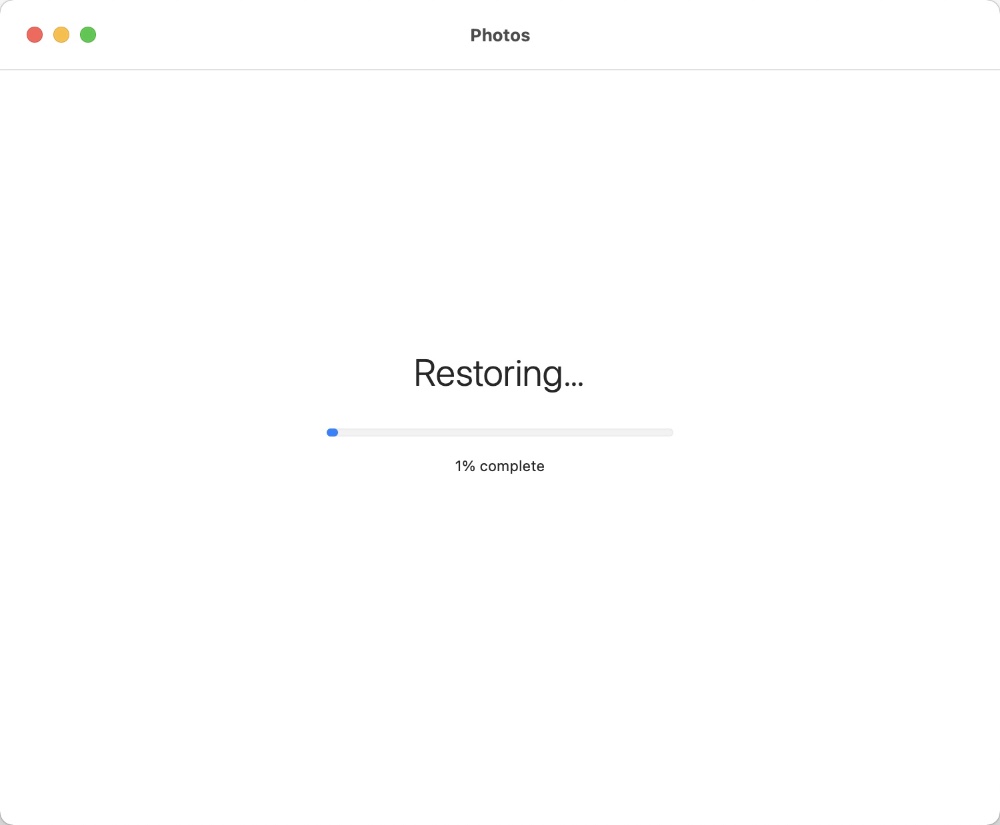
▶ As shown in the figure, the “Repairing library …” and “Restoring …” screens will be displayed several times, so wait until the process is completed.
Depending on the size of your photo library, it may take a few minutes to a few tens of minutes to complete the process.
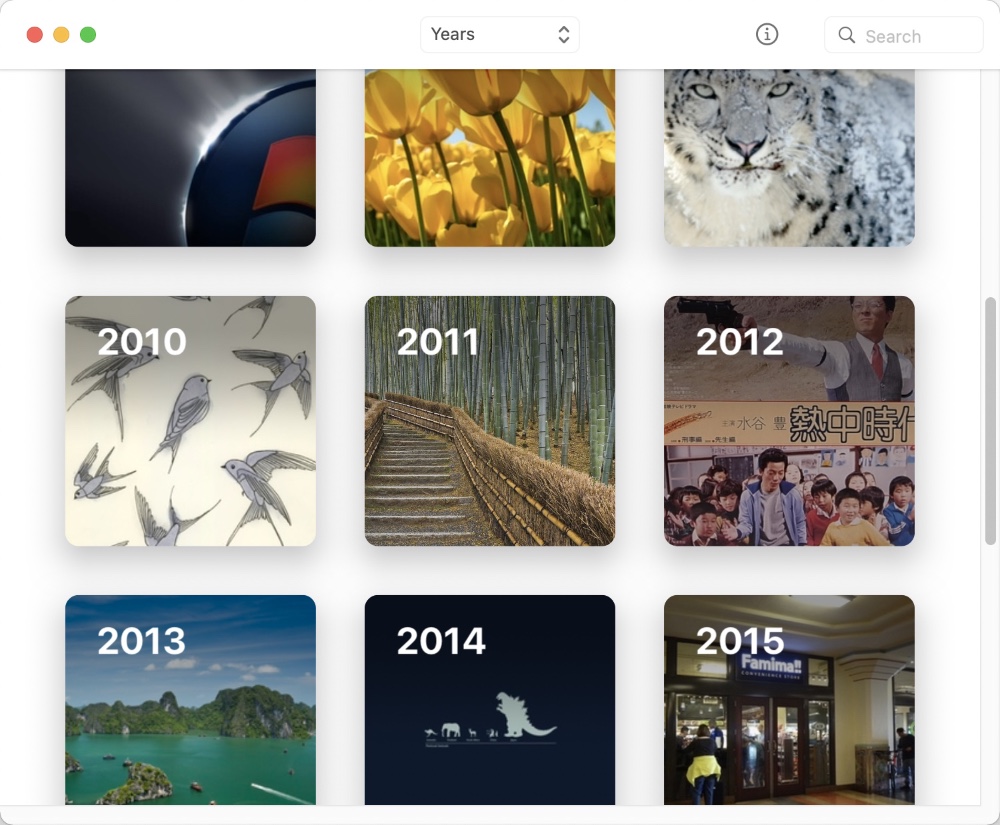
▶ When the repair is completed, the normal screen of the “Photos” app will be displayed as shown in the figure.
If it cannot be repaired or cannot be opened even after repairing
If you cannot repair or the library cannot be opened even after repairing, take out the photo data from the library and recreate the library.
Below are the steps.
Retrieving photo data from the library
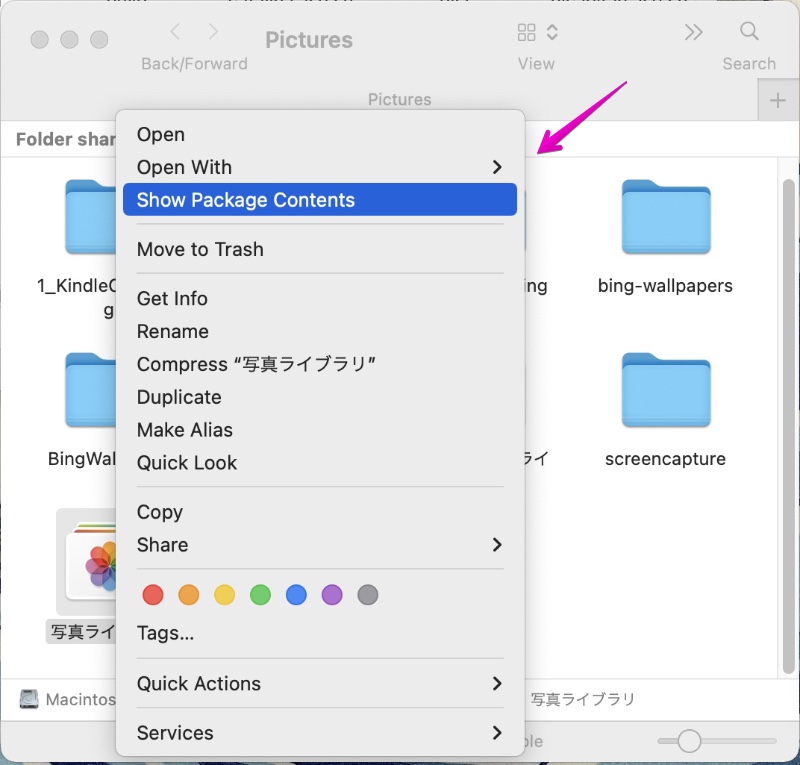
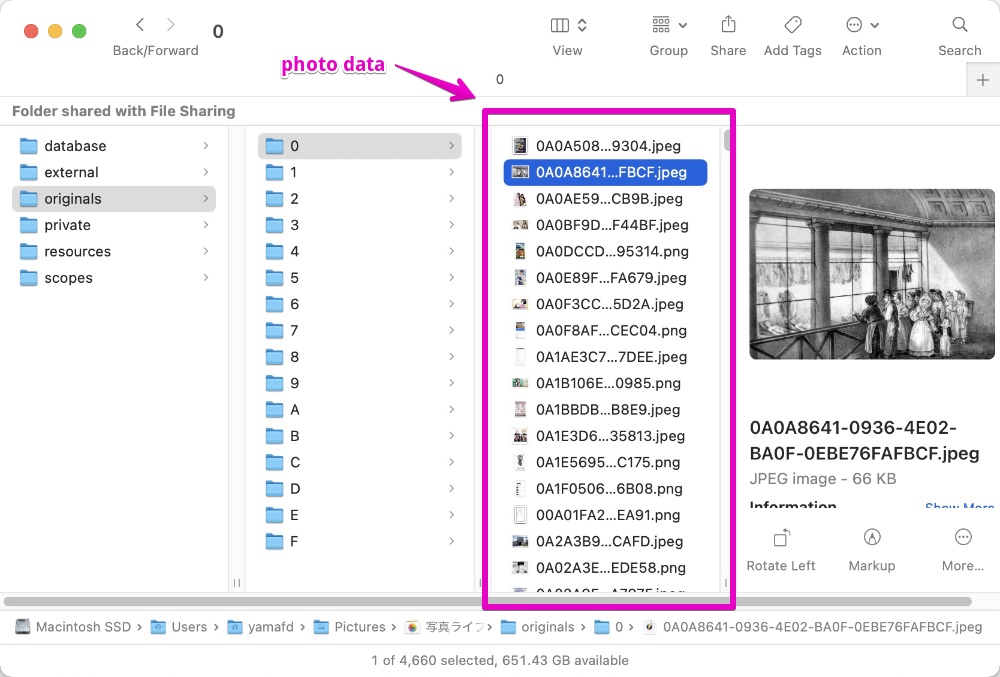
▶ Right-click your photo library in the Finder and select “Show Package Contents” from the menu that appears.
▶ The storage location of photo data differs depending on the version of macOS.
macOS 10.15 Catalina or later
- file “Photos Library”
- folder “originals”
- folder “Alphanumerical”
- photo data
- folder “Alphanumerical”
- folder “originals”
macOS 10.14 Mojave or former
- file “Photo Library”
- folder “Masters”
- folder “Number 4 digit year”
- folder “Number 2 digit month”
- folder “Number 2 digit day”
- folder “Random folder name given by the app”
- photo data
- folder “Random folder name given by the app”
- folder “Number 2 digit day”
- folder “Number 2 digit month”
- folder “Number 4 digit year”
- folder “Masters”
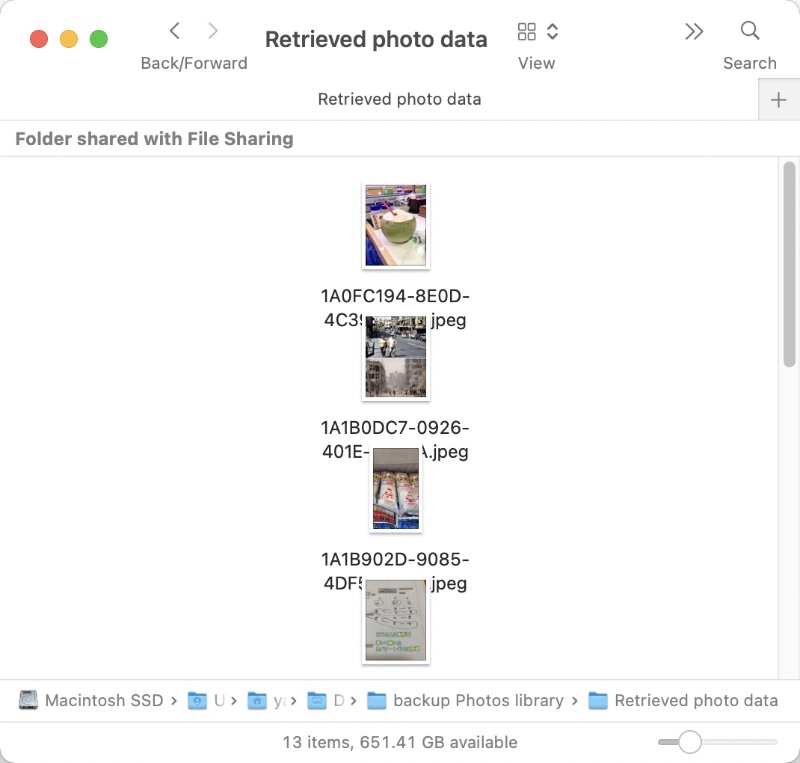
▶ Create an appropriate working folder on your desktop, etc., and copy the photo data to it.
If you drag and drop while holding down the option ⌥ key on your keyboard, you can copy.
Note that if you drag and drop without pressing the option ⌥ key, it will move.
The following video shows drag and drop while holding down the option ⌥ key.
▶ After that, I will try to import the photo data taken out as shown in the figure into the newly created photo library.
This screen will be used later, so leave it open.
Creating a new photo library
▶ Hold down the option ⌥ key on your keyboard and launch the Photos app.
Start the “Photos” app while holding down a key on your keyboard
▶ When the “Choose Library” screen is displayed as shown in the figure, click the “Create New …” button.
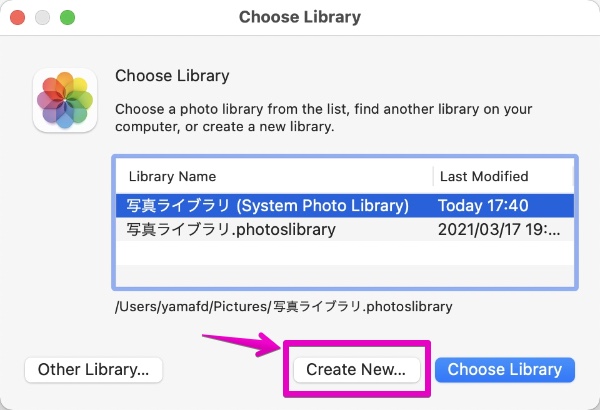
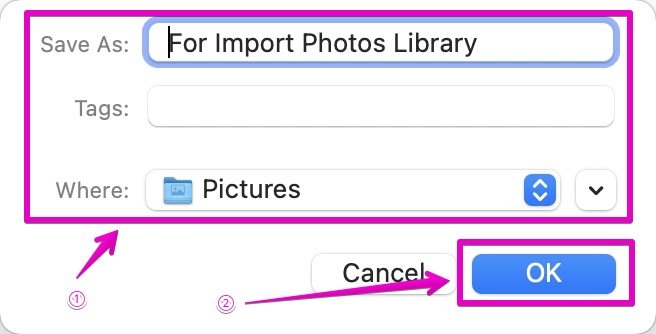
▶ When the library creation screen is displayed as shown in the figure, set an appropriate name and location in ①, and click the button “OK” in ②.
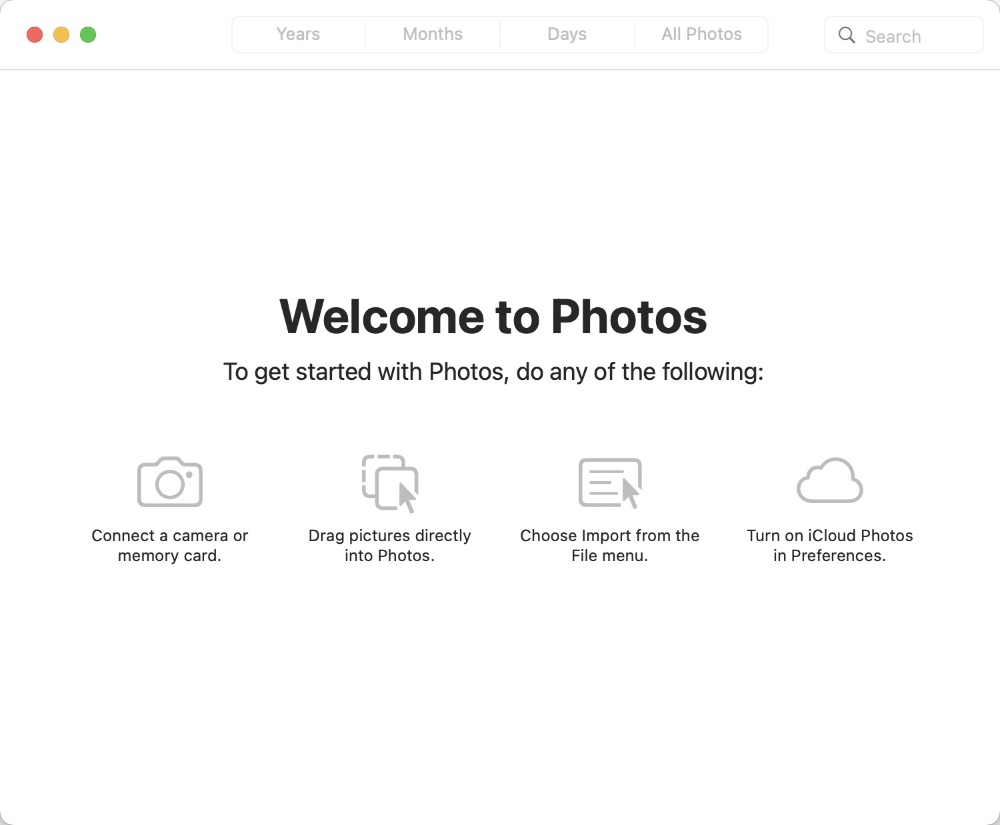
▶ The “Photos” app starts as shown in the figure, but there are no photos yet.
We will continue to import photo data, so please proceed to the next step.
Importing photo data
▶ Display the “Photos” app running up to this point and the Finder screen of the photo data retrieved from the library in the foreground.
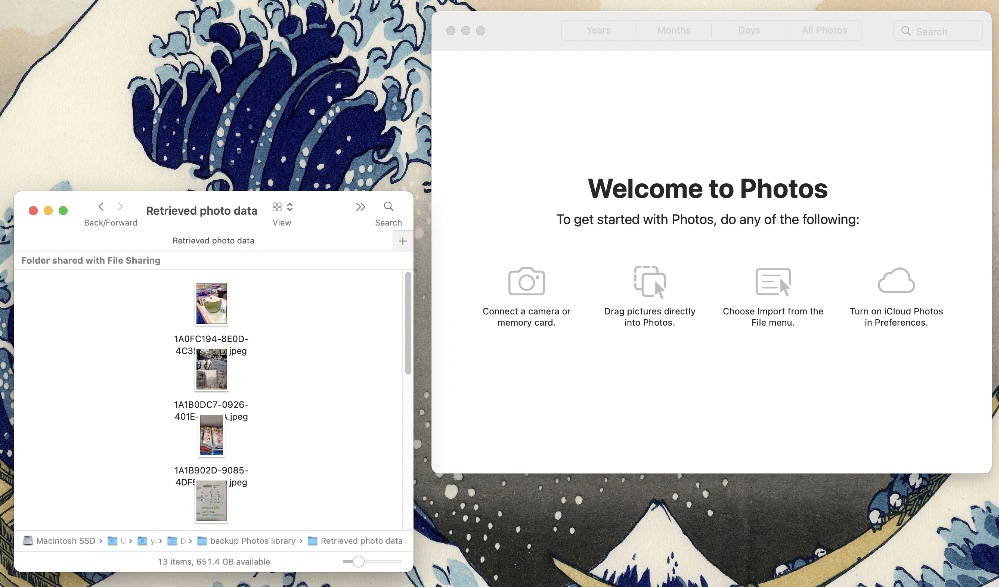
▶ Select photo data and drag and drop it into the screen of the “Photos” app to import it.
To select all photo data, press command ⌘ + A on your keyboard.
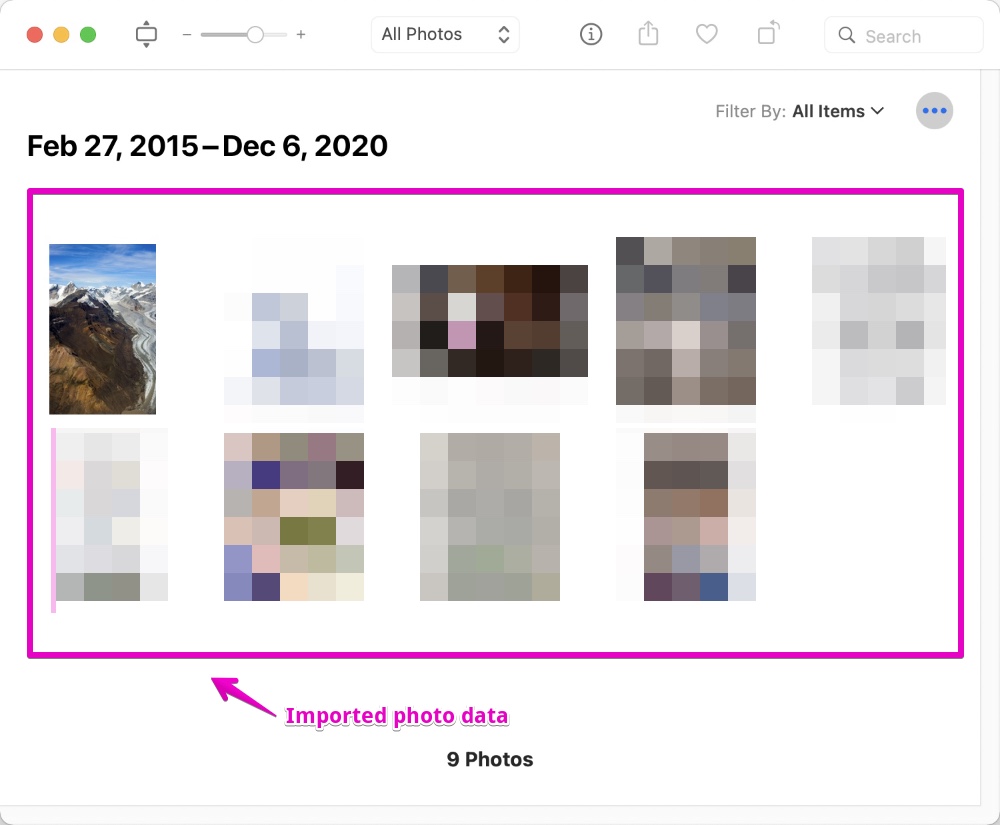
▶ When the photo is displayed in the “Photos” app, the import is complete.
You can close the “Photos” app or the displayed Finder screen.
Reference information
Apple official website photo library reapir article


This is the end of this article.

コメント