
I will introduce three ways to paste images / photos into PDF on Mac.
I will compare the advantages and disadvantages of each and introduce specific operation methods.
List of methods and advantages / disadvantages
You can jump to each description by clicking the title.
| Method | Advantages | Disadvantages |
|---|---|---|
| ① “Preview.app” | ・Free ・Mac standard function | ・Nothing special |
| ② “Adobe Acrobat Reader” | ・Free ・Can also use functions that are not in “Preview.app” | ・Need to install the app ・Takes more time than ① |
| ③ Online service | ・Free ・No need to install the app ・Multi OS environment ・Can choose from multiple services | ・Internet connection required ・Security becomes an issue when using it at work or school |
I understand that there are many ways to do it.
After all, which one is recommended?
Since it is a standard Mac function, ① is recommended.
First of all, I want you to remember the method of ①.
Then, please tell me the recommended order from ① to ③ and the order of difficulty in using it.
The recommended order is ①> ②> ③.
Arranging from the one with the easiest operation, the order is ③> ① = ②.
② is recommended when you want to use functions that “Preview.app” does not have, such as “Poster Printing”.
You can paste images in the free version, but you can also edit the characters in the PDF in the paid version.
③ can be used not only on Mac but also on other OS such as Windows and Chromebook, so I think it’s good to remember it as insurance in case of emergency.
① “Preview.app”
Here, I will explain how to paste photos / images to PDF using “Preview.app” of the standard Mac application.
The points of operation are as follows.
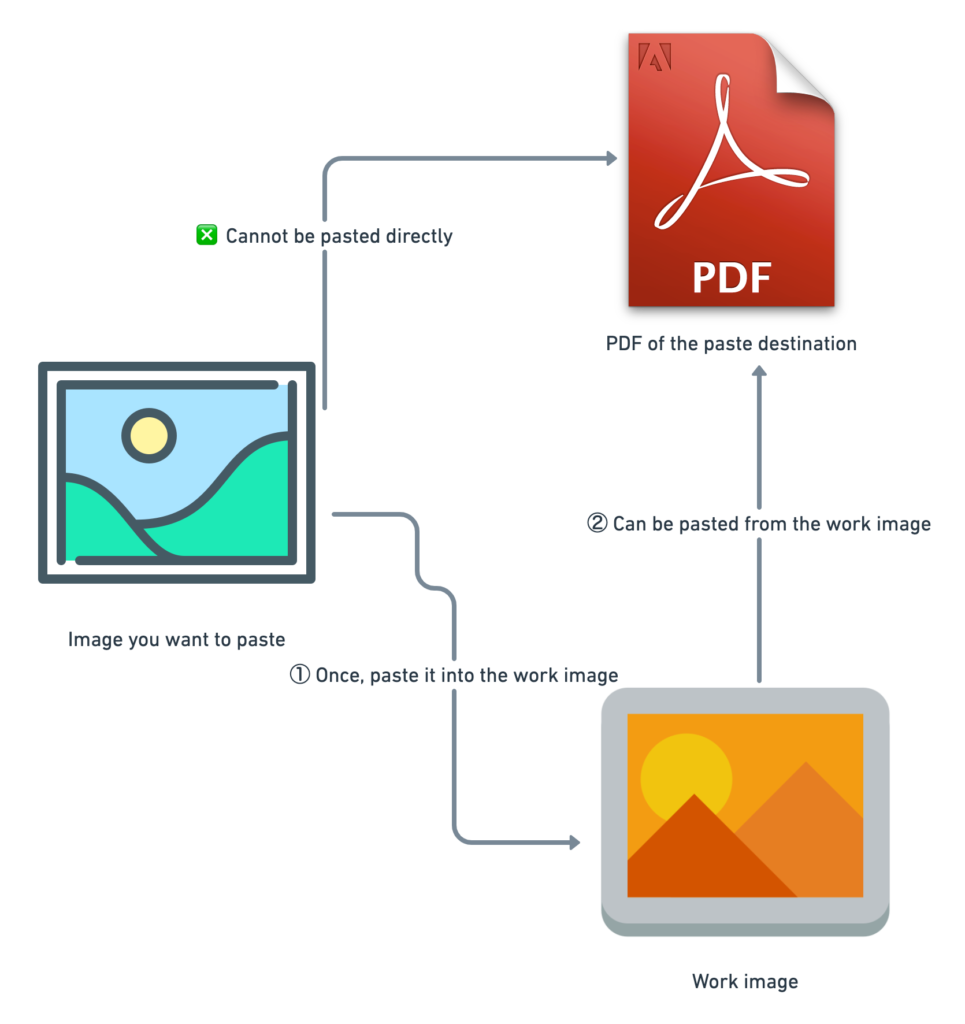
- It is not possible to paste images / photos directly into PDF with “Preview”
- Due to the above restrictions, ① paste it into a dummy photo / image for work, and ② paste it from the image for work to PDF.
The following is the specific work procedure.
▶ Display the PDF to which you want to paste the photo / image in “Preview.app”.
Leave the displayed screen open without closing it.
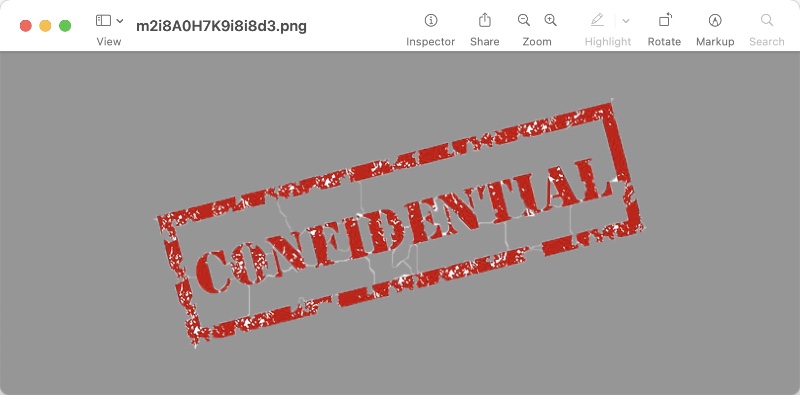
▶ Display the photo / image you want to paste in “Preview.app”.
In the following, the image written as “CONFIDENTIAL” is used as a sample.
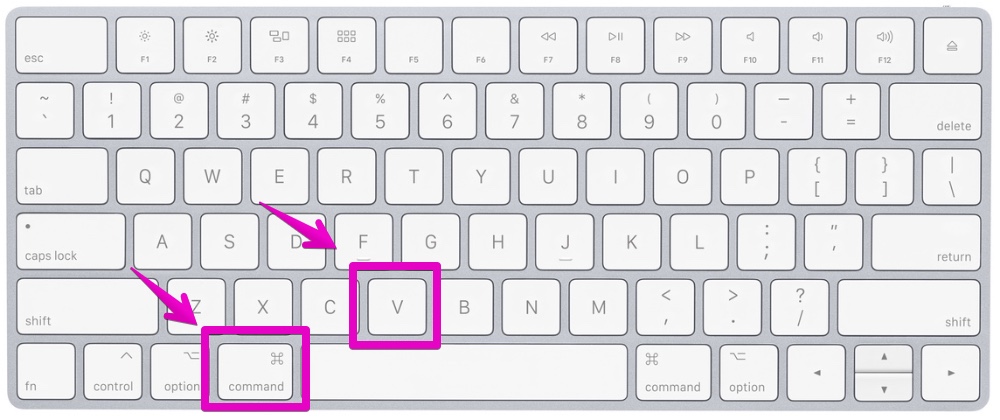
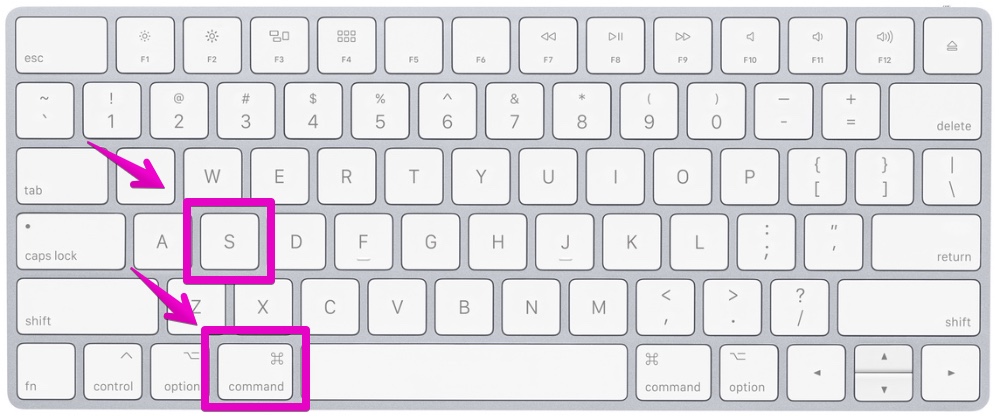
▶ Copy the displayed photo / image to the clipboard.
To operate, press command ⌘ + C on your keyboard.

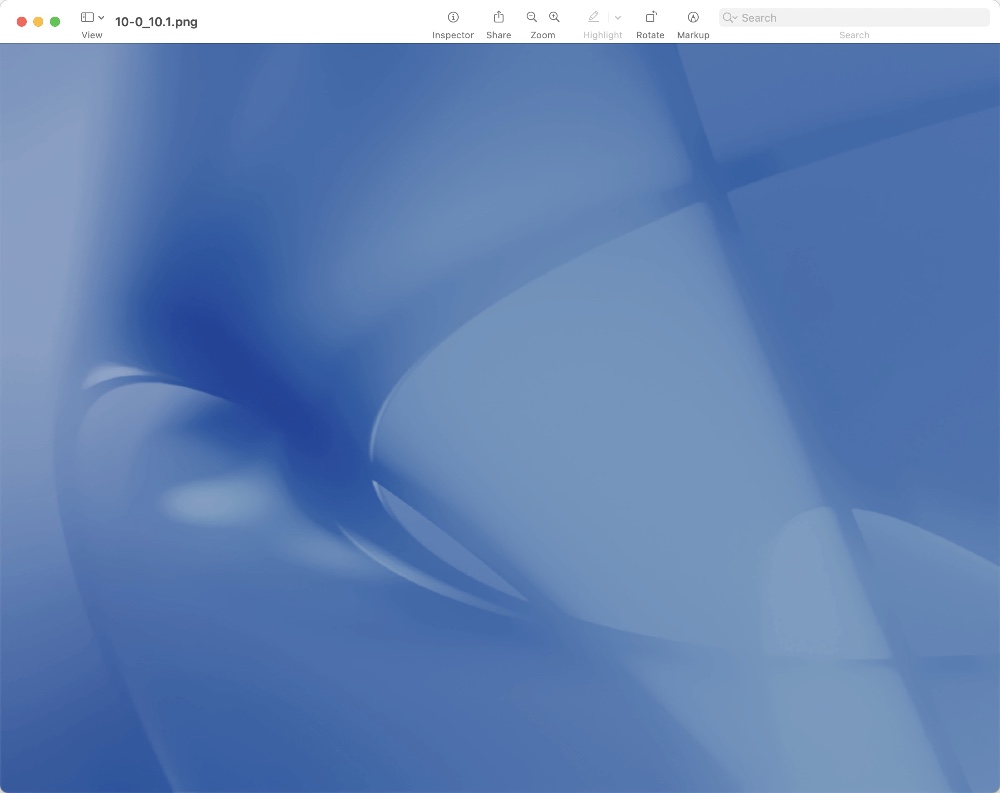
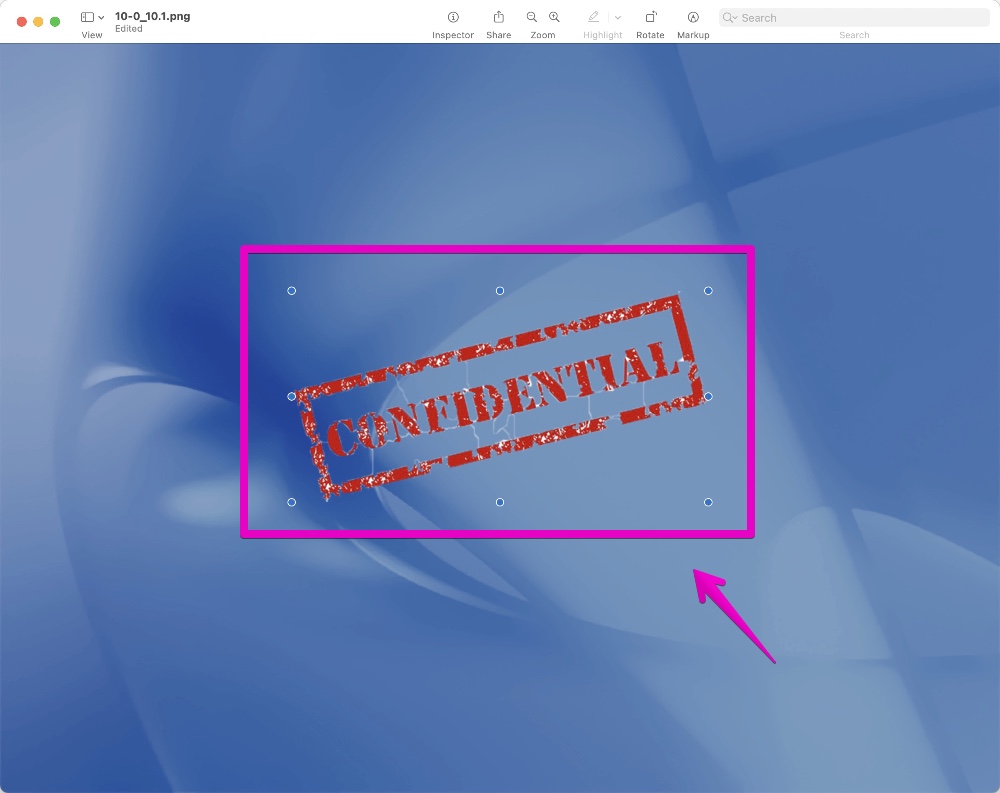
▶ Display a dummy photo / image for work in “Preview.app”.
Any photo or image is OK, but please use one that does not cause any problems even if it is changed.
Below, I’m using an old macOS desktop picture as a sample.
▶ Paste the content saved in the clipboard.
To operate, press command ⌘ + V on your keyboard.
▶ When the photo / image is pasted, click it.
When clicked it, nine circles (dots) are displayed around the photo / image to indicate that it is in the selected state.
▶ Copy the selected photo / image to the clipboard.
To operate, press command ⌘ + C on your keyboard.
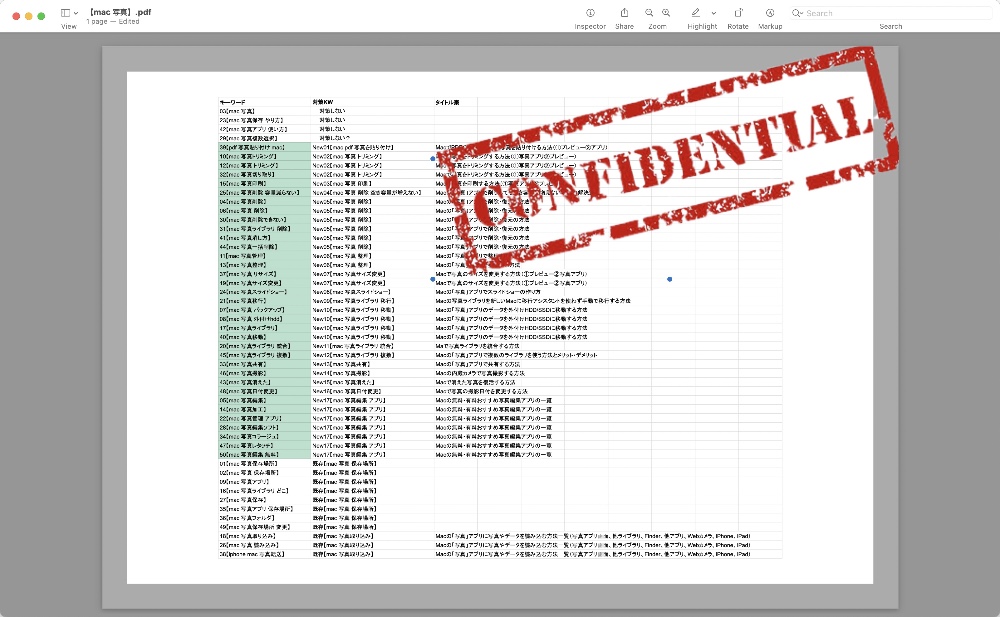
▶ Display the PDF screen of the paste destination.
After displaying, paste the photo / image saved in the clipboard.
To operate, press command ⌘ + V on your keyboard.
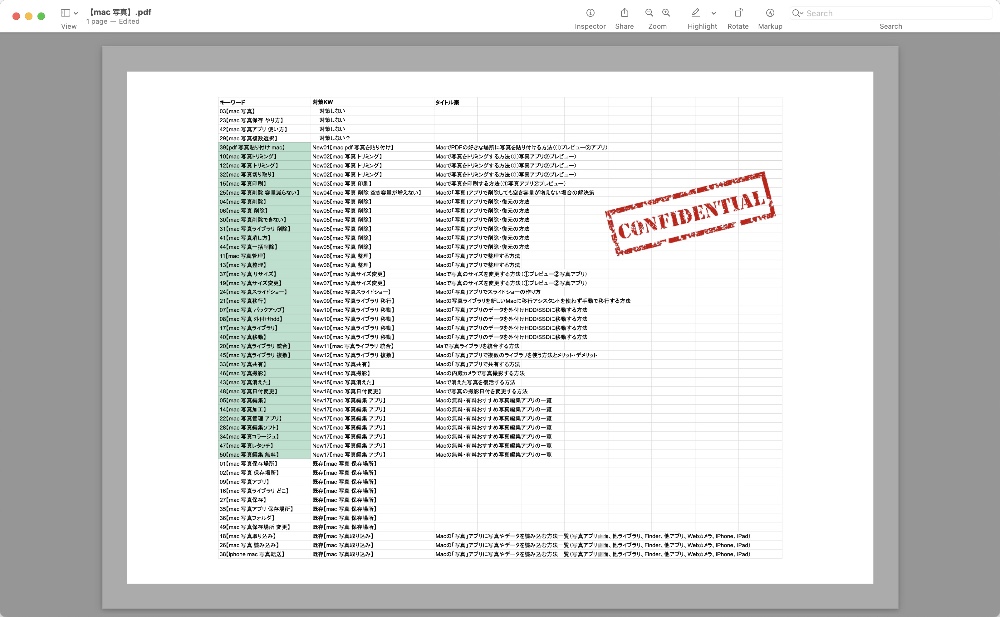
▶ After the photo / image is pasted in the PDF, you can move it by dragging it as needed, or drag the dots (circles) around the image to enlarge or reduce it.
▶ After adjusting the position and size of the image as shown in the figure, save it by pressing command ⌘ + S on your keyboard.
This is the end of the explanation, “① Preview.app”.
② “Adobe Acrobat Reader”
Here, I will explain how to paste photos and images into PDF using “Adobe Acrobat Reader” from Adobe.
From here on, the name “Adobe Acrobat Reader” is long, so it is abbreviated as “Acrobat”.
The points of operation are as follows.
- Convert photo / image files to PDF format
- Paste the above file to PDF using the “Stamp” function of “Acrobat”
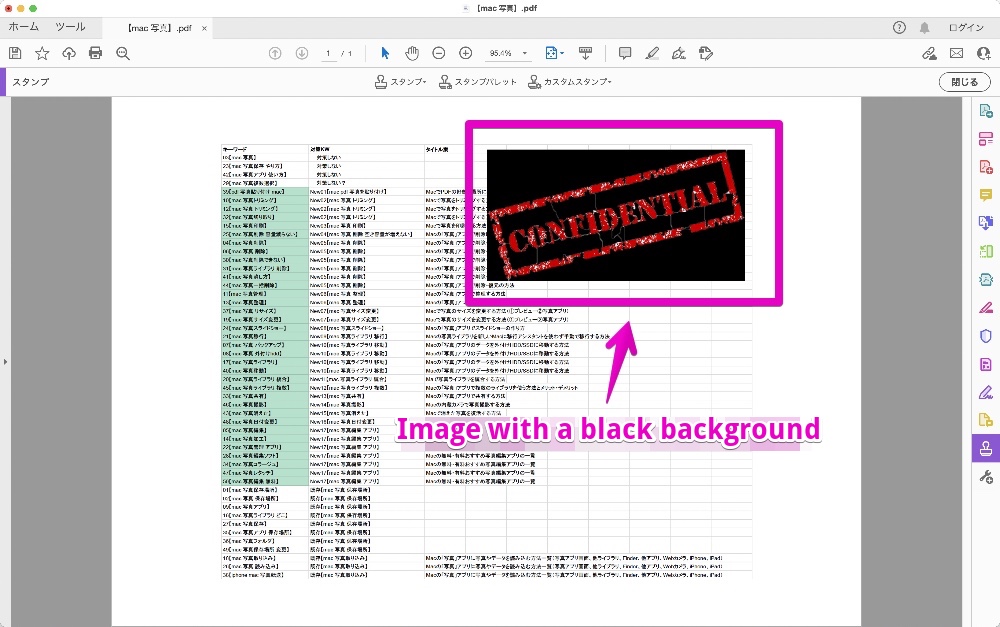
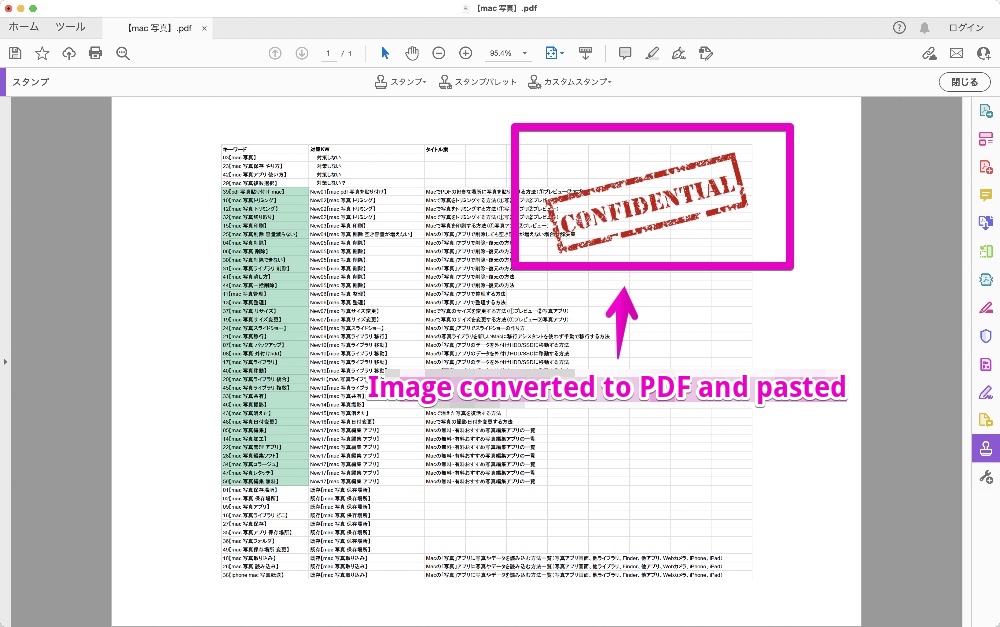
If you paste the photo / image file to PDF directly, the background will be black.
【Paste the photo / image file as it is】
【Convert to PDF format and then paste】
The following is the specific work procedure.
▶ Display the photo / image you want to paste in “Preview.app”.
In the following, the image that says “CONFIDENTIAL” is used as a sample.
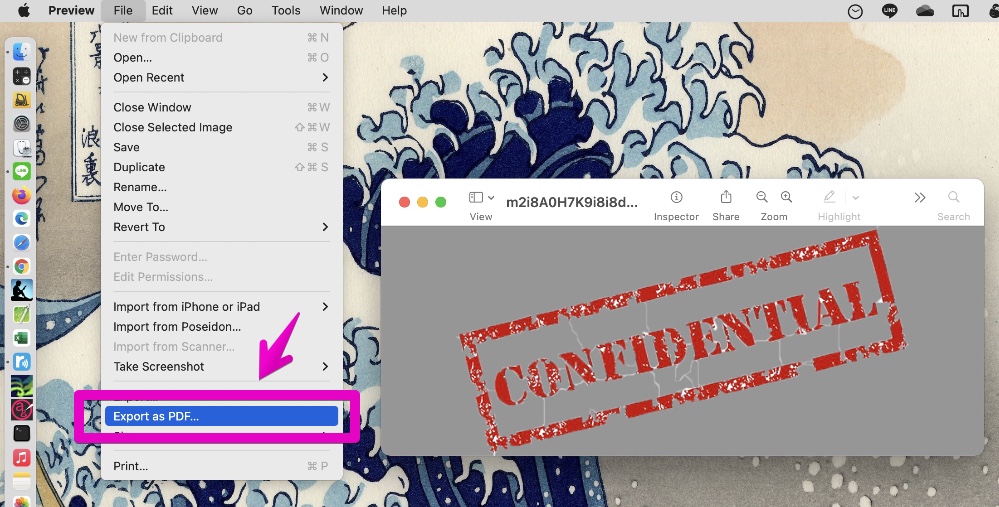
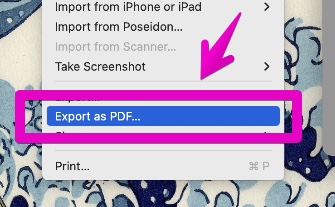
▶ Save photo / image files as PDF format.
To operate, select “File” -> “Export as PDF …” from the menu bar, and save it with an appropriate name.
Below is an enlarged view around the arrow.
▶ Install “Adobe Acrobat Reader” from the following Adobe official website.
▶ Display the PDF to which you want to paste the photo / image in “Acrobat”.
There are two display methods as follows.
- Select the PDF file in Finder and select “Open with this application” -> “Adobe Acrobat Reader DC” from the right-click menu
- After starting “Acrobat”, open the PDF file from “File” -> “Open” from the menu bar

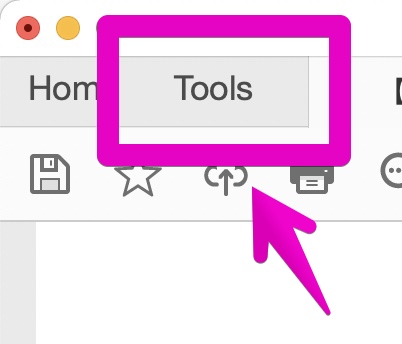
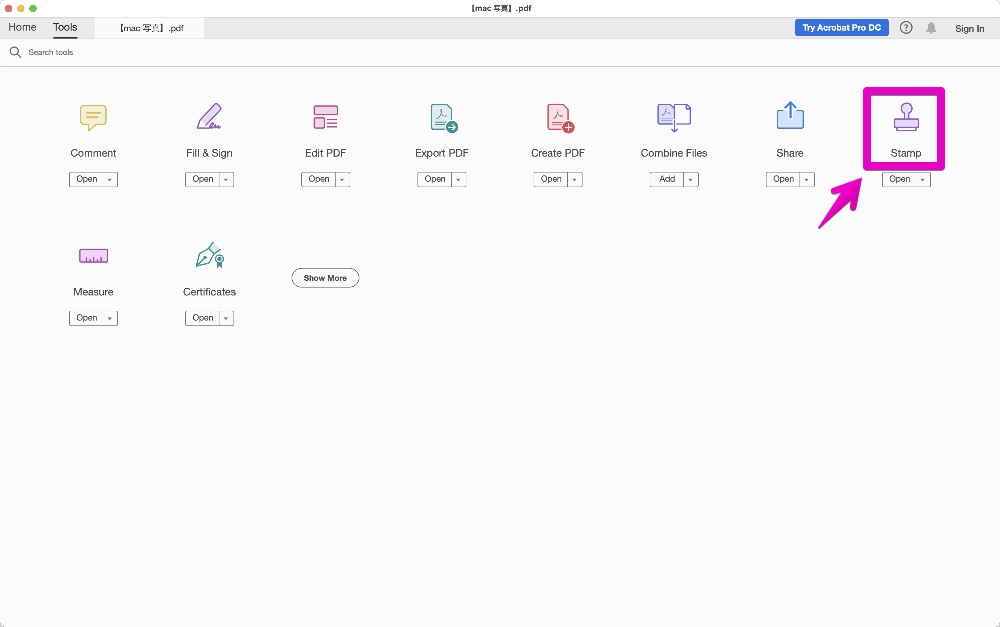
▶ In the figure below, click on the part labeled “Tools” that the arrow points to.
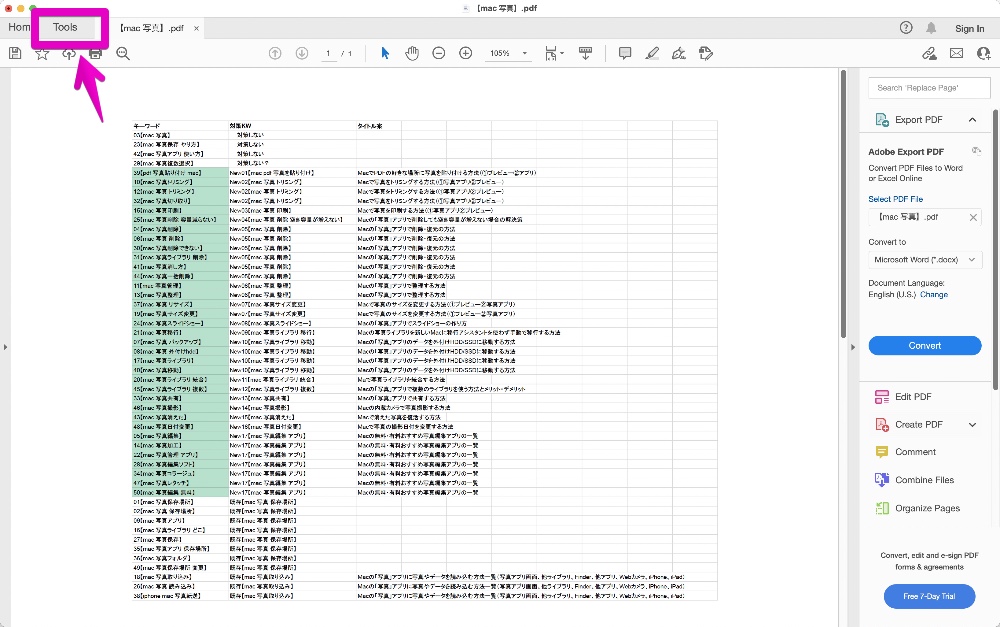
Below is an enlarged view around the arrow.
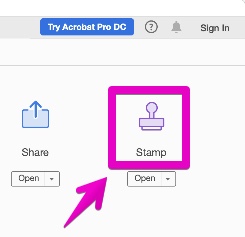
▶ When the screen changes, click the “Stamp” icon.
Below is an enlarged view around the arrow.
▶ When the screen returns to the PDF display, perform the following operations.
- 「Custom Stamps」 -> 「Create…」
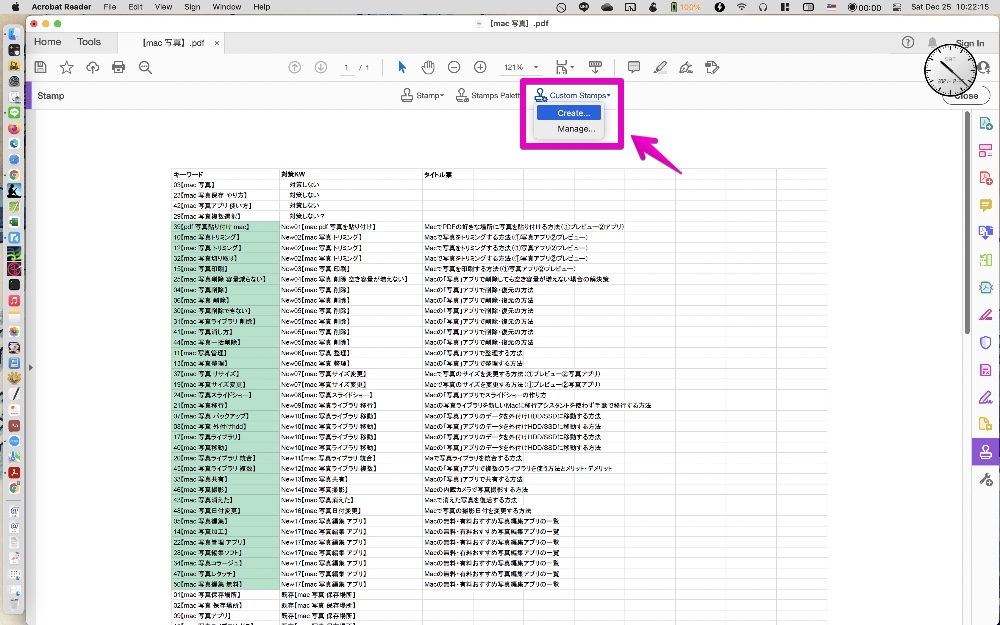
Below is an enlarged view around the arrow.

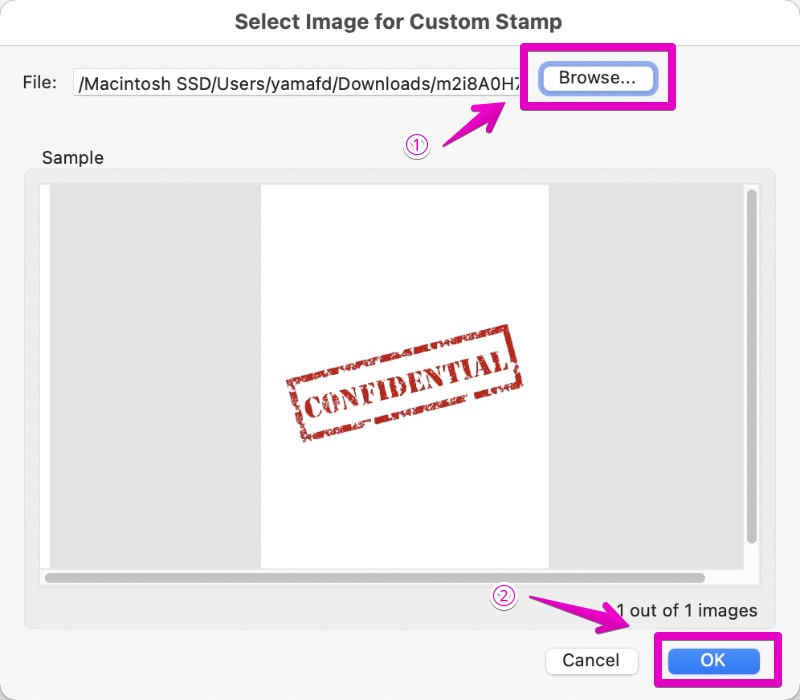
▶ When the “Select Image for Custom Stamp” screen appears as shown, do the following:
- ① Click the button “Browse…”, and specify the image that has been converted to PDF in advance
- ② Click the button “OK”
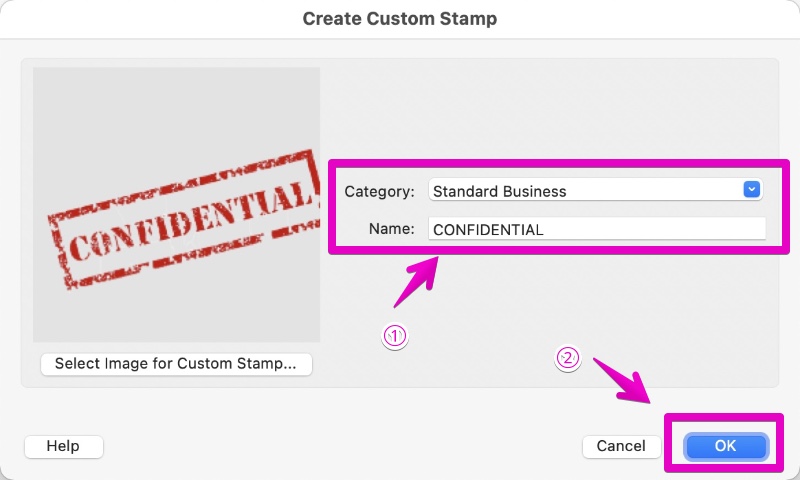
▶ When the “Create Custom Stamp” screen appears as shown, do the following:
- ① Set the items “Category” and “Name” appropriately
- “Category” can be anything OK, but set it to “Standard Business”
- “Name” sets a name that you can identify later
- ② Click the button “OK”
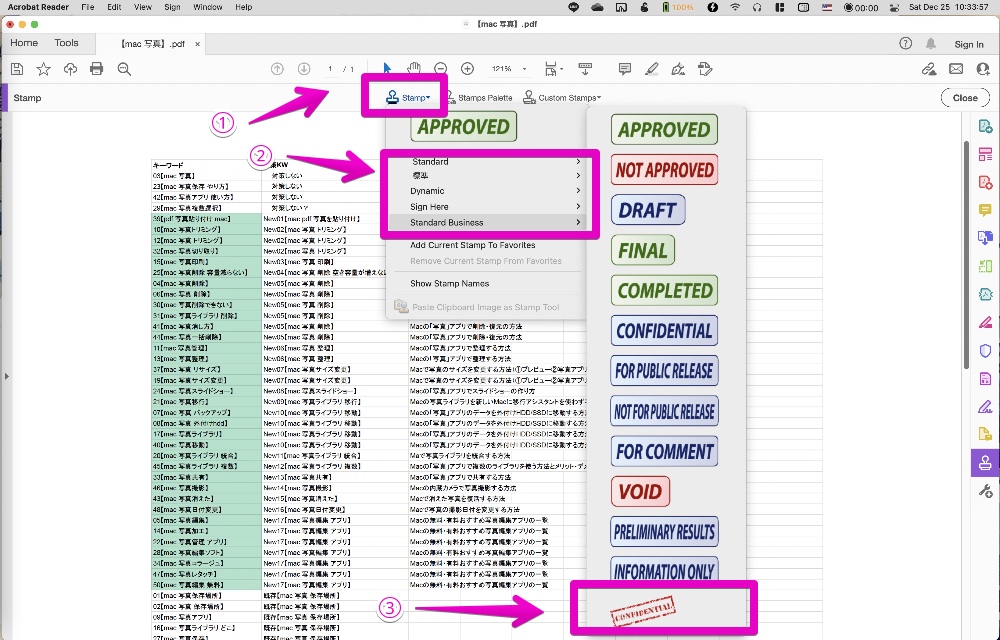
▶ When the screen returns to the PDF display, do the following:
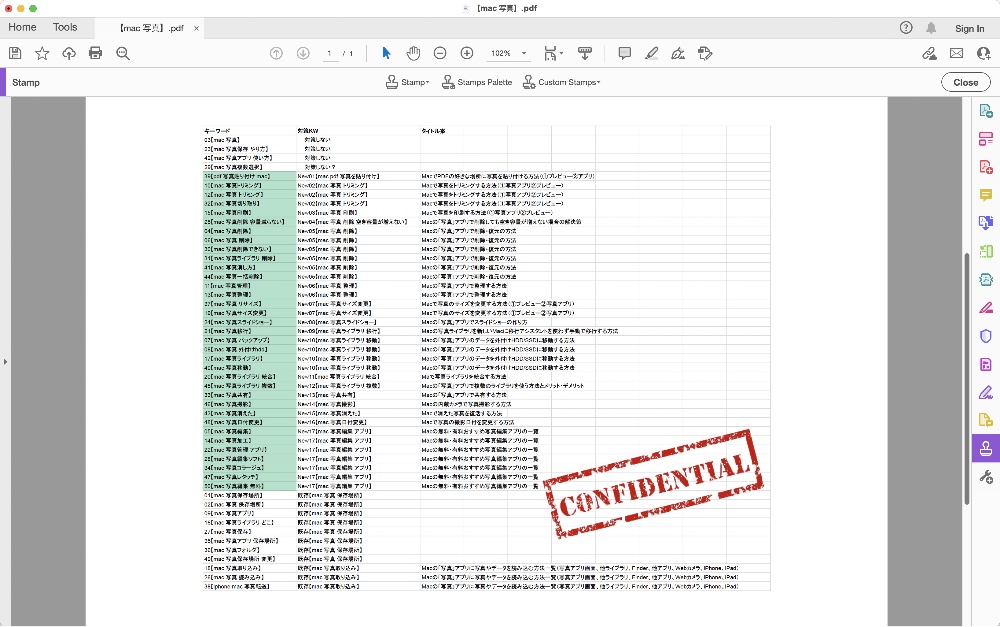
- ① “Stamp”
- ② “Category”
- ③ Select the custom stamp you created
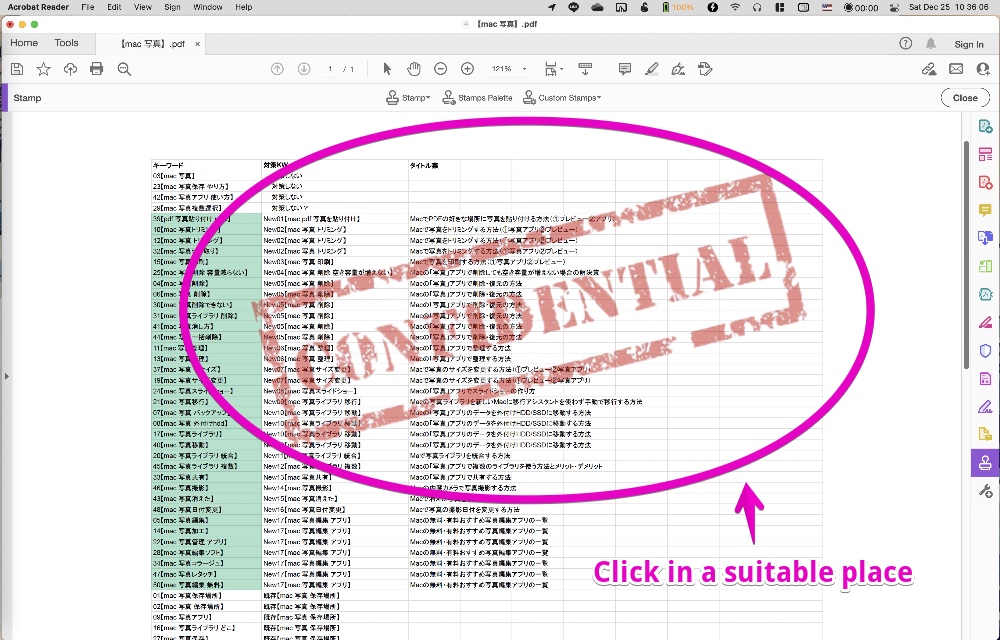
▶ As shown in the figure, the custom stamp is displayed in a light color, so click the appropriate place.
▶ After the photo / image is pasted in the PDF, you can move it by dragging it as needed, or drag the border of the image to enlarge or reduce it.
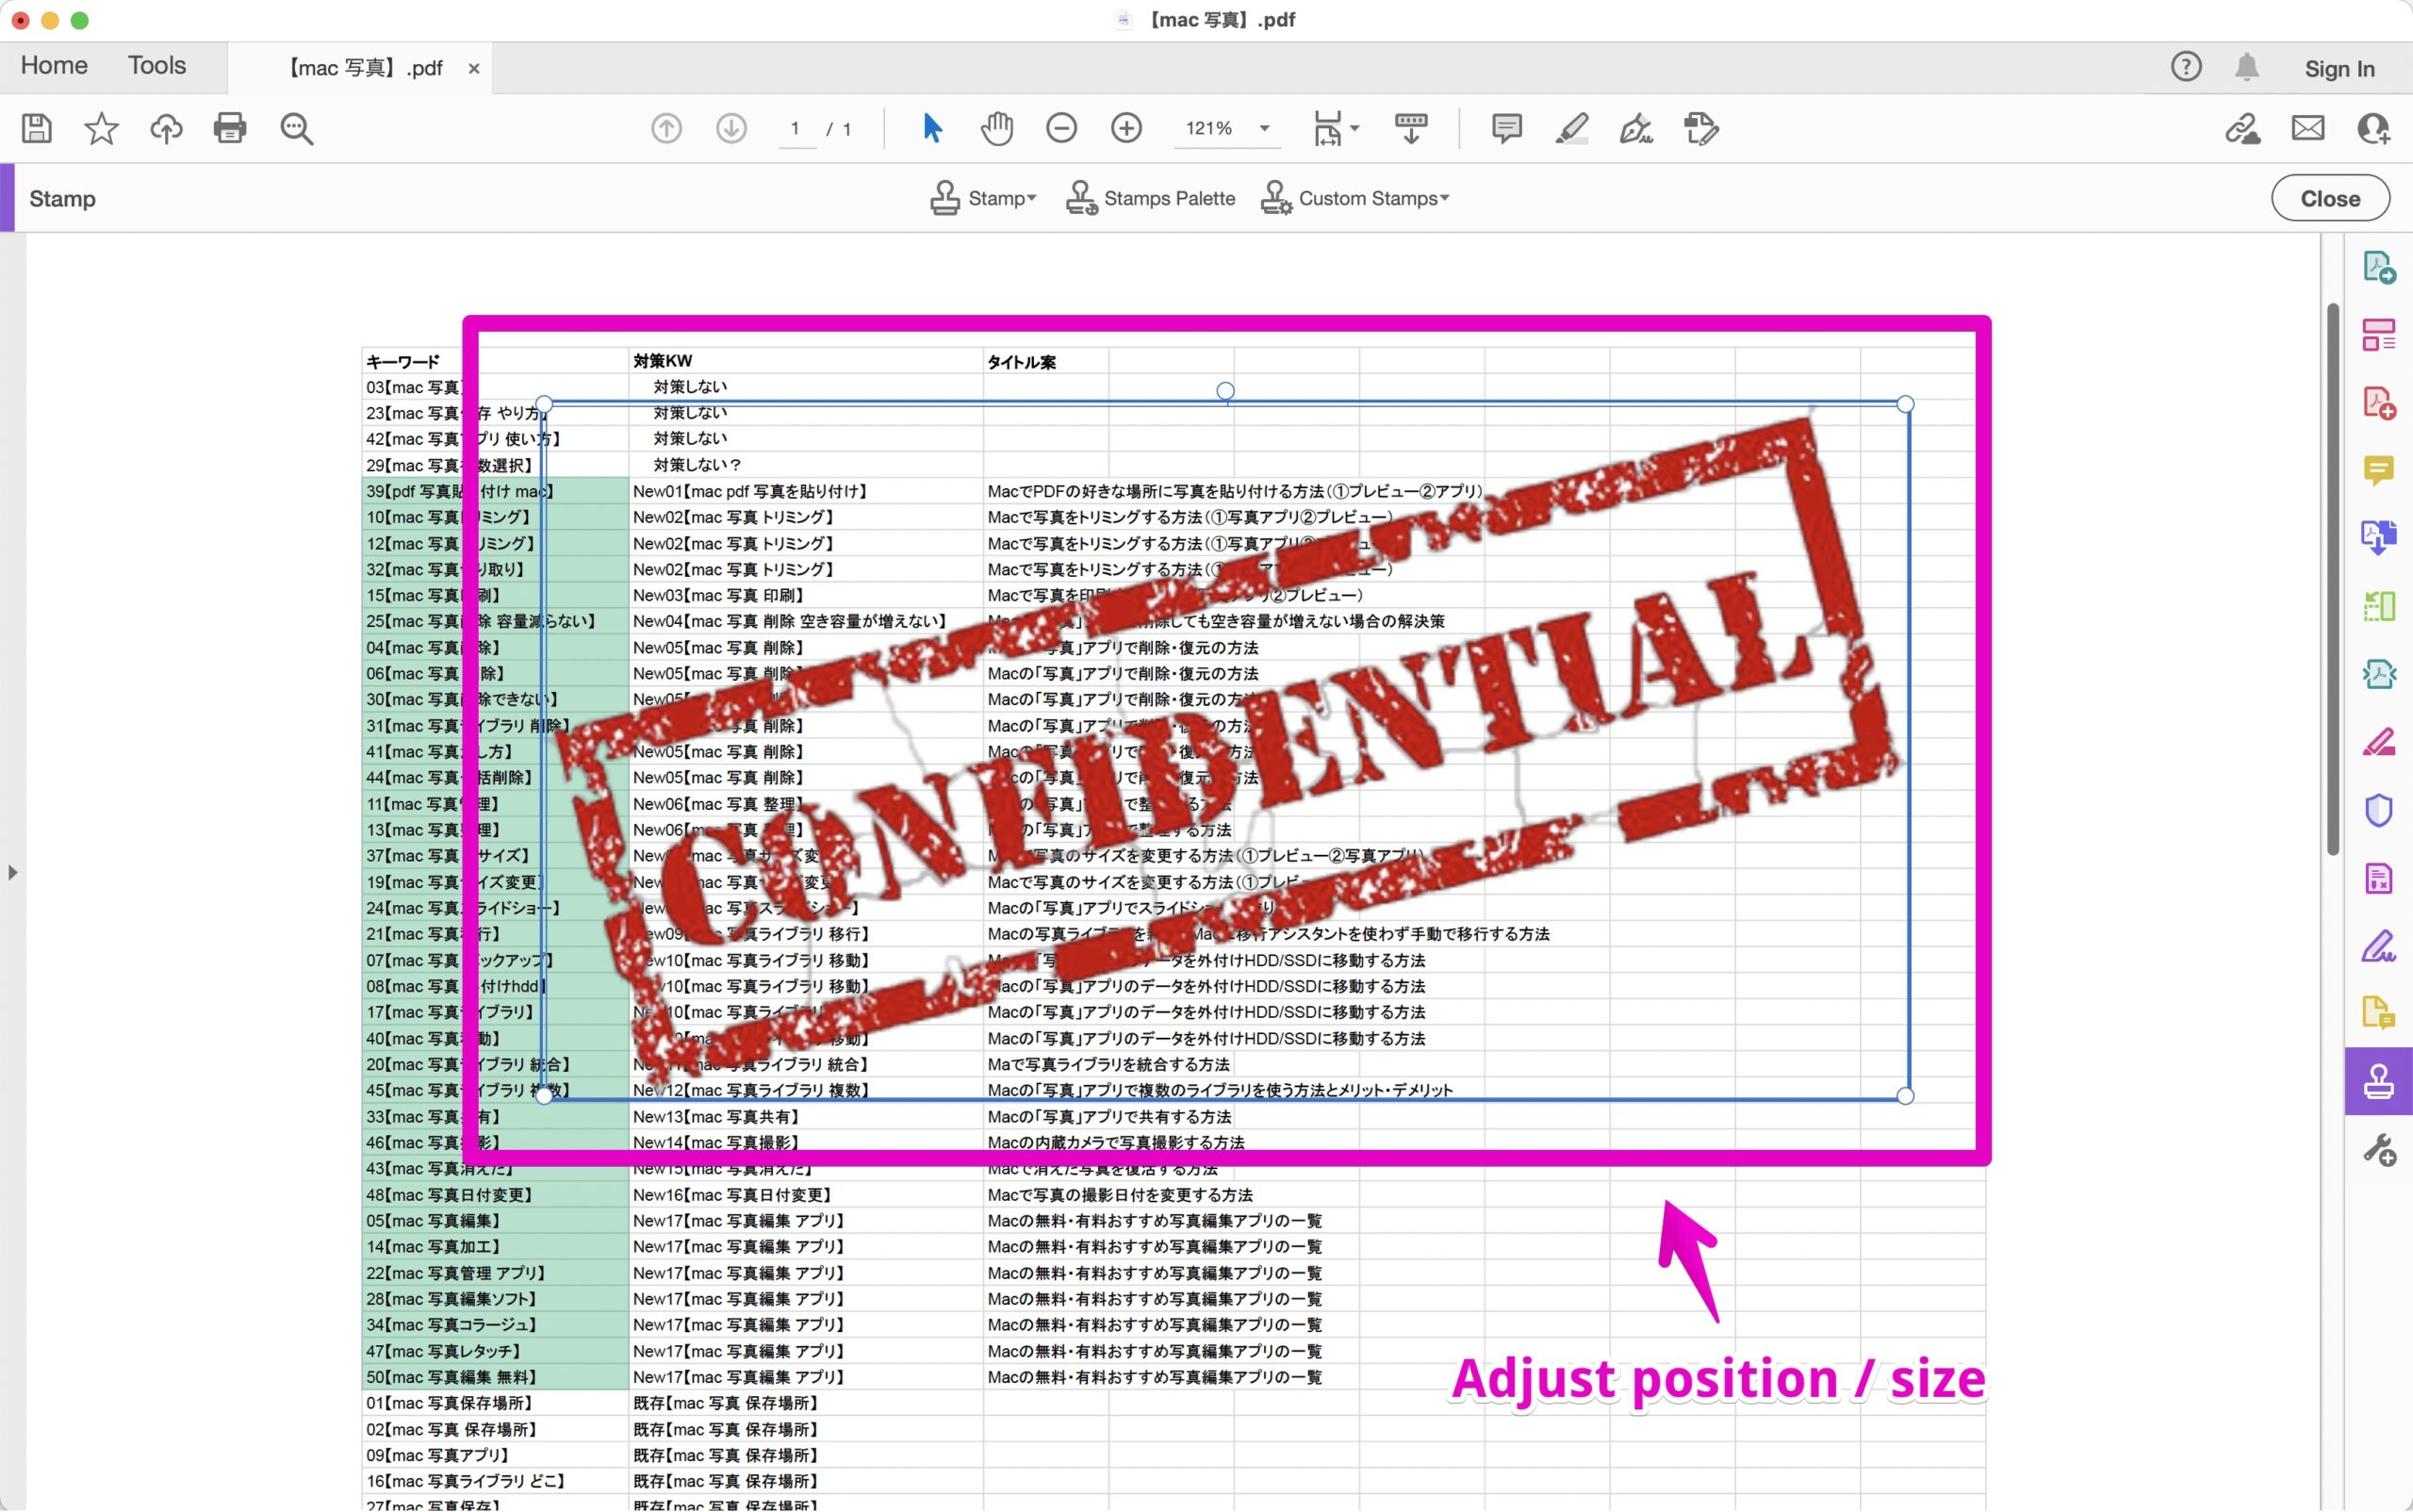
▶ After adjusting the position and size of the image as shown in the figure, save it by pressing command ⌘ + S on the keyboard.
③ Online service
There are several sites where you can edit PDFs with online services.
You can find some by Google search, but the following are typical sites.

This is the end of this article.

コメント