

I will show you how to take screenshots on a Mac window by window.
At that time, I will also introduce how to add or not add “margins and shadows” to the window.
【With shadow and margin (Default)】

【Without shadow and margin】
Compare with list of methods
The screenshot function of Mac is easier to use than other OS such as Windows, and I think that it has a lot of basic editing functions.
Personally, aren’t most people satisfied with just the standard features? ,I think.
So, first try using the standard functions of ①, and if you are not satisfied with the functionality, try using the various apps of ②.
There are various apps in ②, but this page introduces a free app called “monosnap”.
| Method | Advantage | Disadvantage |
|---|---|---|
| ① Take screenshots with Mac standard function | ・Mac standard function | ・Advanced editing functions cannot be used |
| ② Take screenshots using various apps | ・Some apps can use advanced editing functions | ・Cannot be used at companies or schools where free software is prohibited |
① Take screenshots with Mac standard function
Here, the explanation is based on the following two-stage configuration.
- Basic operation method
- How to change the setting to add / remove margins and shadows to windows with terminal commands
When taking a screenshot, you can choose to add or not add “margins and shadows” to the window, but you can set it so that it always uses the method specified in advance by the terminal command.
Many people don’t want to add “margins and shadows” all the time, so please refer to it.
Basic operation method
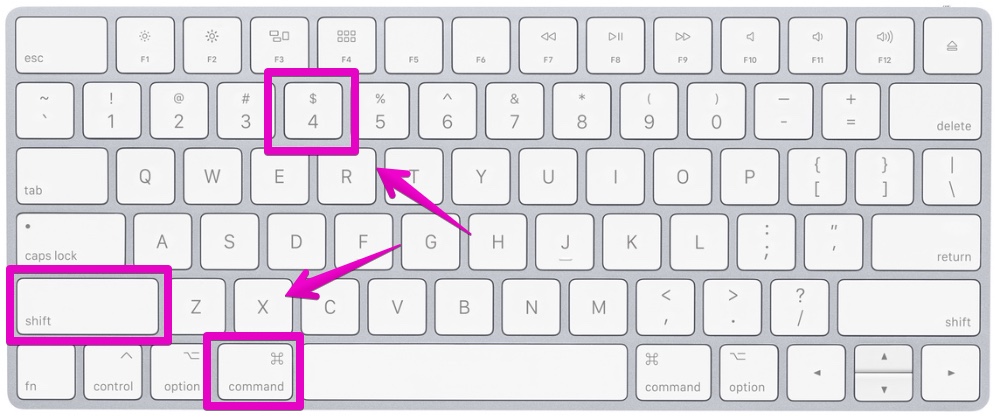
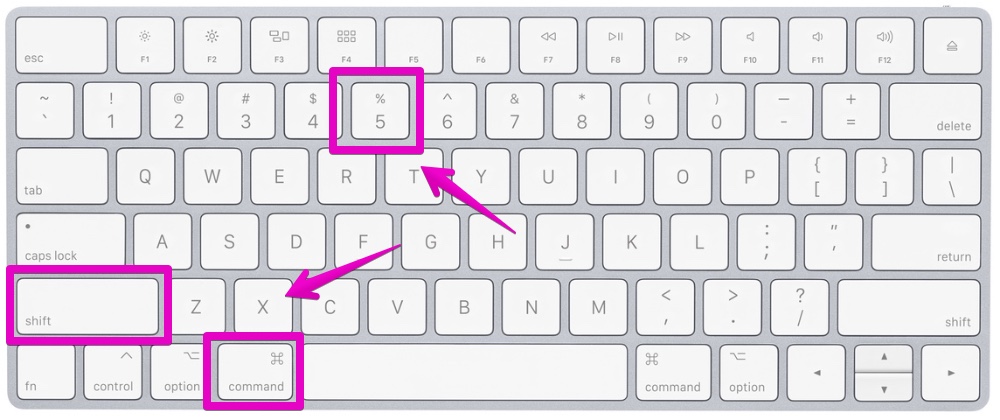
▶ Press shift + ⌘ command + 4 at the same time on your keyboard.
▶ As shown in the figure below, the shape of the mouse cursor is a cross with numbers.
Move the mouse cursor inside the window where you want to take a screenshot.

▶ After moving the cursor inside the window, press “Space” on the keyboard.
Then, the cursor will change to a camera icon as shown in the screen below.
Then left-click the mouse or click the trackpad.
If you press ⌥ option on your keyboard at the same time, there will be no “without margins and shadows”.
【With margins and shadows (Default)】
【Without margins and shadows】
▶ Screenshots are saved on your Mac desktop.
That’s all for the basic operation method.
How to change the setting to add / remove margins (shadows) to windows with terminal commands
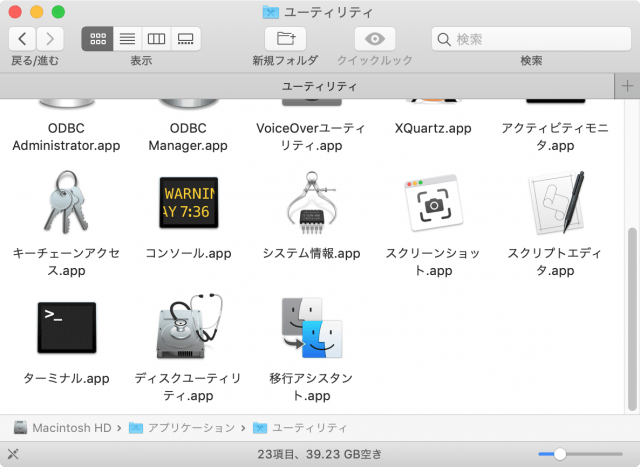
▶ Open “Applications” -> “Utilities” folder in the Finder and double-click the app “Terminal.app”.
▶ When “Termina.appl” starts, proceed to each setting from the “List of items that can be set” after this.
- List of items that can be set
i) Without margins and shadows
▶ Copy and paste the following command into the terminal.
After copying and pasting, press the return key to execute.
defaults write com.apple.screencapture disable-shadow -boolean true
▶ After executing the command, copy and paste the following command and press the return key to execute it in order to reflect the settings.
killall SystemUIServer
ii) With margins and shadows (Default)
▶ Copy and paste the following command into the terminal.
After copying and pasting, press the return key to execute.
defaults write com.apple.screencapture disable-shadow -boolean false
▶ After executing the command, copy and paste the following command and press the return key to execute it in order to reflect the settings.
killall SystemUIServer
This is the end of explanation, “① Take screenshots with Mac standard function”
② Take screenshots using various apps
If you search online, you may find multiple free software that can do the same thing, but I recommend the free software called “Monosnap” that I personally like.
The two reasons we recommend it are that it is easy to operate and that it is easy to write characters and figures when using it in manuals.
The screenshots of the screens used in this blog are also processed using Monosnap.
If you explain how to use Monosnap in detail here, the story deviates from the purpose of this page, “Take a screenshot with a single window”, so I will only explain how to obtain it and how to use it basically.
▶ Click the link below to open the corresponding page of the “App store”.
Please install from there.

▶ After installation, double-click “Monosnap.app” in the “Applications” folder of the Finder to start it.

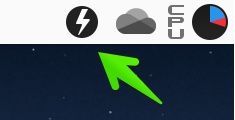
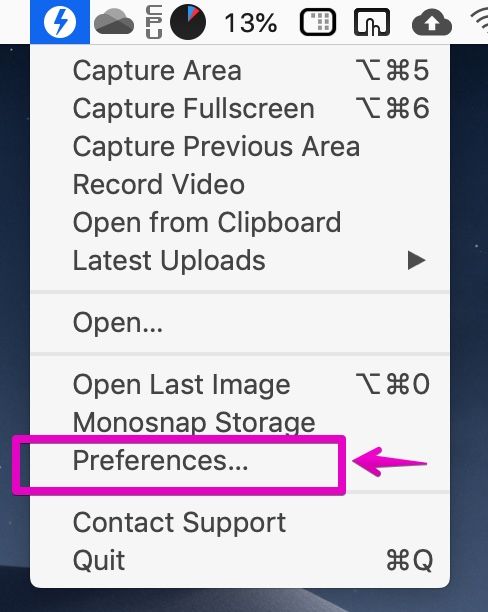
▶ When Monosnap starts up, a lightning bolt-like icon will appear in the menu.
Click the icon and select “Preferences…” to make the settings.
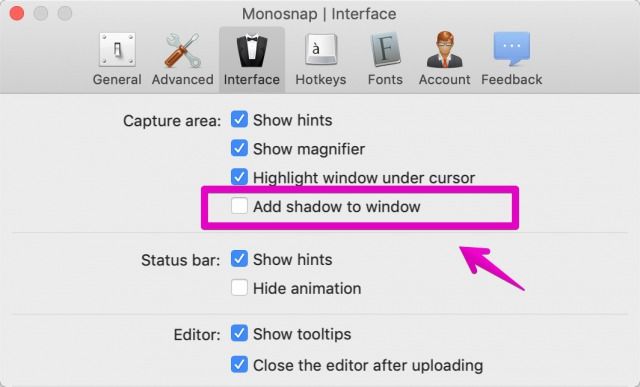
▶ When the following Monosnap setting screen is displayed, click “Interface” from the icon list above.
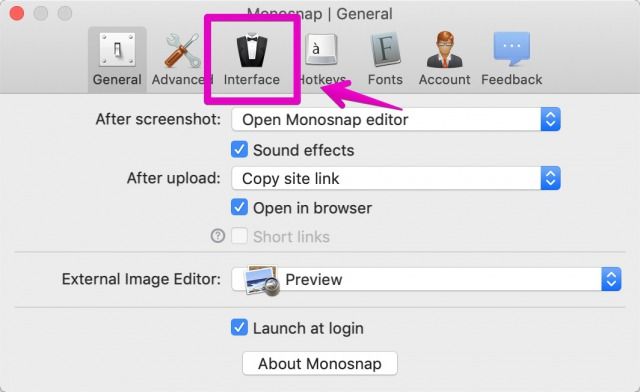
▶ After switching to the screen below, change “Add shadow to windows” as needed.
If checked, “margins and shadows” will be added to the screenshot.
If you uncheck it, “margins and shadows” will not be added.
After completing the settings, click the red circle button on the upper left to close the setting screen.
▶ After making the settings up to this point, let’s actually take a capture.
To start the capture, do one of the following two patterns:
【① : Select from menu】
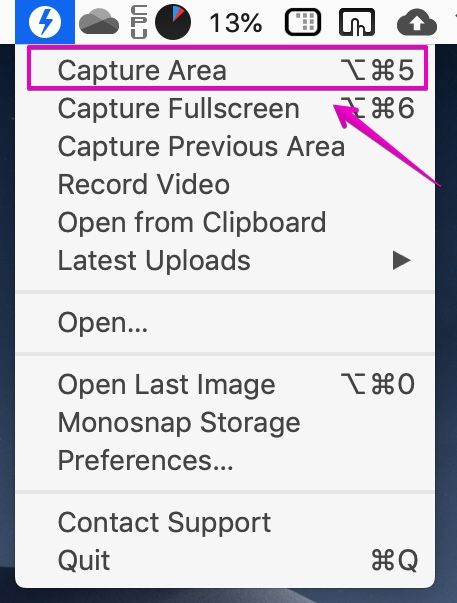
【② Keyboard shortcut】
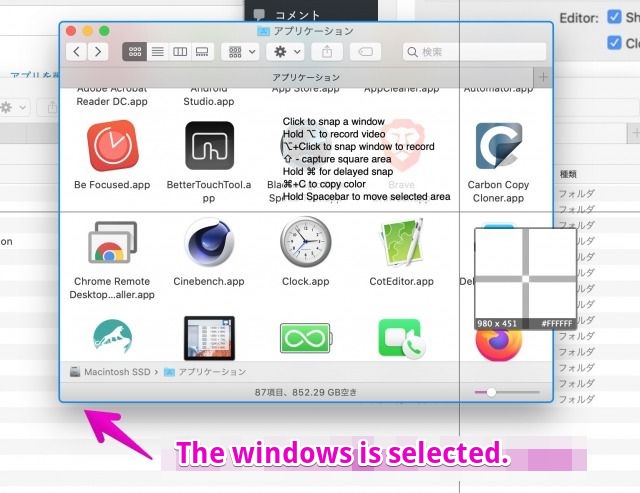
▶ Then, the mouse cursor becomes a cross and the selected window is surrounded by a red line.
When the window you want to capture is selected, left-click the mouse or click the trackpad.
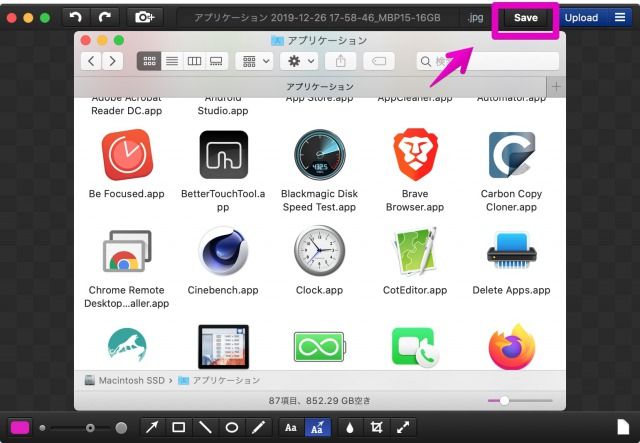
▶ If you can capture it, the following screen will be displayed.
There is a “Save” button in the upper right, so you can choose a save location and save.
This is the end of the explanation, “② Take screenshots using various apps”.
Conclusion
This page introduced two methods.
Each has its advantages and disadvantages, so please consider which one to use by looking at the “Compare with list of methods” at the beginning.
Reference information

This is the end of this article.


コメント