

Added the USB flash memory creation command for macOS 12 Monterey.
Added an error handling method when executing the USB flash memory creation command of macOS 10.12 Sierra.
Added the USB flash memory creation command for macOS 11 Big Sur.
I will show you how to create a USB flash memory for installation for all versions of macOS (OS X) after 10.7 Lion.
Here, I will explain in detail the procedure using the “Terminal” of the standard Mac application using illustrations.
What to prepare
macOS (OS X) Installer
Get the macOS (OS X) installer.
The detailed procedure for each version is introduced in the following article.

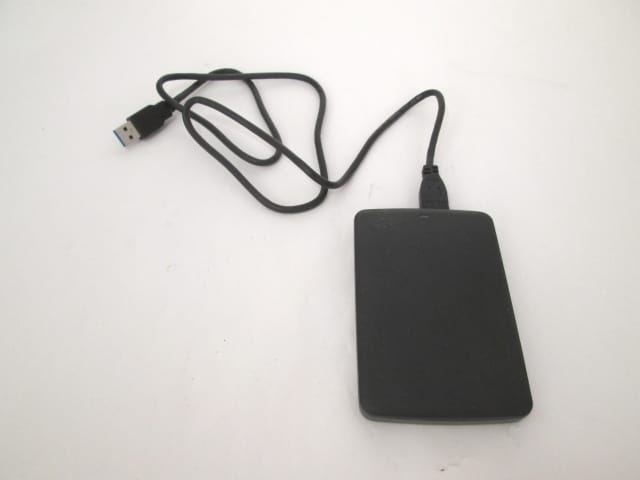
USB flash memory
A USB flash memory with a capacity that allows for the file size of the above macOS (OS X) installer + some margin is required.
It is important to choose a USB flash memory that has a proven track record, as it often happens that if you switch to a different model after struggling with some USB flash memory, it will work quickly.
By the way, the one I actually used was the next one I bought from Amazon.co.jp (Japan).
It is listed on the same page as the slide type, cap type, and iPhone / iPad, but I bought the slide type.
macOS (OS X) bootable USB flash memory (Amazon.co.jp – Japan)

Some USB sticks just can’t boot from your Mac.
In such a case, it is better to give up and use another USB flash memory.
Also, if the free space on the internal SSD / HDD of the Mac is low, the probability of failing to create a USB flash memory will increase.
This is the end of the explanation of “What to prepare”.
Procedure explanation
Initialize the USB flash memory
- ①
The work to be done from now on is to initialize the USB flash memory.
Therefore, it is strongly recommended to remove it until all the work is completed so that you do not accidentally initialize the external HDD or USB flash memory that you usually use.
- ②
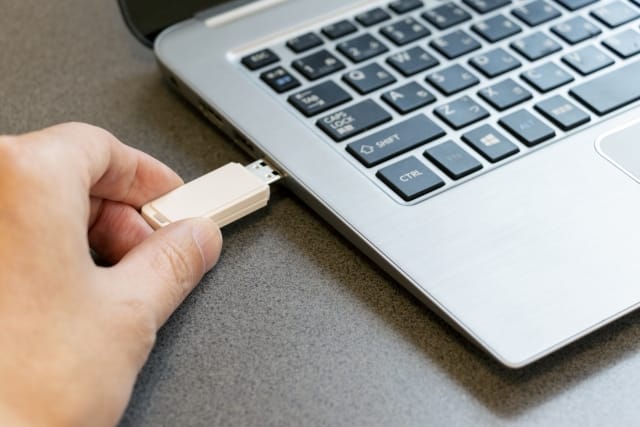
Connect the USB flash memory for macOS installation to the Mac itself.
All the contents of this USB flash memory will be erased, so if necessary, check the contents with Finder to see if there is any problem with erasing.
- ③
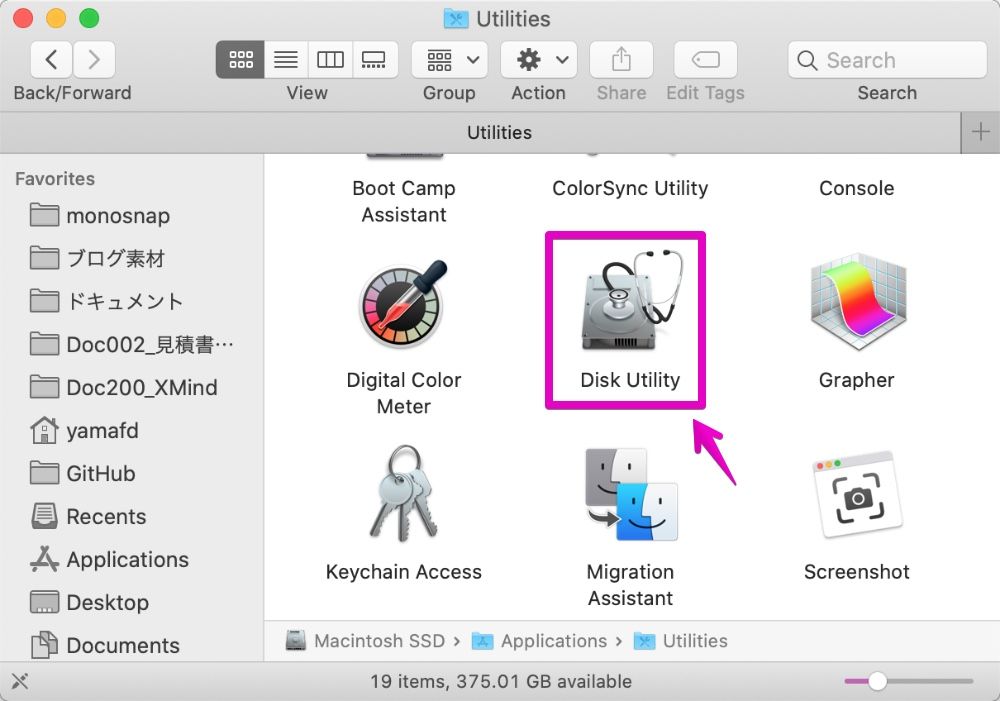
In Finder, start “Disk Utility” in the “Applications” – “Utilities” folder.
- ④
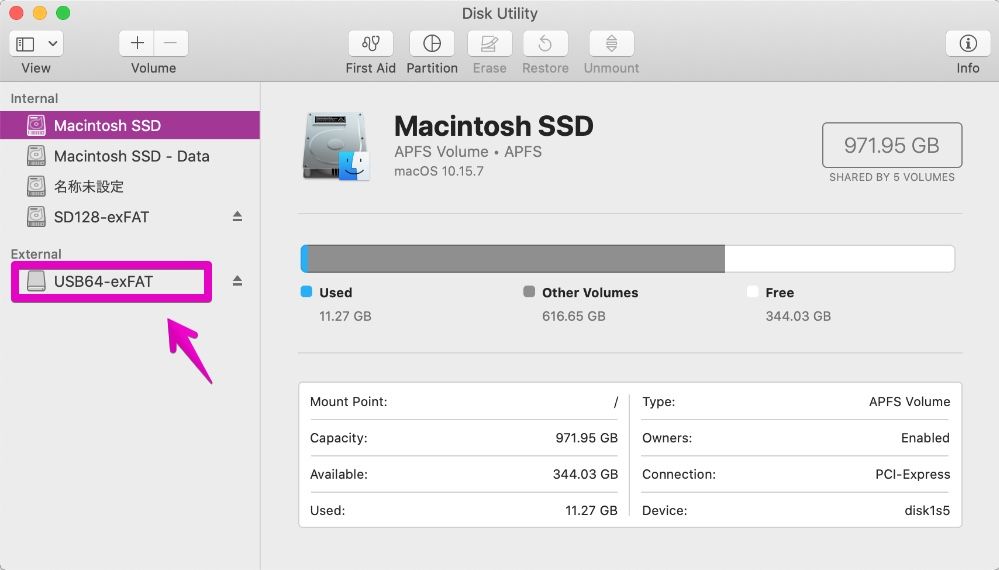
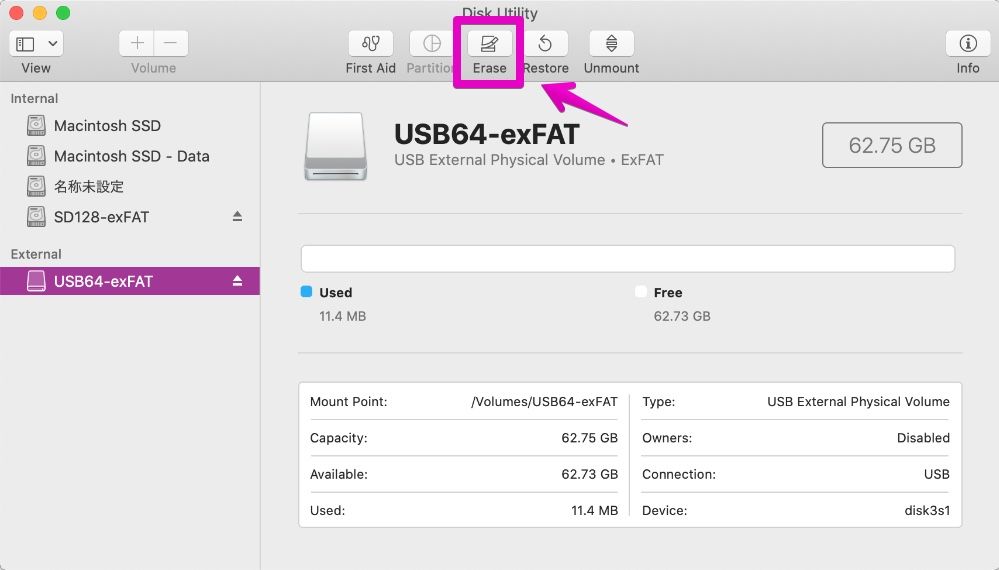
When “Disk Utility” starts, click the USB flash memory for macOS installation from the drive list on the left side of the screen to select it, as shown in the figure below.
In the figure below, it corresponds to “USB 16GB” in the “External” category indicated by the arrow.
- ⑤
When the USB flash memory for macOS installation is selected as shown below, click the “Erase” button pointed by the arrow.
- ⑥
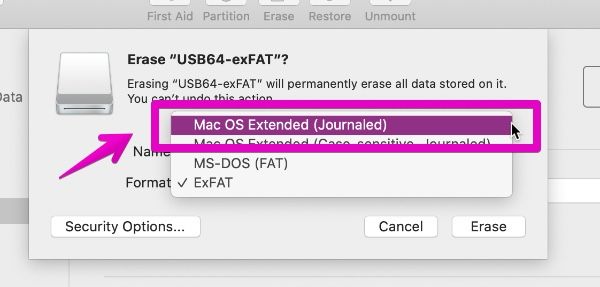
When the message “Erase 〜?” is displayed as shown below, click the “Format” pull-down list pointed to by the arrow.

- ⑦
From the pull-down list, click and select “Mac OS Extended (Journaled)” at the top.
- ⑧
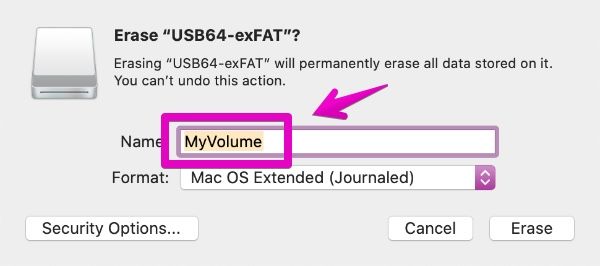
When you return from the pull-down list, enter an appropriate name in the “Name” part.
In the screen below, “My Volume” is entered, similar to the support page on the official Apple website.
Unless there is any other special reason, it is easy to explain later, so please use “My Volume” in the same way.
- ⑨
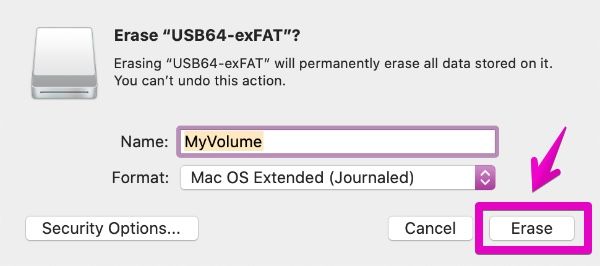
At this point, you are ready to initialize the USB flash memory.
Since it is finally initialized, click the “Erase” button pointed by the arrow in the figure below.
- ⑩
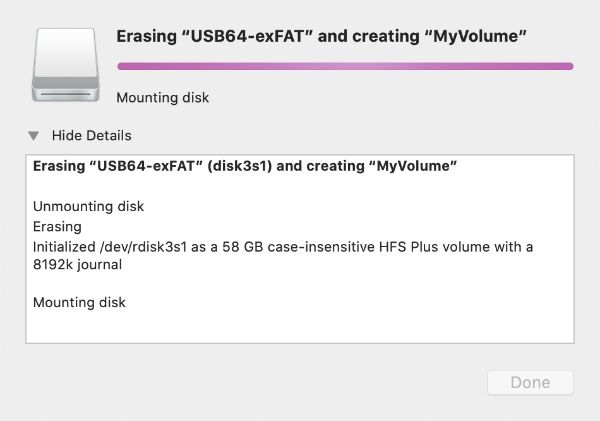
When the screen being erased appears as shown below, wait until it is completed.
It should probably be completed in less than a minute.
- ⑪
As shown in the screen below, when the green completion mark is displayed and “Erase process is completed” is displayed, the erasure is completed, so click the “Finish” button.

After this, anyone making a USB flash memory for installing OS X 10.7 Lion or 10.8 Mountain Lion should continue reading the instructions.
If you are 10.9 Mavericks or later, exit “Disk Utility” and proceed to the next step.
- ⑫So, if you’re a 10.7 Lion or 10.8 Mountain Lion, check the following:
- ① Select the USB memory that you just initialized in the “External” category on the left side.
- ② Pay attention to the “device” part indicated by the arrow in the figure below.
Then, in the figure below, “disk2s4” is displayed, so make a note of the “disk2” part and make a note of it.The meaning of this part indicates the number of the physical disk, and it will be indispensable information when making a USB memory for OS installation after that.Also, if you make a mistake in the number, other HDDs and SSDs will be initialized by mistake, so be careful not to make a mistake.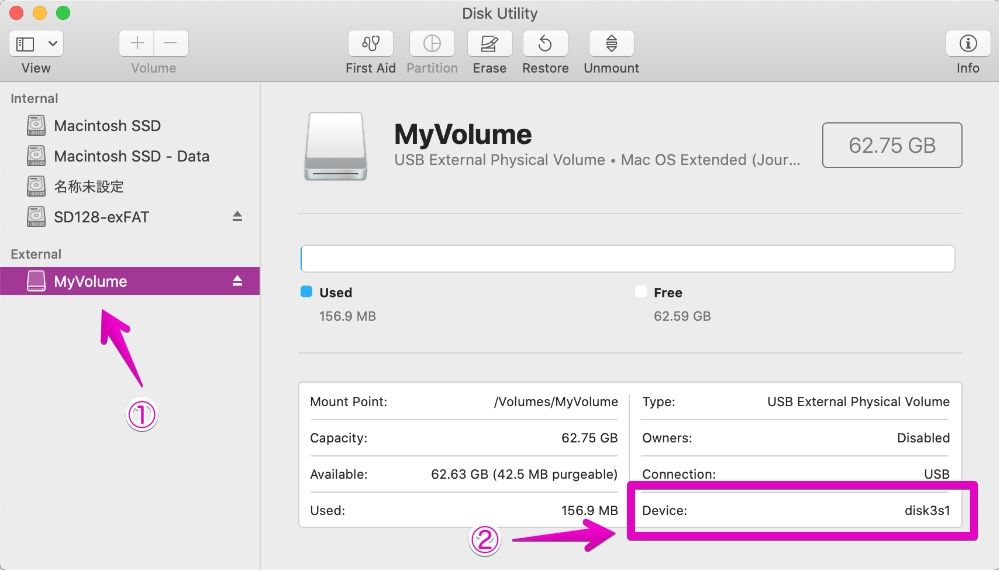
The figure below is an enlarged view of the part indicated by the arrow in ②.

- ⑬
After confirming the physical disk number, click the unmount icon pointed to by the arrow in the figure below to exit Disk Utility.
Do not remove the USB flash memory and leave it connected.

The person who has read this far is the person who makes the USB flash memory for OS installation of OS X 10.7 Lion or 10.8 Mountain Lion, so please proceed to the next step.
Make a USB flash memory for OS installation
10.9 Mavericks and later steps
- ①
In the Finder, make sure the macOS (OS X) installer is in the “Applications” folder.
If it is in another folder or external HDD, move it.
In the figure below, “Install macOS Catalina” is the installer.

- ②
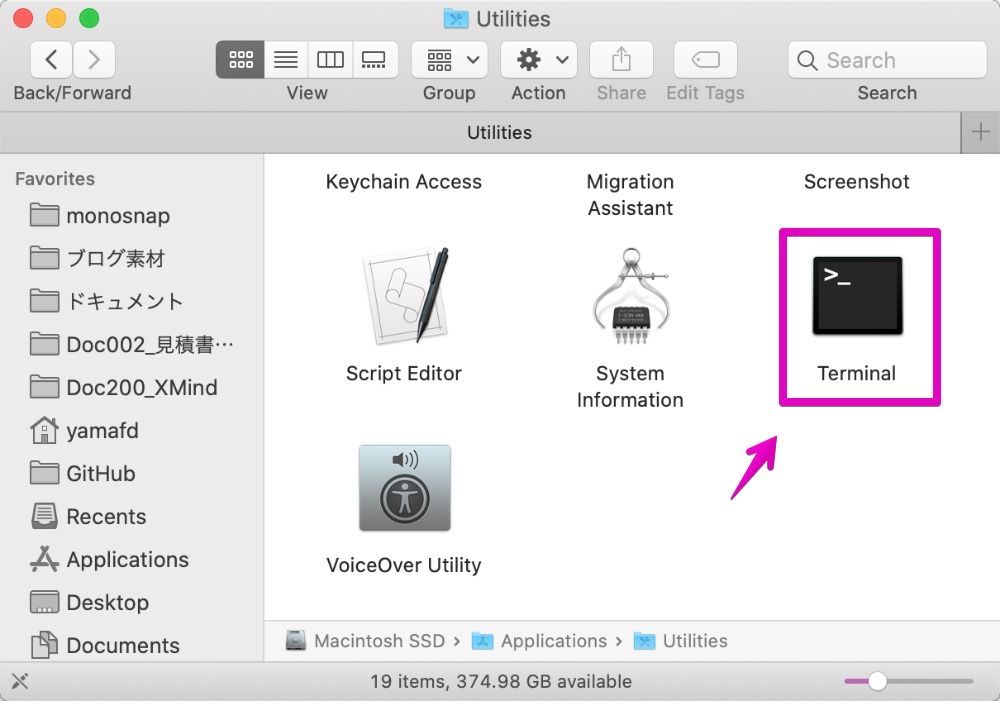
Next, in Finder, start “Terminal” in the “Applications” – “Utilities” folder.
- ③
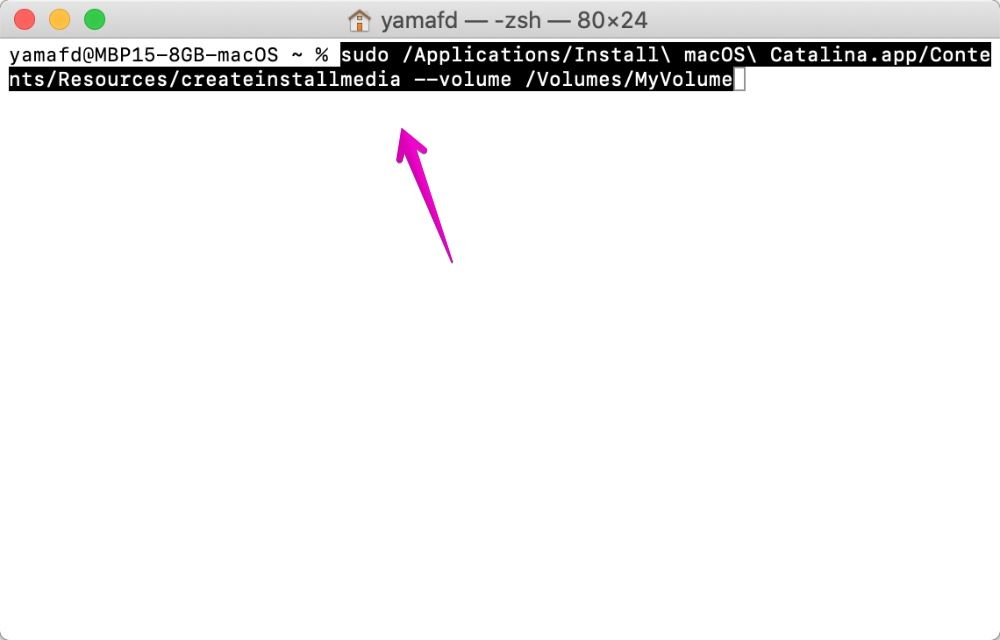
When “Terminal” starts, copy and paste the command to create a USB flash memory for macOS installation.
All commands differ depending on the OS version, so select from the following and copy.
There are “” characters in the middle of the commands, which are called the “escape character”.
The reason for using “” is to recognize half-width space as a half-width character.
If there is no “”, the half-width space will be recognized as a word delimiter instead of a character.OS version Command 12 Monterey sudo /Applications/Install macOS Monterey.app/Contents/Resources/createinstallmedia --volume /Volumes/MyVolume
11 Big Sur sudo /Applications/Install macOS Big Sur.app/Contents/Resources/createinstallmedia --volume /Volumes/MyVolume
10.15 Catalina sudo /Applications/Install macOS Catalina.app/Contents/Resources/createinstallmedia --volume /Volumes/MyVolume
10.14 Mojave sudo /Applications/Install macOS Mojave.app/Contents/Resources/createinstallmedia --volume /Volumes/MyVolume
10.13 High Sierra sudo /Applications/Install macOS High Sierra.app/Contents/Resources/createinstallmedia --volume /Volumes/MyVolume
10.12 Sierra sudo /Applications/Install macOS Sierra.app/Contents/Resources/createinstallmedia --volume /Volumes/MyVolume --applicationpath /Applications/Install macOS Sierra.app --nointeraction
If an error occurs with the above command,
execute the following command in advance,
and then try again.sudo plutil -replace CFBundleShortVersionString -string "12.6.03" /Applications/Install macOS Sierra.app/Contents/Info.plist
10.11 El Capitan sudo /Applications/Install OS X El Capitan.app/Contents/Resources/createinstallmedia --volume /Volumes/MyVolume --applicationpath /Applications/Install OS X El Capitan.app
10.10 Yosemite sudo /Applications/Install OS X Yosemite.app/Contents/Resources/createinstallmedia --volume /Volumes/MyVolume --applicationpath /Applications/Install OS X Yosemite.app --nointeraction
10.9 Mavericks sudo /Applications/Install OS X Mavericks.app/Contents/Resources/createinstallmedia --volume /Volumes/MyVolume --applicationpath /Applications/Install OS X Mavericks.app --nointeraction
- ④
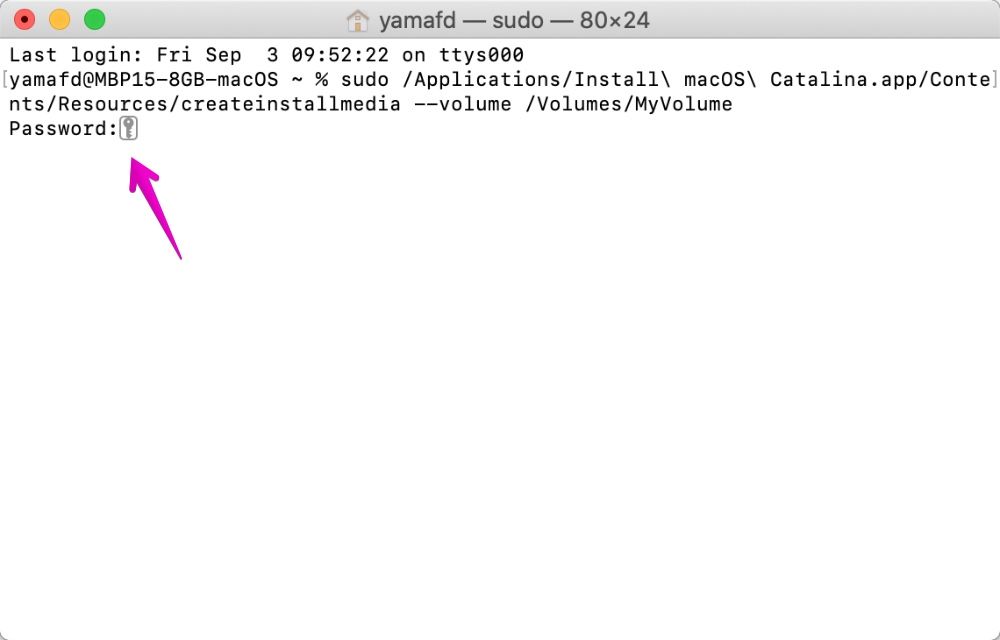
Copy and paste the command into “Terminal” and press enter on your keyboard to execute it.
At that time, you will be asked for the password, so enter the password you used to log in to your Mac and press enter.
Even if you press enter or enter the password, the screen display may not change, but it may change after a few minutes, so please wait for a while.
If the screen still does not change, please check the items in the red “CHECK” box after this.
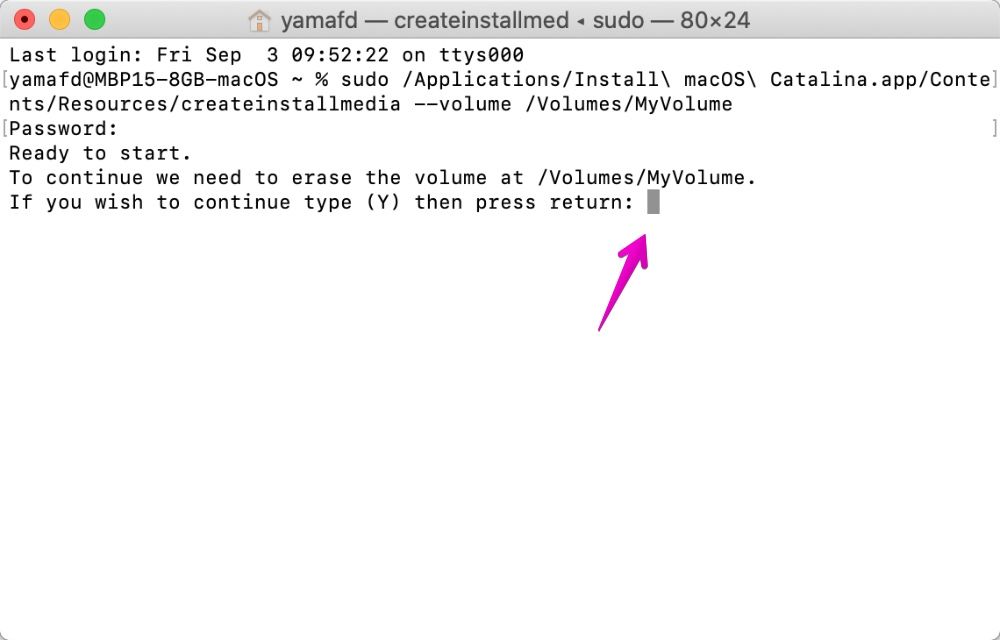
If you see a message like the one below, type Y on your keyboard.
If you wish to continue type (Y) then return:
If the command doesn’t work, try the following:
- Unmount the USB flash memory and try connecting it again
- Make sure that you haven’t made a mistake in copying and pasting the command
- Exit “Terminal” and try again
- Initialize the USB flash memory again, unmount it, and then try connecting it again
- Try restarting your Mac
- ⑤
During the process, the progress is displayed as a percentage as shown in the screen below.
It will take 20 to 30 minutes to complete, so wait for it to complete.
It’s not that heavy (a few percent of CPU usage), so you can do other work while it’s working.

- ⑥
When the process is done, exit Terminal and remove the USB flash memory from your Mac.
10.7 Lion and 10.8 Mountain Lion steps
- ①
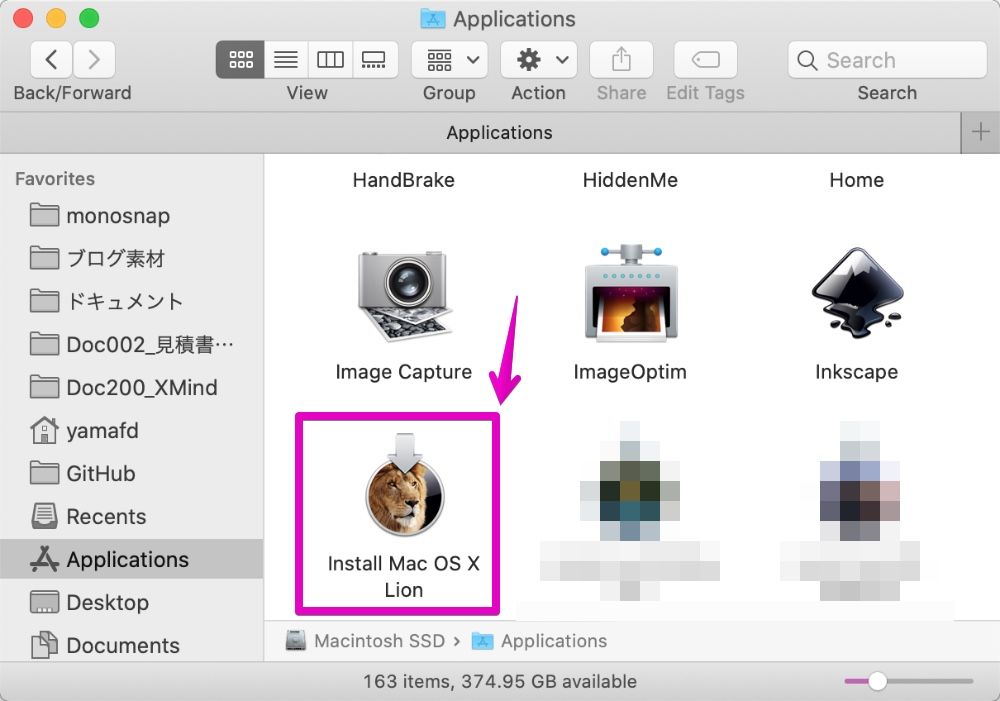
In the Finder, make sure the macOS (OS X) installer is in the “Applications” folder.
If it is in another folder or external HDD, move it.
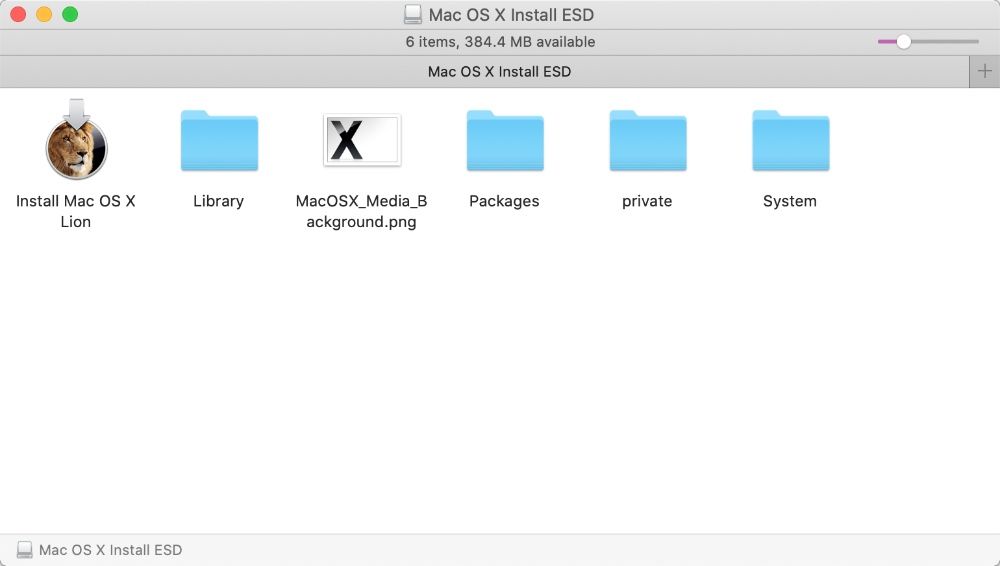
In the figure below, “Install Mac OS X Lion” is the installer.
- ②
Next, in Finder, start “Terminal” in the “Applications” – “Utilities” folder.
- ③
When “Terminal” starts, copy and paste the command to create a USB flash memory for macOS installation.
All commands differ depending on the OS version, so select from the following and copy.
There are “” characters in the middle of the commands, which are called the “escape character”.
The reason for using “” is to recognize half-width space as a half-width character.
If there is no “”, the half-width space will be recognized as a word delimiter instead of a character.OS version Command 10.8 Mountain Lion hdiutil convert -format UDRW -o ~/OsInstall.img /Applications/Install OS X Mountain Lion.app/Contents/SharedSupport/InstallESD.dmg
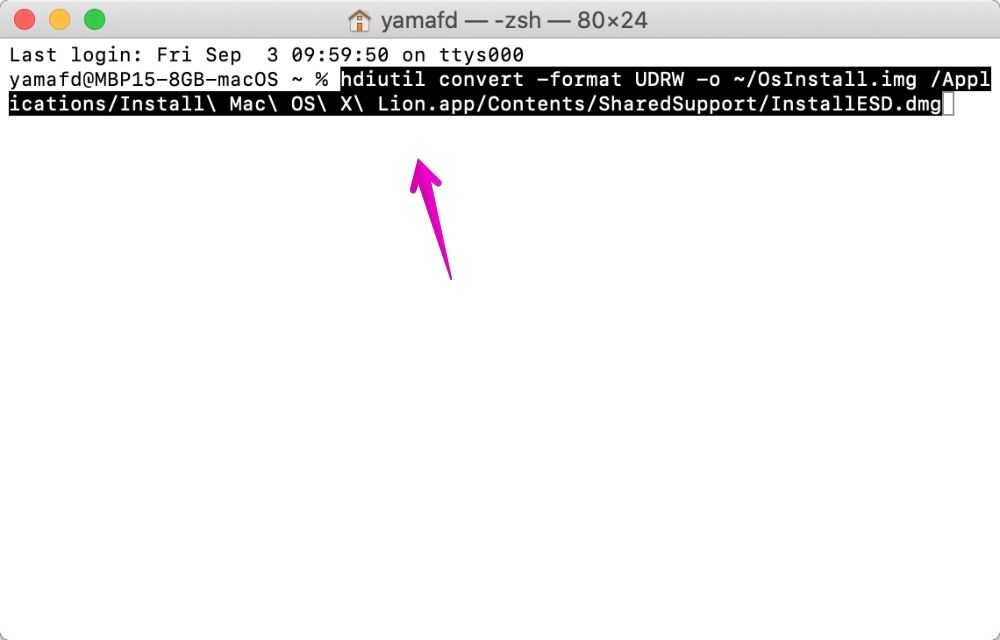
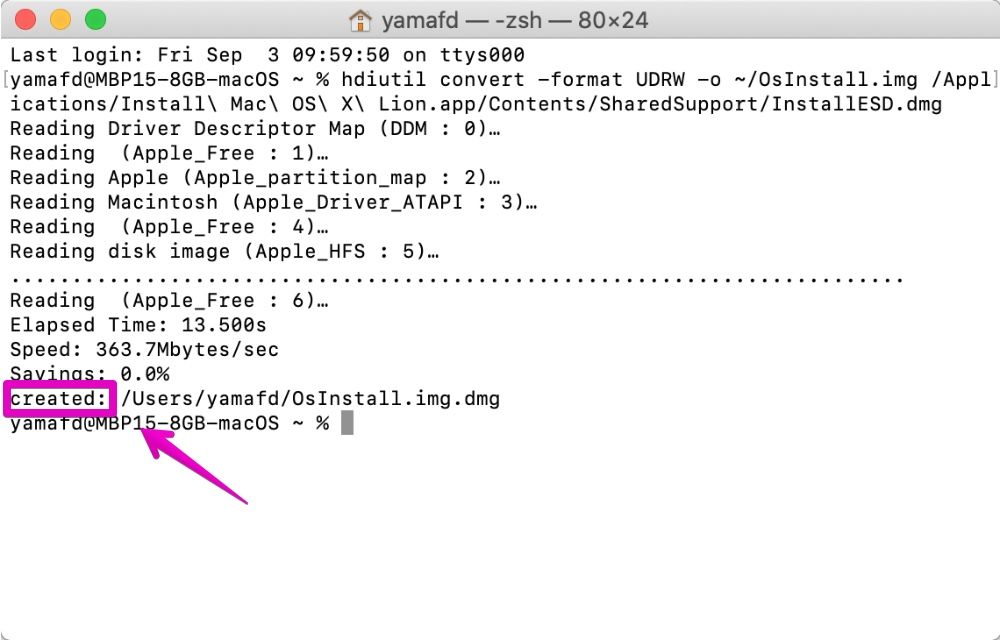
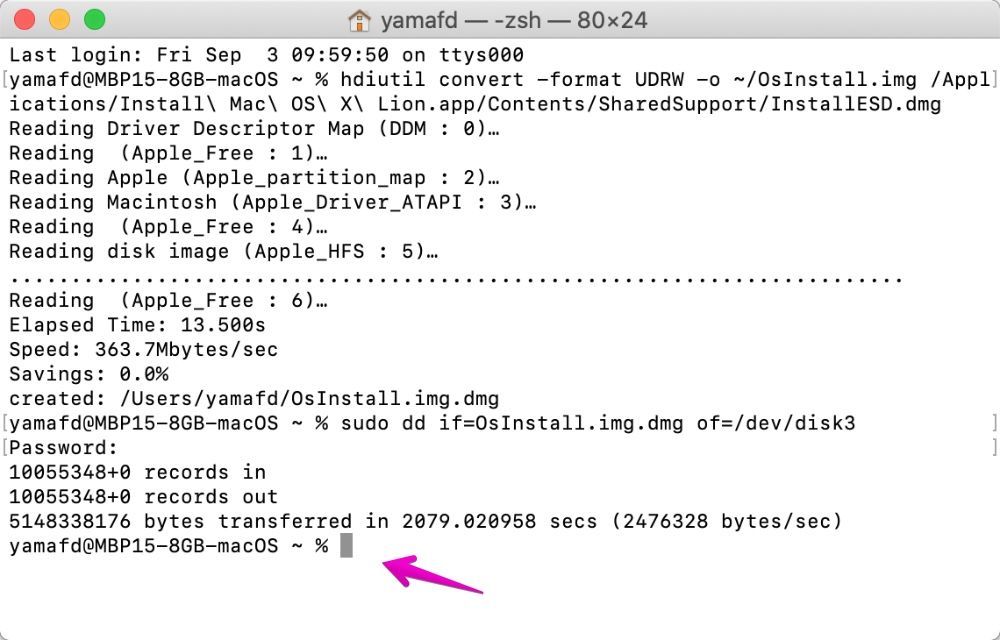
10.7 Lion hdiutil convert -format UDRW -o ~/OsInstall.img /Applications/Install Mac OS X Lion.app/Contents/SharedSupport/InstallESD.dmg
- ④
Copy and paste the command into “Terminal” and press enter on your keyboard to execute it.
The processing time should be less than a minute.
- ⑤
When “created” is displayed and the command prompt screen (command input screen) changes as shown below, the creation of the OS installation image file is complete.
- ⑥
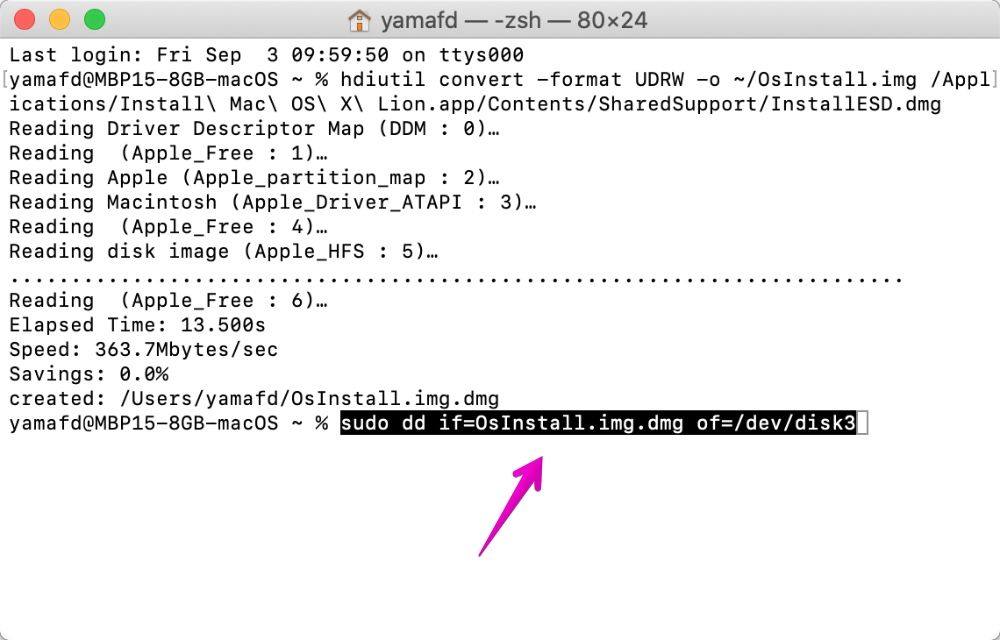
Next, create a USB flash memory for OS installation from the image file for OS installation that you just created.
Copy and paste the following command to the “Terminal” screen and execute it. (Press the enter key on the keyboard)
Please replace the number part of “disk3” with the number of “physical disk number” confirmed earlier.
sudo dd if=OsInstall.img.dmg of=/dev/disk3
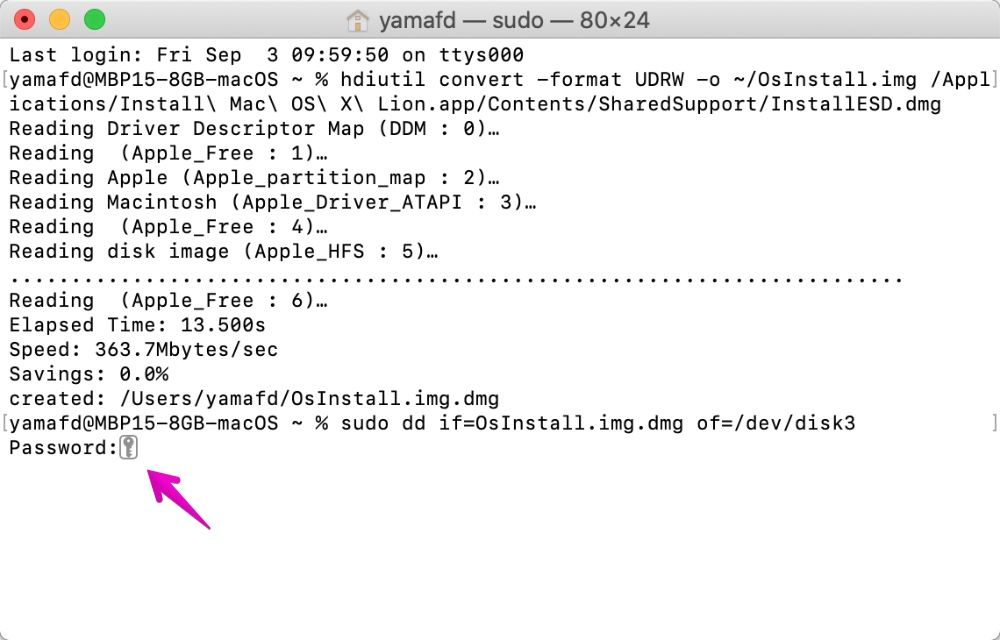
At that time, you will be asked for the password, so enter the password you used to log in to your Mac and press enter.
Even if you press enter or enter the password, the screen display may not change, but it may change after a few minutes, so please wait for a while.
If the screen still does not change, please check the items in the red “CHECK” box after this.
If the command doesn’t work, try the following:
- Unmount the USB flash memory and try connecting it again
- Make sure that you haven’t made a mistake in copying and pasting the command
- Exit “Terminal” and try again
- Initialize the USB flash memory again, unmount it, and then try connecting it again
- Try restarting your Mac
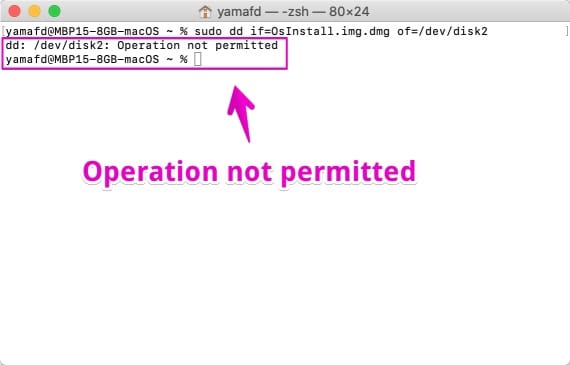
If “Resource busy” or “Operation not permitted” is displayed, the USB flash memory for OS installation is still mounted, so unmount it and then execute the copied command again.

- ⑦
You may be worried because the screen during the process is not displayed, but it will take about 1 hour to complete the process, so leave it for a while.
When the process is completed, the files in the USB memory will be listed as shown below.
Furthermore, the “Terminal” screen changes to the command prompt screen (command input screen) as shown below.
Operation check
Check the operation to see if it can be booted with the created USB memory for OS installation.
- ①
With the power of the Mac main unit turned off, connect the USB flash memory for OS installation.
- ②
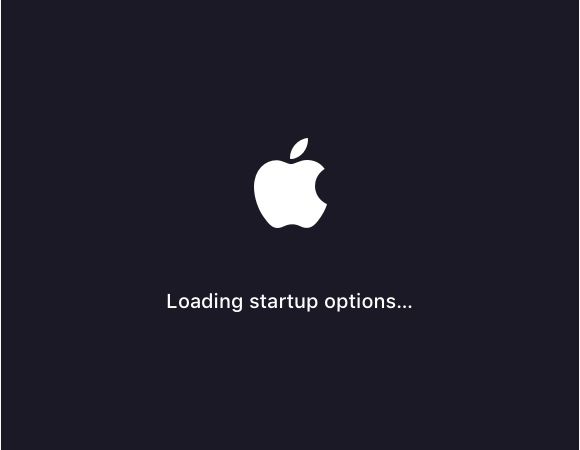
For Apple Silicon Macs, press and hold the power button and release the power button when “Loading boot options …” appears.
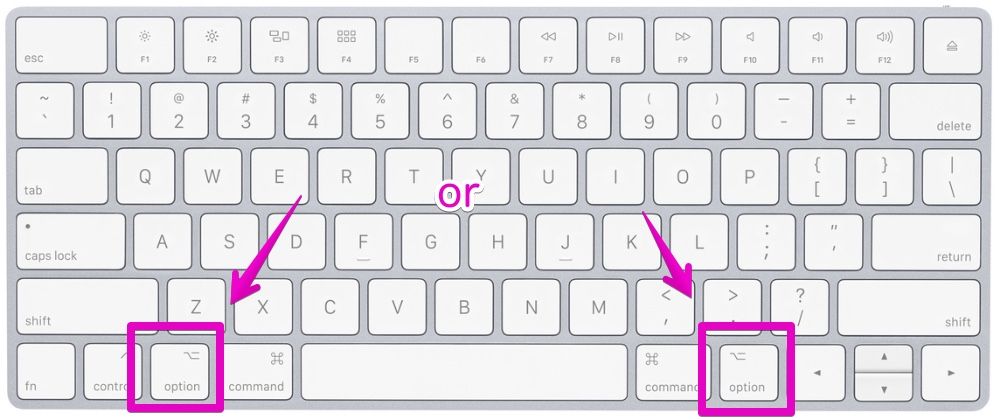
For Intel Macs, hold down the option ⌥ key on your Mac keyboard and turn on your Mac.
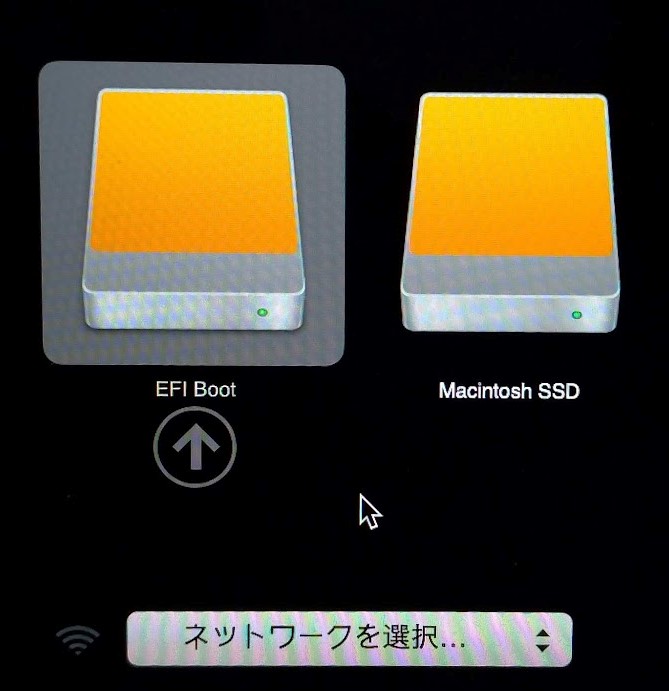
- ③
Hopefully you will see a screen where you can select a boot drive like the one below.
Reference information

This is the end of the article on this page.

コメント