
When you take a screenshot on your Mac, the image file in PNG format is usually saved on your desktop.
However, on macOS 10.14 Mojave oe later, it is possible to save directly to the genuine Mac application “Photos.app”.
This page will guide you through the process.
Operating environment
On macOS 10.14 Mojave or later, you can perform various operations immediately after taking a screenshot.
The methods presented on this page are limited on macOS 10.14 Mojave or later versions because they use that feature.
How to save screenshots to the “Photos.app”
From here, I will explain the specific procedure.
If you are unsure or uneasy about how to take screenshots, please read the following items first.
▶ On macOS 10.14 Mojave or later, a thumbnail of the screenshot image is displayed in the lower right corner of the screen for about 5 seconds immediately after taking a screenshot.
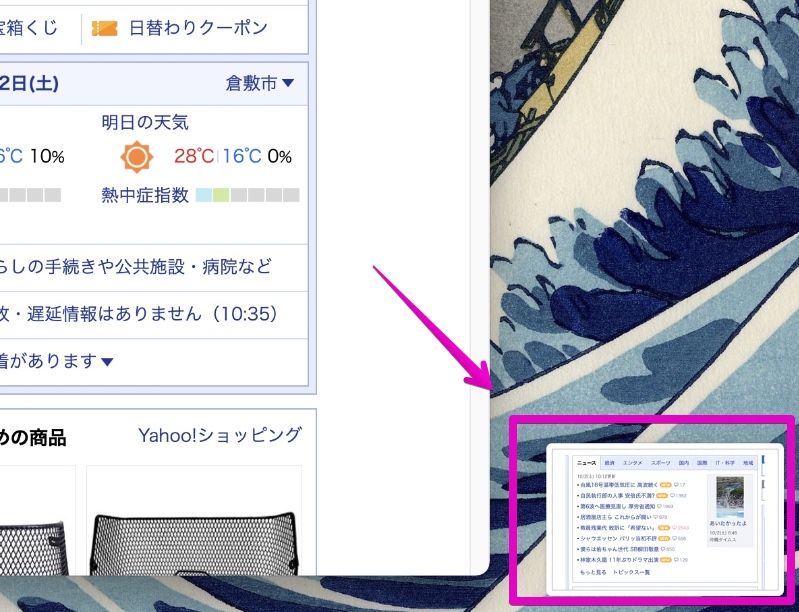
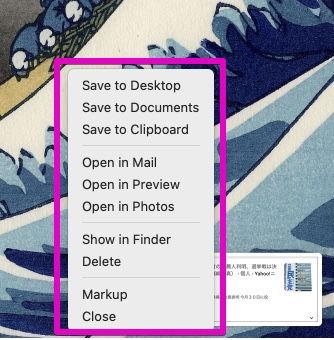
▶ Right-click on this thumbnail image to display menu items.
If you select “Open in Photos ” in this, the Apple genuine application “Photos.app” will start and the screenshot image will be loaded.
▶ After confirming that the screenshot image can be loaded, it is OK to finish “Photos.app”.
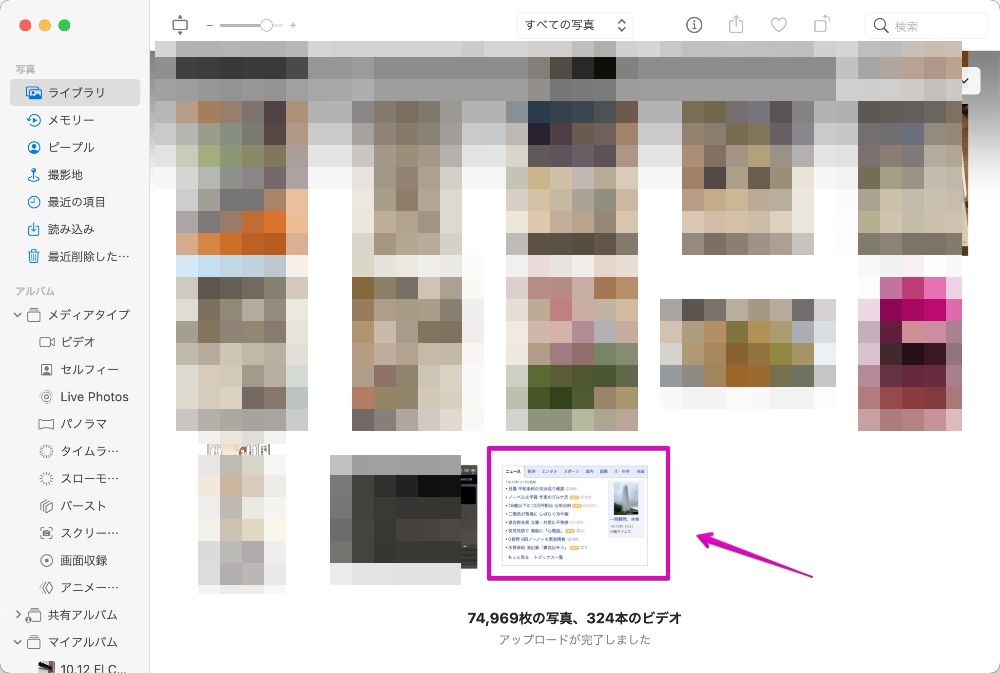

How to save screenshots to the “Photos.app”
Review keyboard shortcuts for Mac screenshots
The screenshot feature on Mac has five basic keyboard shortcuts:

It’s the same up to the first shift + command ⌘ , but the numbers and space that follow are different!

Macs with a touch bar are limited to some MacBook Pros.
Moreover, the touch bar is being abolished from Apple Silicon Mac.
Therefore, if you know only the four items ① to ④, there is no problem.
| Content | Operation |
|---|---|
| ① Capture full screen | shift + command ⌘ + 3 |
| ② Capture in any area | shift + command ⌘ + 4 |
| ③ Capture a windows or menu | shift + command ⌘ + 4 and space |
| ④ Launch “Screenshot.app” (macOS 10.14 Mojave or later) | shift + command ⌘ + 5 |
| ⑤ Capture touch bar (Only touch bar models) | shift + command ⌘ + 6 |
To interrupt the keyboard shortcut, press the esc key.

Whenever you want to quit screenshot, you can stop with this.
| Item | keyboard shortcut |
|---|---|
| Interrupt screenshot | esc |

So far, it’s basic, so you should remember it even if it’s a little troublesome.
It makes you happier to remember.
Conclusion
So far, we have shown you how to save screenshots to the “Photos.app”.
If you save it in the “Photos” app, it is very convenient to load images on other Macs, iPhones and iPads with iCloud sync.
You can read more about photo synchronization in the following article.
Reference information

This is the end of this article.


コメント