

Sometimes you want to take a screenshot on your Mac and use it in other apps.
Here’s how to copy it directly to the clipboard and paste it in another app without having to save it to an image file.
I will also show you how to check the contents of the clipboard.
Review keyboard shortcuts for Mac screenshots
The screenshot feature on Mac has five basic keyboard shortcuts:
It’s the same up to the first shift + command ⌘, but the Numbers and space that follow are different!
Macs with a touch bar are limited to some MacBook Pros.
Moreover, there is a move to abolish the touch bar from Apple Silicon Mac.
Therefore, if you hold down only the four items ① to ④, there is no problem.
| Item | Keyboard shortcut |
|---|---|
| ① Capture full screen | shift + command ⌘ + 3 |
| ② Capture in any area | shift + command ⌘ + 4 |
| ③ Capture a window or menu | shift + command ⌘ + 4
and space |
| ④ Launch “Screenshot.app”
(macOS 10.14 Mojave or later) | shift + command ⌘ + 5 |
| ⑤ Capture touch bar
(Only touch bar models) | shift + command ⌘ + 6 |
To interrupt the keyboard shortcut, press the esc key.
Whenever you think “screenshots are gone”, you can stop with this.
| Item | keyboard shortcut |
|---|---|
| Interrupt screenshot | esc |
So far, it’s basic, so you should remember it even if it’s a little troublesome.
It makes you happier to remember.
Comparison of the two methods and advantages / disadvantages

Here, I have introduced two methods, but let’s compare them together with their advantages and disadvantages.
| Method | Advantages | Disadvantages |
|---|---|---|
| ① How to copy to clipboard when taking a screenshot | ・Fewer operating steps ・Possible on all macOS | ・Nothing special |
| ② How to copy to clipboard immediately after taking a screenshot | ・Can be copied even after taking a screenshot | ・Possible on macOS 10.14 Mojave or later |
As shown in the table, ② can only be used after 10.14 Mojave, so it’s a good idea to remember ① as a basis.
I think it is recommended to use ② when you change your mind immediately after taking a screenshot.
① How to copy to clipboard when taking a screenshot

At the beginning, I reviewed the keyboard shortcuts in the screenshots.
In addition, at timing to take a screenshot, pressing control ⌃ will copy the file directly to the clipboard instead of saving it.
Pay attention to the “at timing to take a screenshot”!
In the table below, ①, ② and ⑤ are keyboard shortcuts and shooting at the same time.
Only ③, the timing of shooting is off.
| Item | Keyboard shortcut |
|---|---|
| ① Capture full screen | shift + command ⌘ + 3 + control ⌃ |
| ② Capture in any area | shift + command ⌘ + 4 + control ⌃ |
| ③ Capture a window or menu | shift + command ⌘ + 4 and space ↓ at the timing to capture, press control ⌃ together |
| ④ Launch “Screenshot.app”
(macOS 10.14 Mojave or later) | – |
| ⑤ Capture touch bar
(Only touch bar models) | shift + command ⌘ + 6 + control ⌃ |
If you want to have no shadows and no margins in the screenshot, you can also press option ⌥ at the same time.
However, if you try to remember it all at once, your head will puncture, so you should get used to it slowly.
| Item | Keyboard shortcut |
|---|---|
| Take a screenshot with no shadow | Press option ⌥ at the same time |
【With shadow】

【No shadow】
This is the end of the explanation of “① How to copy to clipboard when taking a screenshot”.
② How to copy to clipboard immediately after taking a screenshot

This method is only valid on macOS 10.14 Mojave or later.
Below are the steps to copy.
▶ On macOS 10.14 Mojave or later, a thumbnail of the screenshot image is displayed in the lower right corner of the screen for about 5 seconds immediately after taking a screenshot.
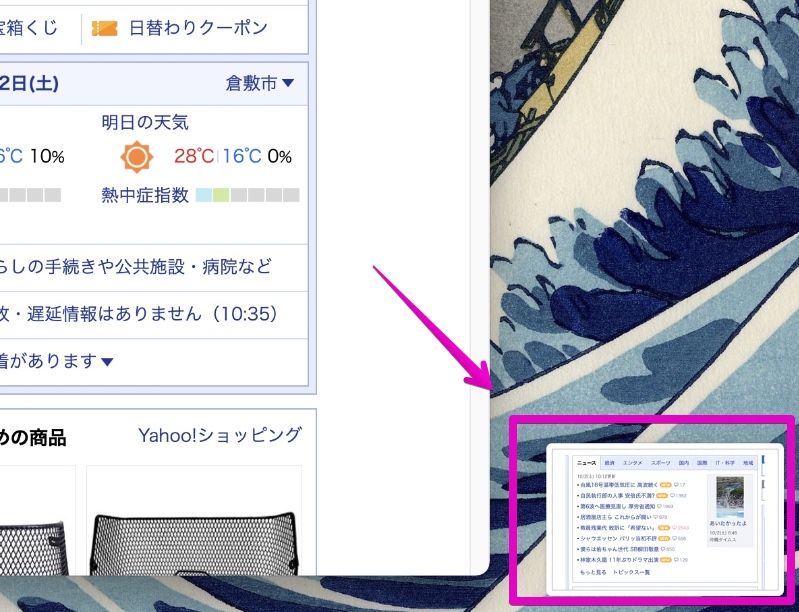
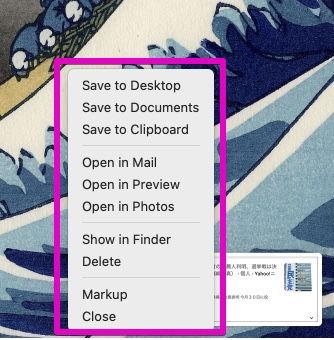
▶ Right-click on this thumbnail image to see the menu items.
If you select “Save to clipboard”, the file will be saved to the clipboard without being saved.
This is the end of the explanation of
How to check the contents of the clipboard?
You can check what you have copied immediately after copying it to the clipboard by following the steps below.
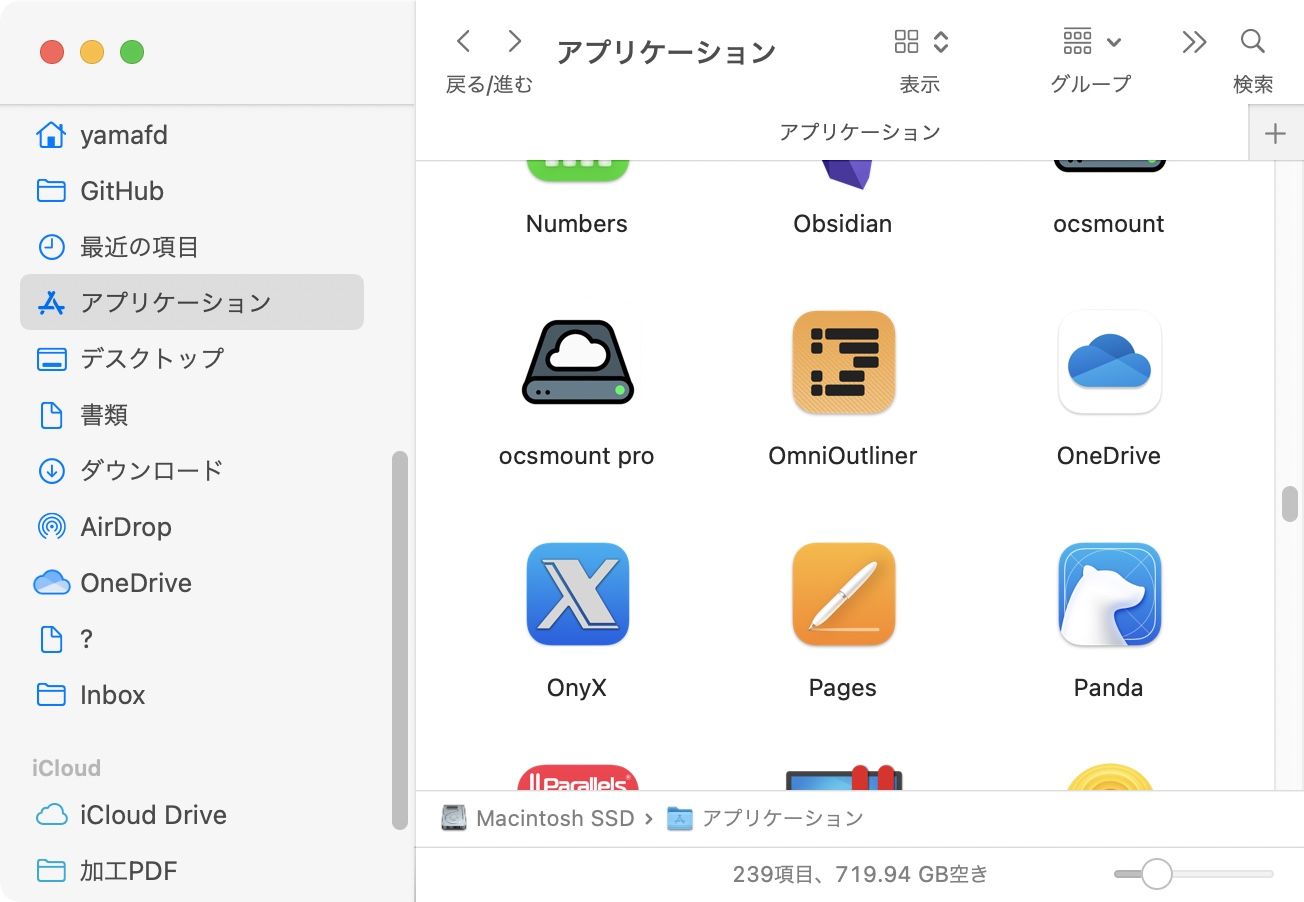
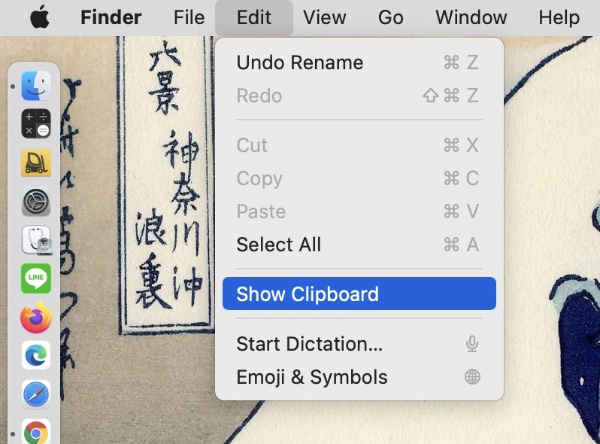
▶ Click the Finder icon in the Dock to bring the Finder to the front.

▶ From the menu bar, select “Edit”-> “Show Clipboard”.
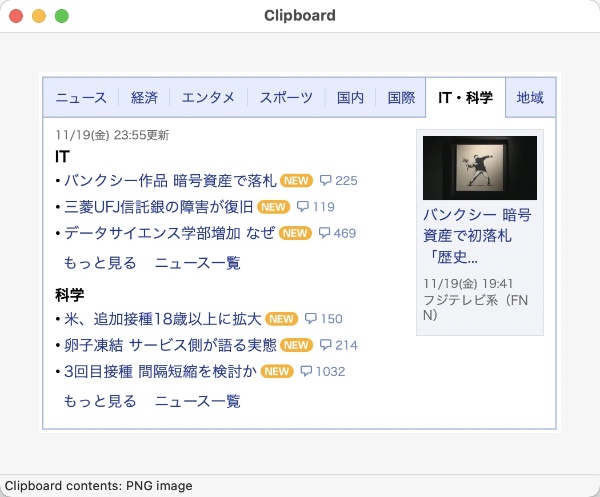
▶ The contents of the clipboard are displayed as shown.
This is the end of the explanation of
Conclusion
I think there are many opportunities to copy and paste, such as taking a screenshot on a Mac and pasting it into another app.
If you use the method on this page, you can save labor in the operation procedure and prevent the desktop from being flooded with screenshot images, so please learn it.
In addition, there is a summary article of “Clipboard” as a related article on this site.
The contents include the introduction of “Universal Clipboard” that displays and erases the contents of the clipboard, sharing the clipboard between terminals, and the introduction of applications that can manage the history of the clipboard.
Please see the link below.

Reference information

This is the end of this article.
コメント