

Here’s how to crop a part of the screen when taking a screenshot on a Mac.
Here, the two methods are explained in detail with illustrations.
I also compare the advantages and disadvantages.
Screenshot cropping, comparison of the two methods and advantages / disadvantages

Here, I have introduced two methods, but let’s compare them together with their advantages and disadvantages.
| Method | Advantages | Disadvantages |
|---|---|---|
| ① How to crop a screenshot when taking it | ・Fewer operating steps ・Possible on all macOS | ・Nothing special |
| ② How to crop a screenshot after taking it | ・Can be copied even after taking a screenshot | ・Possible on macOS 10.14 Mojave or later |
As shown in the table, ② can only be used after 10.14 Mojave, so it’s a good idea to remember ① as a basis.
② is recommended to use when you change your mind immediately after taking a screenshot, or when you want to insert characters at the same time as cropping.
① How to crop a screenshot while taking it

Below are the steps for cropping.
▶ If you press the following keys on your Mac at the same time, the screen will change to a screenshot while cropping.
- shift + command ⌘ + 4
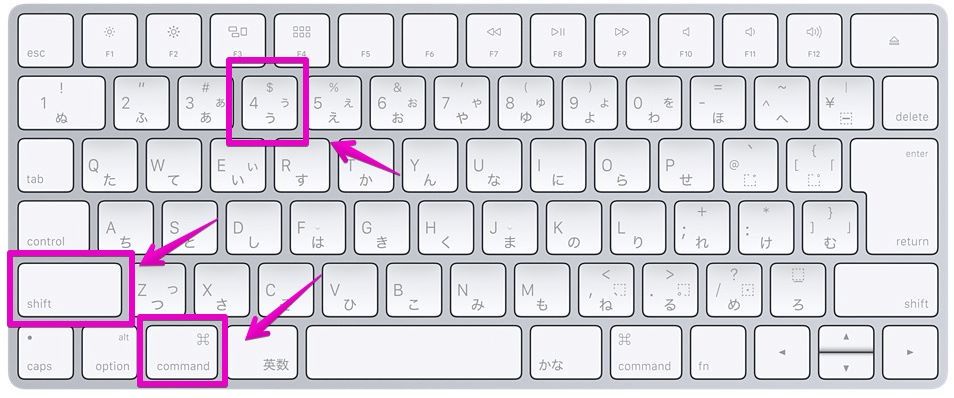
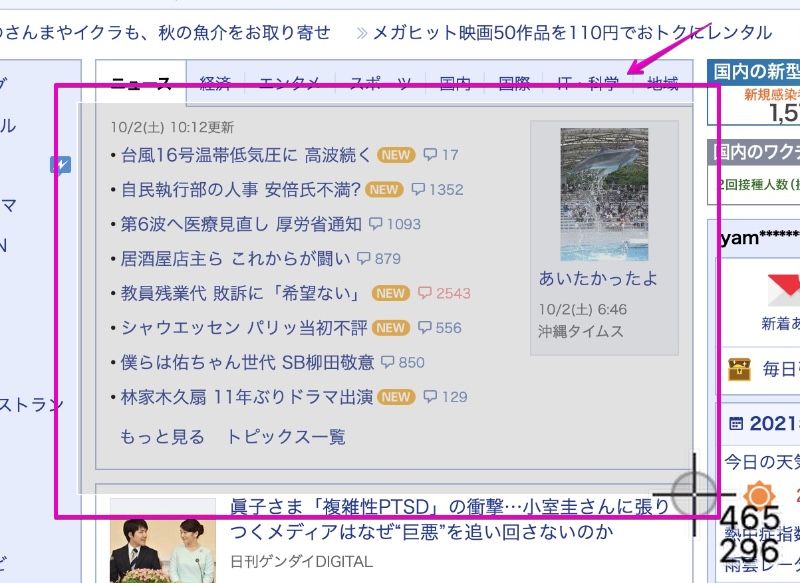
▶ When the cursor with crosses and numbers is displayed as shown in the figure, move the cursor to the upper left, lower left, upper right, or lower right position of the range you want to capture in the screenshot.

▶ After moving the cursor, click and hold the mouse or trackpad and drag to specify the range to start the capture.
The area where the range is specified is displayed in a different color as shown in the figure.
When you have finished specifying the range, release the finger that you have clicked.
By the way, if you want to stop the screenshot, press esc on your keyboard.
▶ You will hear a clicking sound when you press the shutter.
This will save the cropped image.
This is the end of the explanation, “① How to crop a screenshot while taking it”.
② How to crop a screenshot after taking it

This method is only valid on macOS 10.14 Mojave or later.
Below are the steps to copy.
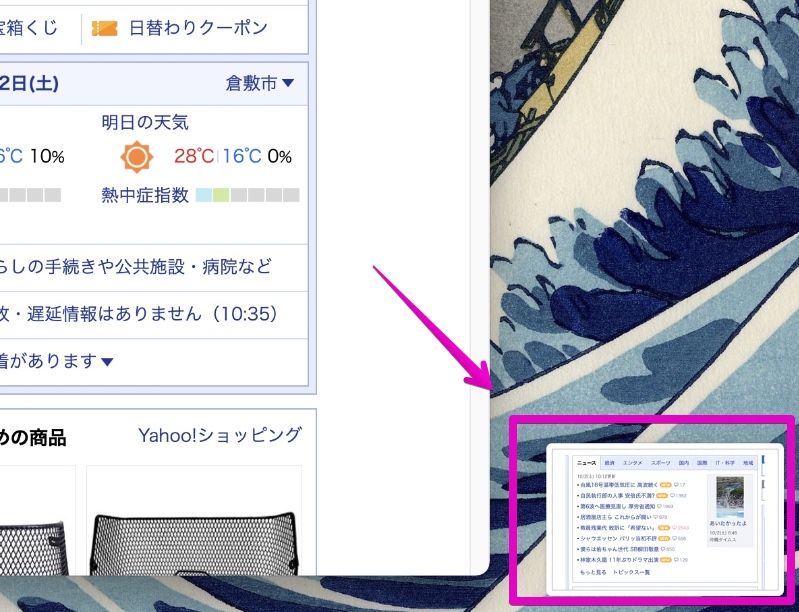
▶ On macOS 10.14 Mojave or later, a thumbnail of the screenshot image is displayed in the lower right corner of the screen for about 5 seconds immediately after taking a screenshot.
Click this thumbnail image to move to the edit screen.
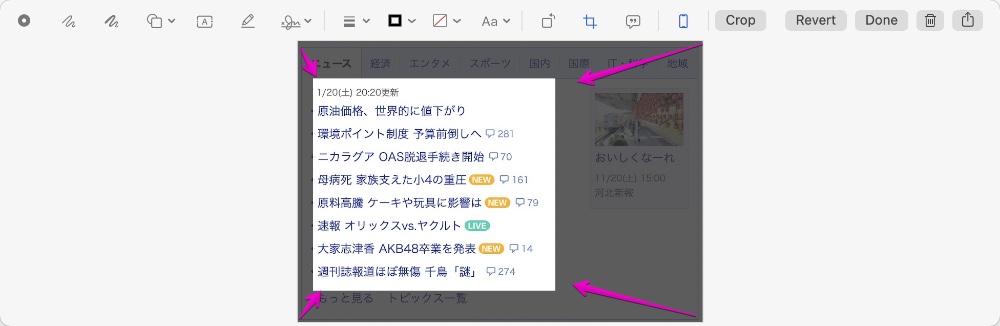
▶ Did the edit screen appear as shown in the figure?
The icon is displayed at the top of the screen, but clicking the icon pointed to by the arrow in the figure switches to the cropping screen.
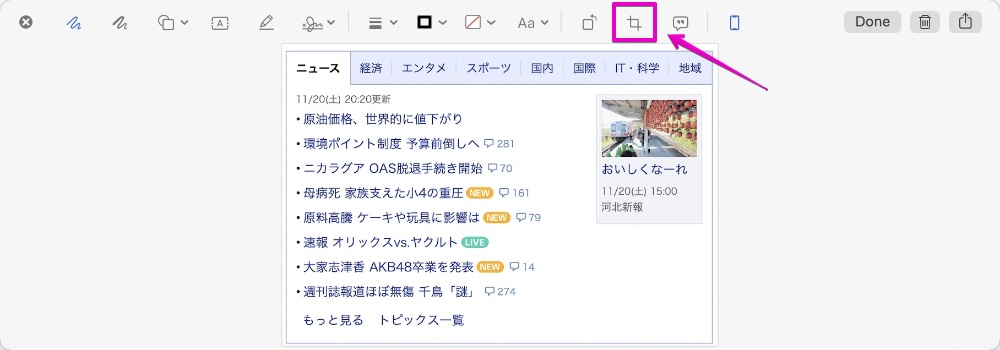
It’s a little small and hard to see, so I enlarged the icon.
Click this icon.

▶ As shown in the figure, drag from the four corners of the image to determine the area to be cropped.
The bright part of the display is the cut-out part, and the dark part is the cut-off part.
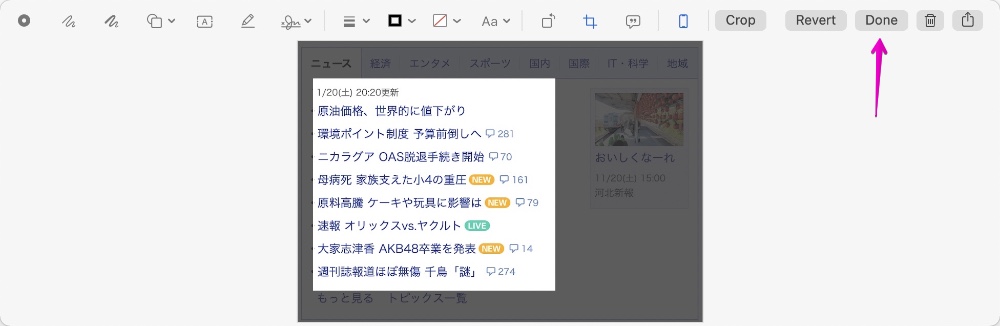
▶ After deciding the area to cut out, click the “Crop” button.

▶ To save and exit, click the “Finish” button.
This will save the cropped image and close the edit screen.
▶ When you checked the saved image, it was cropped as shown in the figure.

This is the end of the explanation, “② How to crop a screenshot after taking it”.
Conclusion
The Mac has a lot of screenshot features that are available by default.
In addition to the cropping introduced on this page, the following links introduce basic screenshot functions.
Reference information


This is the end of this article.
コメント