
I replaced the HDD of my MacBook (13-inch, Late 2009), so I will explain the procedure at that time in detail with photos.
In these models, the CPU is Core 2 Duo and the power is insufficient, but the memory can be expanded to 8GB or more and it can be used up to macOS 10.13 High Sierra, so it can be used normally if it is not heavy processing.
Also, the design is pop and HDD / SSD replacement is relatively easy, so if you have a model that you are not using, why not try modifying it as a second machine?
Advantages and disadvantages (risks) of replacing the iMac internal HDD
Advantages
- The model introduced on this page is relatively easy to replace the HDD.
The model introduced on this page has relatively high performance among polycarbonate MacBook series. - Even if the HDD breaks down, you can repair it yourself at low cost.
- It can be replaced with a recent HDD that has a larger capacity, lower heat generation, and less noise than the originally built-in HDD.
- If you replace it with SSD, the operation speed will be faster and the number of failures will be less than HDD.
Disadvantages(Risks)
- Since it is a Core 2 Duo generation Mac released from 2009 to 2010, performance can not be expected excessively
Target MacBook model
This is a list of Mac models that can replace HDD / SSD by the method explained on this page.
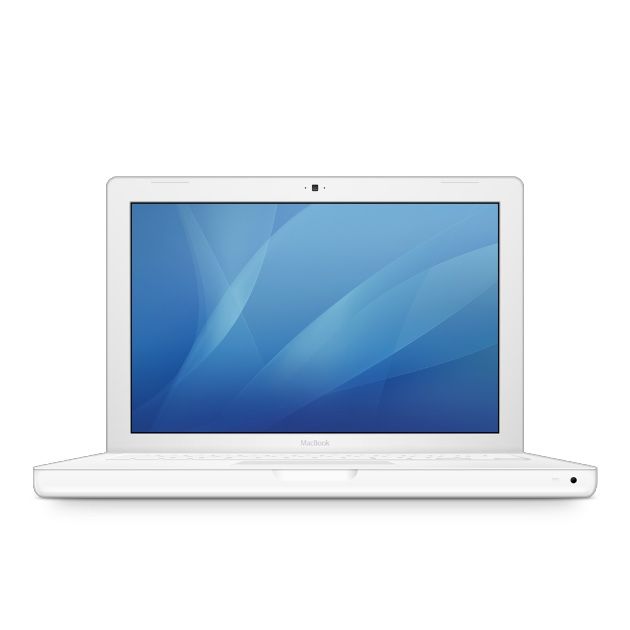
What they have in common in appearance is the body of white polycarbonate (reinforced plastic).
When the main body is turned over, the entire back surface becomes a single plate.
| Introduced | Model | Min OS | Max OS |
| 2009 | MacBook (13-inch, Late 2009) | 10.6.1 | 10.13.6 |
| 2010 | MacBook (13-inch, Mid 2010) | 10.6.3 | 10.13.6 |
| End of list |
Regarding how to check the model (model), if you have OS X 10.7 Lion or later, you can display it from “About this Mac” in the Apple menu.
The following is the confirmation method for OS X 10.12 Sierra, but the procedure differs slightly depending on the OS version.
▶ Select “About This Mac” from the Apple menu
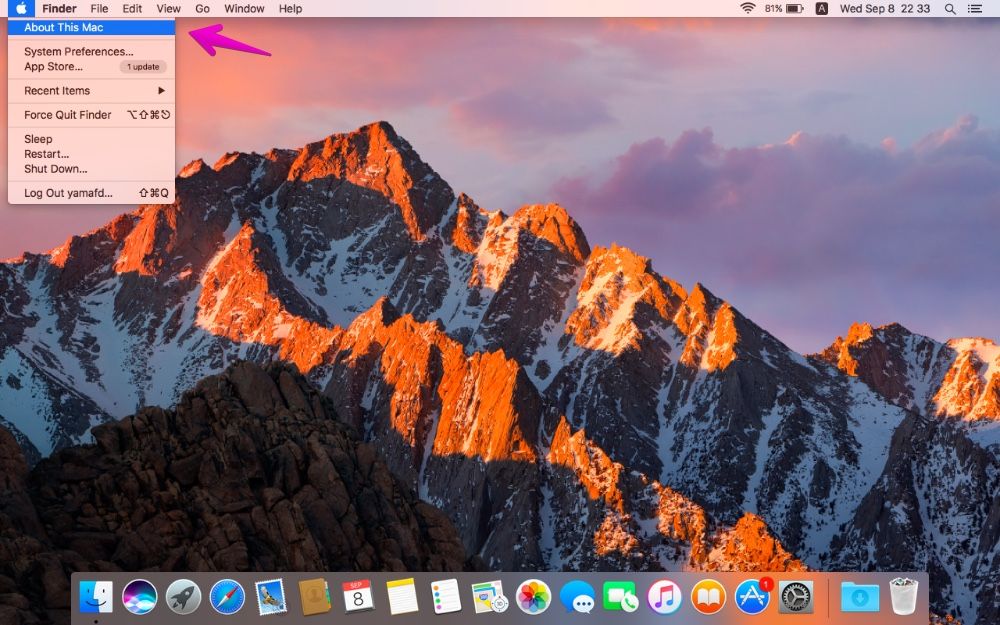
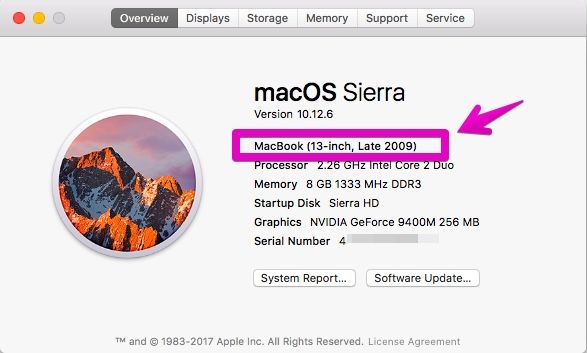
▶ Mac model is displayed in the arrow part of the figure.
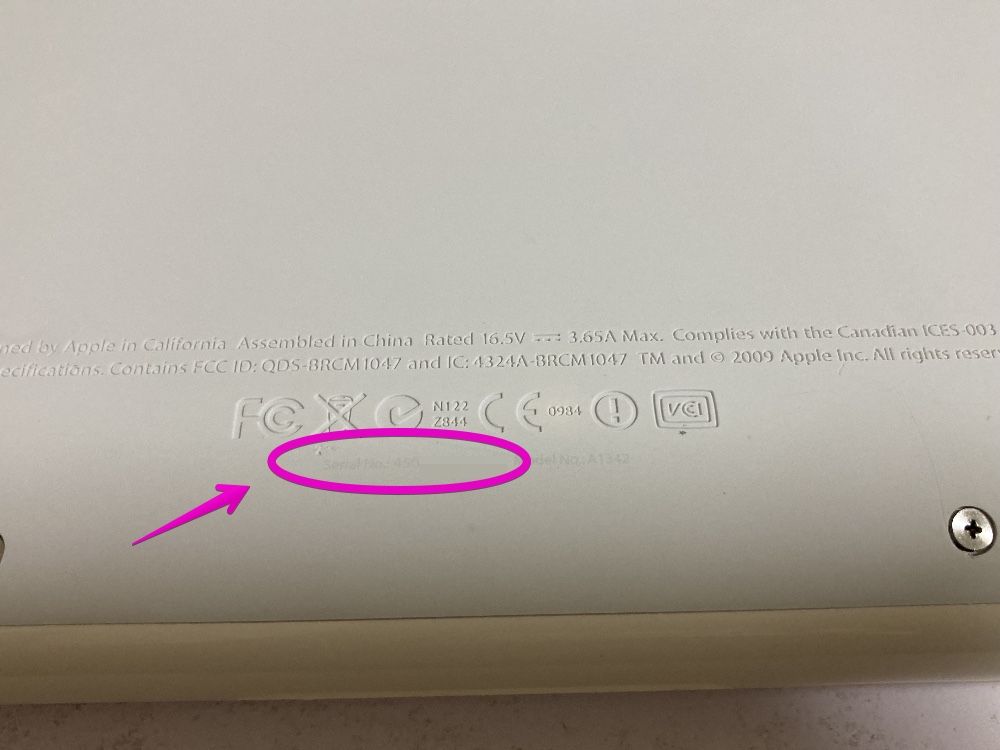
As another confirmation method, the MacBook body is turned over and the serial number is written on the front side, so you can search for the model on the following site based on it.

Predetermine how to restore the OS
The MacBook featured on this page comes with recovery discs.
After replacing the HDD, you need to use the recovery disc for a new installation, or prepare a separate installation disc or USB memory.
As a separate installation disc, you can purchase an OS X 10.6.3 disc from Amazon.com.
On the other hand, for OS X 10.7 Lion, you can either purchase a USB stick for installation from Apple.com or download the installation program yourself to create a USB stick.
USB memory can be purchased from the following Apple official website.

In addition, if you want to make your own USB memory, the following article will introduce the procedure.

About data backup
It is strongly recommended to back up your data in case the HDD replacement work fails.
As for the method, Time Machine, which is a standard Mac function, is easy and recommended.

In addition, you can see several other backup methods introduced from the following articles.

Required tools
Essential tools
The following 2 are essential because you can’t work without them.
- Phillips screwdriver (size is PH00?)
- T6 torx screwdriver
The size of a Phillips screwdriver is “PH00”, but it seems that the size may not fit depending on the screwdriver, so if possible, prepare multiple sizes of 2 to 3 types or more.
The T6 Torx screwdriver is a special screwdriver with a star-shaped tip, which probably few people have.
The name “Torx” is a registered trademark and is sometimes referred to as the “hex lobe”, but it is actually the same.
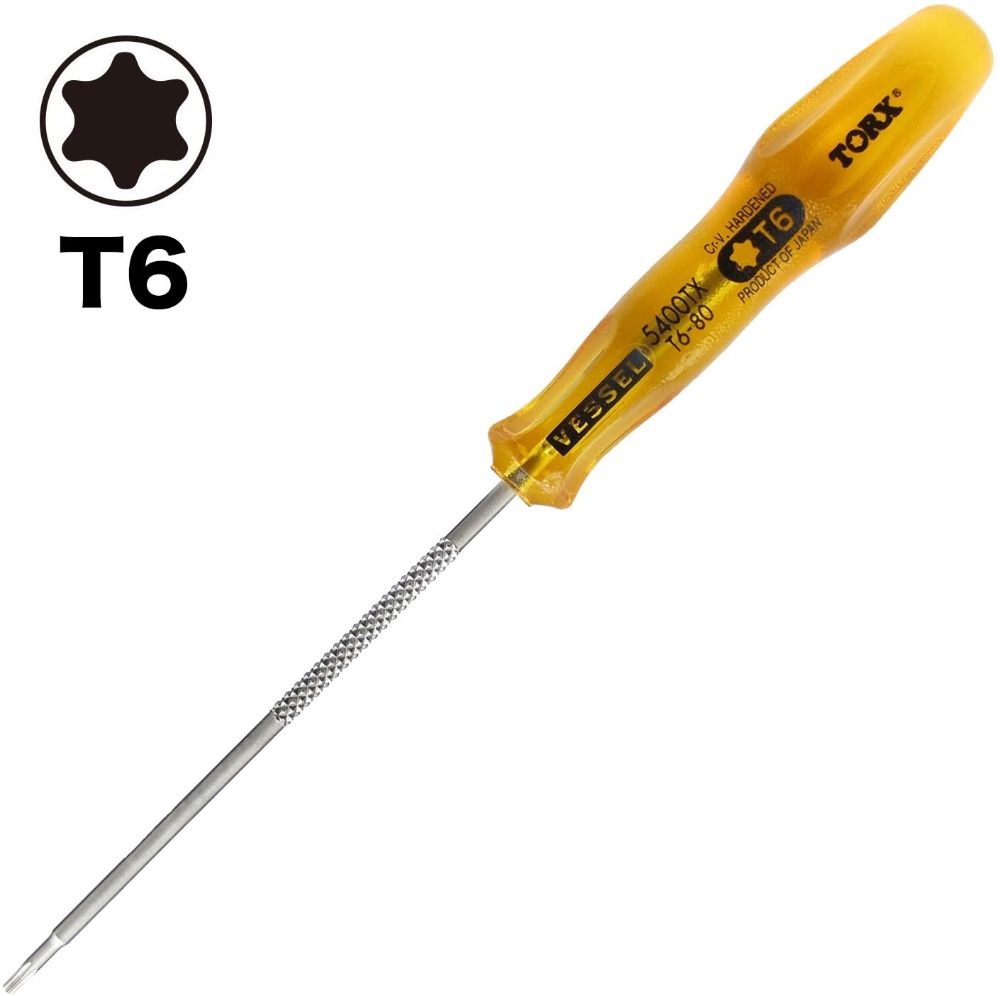
It is available at home improvement stores and Amazon.com.
T6 torx scrrewdriver
Usable HDD and SSD
As a replacement HDD or SSD, you can use a SATA format 2.5-inch drive.
Please note that 2.5 inch drives have multiple “thicknesses” and can be used with 7mm and 9.5mm.
On the other hand, if it is 12.5 mm or 15 mm, it cannot be stored in the MacBook, so it cannot be used.
The following are recommended products.
The maximum capacity is up to 1TB for SSD (some 2~4TB is very expensive), and up to 2TB for HDD, each of which can be selected from multiple options.
So, if speed is prioritized, select SSD, and if capacity is prioritized, select HDD.
If you’re wondering which one, SSD is recommended.
2.5 inch SSD
2.5 inch HDD
Procedure for disassembling MacBook and replacing HDD
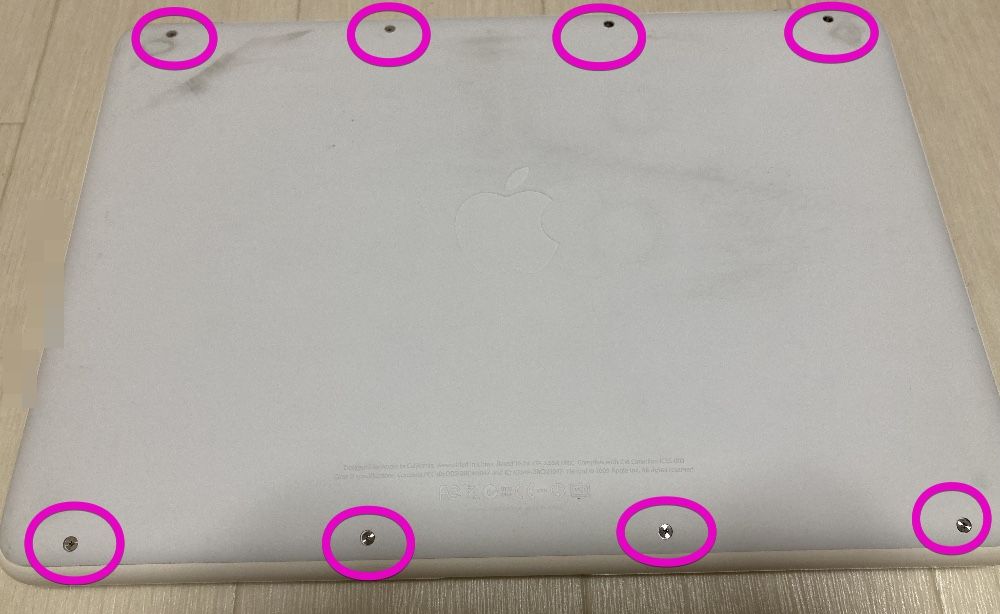
▶ Unplug the power cable from your MacBook, turn it over, and remove the eight PH00-sized Phillips screws circled in the figure.
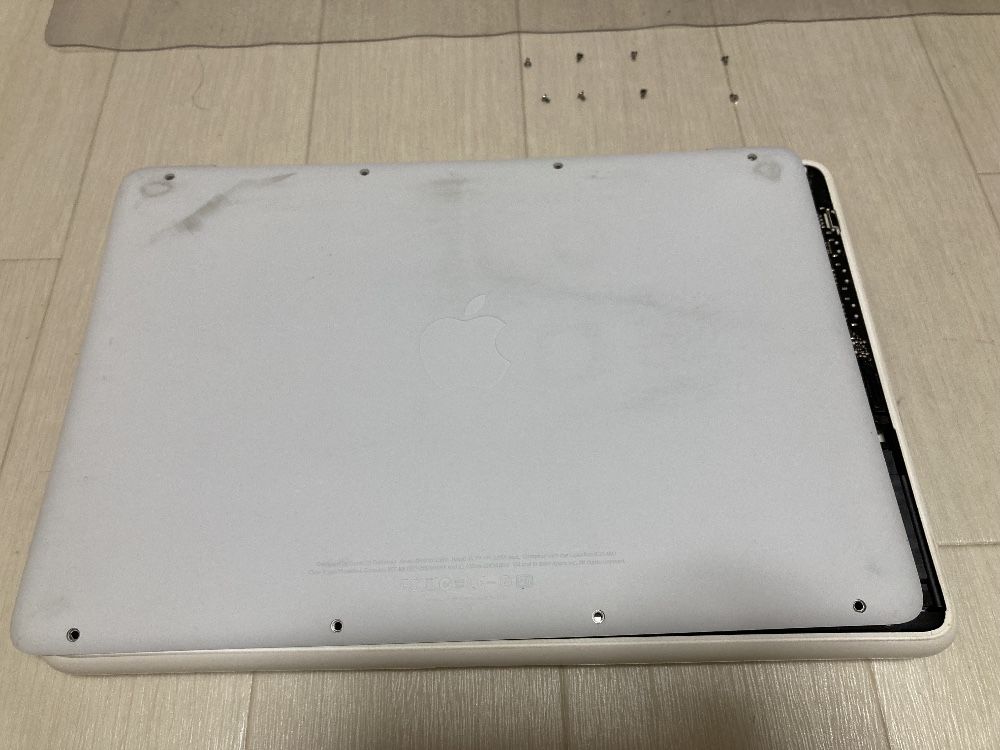
▶ After removing the screws, slowly remove the bottom case.
The trick to remove it is to carefully insert your finger into the gap between the bottom case and the main body.
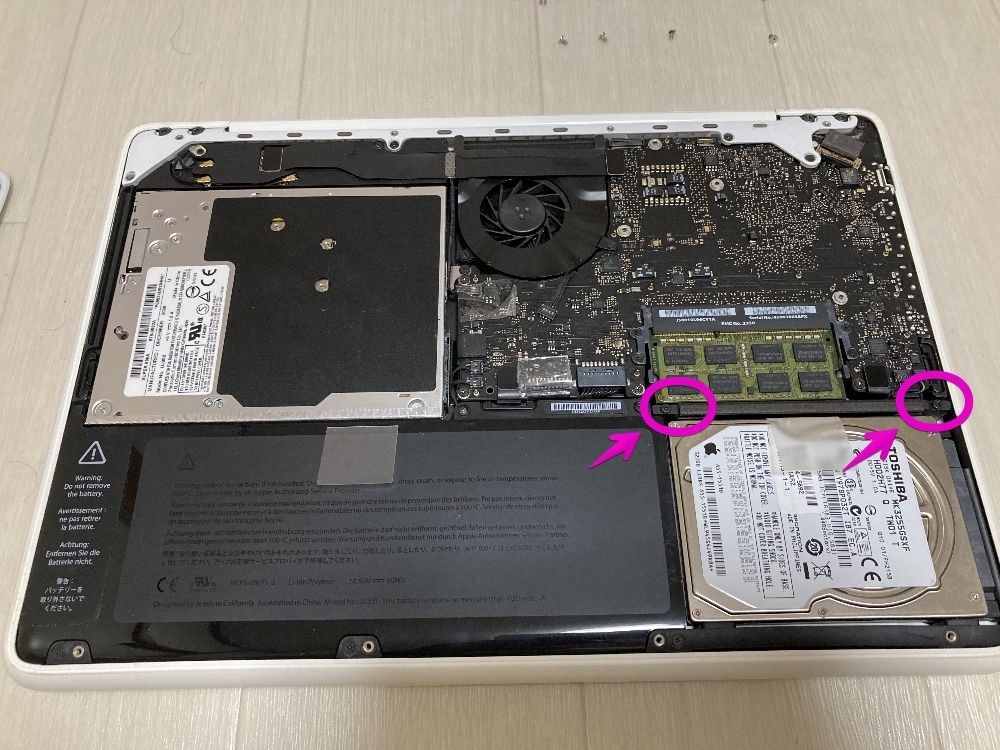
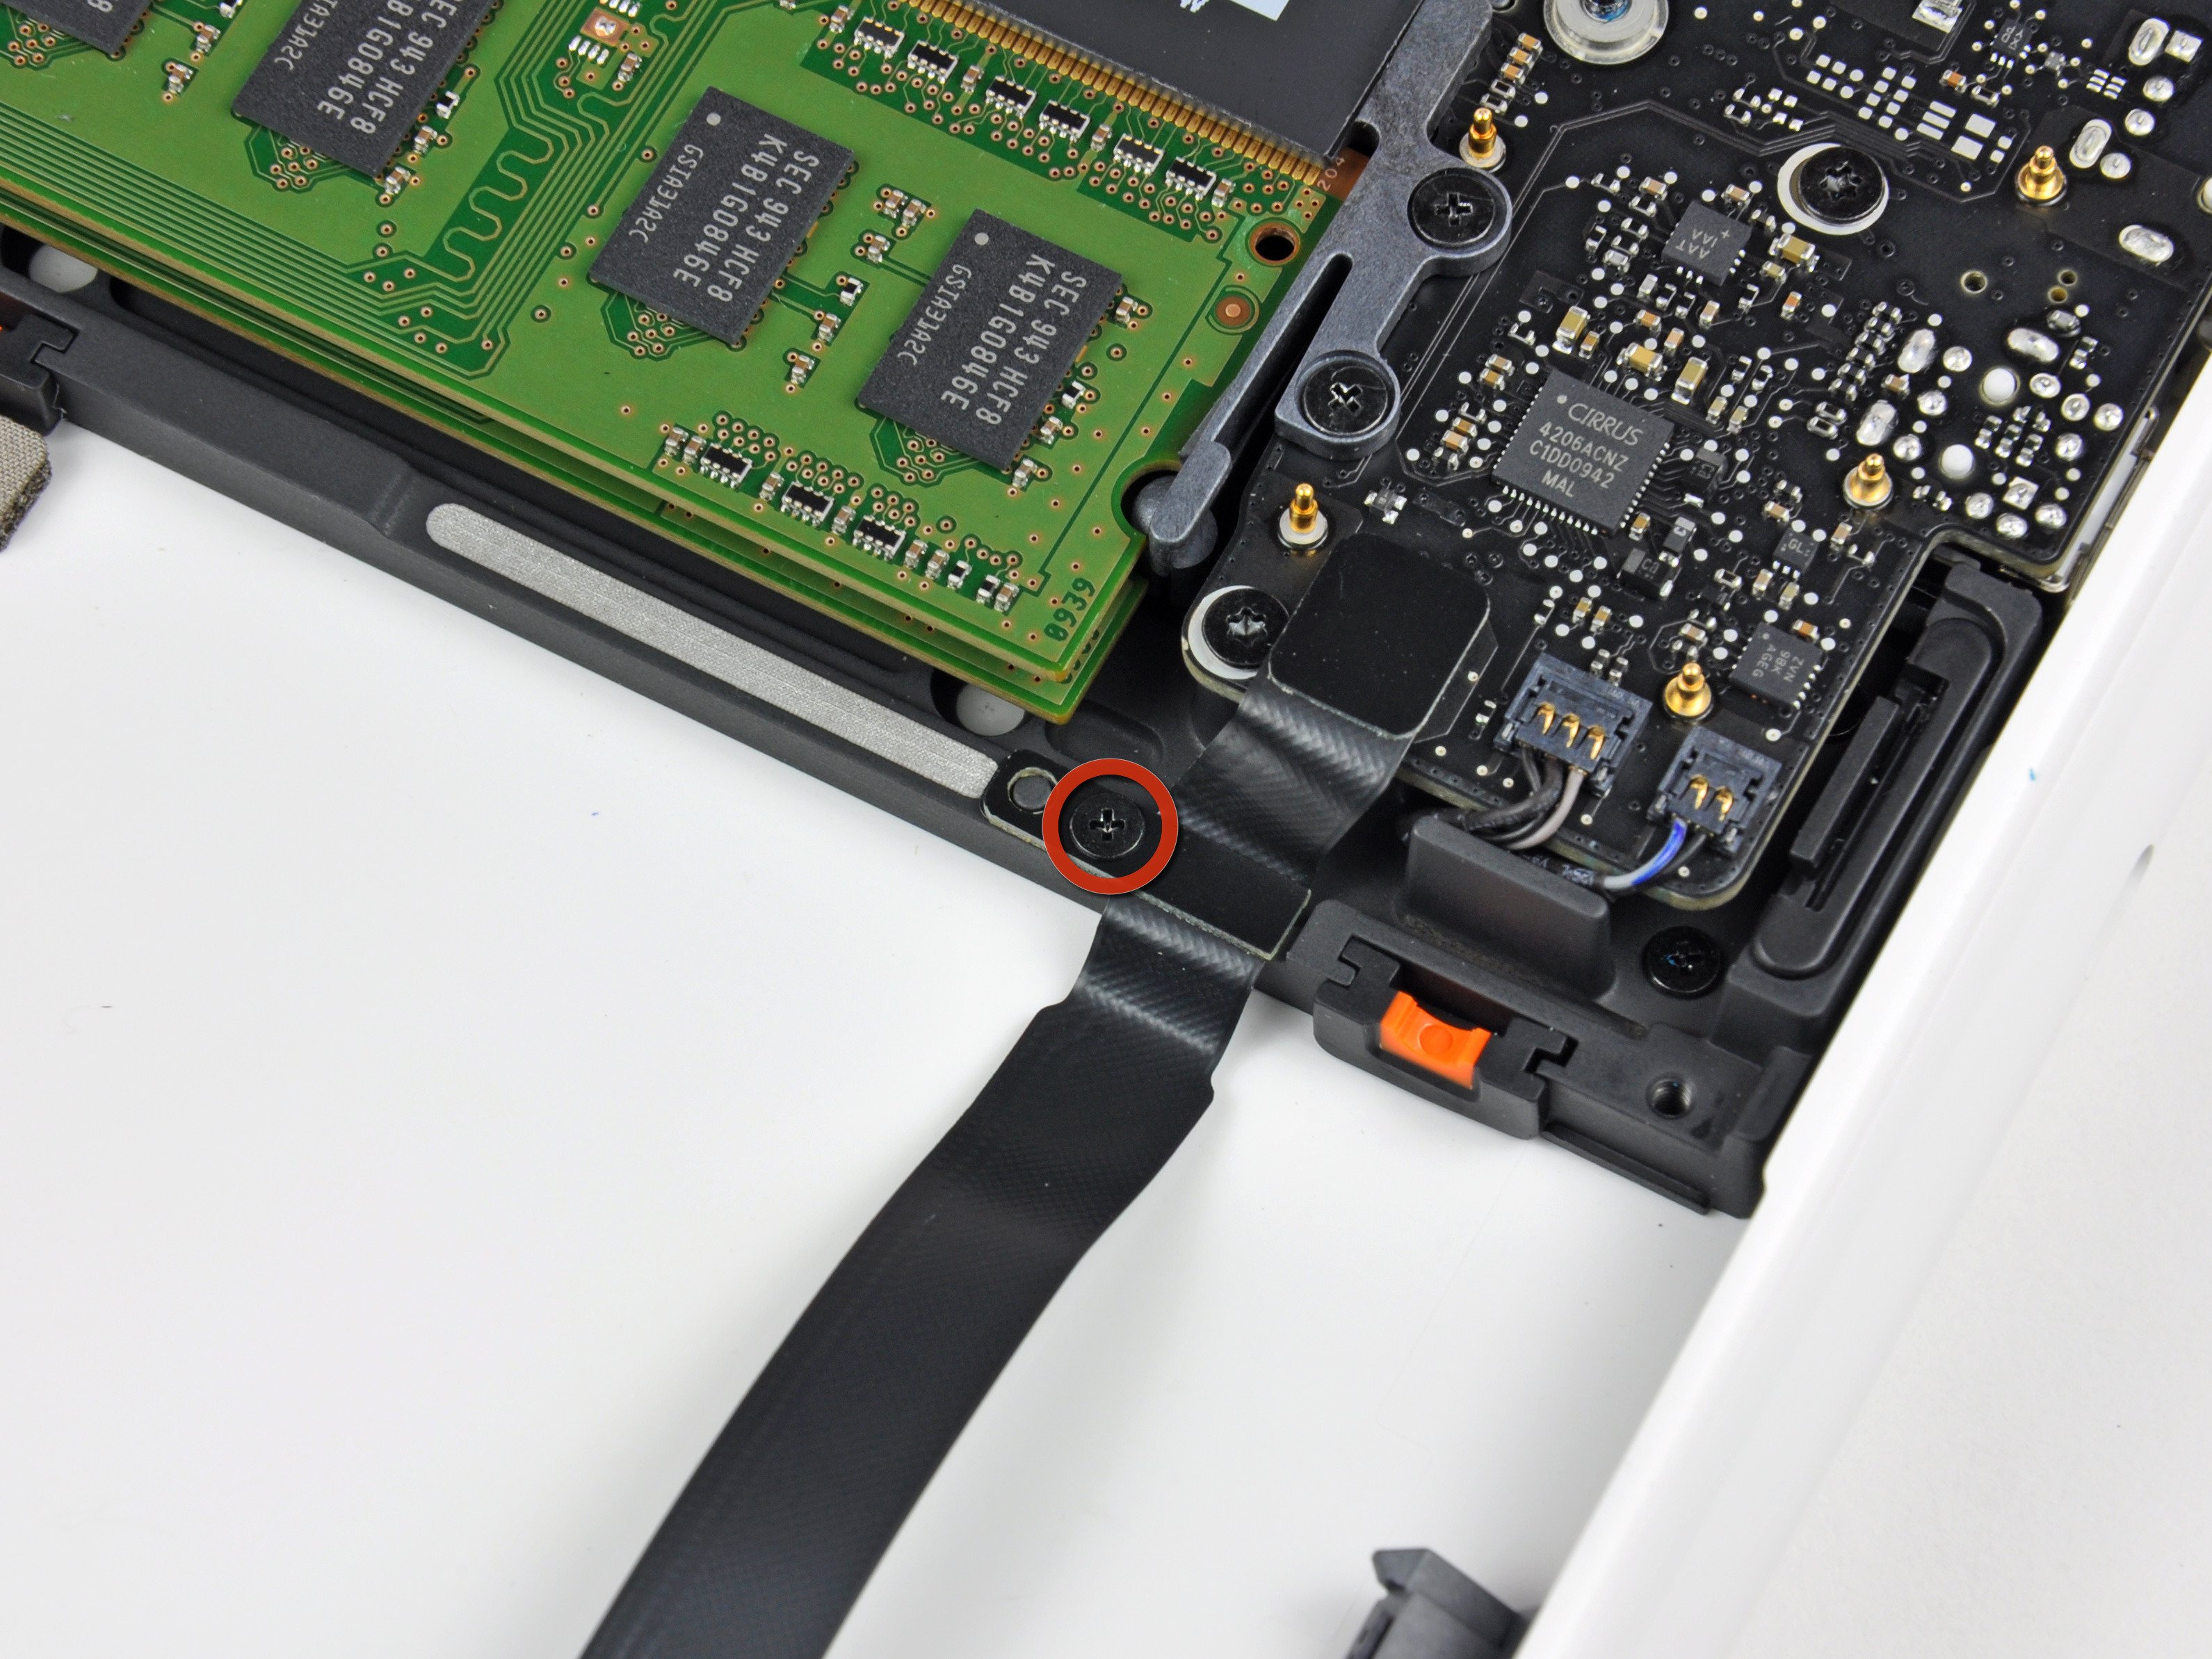
▶ When the bottom case comes off, remove the two PH00 size Phillips screws indicated by the arrows in the figure.
▶ Once you’ve removed the screws, carefully remove them along with the plastic parts that hold the HDD in place so you don’t roll them onto the board inside your Mac.
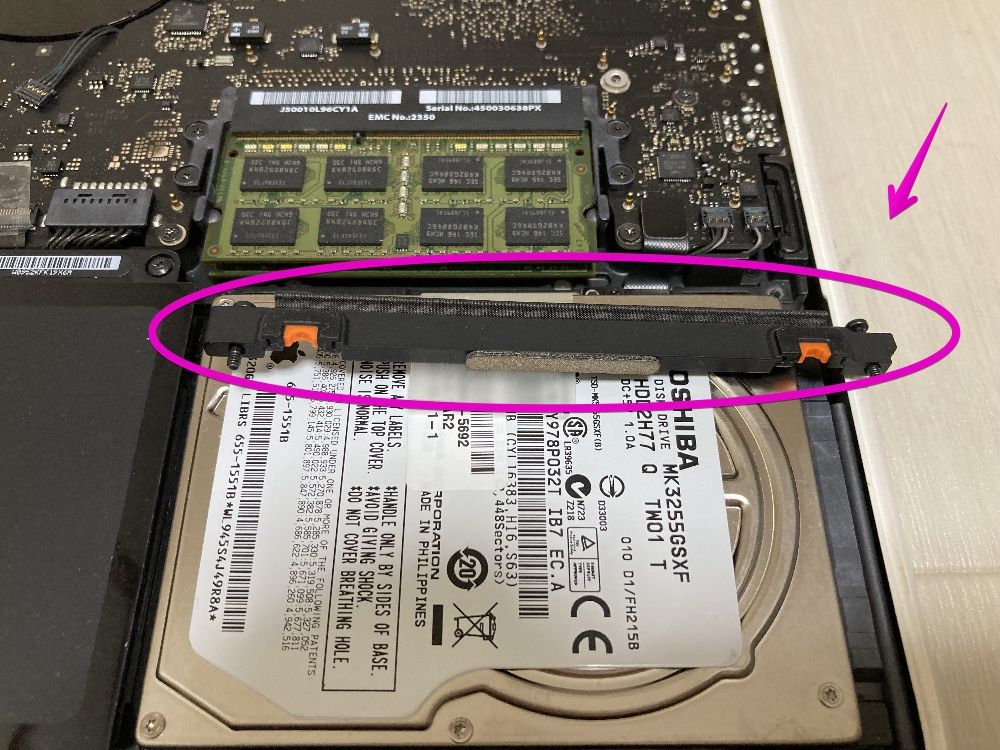
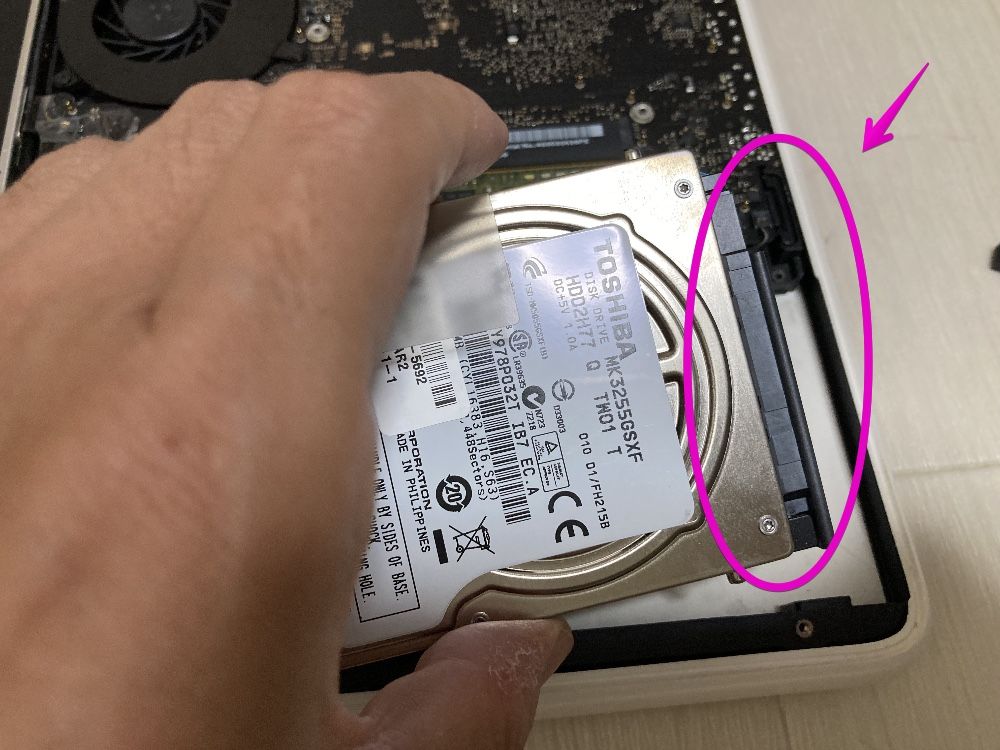
▶ As shown in the figure, while removing the HDD from the Mac body, remove the connector part indicated by the arrow.
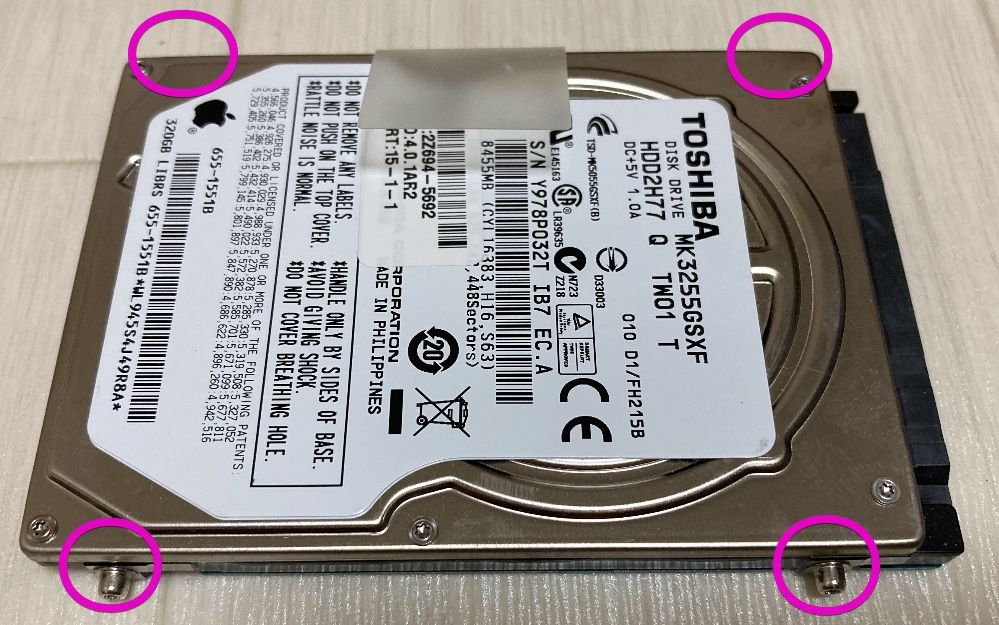
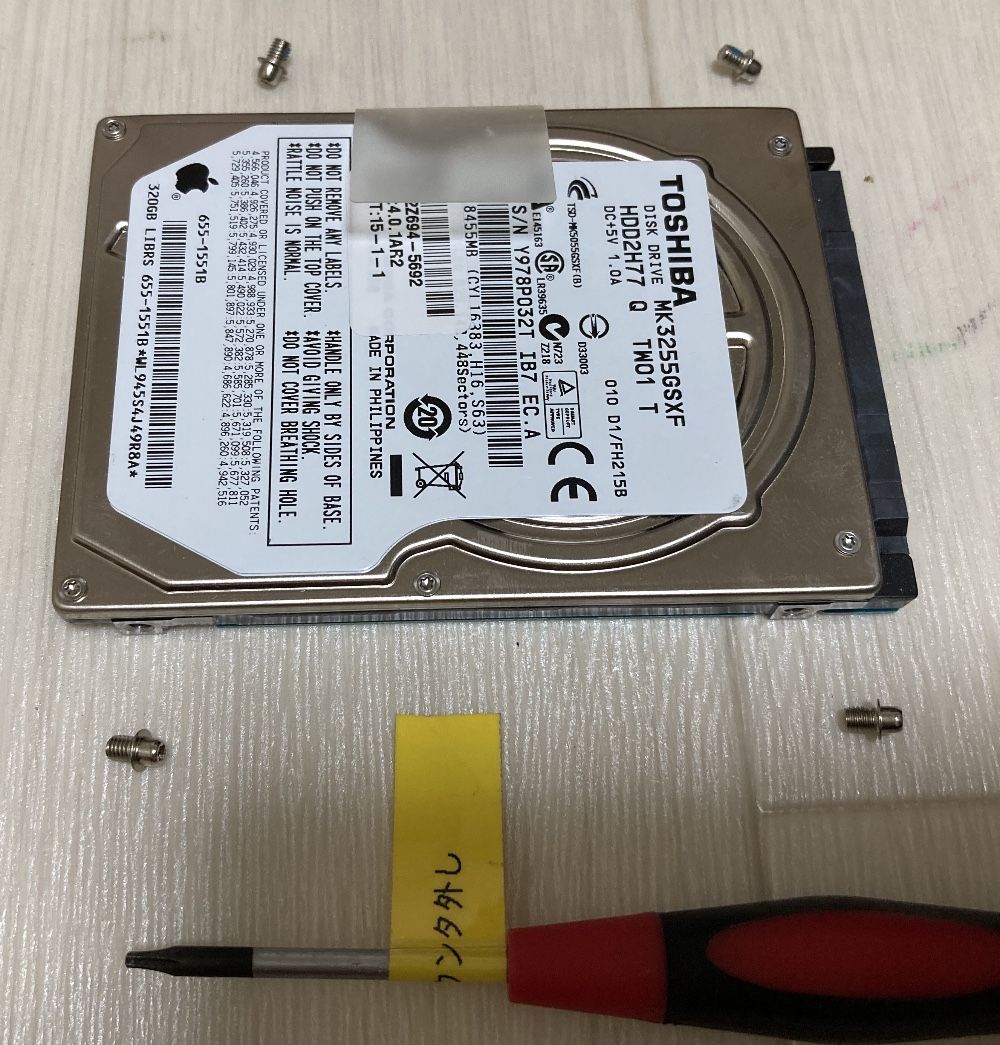
▶ After removing the HDD, remove a total of four T6 Torx screws on both sides of the HDD with a Torx screwdriver.
▶ After removing the screws, replace them with a replacement HDD / SSD and assemble in the reverse order up to this point.
Conclusion
The MacBook introduced here is old from 2009 to 2010, but it can be used more quickly than Chromebooks and Windows with low specifications of around $ 200 to $ 300.
So it’s a good idea for someone who already has another Mac to buy a second hand for internet search or light work.
Reference information
コメント