You can use the “Preview.app” and “Photos.app” apps to print photos with standard Mac features.
At that time, I will show you how to print multiple photos on one sheet of paper.
Advantages and disadvantages of each method
| Method | Advantage | Disadvantage |
|---|---|---|
| ① “Preview.app” | ・You can print as a photo file | ・You can’t adjust the orientation of individual photos |
| ② “Photos.app” | ・You can adjust the orientation of individual photos | ・You need to import the photo file to the “Photos.app”. |

If you want to print the photos that have already been imported into the “Photos” app, ② seems to be better.

That’s right.
Since the orientation of the photo can be adjusted individually, the appearance of the print is better in ②.

So, for example, shouldn’t it be used properly as follows?
- ① “Preview.app”: When it is enough to check the contents for your own work
- ② “Photos.app”: If you want to show other people the photos you took with your iPhone or digital camera, or save them.
① “Preview.app”
Since the text is long, I added a headline.
Click to jump to each description.
- ①-1 Check “Preferences”
- ①-2 Open multiple photos in the same group
- ①-3 Print
- ①-4 Appendix: Use thumbnail list
①-1 Check “Preferences”
The Preview app opens a separate window each time you open a photo by default settings.
However, this setting does not allow you to print multiple photos on a single sheet of paper.
Therefore, check the settings according to the following procedure.
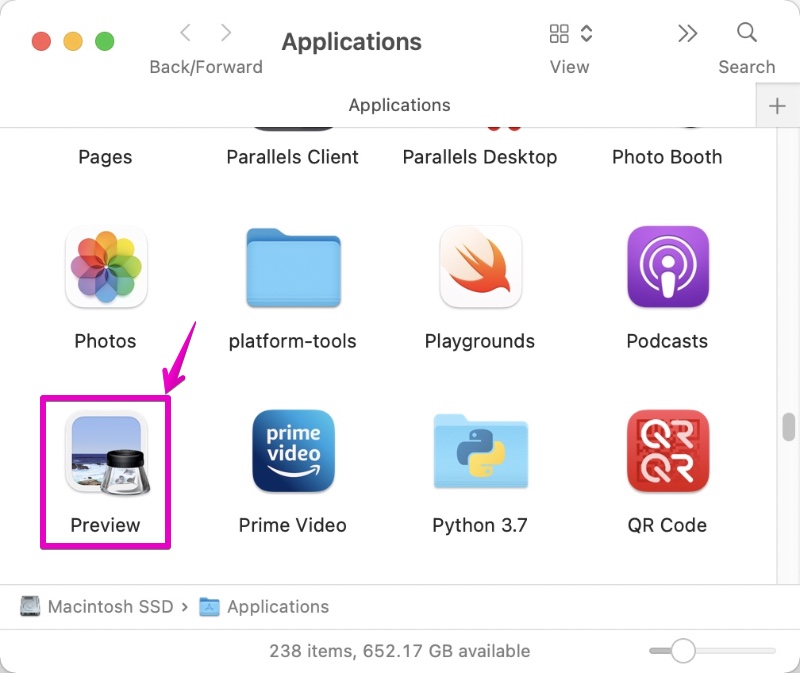
▶ Launch the “Preview” app.
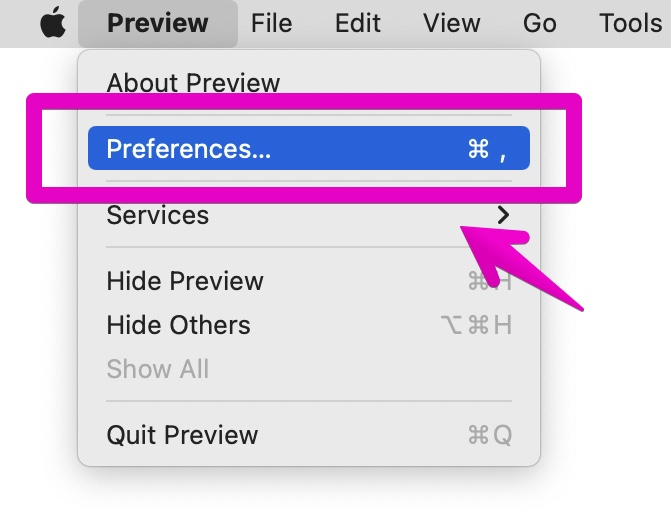
▶ When the Preview app launches, select “Preview” -> “Preferences…” from the menu bar.
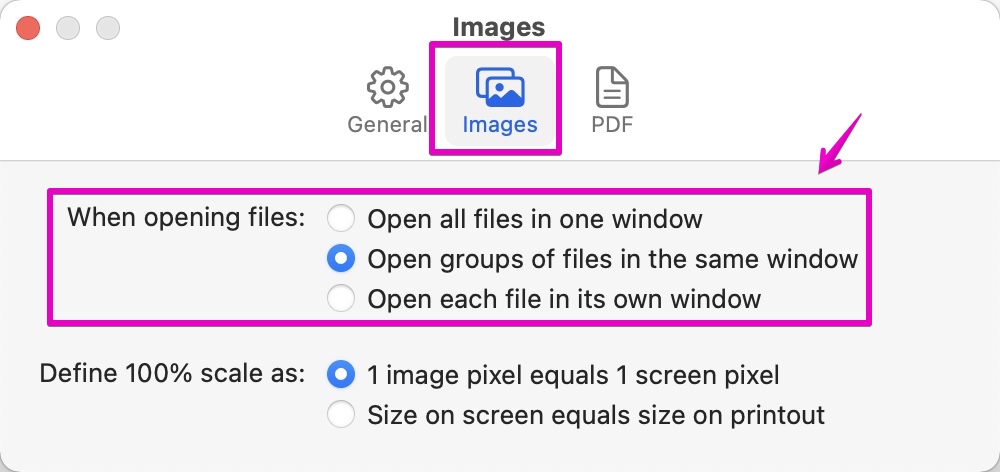
▶ Click the “Images” icon at the top of the Preferences screen as shown.
▶ When the screen changes, change the “When opening files” setting to the required content.
Details will be explained immediately after this.
| Item | Description |
|---|---|
| Open all files in one window | View files in one window whenever you open them |
| Open groups of files in the same window | If you select multiple files and open them at the same time, they are displayed in one window. |
| Open each file in its own window | Even if you select multiple files and open them at the same time, they are displayed in separate windows. |

I almost got it.
But I’m not sure what “group” is in the second item.

A “group” is a group of photos that open at the same time.
When not at the same time, it becomes “another group”.

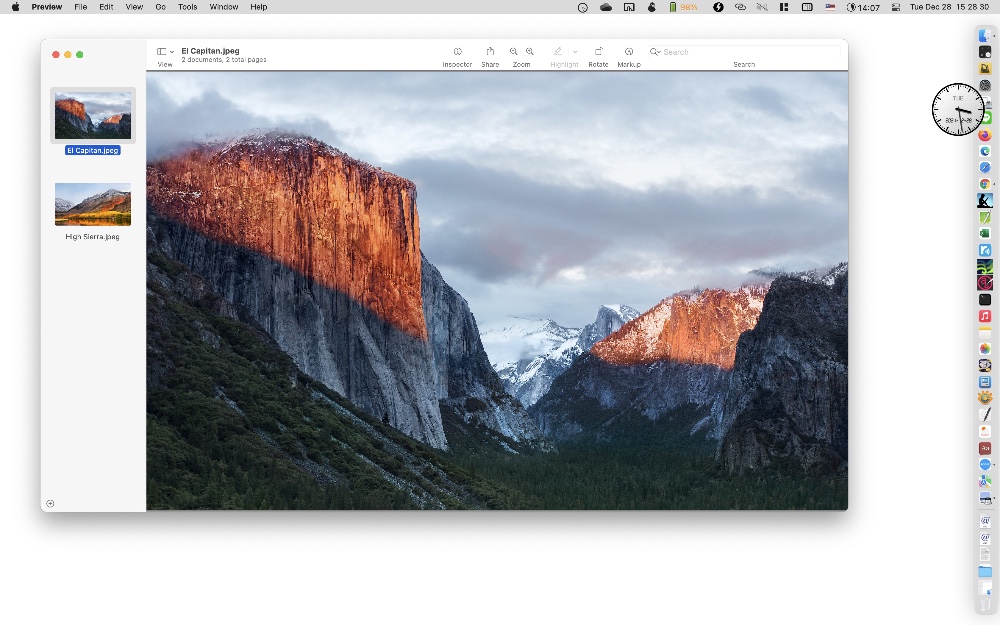
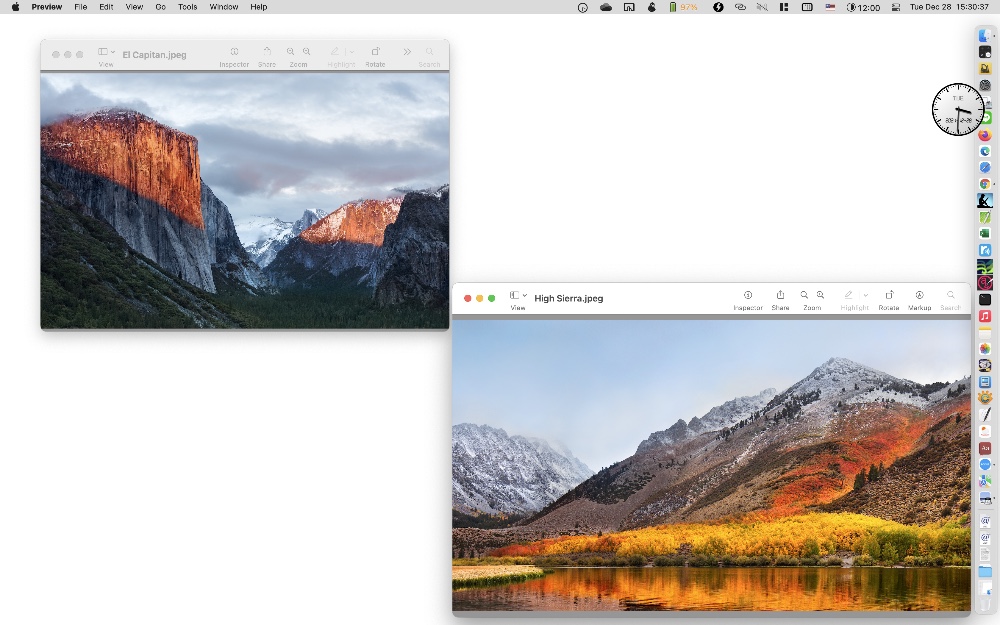
So, if you set it to the second item, you will get the following result.
- When opening multiple files at the same time: same group
- When you already have a photo open and want to open an additional photo: another group

I finally understood!

Now that the explanation so far has been lengthened, let’s get back to the main story.
The first one in the above figure can print multiple photos on one sheet of paper.
But second one can’t.

That’s why we need to open multiple photos as “Same Group”!

Exactly.
From here, we will return to the continuation of the explanation of checking settings.
▶ Change the “When opening files” setting to the required content.
| Item | Description |
|---|---|
| Open all files in one window | View files in one window whenever you open them |
| Open groups of files in the same window | If you select multiple files and open them at the same time, they are displayed in one window. |
| Open each file in its own window | Even if you select multiple files and open them at the same time, they are displayed in separate windows. |
The recommended setting is the second “Open groups of files in the same window”.
This is because when you normally open a photo, you open it in a separate window, and when you print multiple photos on one page, you open them in the same window.
However, if you often print multiple photos on one page, you may want to set the first setting.
The following describes how to print multiple photos on one sheet, assuming the second setting.
①-2 Open multiple photos in the same group
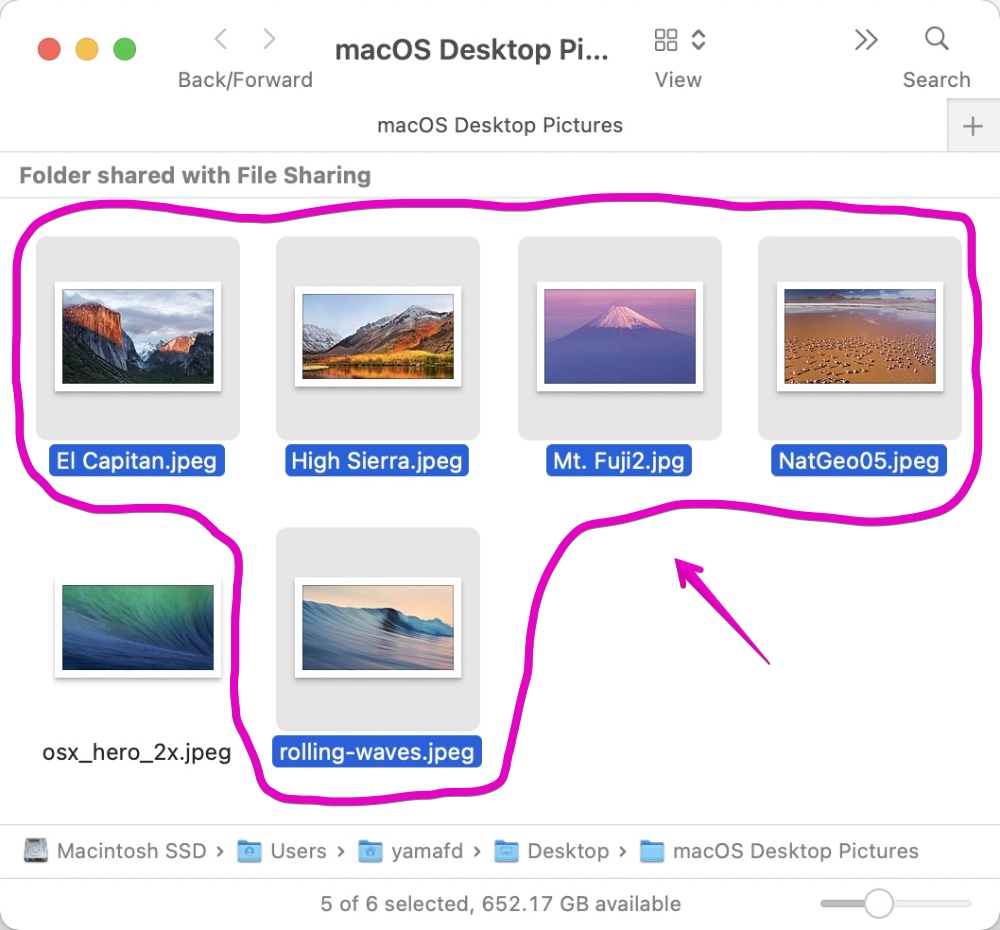
▶ In the Finder, select the photos you want to print together on one page of paper.
There are the following selection methods.
- Continuous photos: Select by dragging the range with the mouse (trackpad)
- Randomly arranged photos: Hold down the command ⌘ key on your keyboard and click the mouse (trackpad) to select
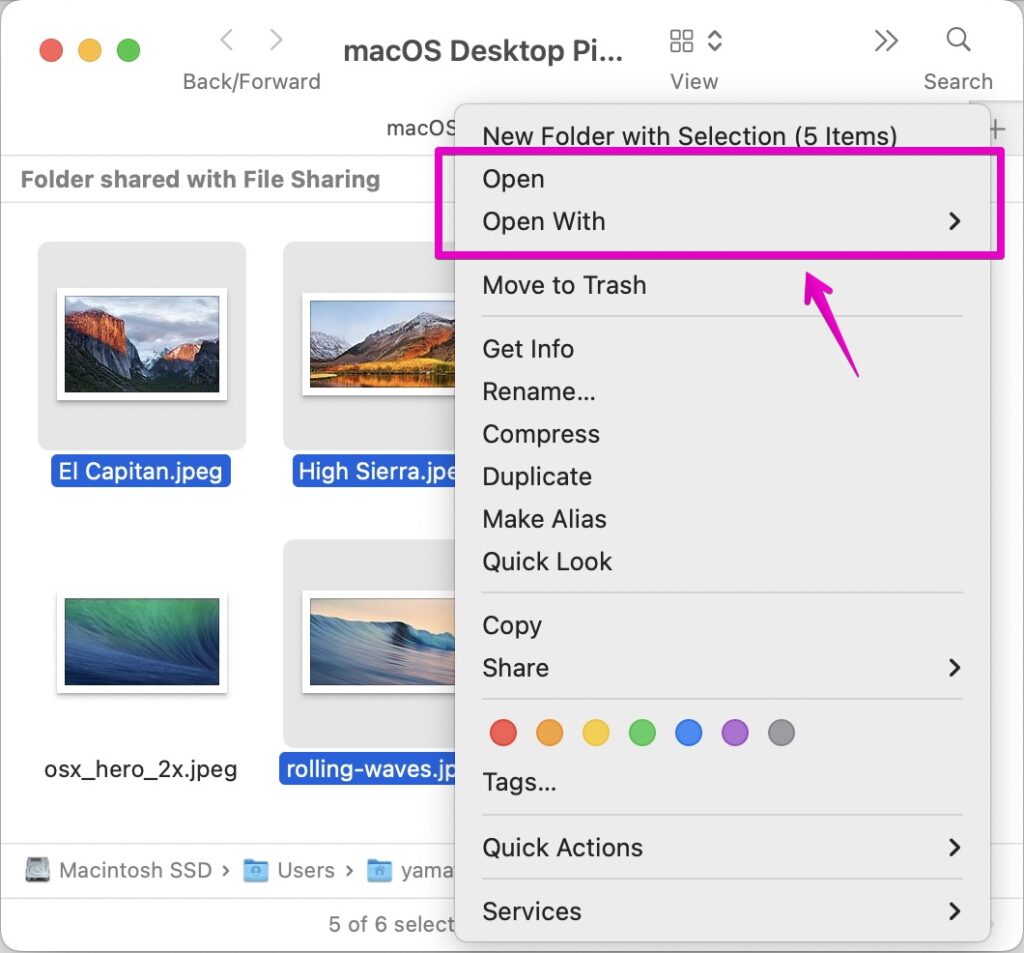
▶ After selecting photos, right-click on any of the selected photos to display the menu.
From the displayed menu, select “Open” or “Open With” to open it in the “Preview” app.
①-3 Print
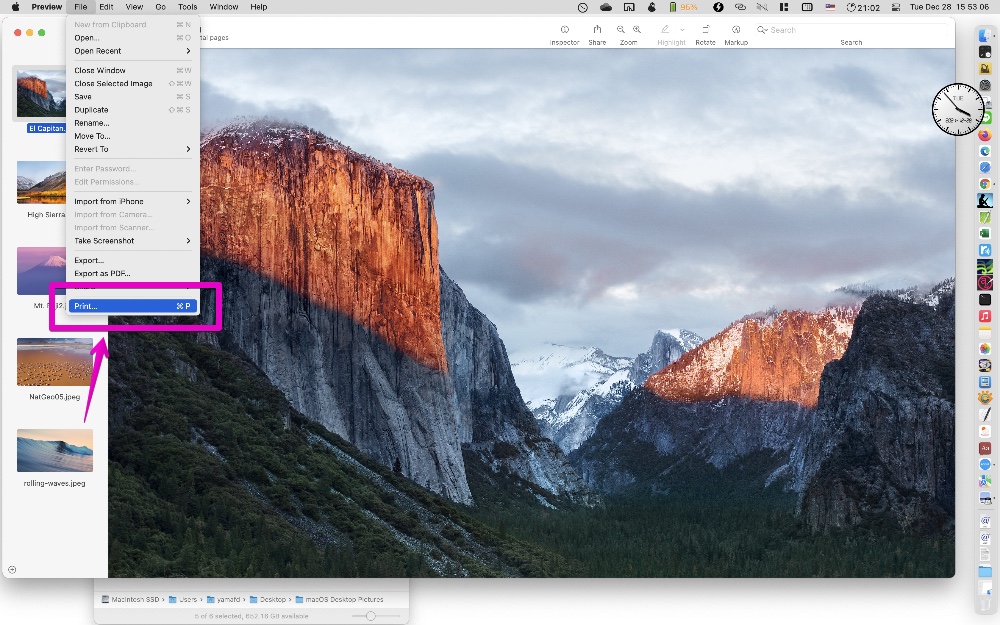
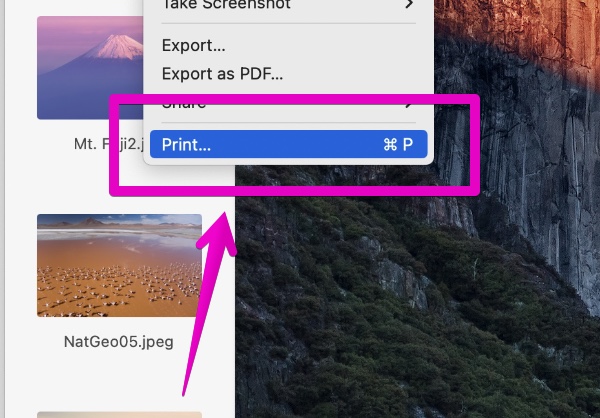
▶ When the photos opens in Preview, select “File” -> “Print…” from the menu bar.
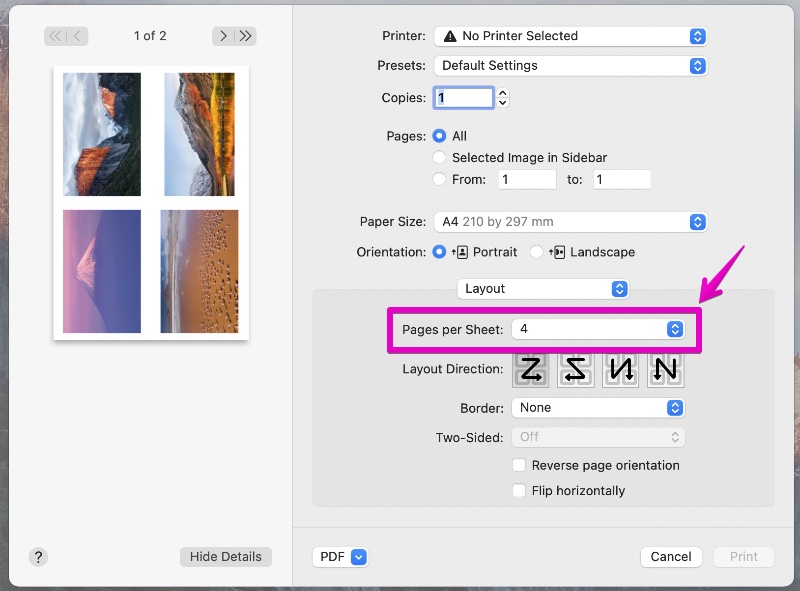
▶ When the print settings screen appears, select “Layout” from the drop-down list pointed to by the arrow in the figure.
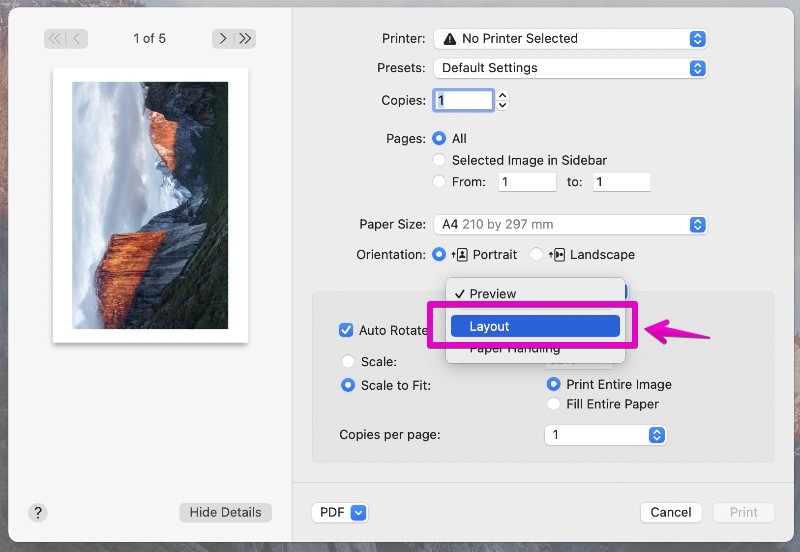
▶ After switching to the “Layout” setting item, change the “Pages per Sheet” part to your favorite setting.
For example, if you change it to 4, 4 photos will be reduced and printed on one sheet of paper.
After changing the settings, click the “Print” button at the bottom right to print.
▶ This is the end of “①-3 Print”.
①-4 Appendix: Use thumbnail list
So far, I’ve explained how to change the “Preferences” of the “Preview” app, but I’ll show you another way.
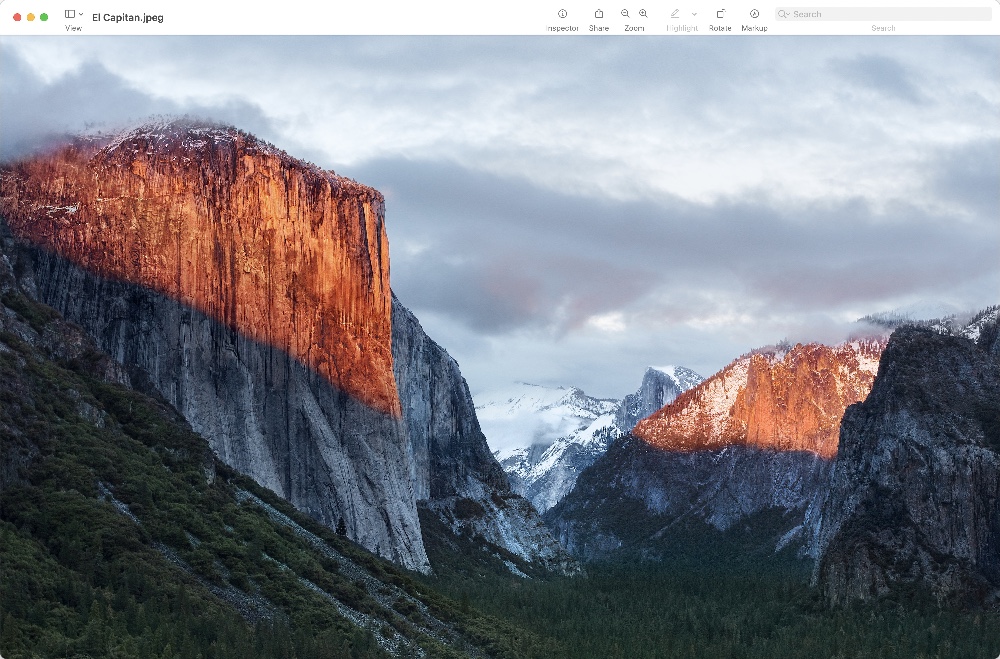
▶ The photo is already displayed in the “Preview” app.
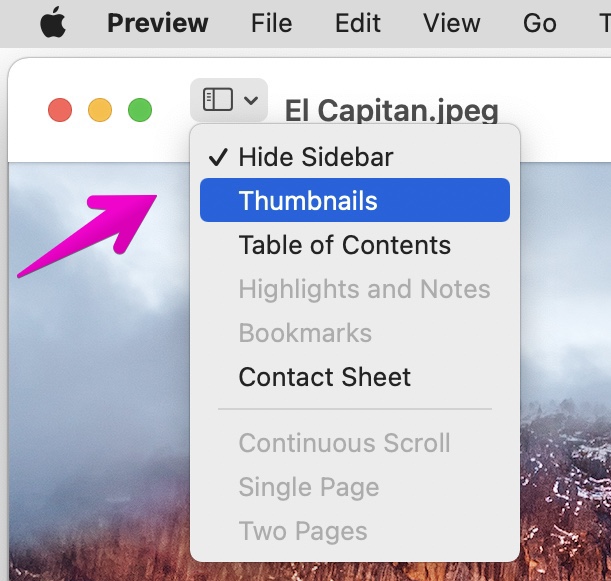
▶ Display “Thumbnails” in the “Sidebar”.
The display method is one of the following two.
- a) From the toolbar, select “View” -> “Thumbnails”
- b) From the menu bar, select “View” -> “Thumbnails”
【b) Menu bar】
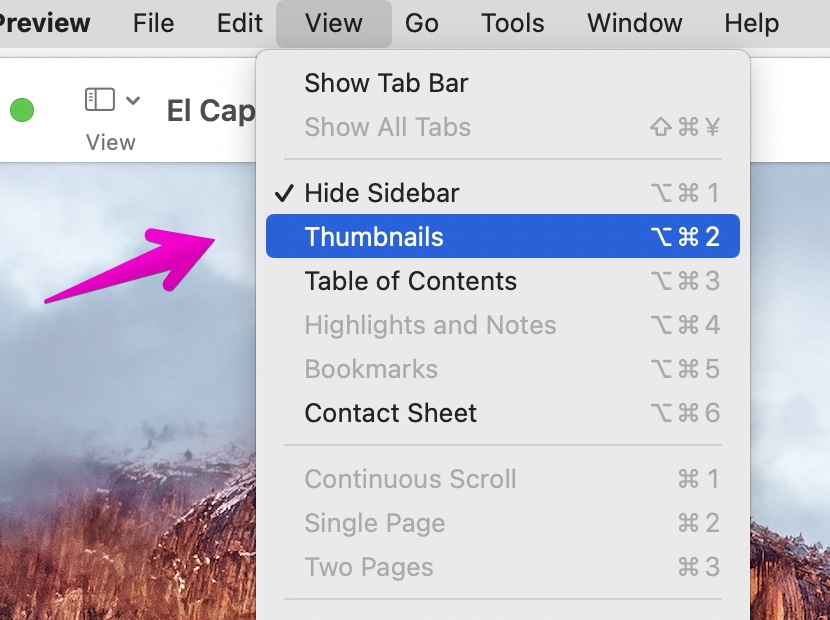
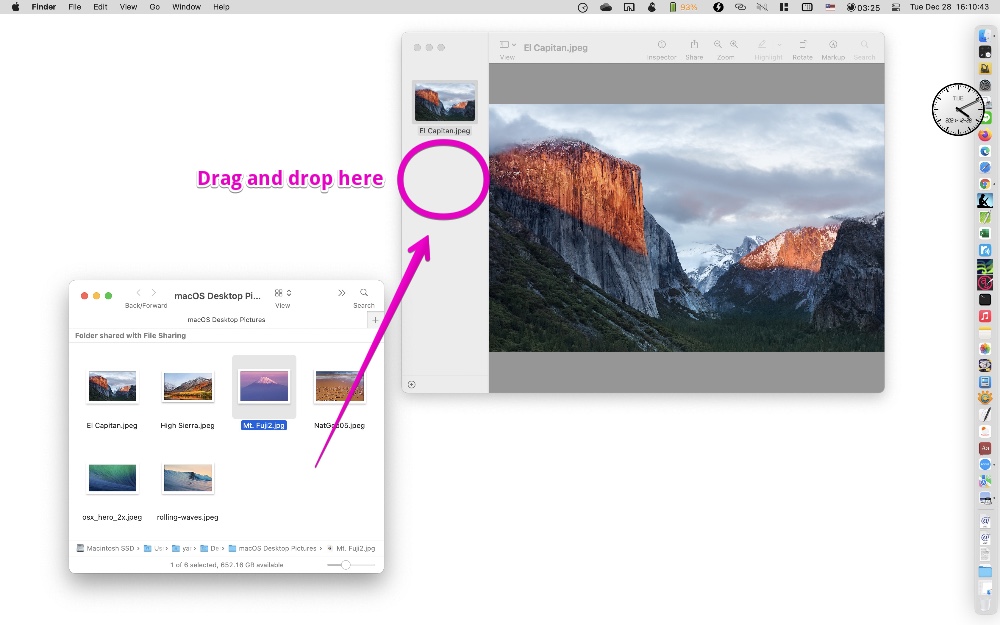
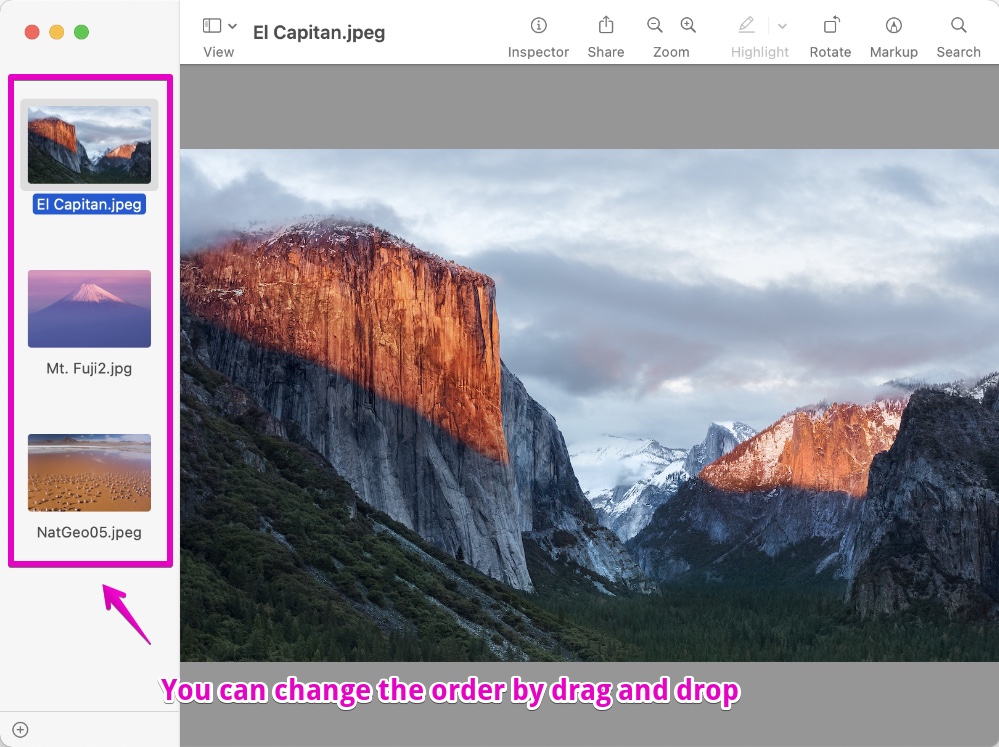
▶ When the thumbnails appear in the sidebar as shown, drag and drop the photos you want to print together to the bottom of the thumbnail list.
▶ You can change the order of the photos displayed in the thumbnail list by dragging and dropping.
▶ For the printing method, refer to the explanation from “①-3 Print“.

This is the end of the explanation, “① Preview.app”.
② “Photos.app”
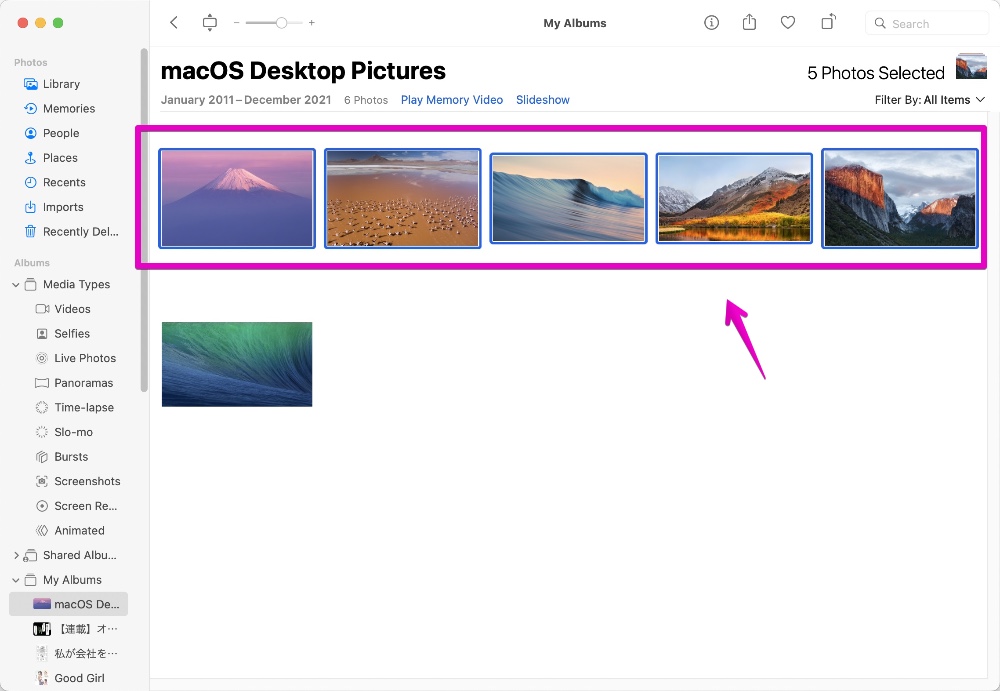
▶ In the “Photos” app, select the photos you want to print together on one page of paper.
There are the following selection methods.
- Continuous photos: Select by dragging the range with the mouse (trackpad)
- Randomly arranged photos: Hold down the command ⌘ key on your keyboard and click the mouse (trackpad) to select
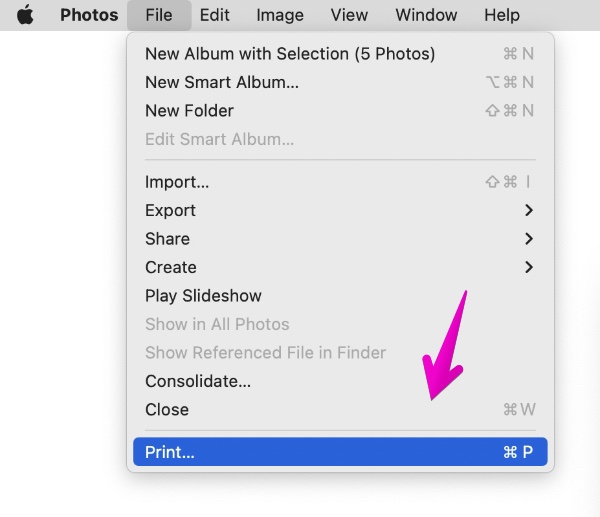
▶ After selecting the photo, select “File” -> “Print…” from the menu bar.
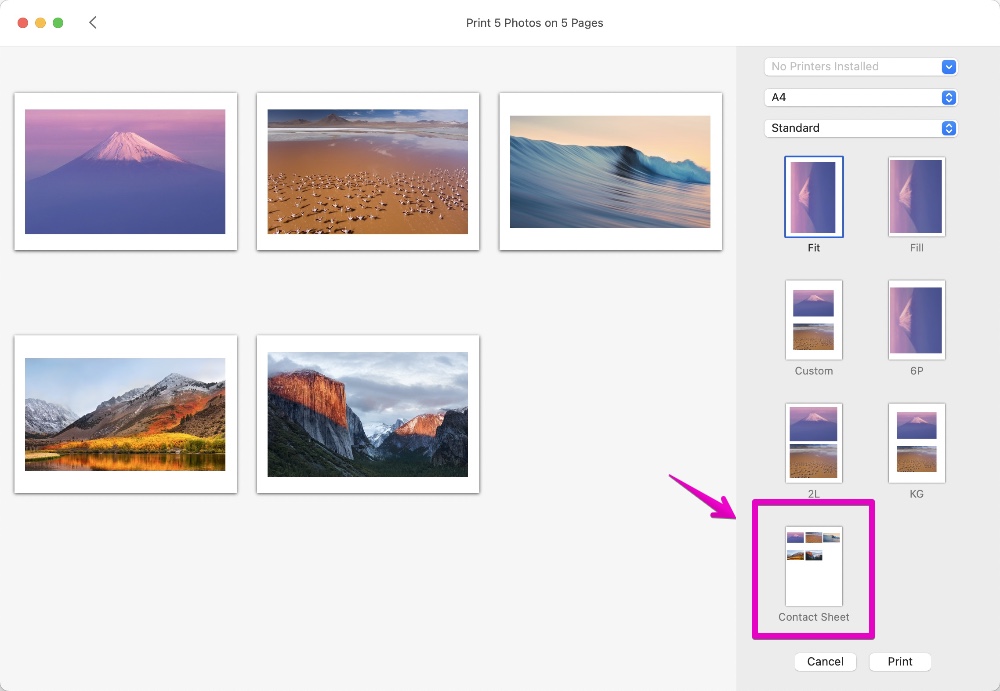
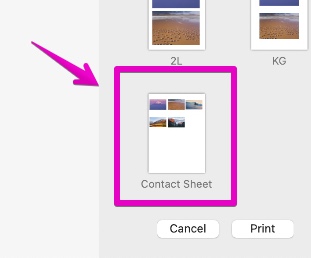
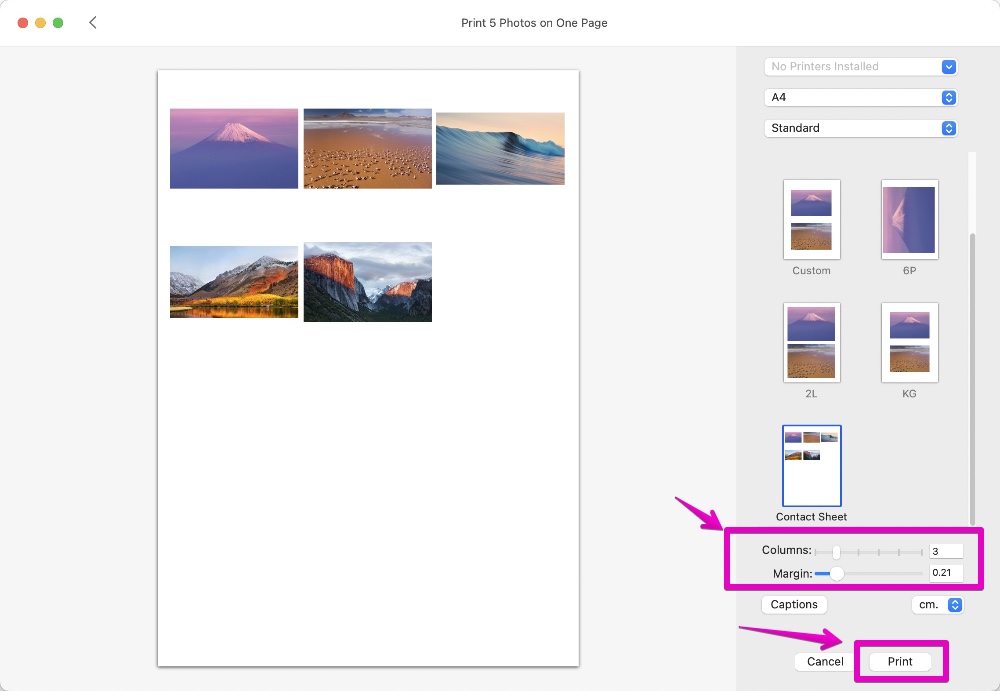
▶ When the print instruction screen is displayed as shown in the figure, click “Contact Sheet” from the list on the right.
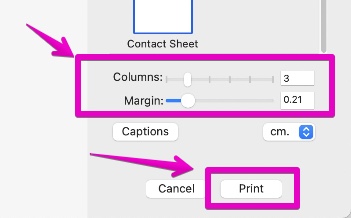
▶ Regarding the “Contact Sheet” setting, increase or decrease the “Number of Columns” to adjust the number of photos printed on one page.
After making adjustments, click the “Print” button at the bottom right to print.

This is the end of the explanation, “② Photos.app”.
Reference information
This is an explanation of how to set to display multiple files in one window with “Preview” on the Mac official website.
This is an explanation of how to print the “Preview” app on the official Mac website.
This is an explanation of how to print the “Photos” app on the official Mac website.

This is the end of this article.



コメント