

I will explain in detail the account management when using “Notes” app on Mac, using illustrations.
This is useful when you want to synchronize between multiple devices, or don’t want to vice versa.
The following explanation is given in the following environment.
- macOS Big Sur 11.5.2
Notes accounts types
To start using “Notes” app, you need to set up an account.
There are three types of accounts, and the differences between them are summarized in the table.
If you are using iCloud, you have already set up “① iCloud account”.
| Account type | Sync between devices (Mac/iPhone/iPad) |
Account suspension |
Restriction |
| ① iCloud account | Possible | No restriction | |
| ② Internet accounts other than iCloud |
Possible | Possible, but the data will be deleted from the device (Saved on the cloud) |
|
| ③ Local account | Impossible | Impossible,and data will be deleted |
No restriction |
The restrictions on “② Internet accounts other than iCloud” are as follows.
| Possible | Impossible |
| Attach files and images | Heading |
| Inline display of images | Table |
| List (Bullets, dashes, numbers) |
List (Check lists) |
| – | Markup of attached files and images |
| – | Insert images from iPhone or iPad (Take a photo, scan a document, add a sketch) |
| – | Recently deleted items (Save deleted items for 30 days) |
In summary, wI recommend using “① iCloud account” if you want to synchronize between devices, and “③ Local account” if you do not want to synchronize.
If for some reason you cannot use “① iCloud account” but want to synchronize, you will need to use “② Internet accounts other than iCloud”.
Create a new Notes account
The operation method differs depending on the “Notes accounts types” described above, so proceed to the procedure linked to each.
- ① iCloud account / ② Internet accounts other than iCloud
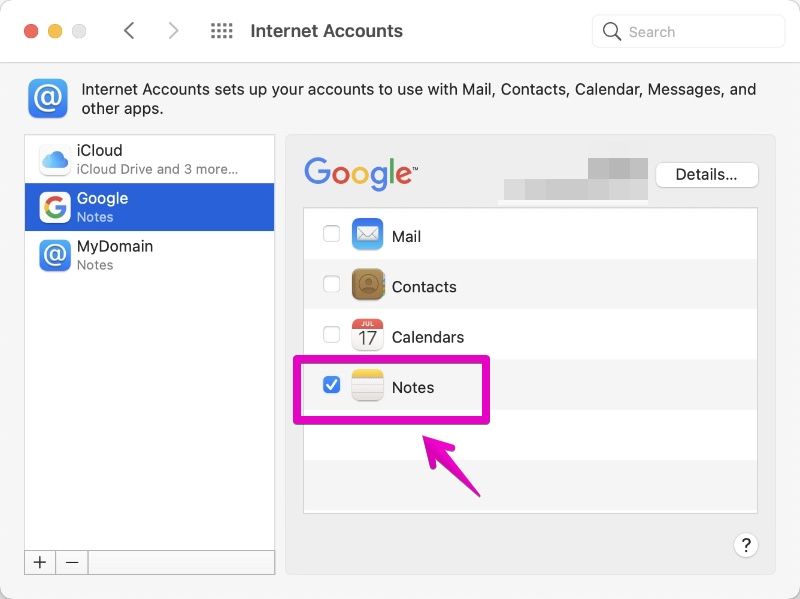
▶ In the app “Notes”, select “Notes” – “Accounts…” from the menu bar.
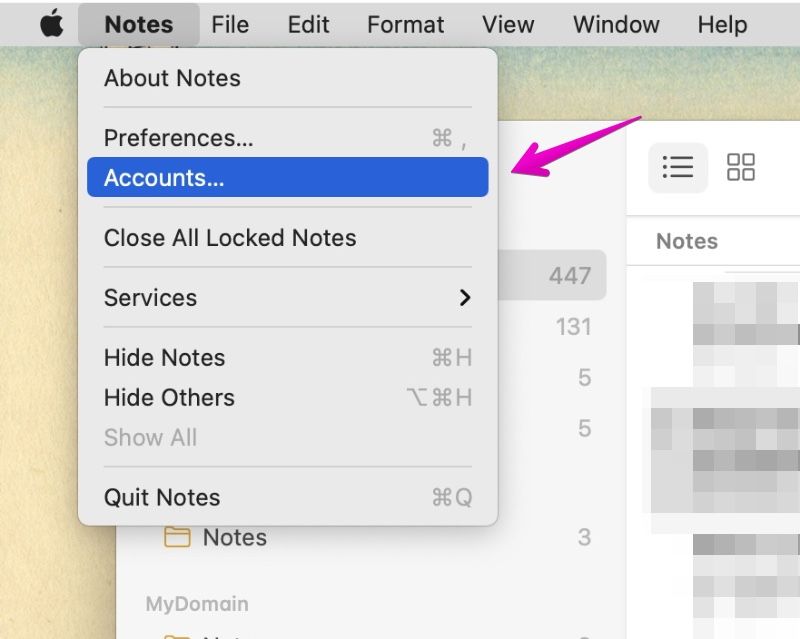
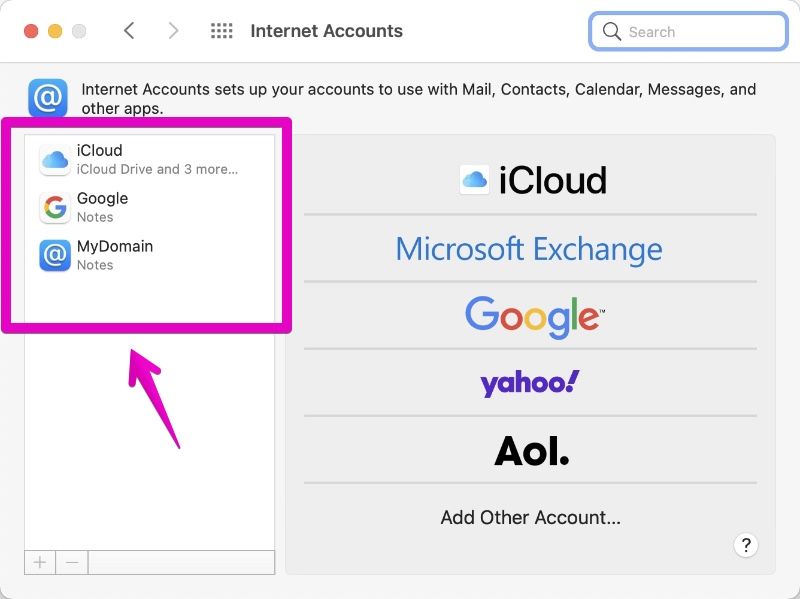
▶ When the “Internet Account” screen is displayed, click “iCloud / Microsoft Exchange / Google / yahoo! / AOL. / Add Other Account…” displayed on the right side of the screen, and follow the onscreen instructions to set up your account.

▶ After setting up an account, make sure that the set up account is displayed on the left side of the “Internet Accounts” screen.
▶ Furthermore, on the basic screen of the application “Notes”, check that the folder of the account set on the left side is displayed.
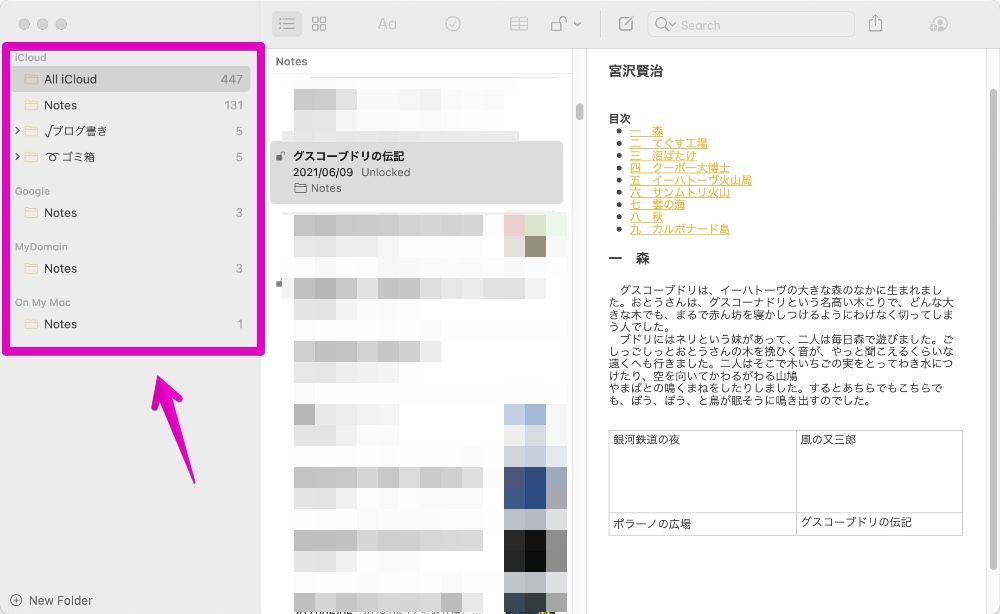
At this time, if you have already set up an account on another Mac / iPhone / iPad and saved some notes, the notes will be downloaded.
This completes the settings.
- ③ Local account
▶ In the app “Notes”, select “Notes” – “Preferences…” from the menu bar.
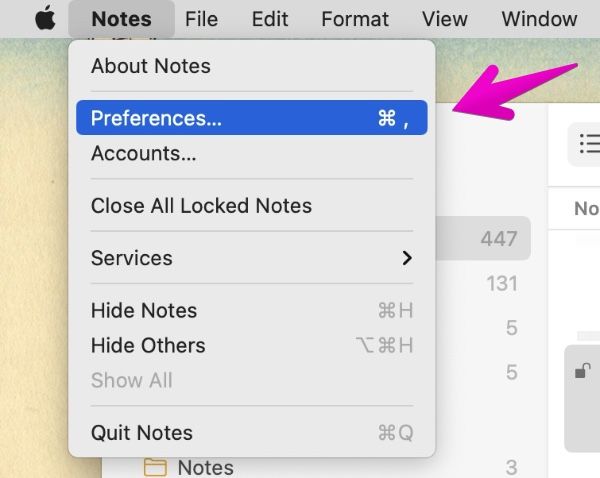
▶ When the “Preferences” screen appears, check “Enable the On My Mac account”.

▶ On the screen of the application “Notes”, confirm that “On My Mac” is displayed on the left side.
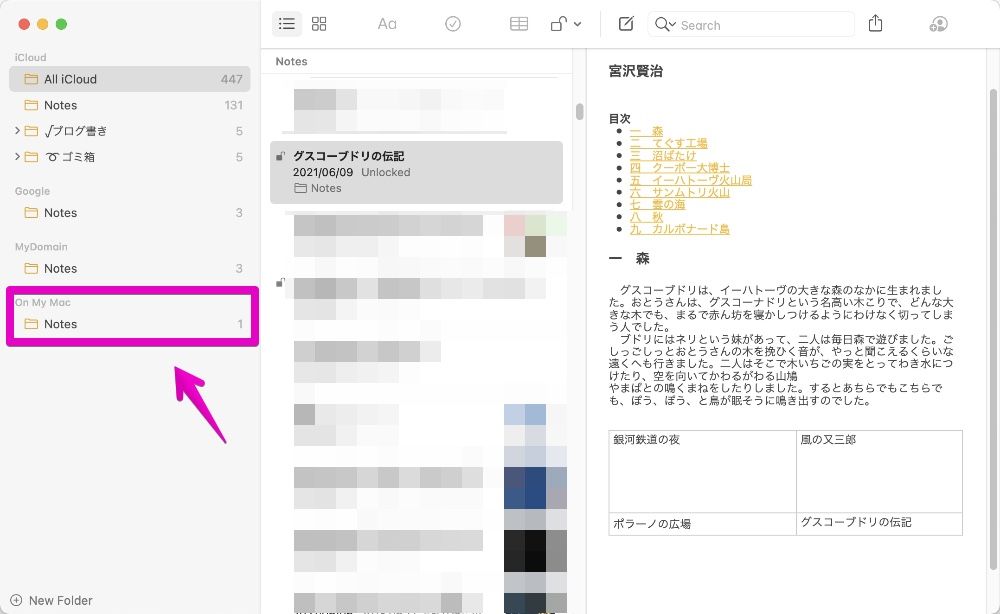
This completes the settings.
Suspend the Notes account
As explained earlier in “Notes accounts types“, you cannot suspend with “③ Local account”.
The following is a description of “① iCloud account” or “② Internet accounts other than iCloud”.
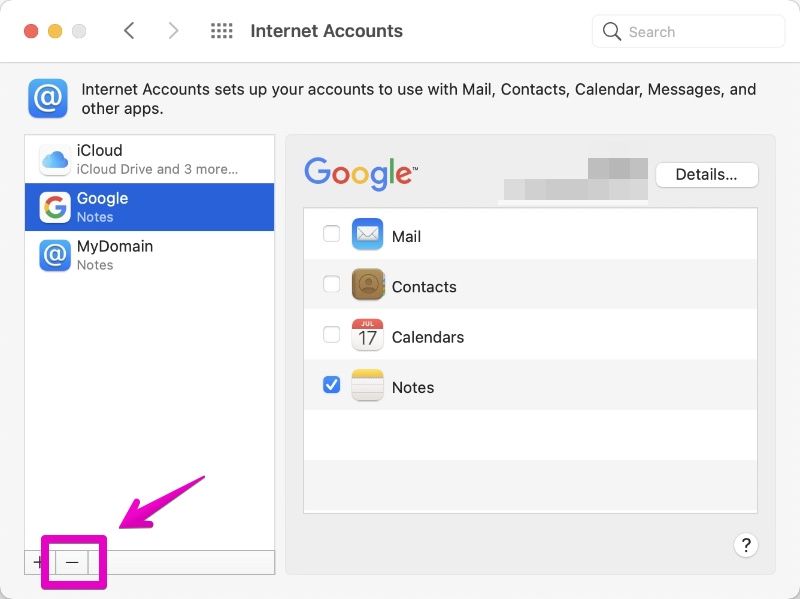
▶ In the app “Notes”, select “Notes” – “Accounts…” from the menu bar.
▶ When the “Internet Accounts” screen appears, click the account you want to suspend on the left side of the screen.
▶ Uncheck “Notes” in the area displayed on the right side of the screen.
This will remove the note from the paused device, but it will remain stored on other devices and in the cloud.
Alternatively, you can display and edit with the “Notes” of the following Web screen version of iClouud
This completes the settings.
Delete the Notes account
The operation method differs depending on the “Notes accounts types” described above, so proceed to the procedure linked to each.
- ① iCloud account / ② Internet accounts other than iCloud
▶ In the app “Notes”, select “Notes” – “Accounts…” from the menu bar.
▶ When the “Internet Accounts” screen appears, click on the account you want to delete on the left side of the screen.
▶Click the – button at the bottom left of the screen.
This will remove the notes from the device where you deleted the account, but it will still be stored on other devices and in the cloud.
Alternatively, you can display and edit with the “Notes” of the following Web screen version of iClouud
This completes the settings.
- ③ Local account
In order to delete the local account, you need to leave no notes saved.
If you have any notes saved, you will not be able to delete your local account.
Therefore, delete unnecessary notes in advance, or move them to another Internet account such as iCloud by dragging and dropping.
▶ In the app “Notes”, select “Notes” – “Preferences…” from the menu bar.
▶ When the “Preferences” screen appears, uncheck “Enable the On My Mac account”.
This completes the settings.
FAQ
| Question | Answer |
| How do I create an account that doesn’t sync? |
Create the Llocal account” introduced on this page. |
If there is any material above, I will update it from time to time.
Reference infromation

コメント