
I will explain in detail how to use the lock function of the “Notes” app on Mac, using illustrations.
I also explain points to note when using the lock function and what to do if you forget your password.
The following explanation is given in the following environment.
Please note that there are some differences depending on the version of macOS.
- macOS Big Sur 11.5.2
What is lock function of Notes?
The Notes lock function is a security function that requires a password or Touch ID to protect the contents with a preset password and display them.
The features are summarized in the table below.
| Contents | Description |
| Target of lock |
(Caution that See also figure below |
| How to set the lock |
|
| Switching display / non-display of contents |
|
| Automatically hide |
|
| How to manage passwords |
|
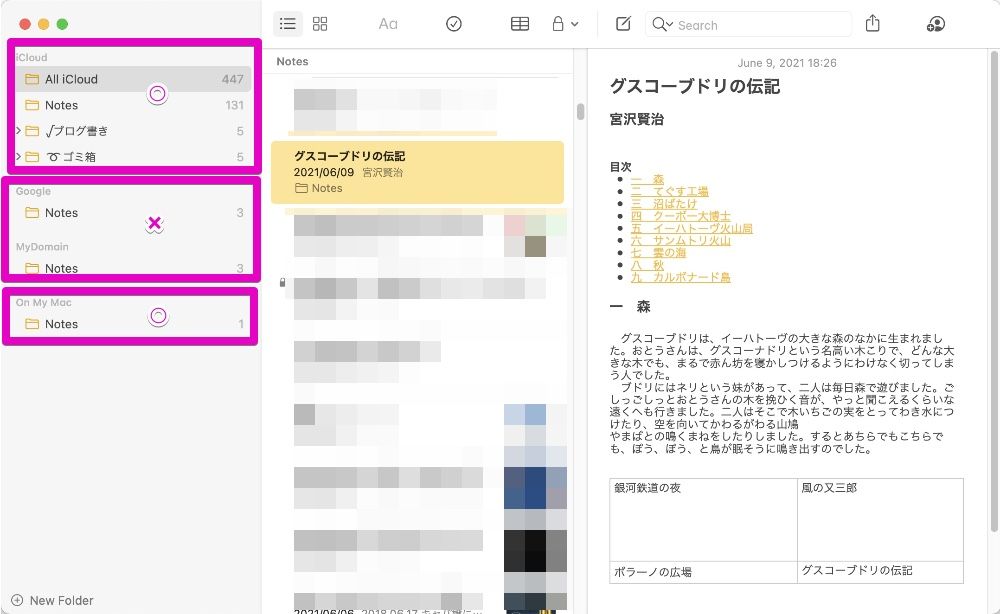
In the figure below, ◯ is “iCloud” account and ” On My Mac ” account, and these two can use the lock function.
On the other hand, the lock function cannot be used for “Internet accounts other than iCloud (Google account and MyDomain account in the figure below)” with ✕.
How to lock note
▶ In the app “Notes”, select the note you want to lock.
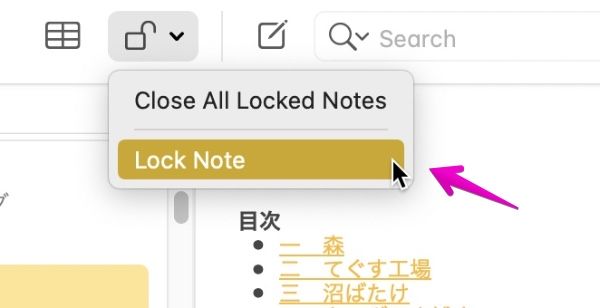
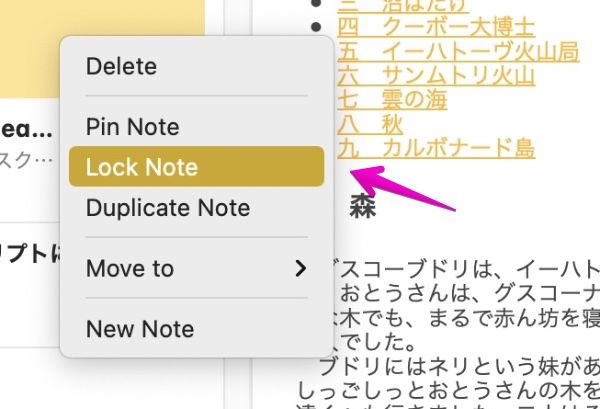
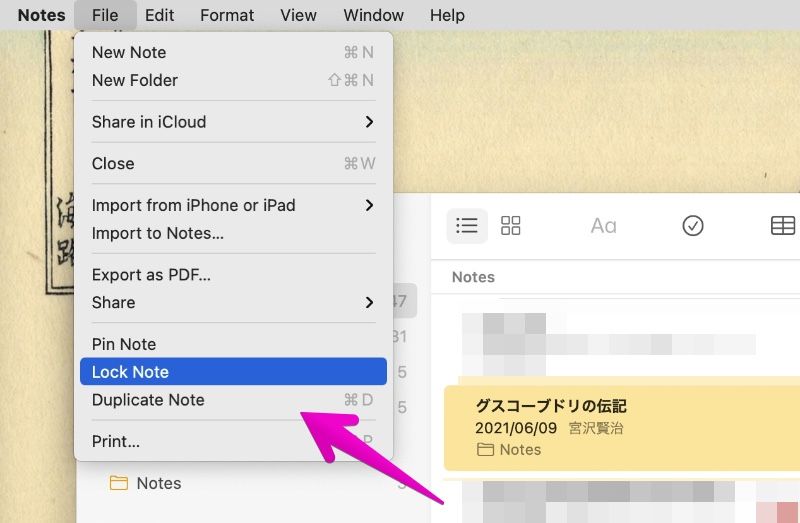
▶ To set a lock on a note, do one of three things:
①. From the toolbar, click the “Lock Note” icon
②. Select “Lock Note” from the right-click menu
③. From the menu bar, select “File” – “Lock Note”
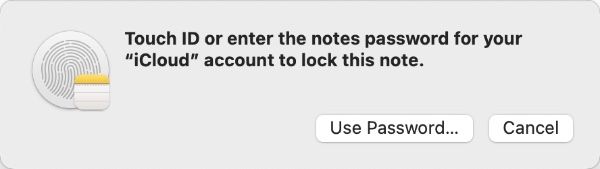
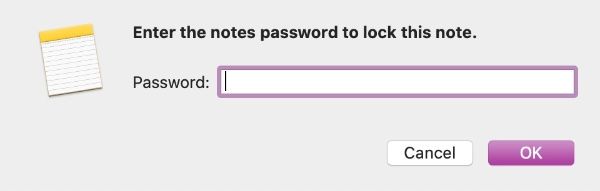
▶ The screen for setting a lock on a note is slightly different on a Mac with Touch ID and on a Mac without Touch ID, but follow the onscreen instructions to set it.
If you use the note lock function for the first time, the password you enter at this time will continue to be used as the note lock password.
【Touch ID-equipped Mac screen】
【Not Touch ID-equipped Mac screen】
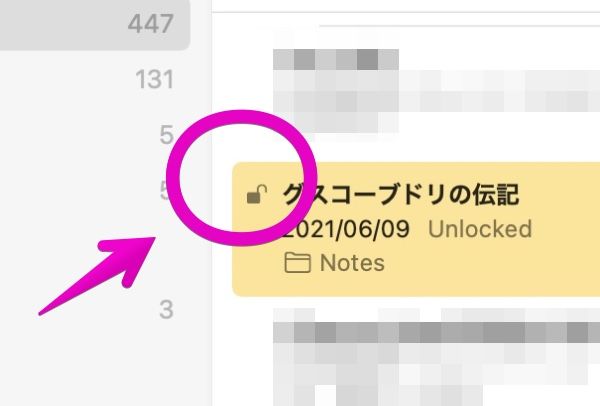
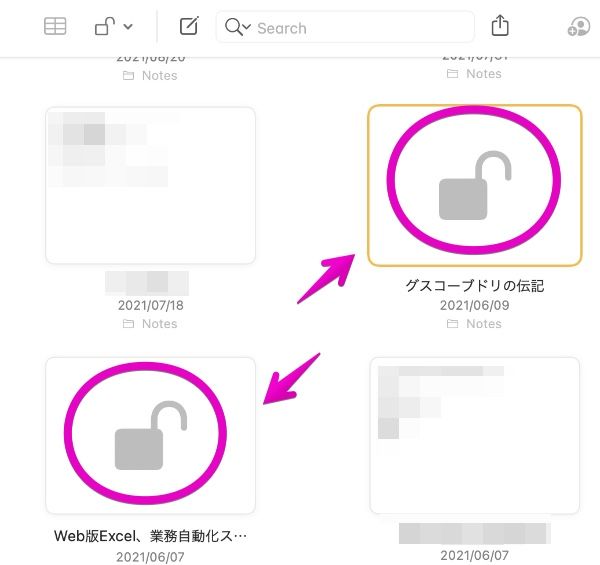
▶ For notes that have been locked, a key-shaped icon is displayed in the note list.
The note is still displayed as it is, so if you want to hide it, proceed to the next “Hide locked note”.
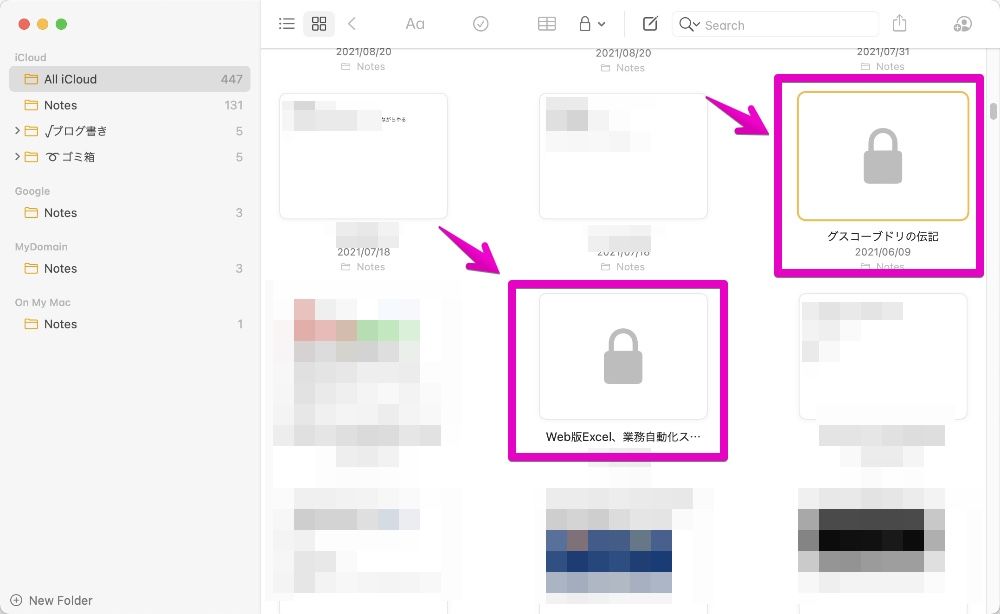
View notes as list
View notes as gallery
Hide locked note
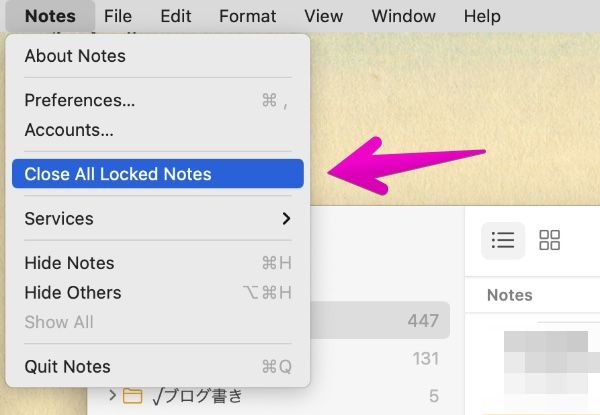
▶ To hide a locked note, do one of two things:
①. From the toolbar, click “Close All Locked Notes”
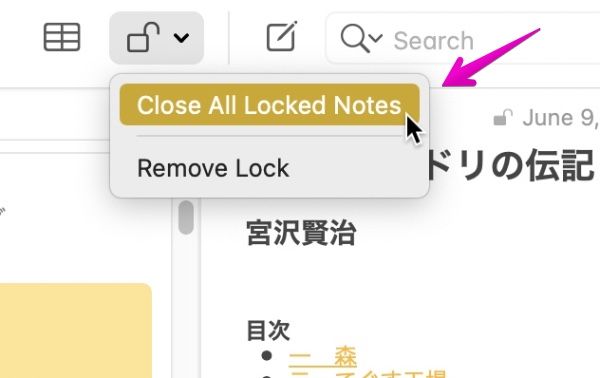
②. From the menu bar, select “Notes” – “Close All Locked Notes”
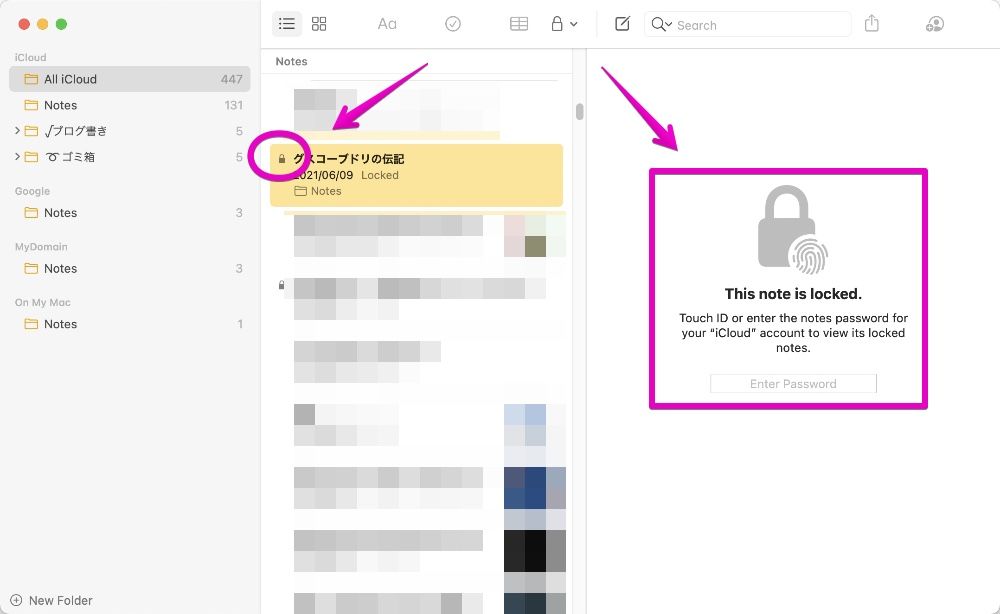
▶ When you hide the notes, the key-shaped icon changes to the locked state, and only the title is displayed in the notes list, but the contents cannot be seen.
View notes as list
View notes as gallery
Display locked note
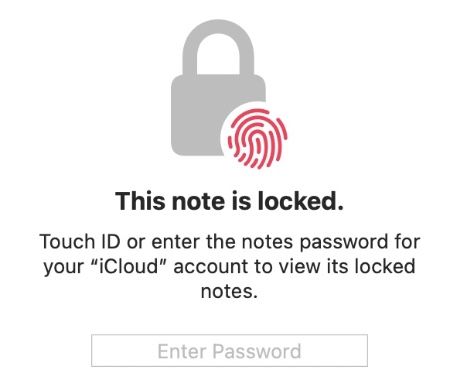
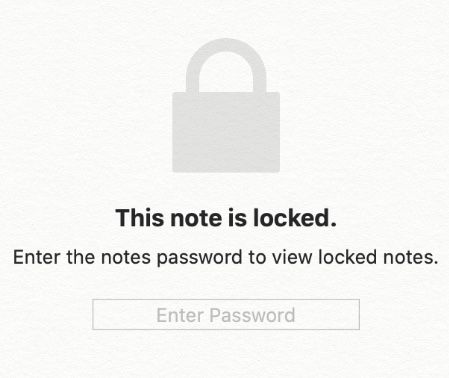
▶ To view locked notes, select one of the locked and hidden notes.
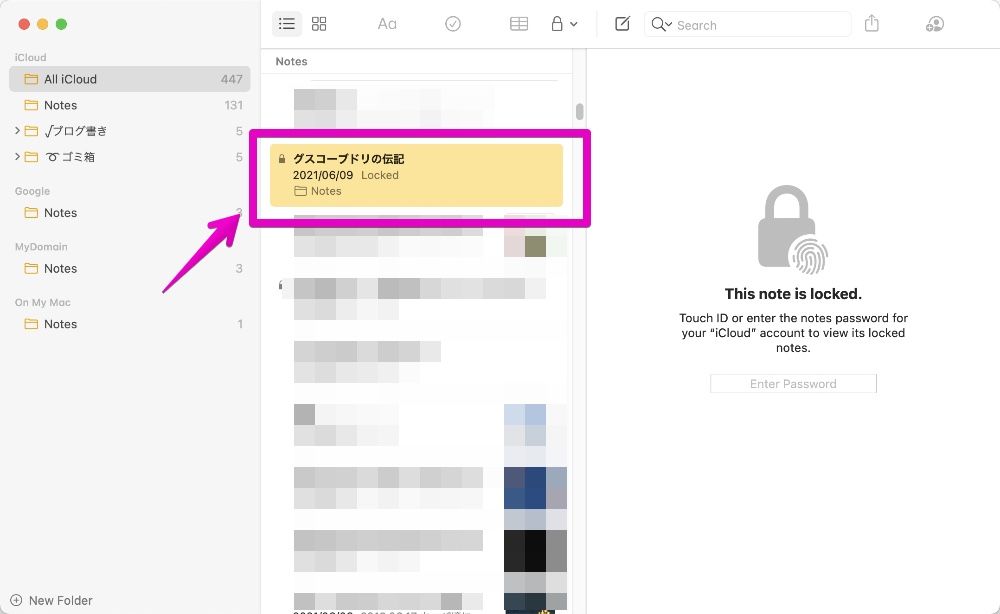
▶ The screen will say “This note is locked”, use Touch ID or enter your password.
【Touch ID-equipped Mac screen】
【Not Touch ID-equipped Mac screen】
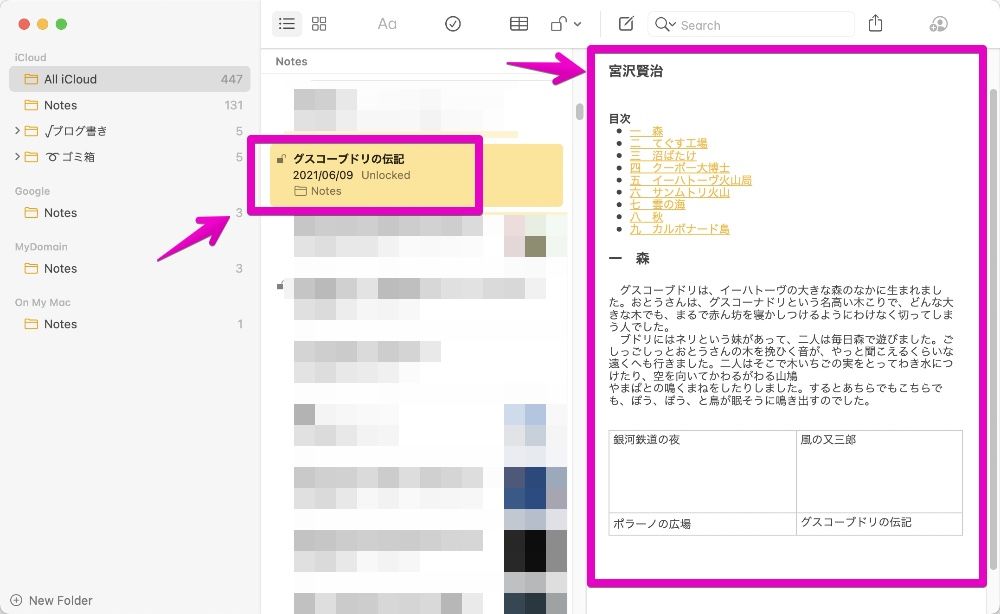
▶ All the notes that were locked and hidden will be displayed.
Remove lock from note
▶ In the app “Notes”, select the note you want to remove lock.
▶ To remove lock from your notes, do one of three things:
①. From the toolbar, click the “Remove Lock” icon
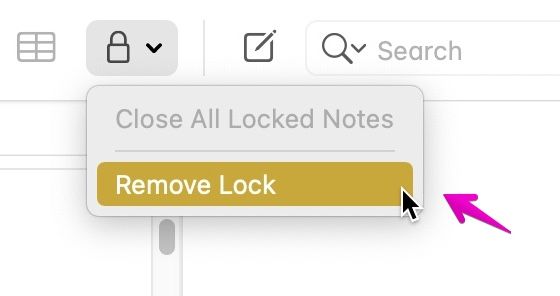
②. Select “Remove Lock” from the right-click menu
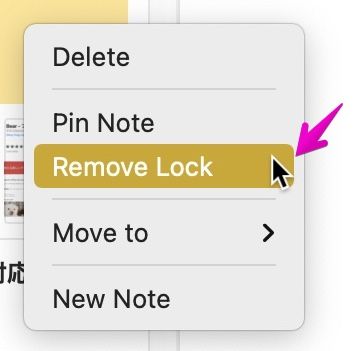
③. From the menu bar, select “File” – “Remove Lock”
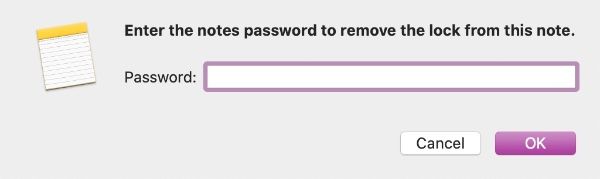
▶ The screen for removing the lock is slightly different for Macs with Touch ID and those without it, but follow the onscreen instructions.
【Touch ID-equipped Mac screen】
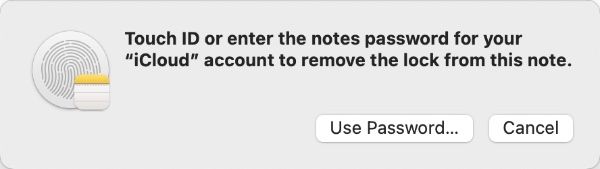
【Not Touch ID-equipped Mac screen】
Change password
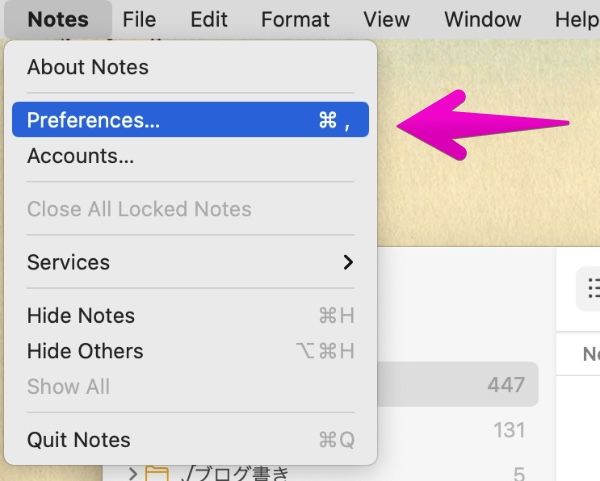
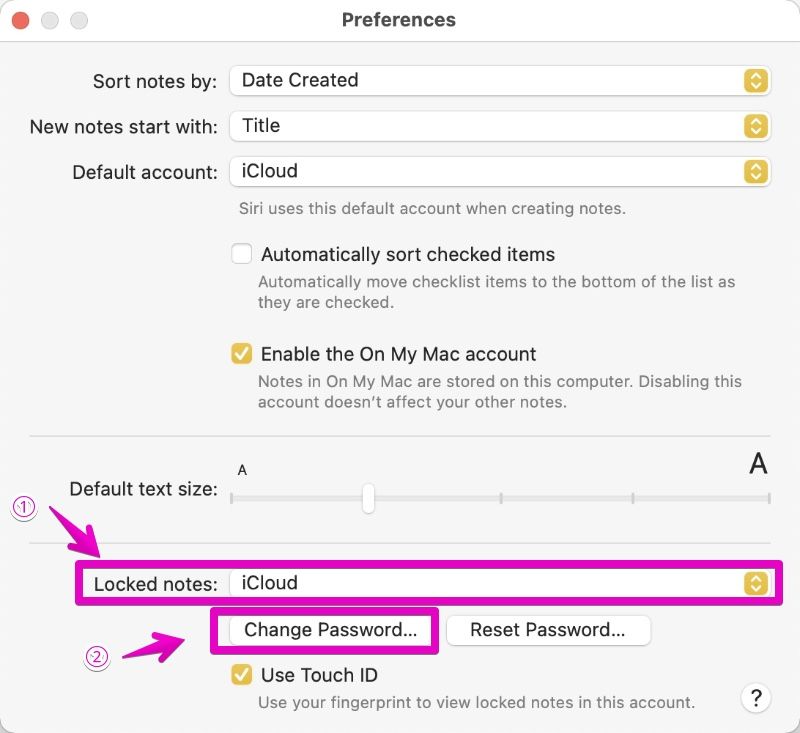
▶ In the app “Notes”, select “Notes” – “Preferences…” from the menu bar.
▶ When the “Preferences” screen is displayed, at first select the account (“iCloud” account or “On My Mac” account) whose password you want to change in the “Locked notes” item in ①, and then press the button ② “Change Password …”.
「環境設定」の画面が表示されたら、まず①で「ロックされたメモ」の項目でパスワード変更するアカウント(iCloudアカウントか、”このMac内”アカウントか)を選んで、次に②でボタン「パスワードを変更…」をクリックします。
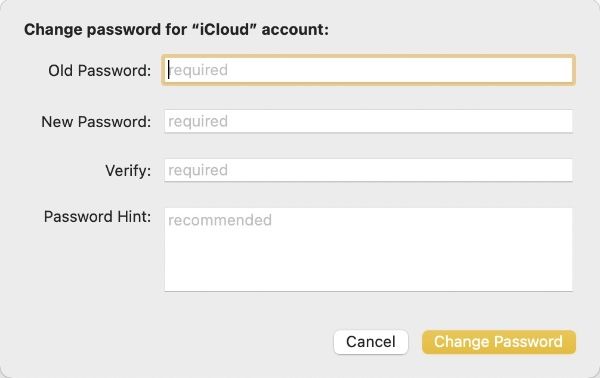
▶ When the password change screen is displayed, enter each item and finally click the button “Change password”.
パスワード変更画面が表示されたら、各項目を入力して、最後にボタン「パスワードを変更」をクリックします。
This completes the settings.
以上で設定は完了です。
Reset password
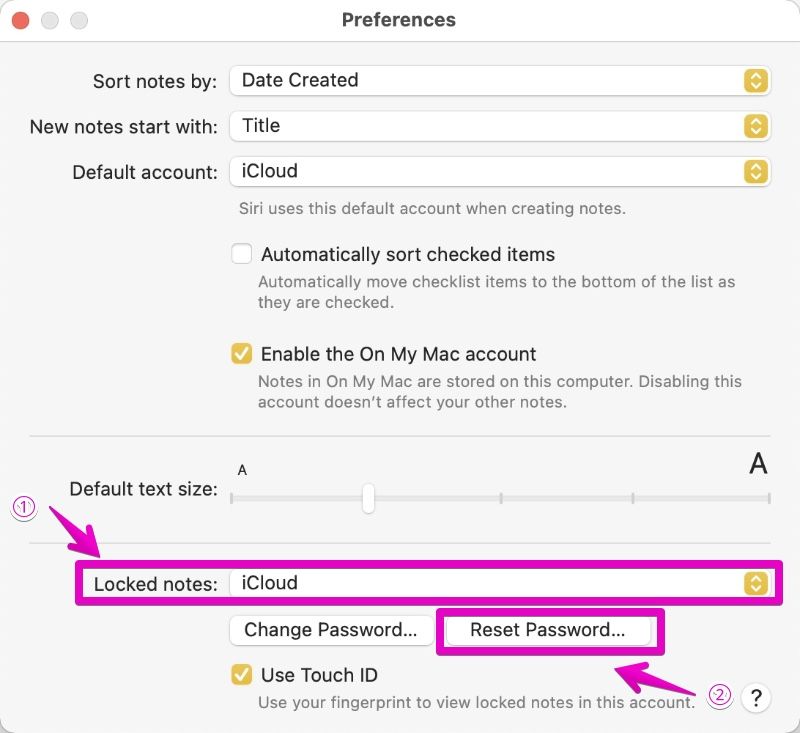
▶ In the app “Notes”, select “Notes” – “Preferences…” from the menu bar.
アプリ「メモ」で、メニューバーから「メモ」-「環境設定…」を選択します。
▶ When the “Preferences” screen is displayed, first select the account (iCloud account or “in this Mac” account) whose password you want to reset in the “Locked notes” item in ①, and then click the button ② “Reset Password… “.
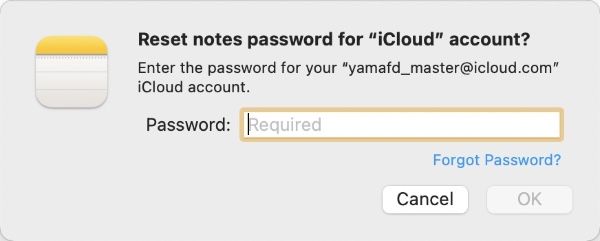
▶ When the screen, “Reset notes password ~ ?” appears, click the “OK” button.
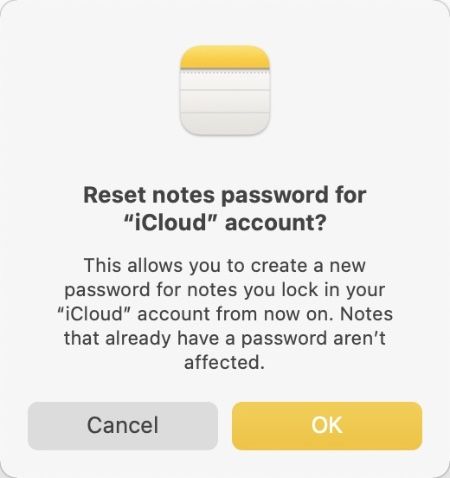
▶ If the note is at “Local account”, the setting is completed here, but if it is an “iCloud account”, a screen for confirming the iCloud ID and password will be displayed.
In that case, proceed according to the screen.
This completes the settings.
Reference information


コメント