Double-clicking a file on your Mac will open the app that is set by default, but I will show you how to change this setting.
There are two methods to do this, one is to use the Mac standard function and the other is to use the app “SwiftDefaultApps”.
Advantages and disadvantages of the two methods
| Method | Advantage | Disadvantage |
|---|---|---|
| ① Mac standard function | ・Can be used with Mac standard function | ・It is necessary to open the setting screen for each file type and set it |
| ② App “SwiftDefaultApps” | ・Multiple file types can be set collectively on one screen | ・It cannot be used when the installation of apps is prohibited, such as at companies and schools |
① How to change the default open app with only Mac standard function
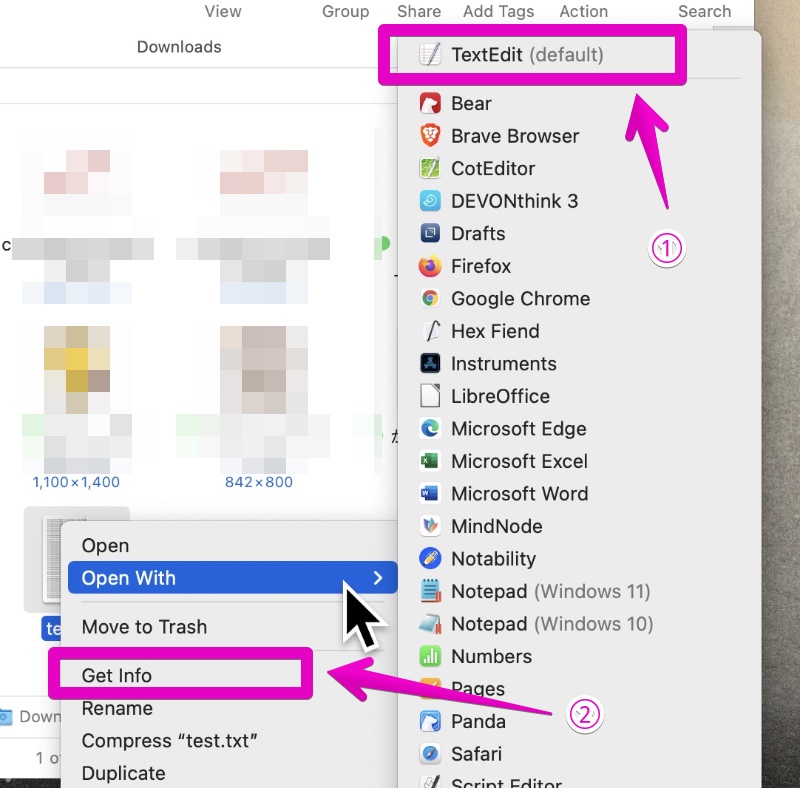
If you right-click on a file in the Finder, a menu will be opened.
① In the list of apps displayed in “Open With”, the app written as (default) at the top is the default app (the app that opens by double-clicking on the left).
② Select “Get Info” to display the file information.
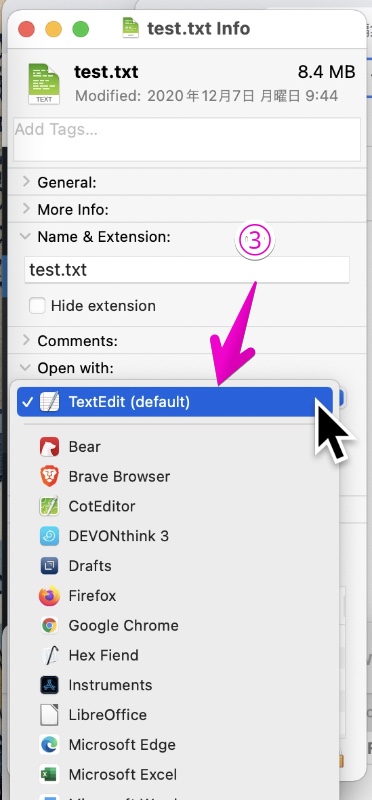
When the information window is displayed, select the app you want to use by default from the apps listed in ③ “Open with this application”.
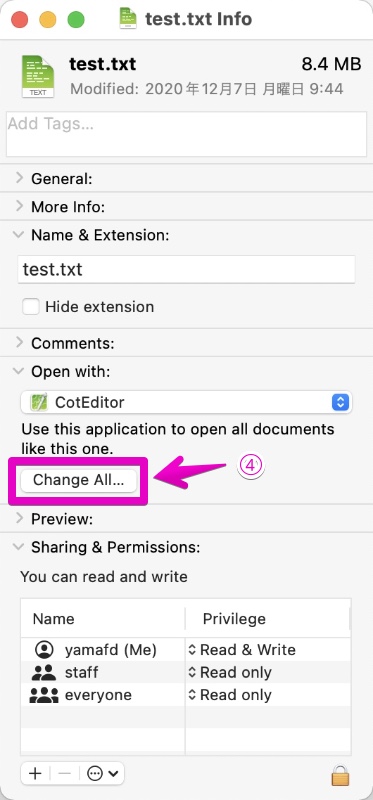
After that, if you click the ④ “Change All…” button, all files with the same extension and file format will be opened in the set app.

This is the end of the explanation, “① How to change the default open app with only Mac standard function”
② How to change the default open app with “SwiftDefaultApps”
Previously, the app named “RCDefaultApp” was the default standard.
However, it stopped working from macOS 10.12 Sierra released in 2016, and the official website of the app has already been closed.
Currently, “Swift Default Apps”, which was developed to replace this app, is the default standard.
Therefore, from here, I will introduce in detail how to install and use “Swift Default Apps”.
②-1 How to install SwiftDefaultApps
▶ Click the link below to open the official GitHub site.
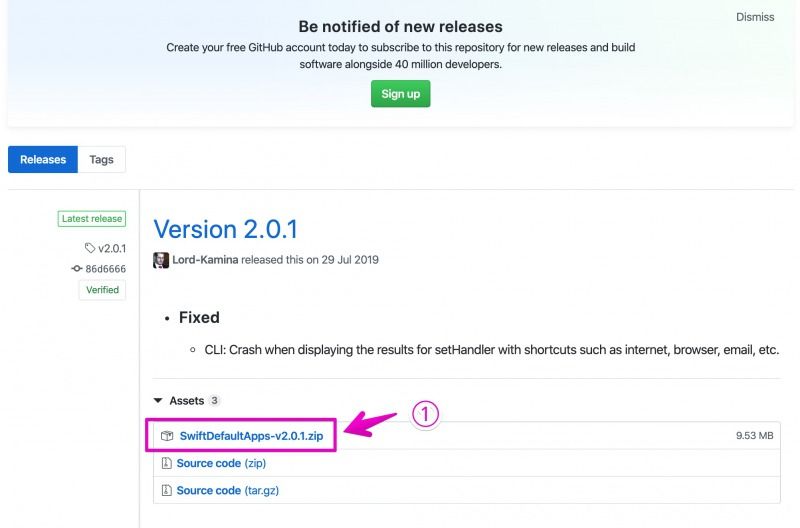
▶ Open the site and download the latest version of the ZIP file.
By the way, the ZIP file is named “SwiftDefaultApps-v ~ .zip” (~ is the version number).
As an example, the screen below is as of December 6, 2021, but since the ZIP file indicated by the arrow ① is the latest version, download it.
▶ After downloading the ZIP file, double-click it to extract (decompress) it.
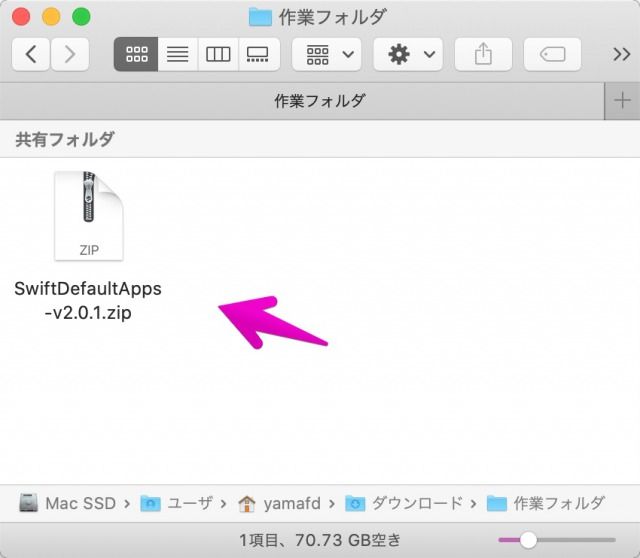
▶ When the ZIP is unzipped (decompressed), a folder will be created, so open the folder.
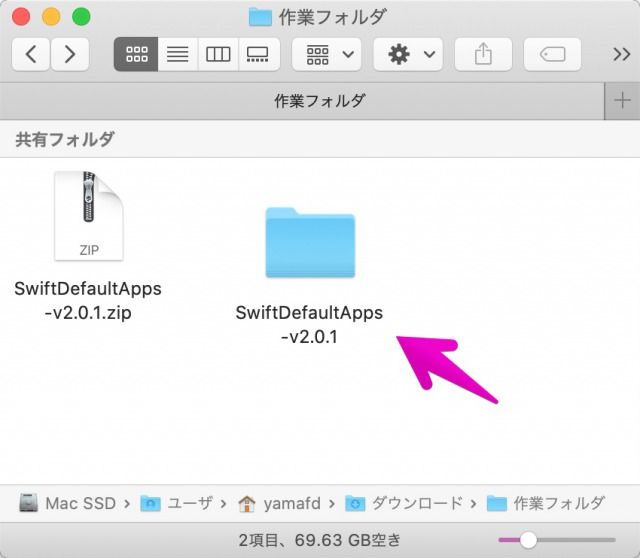
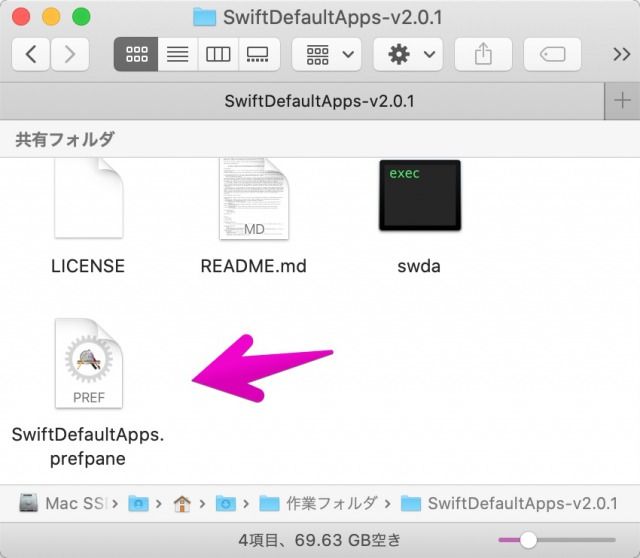
▶ As shown in the screen below, there is a “SwiftDefaultApps.prefpane” file in the folder, so double-click it to start the installation.
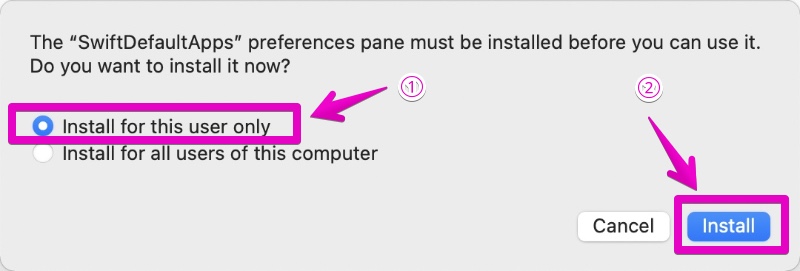
▶ When the installation confirmation screen appears as shown in the screen below, select ① “Install for this user only” and ② click the “Install” button.
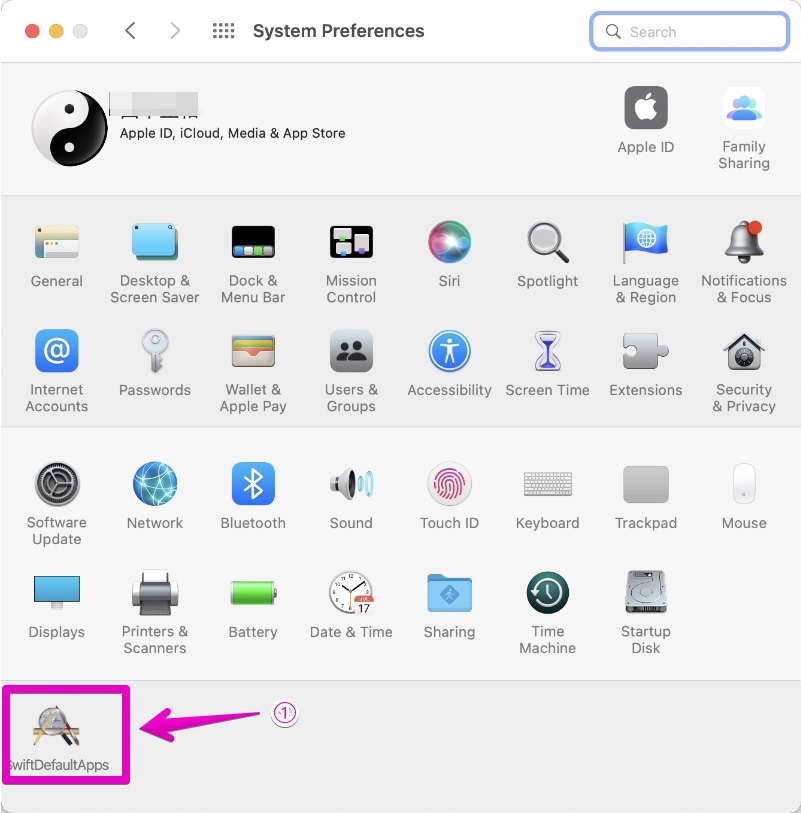
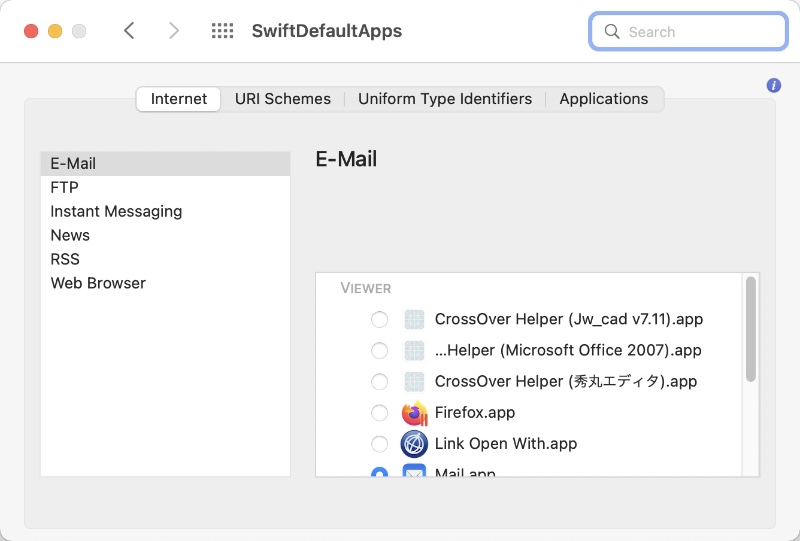
▶ When the installation is completed, the icon ① will be added for a moment, and the screen will immediately switch to the SwiftDefaultApps setting screen.

This is the end of the explanation, “How to install”.
I will continue to explain “How to use”.
②-2 How to use SwiftDefaultApps
I will explain how to use it from here, but since technical terms such as those used by programmers appear on the setting screen of “SwiftDefaultApps” and it is difficult for general users to understand, I will explain with a concrete example with an emphasis on comprehensibility.
As a concrete example, try changing the default app that opens a text file with the extension txt as follows.
【Before the change】
Mac genuine app “TextEdit.app”
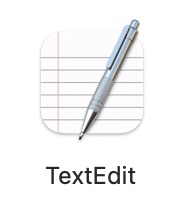
【After the change】
Free app “CotEditor.app”

“CotEditor.app” is available from the Mac App Store linked below.
From here, I will explain how to use it.
▶ Select ① “SwiftDefaultApps” from “System Preferences” on your Mac.
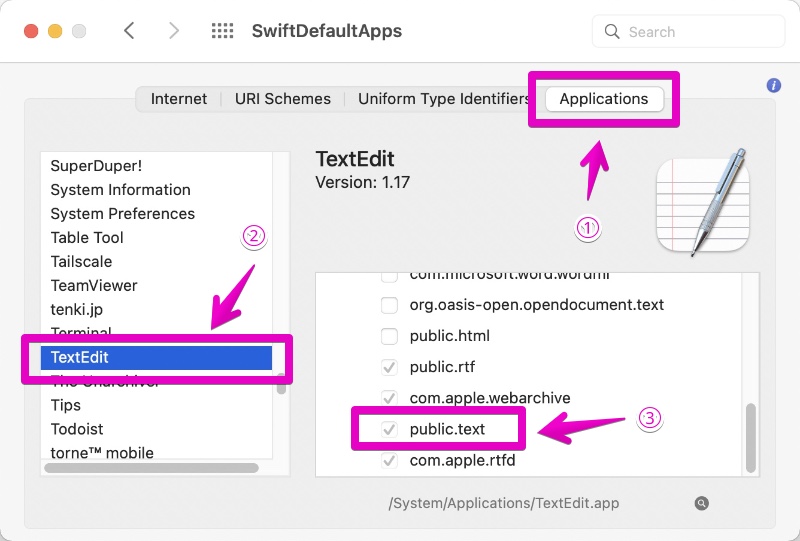
▶ When the following screen opens, ① Click “Applications” from the tab at the top of the screen.
Next, from the application list on the left, click ② “TextEdit” and make sure that ③ “public.text” is checked.
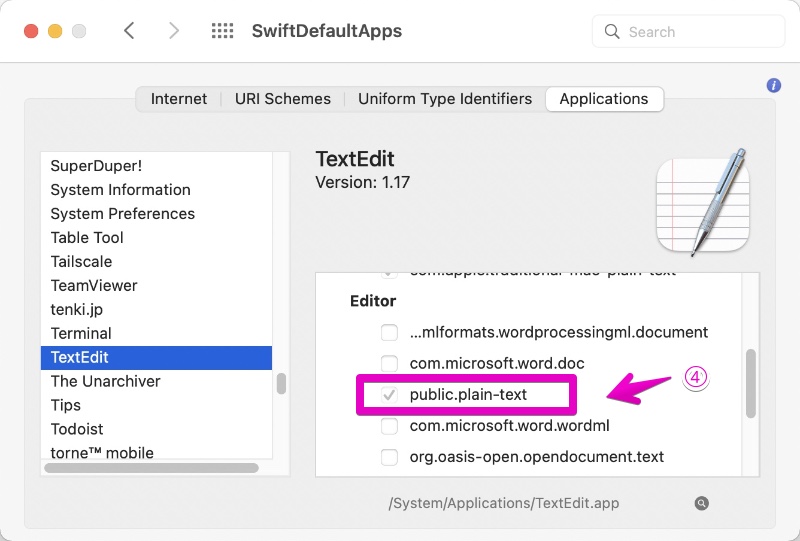
In addition, make sure that ④ “public.plain-text” is also checked.
What this does is check the file format assigned to “TextEdit”.
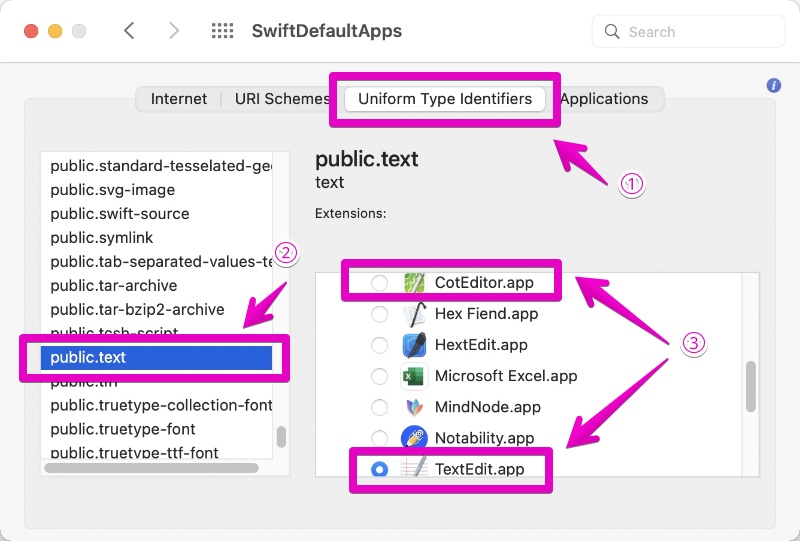
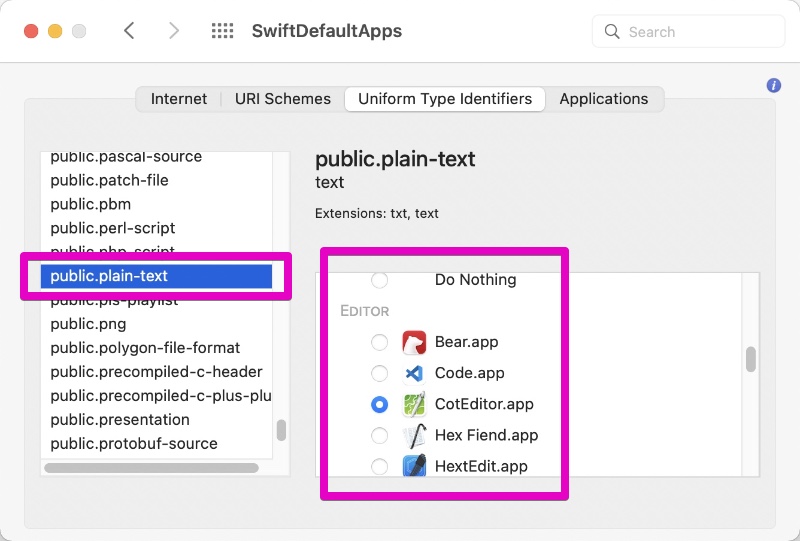
▶ Next, ① Click “Uniform Type Identifiers” from the tab at the top of the screen.
Next, from the file type list on the left, click ② “public.text” and change the check mark from ③ “TextEdit.app” to “CotEditor.app”.
What this is doing is changing the app assigned to the file type “public.text”.
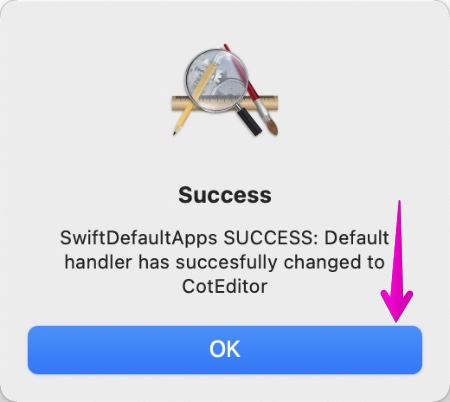
▶ If the change is successful, “Success” will appear as shown in the screen below, so click the “OK” button.
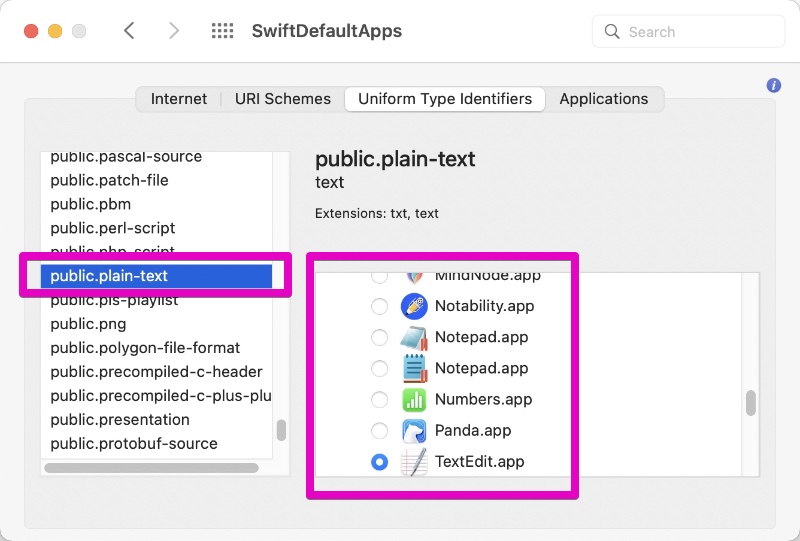
▶ Similarly, change “public.plain-text”.

Was it a little difficult?
The point is to check the “Uniform Type Identifiers” assigned to the application on the tab “Applications”.
With that in mind, “Uniform Type Identifiers” is like a file extension.
Reference information
The following is Apple’s official website.
It shows how to change the app that opens the file temporarily and how to change it permanently.

This is the end of this article.





コメント