I will introduce some ways to make a list of apps installed on your Mac.
The installation destination of the apps is basically in the “Applications” folder, but there are apps that are installed in other locations, so this is a method that includes that as well.
List of how to make a list of apps and advantages / disadvantages
| Method | Advantages | Disadvantages |
|---|---|---|
| ① Use Finder | ・Easy to use | ・Except for “Applications” folder |
| ② Use Smartfolder function | ・Can include anything other than the “Applications” folder | ・It takes time and effort |
| ③ Use Terminal.app | ・Can include anything other than the “Applications” folder ・It takes less time and effort than ② | ・Nothing special |
| ④ Use dedicated app “List My Apps” | ・Easy to use ・Easy to read list ・Can also see the version and installation date of the app ・Can export to Excel or CSV | ・Paid app only ($1.99 as of Dec. 2021) ・Need to install ・Except for “Applications” folder |
① Use Finder
In the Finder of Mac, there is a function that you can paste the folders and files names by selecting them, copying their names, and pasting them into an editor such as “TextEdit.app” of the genuine Mac app.
Here are the steps to create a list of apps using this function.
In addition, here is the procedure when using “TextEdit.app”.
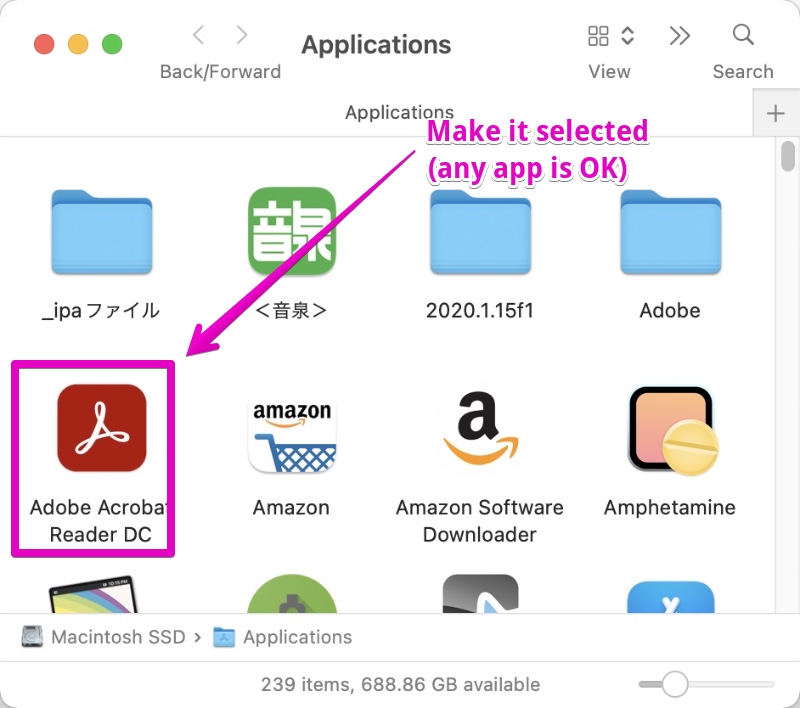
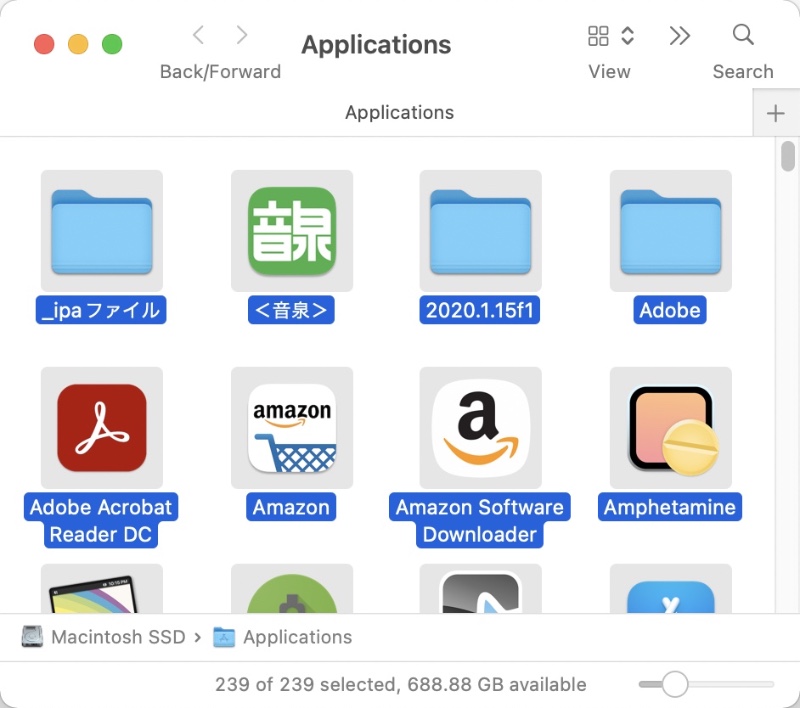
▶ Bring the Finder to the front, display the folder “Applications”, and click any app to make it selected.
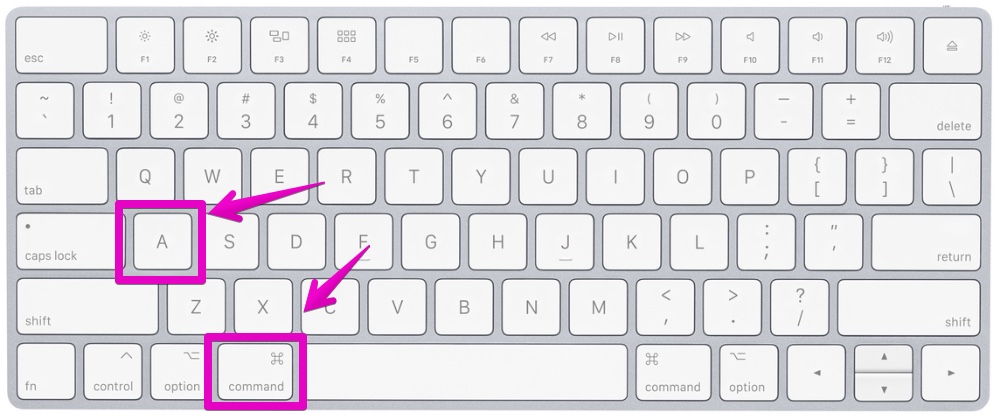
▶ Press the keyboard shortcut command ⌘ + A to select all items.
▶ With all items selected, press the keyboard shortcut command ⌘ + C.
Click to copy the contents to the clipboard, but nothing changes on the screen.
▶ Currently, all items are selected in the Finder, so click on the white part that has nothing such as an icon or label to cancel the selected state.
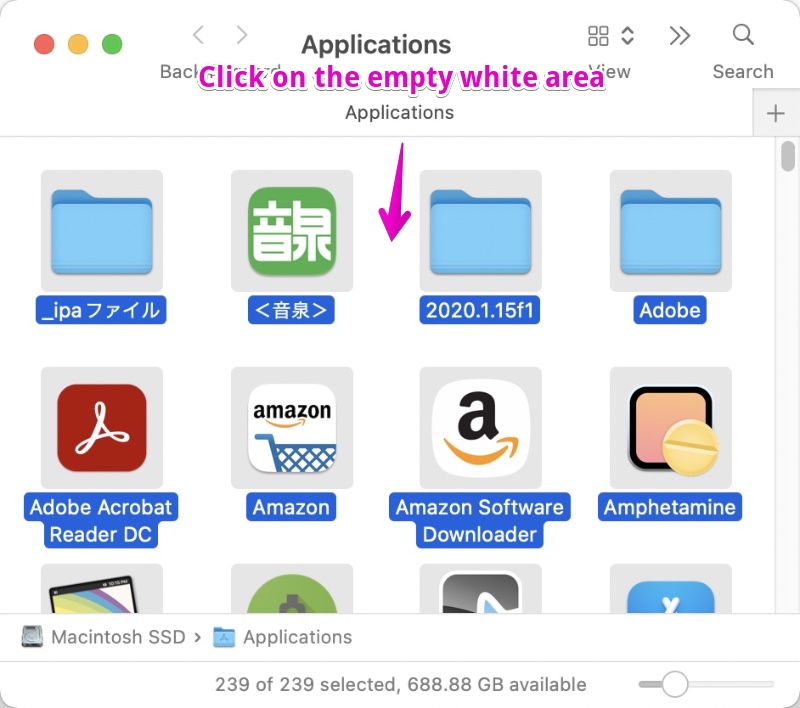
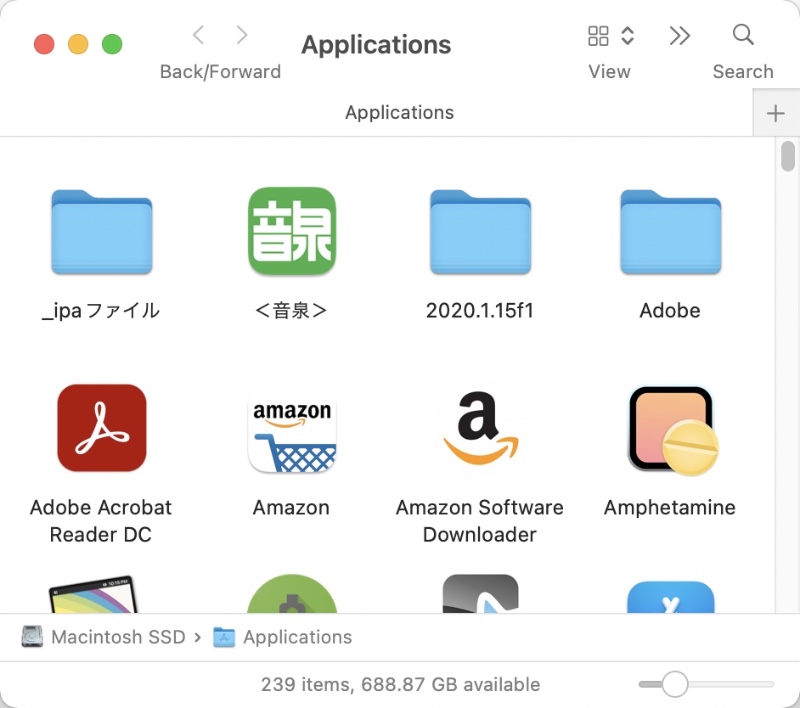
The following is the deselected state.
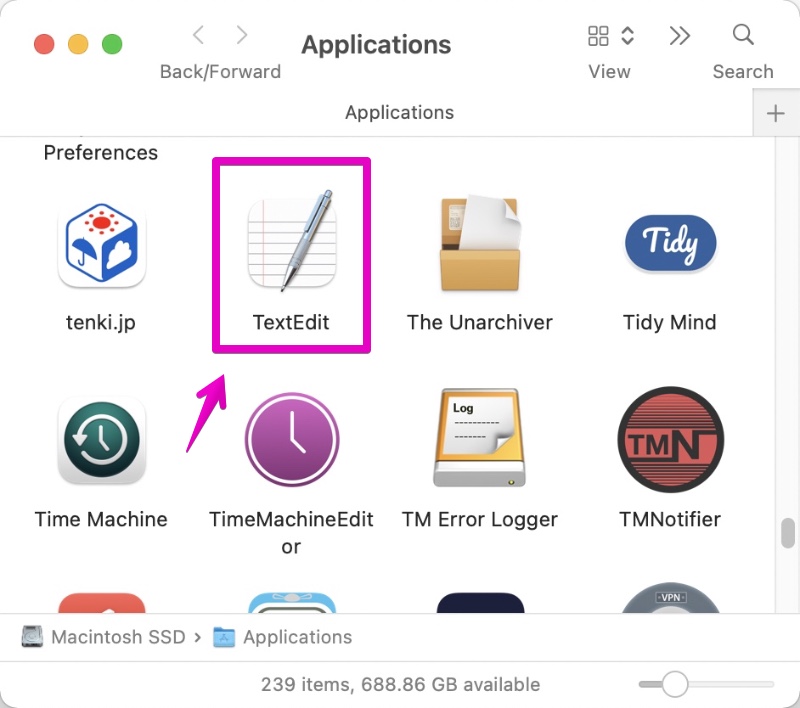
▶ Start “TextEdit.app” in the folder “Applications”.
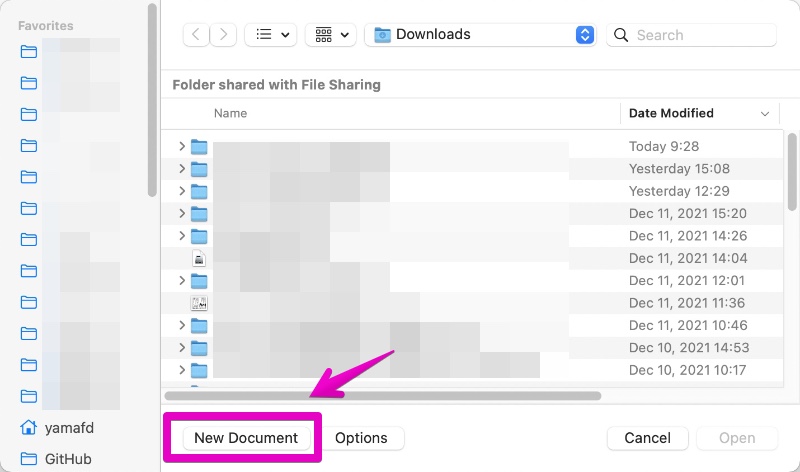
▶ The file operation screen will be displayed when “TextEdit.app” is started.
Click the “New Document” button as shown in the figure.
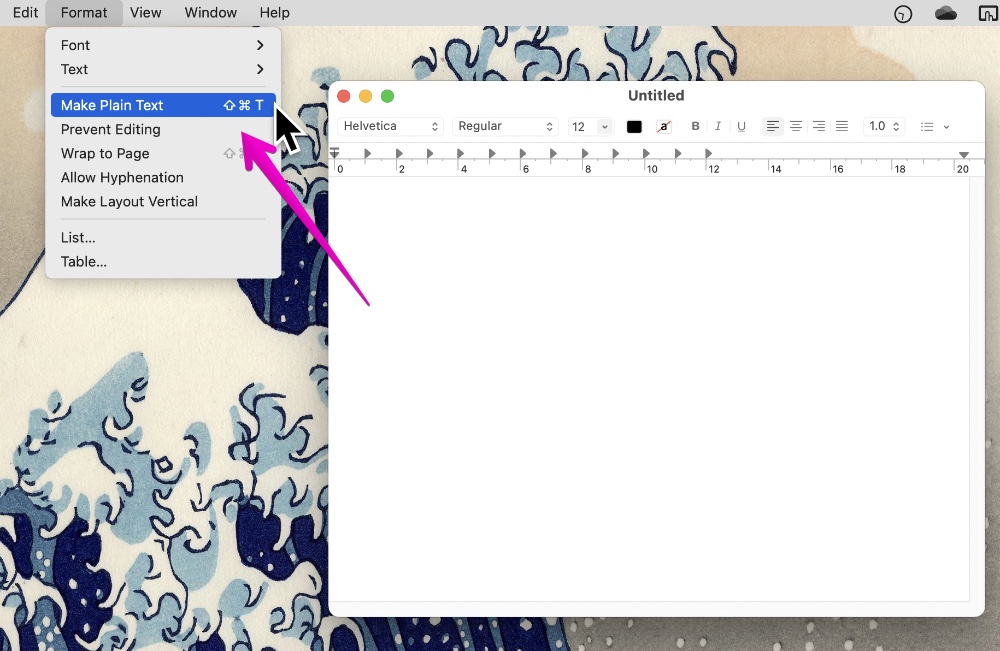
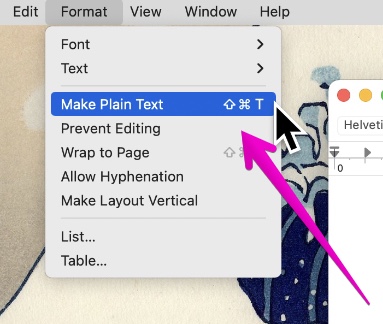
▶ When “TextEdit.app” starts, select “Format” -> “Make Plain Text” from the menu.
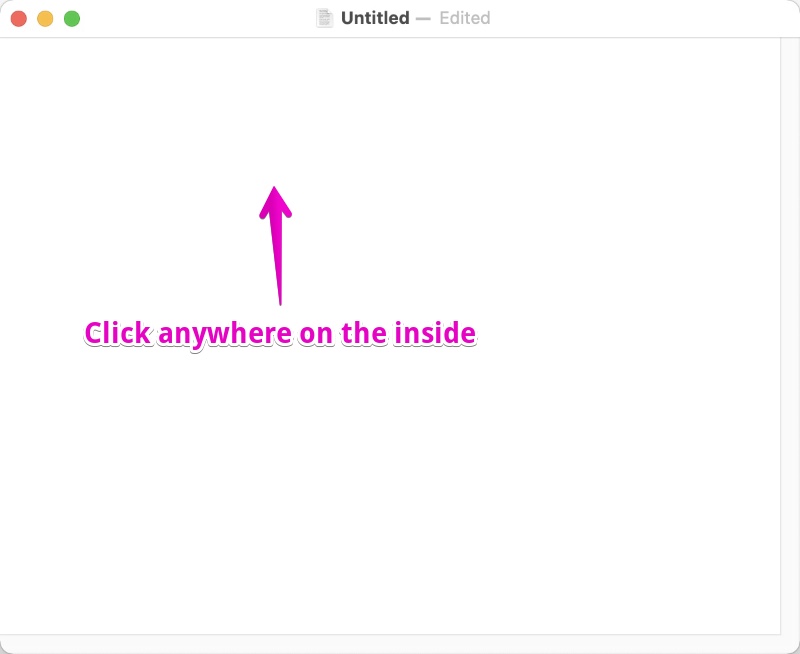
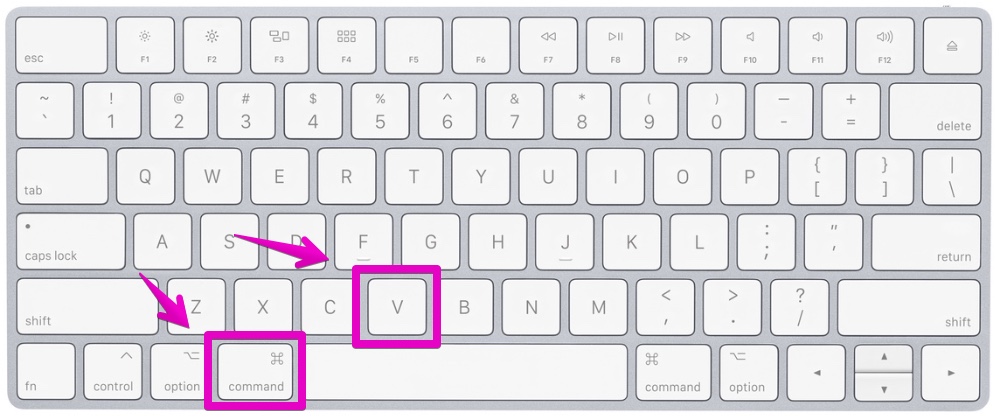
▶ Click anywhere inside “TextEdit.app”, then press the keyboard shortcut command ⌘ + V.
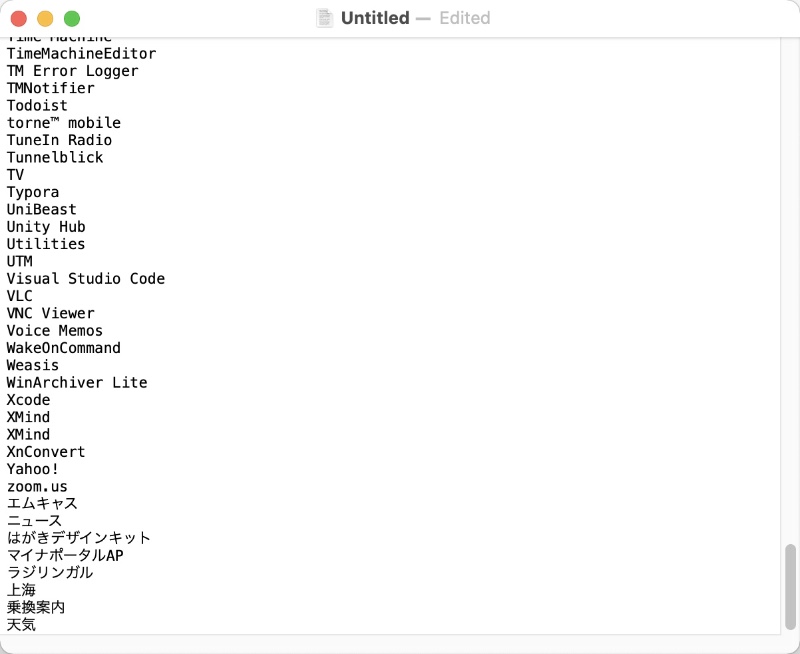
▶ As shown in the figure below, the contents saved in the clipboard, that is, the items in the “Applications” folder are pasted.
After that, give a file name if necessary and save it in a suitable location.

This is the end of the explanation, “① Use Finder”.
② Use Smart Folder function
This is a method to create a list of apps for the entire Mac using the “Smart Folder” function that can be used as standard on the Mac.
“Smart Folder” is a function to extract folders and files that meet the preset conditions.
For example, you can extract image files created within the last week.
The following is the procedure using “Smart Folder”.
▶ Bring the Finder to the front.
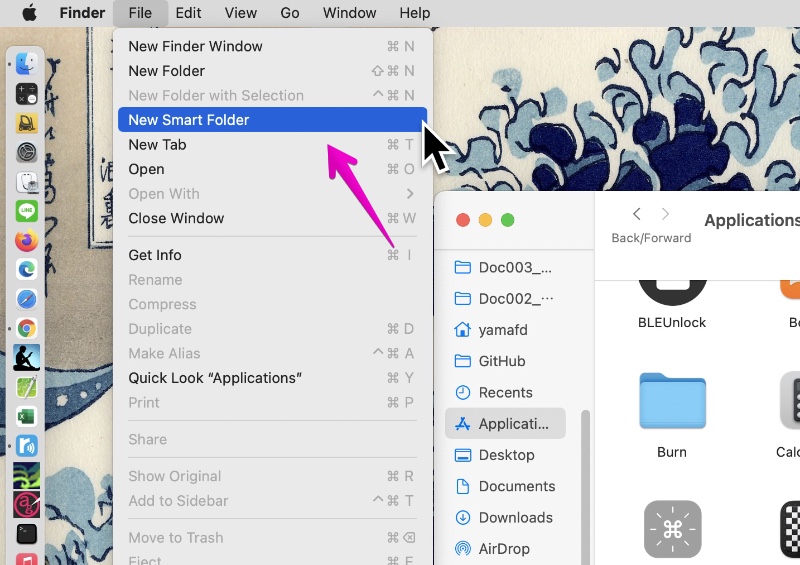
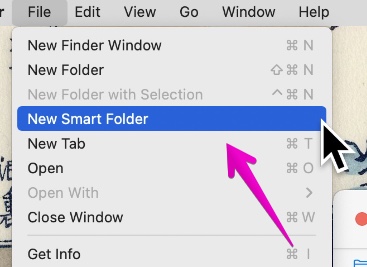
When it is displayed, select “File” -> “New Smart Folder” in the menu bar.
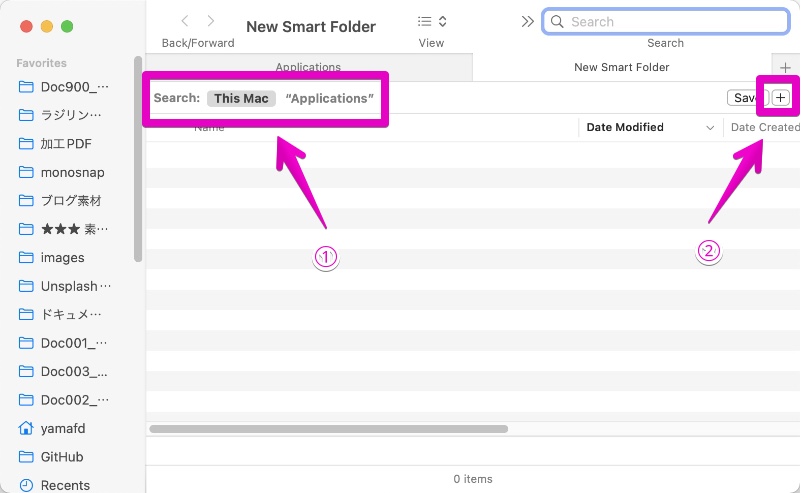
▶ When the new smart folder setting screen is displayed as shown in the screen below, ① click “Search: This Mac” and ② click the + button.
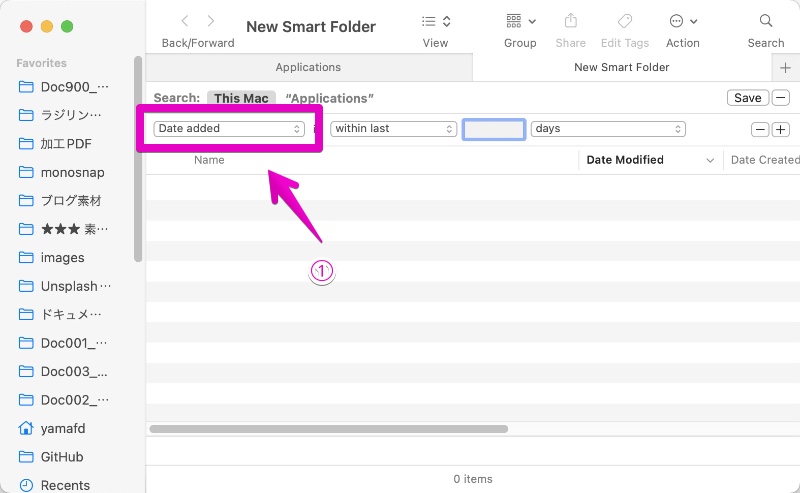
▶ One line will be added as shown in the screen below.
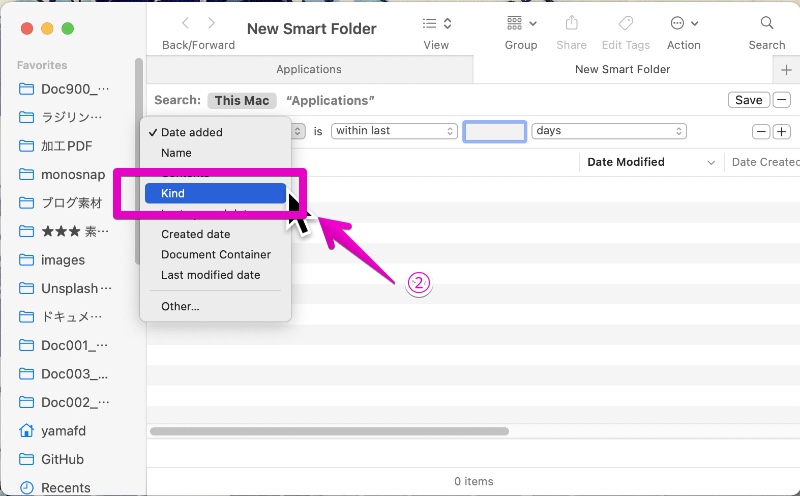
① Click the part labeled “Date added” and ② select “Kind” from the list.
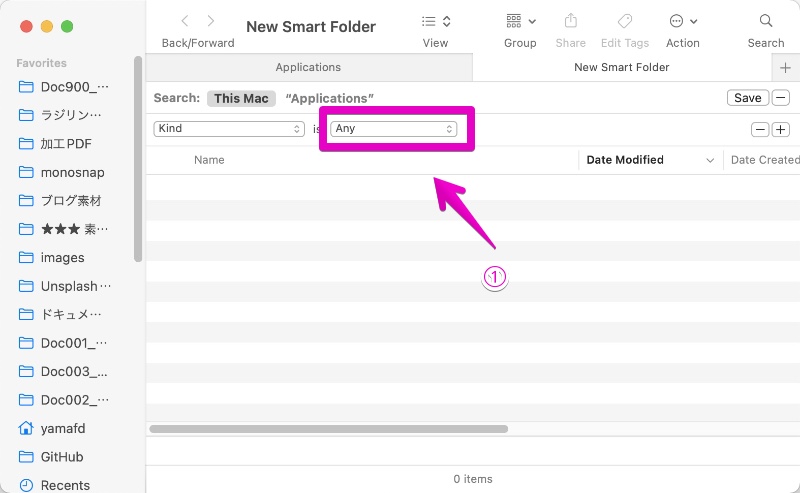
▶ As shown in the screen below, the “Type” will be “Any”.
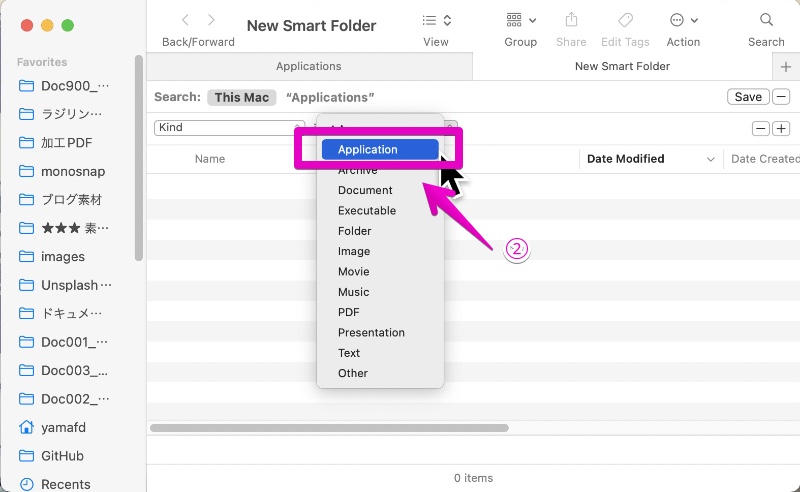
① Click the part marked “Any” and ② select “Application” from the list.
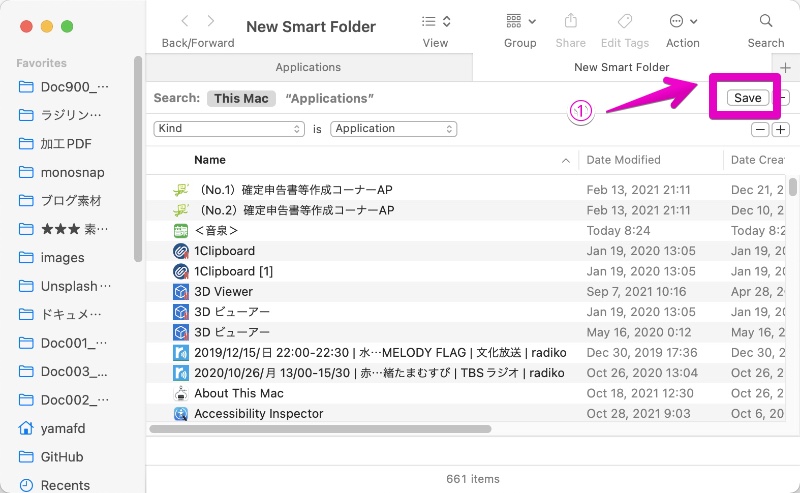
▶ When the application list can be displayed as shown in the screen below, the “Smart Folder” is complete!
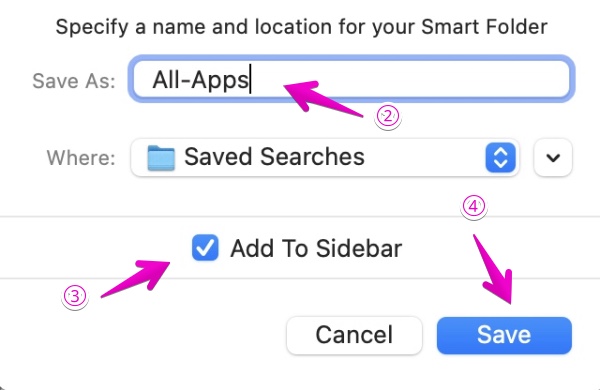
① Click the “Save” button, ② give it a “name”, check ③ “Add To Sidebar”, and then ④ click the “Save” button.
▶ The “Smart Folder” you just created will be added to the sidebar, so click it if you want to display it.
When this “smart folder” is displayed, you can sort by clicking the “Name”, “Date Modified”, etc. pointed to by the arrows below.
▶ You can copy and paste the “Smart Folder” created here by copying and pasting using “TextEdit.app” in the same way as “① Use Finder“.
For how to do it, refer to “① Use Finder” in the previous section.

This is the end of the explanation, “② Use Smart Folder function”.
③ Use Terminal.app
▶ Launch “Terminal.app” in “Applications” -> “Utilities” in Finder.
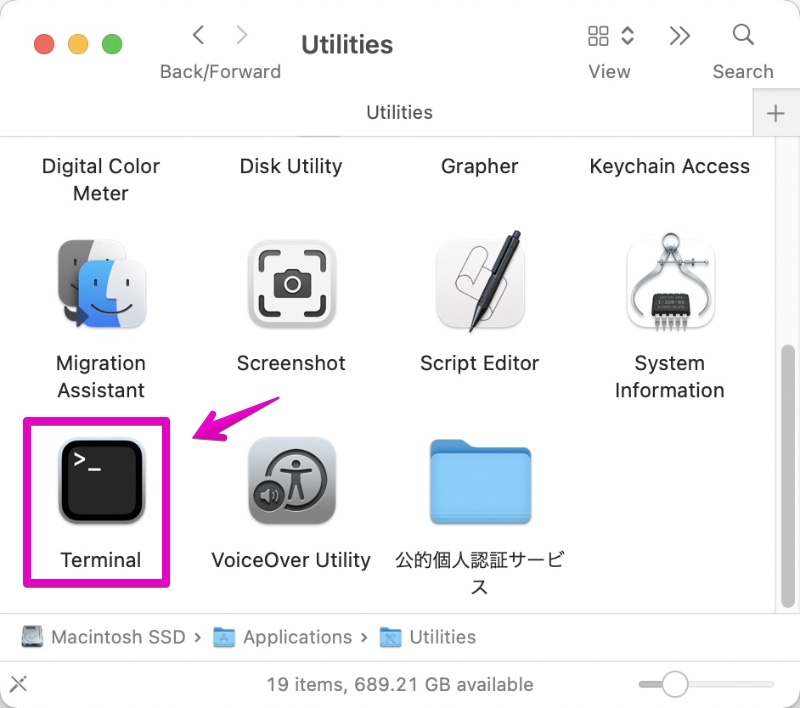
▶ When “Terminal.app” starts, type or copy and paste the following command and press the return on your keyboard to execute it.
① For only apps in “Applications”
ls /Applications/ > Apps-AppFolder.txt
② For all apps in your Mac
sudo find / -iname '*.app' > Apps-All.txt
You will be prompted to enter the password when executing the command, so enter the password.
▶ When the command completes, a list will be created in the user folder, so open it with an editor such as “TextEdit.app”.
The resulting list looks like this:
① For only apps in “Applications”
AVGAntivirus.app
Adobe Acrobat Reader DC.app
Android Studio.app
AppCleaner.app
... and so on
② For all apps in your Mac
/usr/libexec/MiniTerm.app
/usr/local/git/share/git-gui/lib/Git Gui.app
/Library/Apple/System/Library/CoreServices/MRT.app
/Library/Apple/System/Library/PrivateFrameworks/MobileDevice.framework/Versions/A/AppleMobileDeviceHelper.app
... and so on
The command “ls” introduced here can be combined with options to display more information such as time stamps.
Details are introduced in the next article.

This is the end of the explanation, “③ Use Terminal.app”.
④ Use dedicated app “List My Apps”

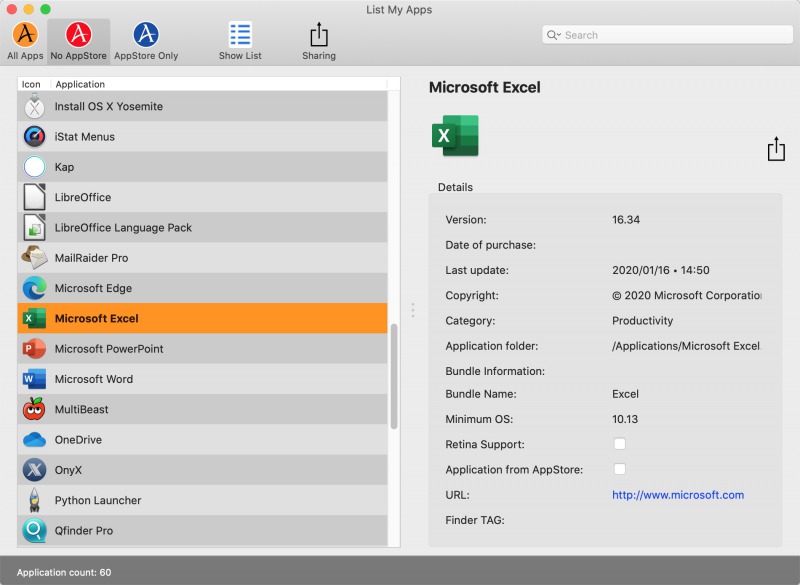
It is a paid app of $1.99 as of Dec. 2021. (Prices may change.)
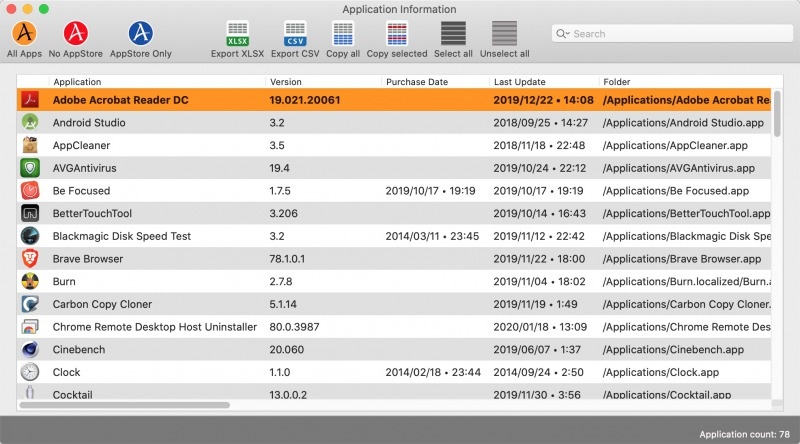
Since I actually purchased and used it, I put a screenshots of the screen below.
In addition, the list can be exported in Excel or csv format.

This is the end of the explanation, “④ Use dedicated app List My Apps”.
Conclusion: :After all, which method is recommended?

If you just want to make a list of apps, I recommend “① Use Finder“.
However, since you will miss apps except the “Applications” folder, if you want to include all apps on your Mac, “③ Use Terminal.app” is a good choice.

“② Use Smart Folder function” takes time to set up, so if you need to check it repeatedly in the future, you can use it.
In other words, “Smart Folder function” is programming in a broad sense, so it takes time to make the initial settings, but once it is created, it is convenient for repeated use.
If it is only once, I think that “① Use Finder” or “③ Use the terminal.app” are good choices.
Reference information

This is the end of this article.






コメント