
Here are some solutions for when you can’t take screenshots on your Mac, by symptom pattern.
For example, I will isolate from the symptoms such as whether or not there is a sound when taking a screenshot.
Isolation of symptoms when screenshots cannot be taken
See the flowchart below and check from ① to ③.
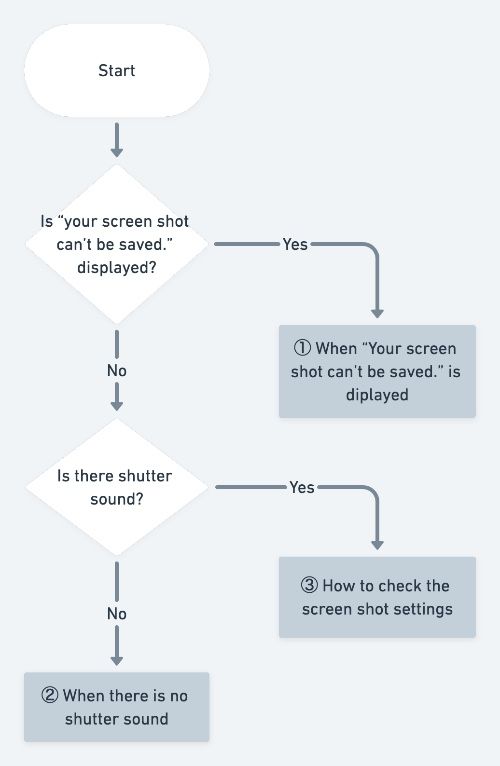
You can jump to each confirmation method by clicking the link below.
- ① When “Your screen shot can’t be saved.” is displayed
- ② When there is no shutter sound
- ③ How to check the screen shot settings

Once the isolation is complete, here is an explanation of the specific confirmation method!
① When “Your screen shot can’t be saved.” is displayed
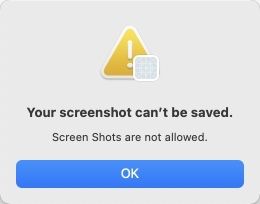
If you see “Screen Shots are not allowed.” as shown above, make sure your Mac is not set to prohibit screenshots.
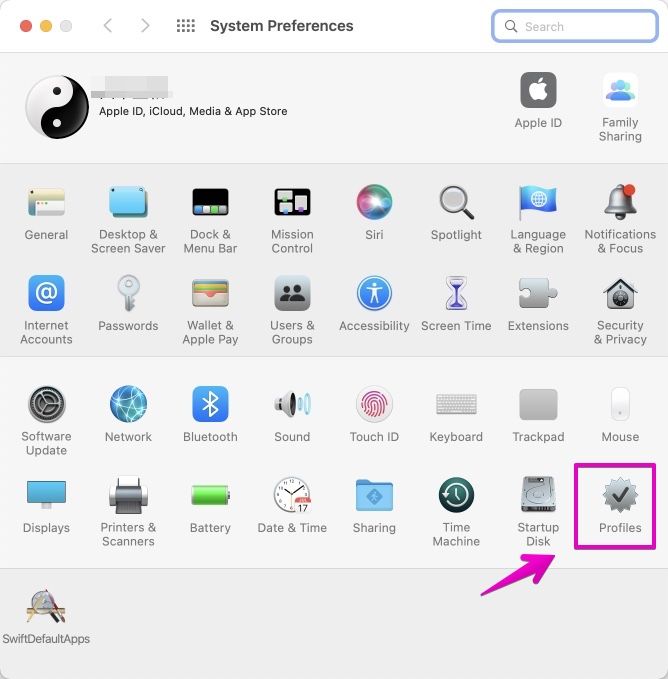
To check, launch “System Preferences”, then click the “Profile” icon to see if any profile has been set.
If your profile is set, as shown in the figure below, it’s likely that your Mac administrator has set it to “Prohibit screenshots for security reasons”.
In that case, talk to your Mac administrator.
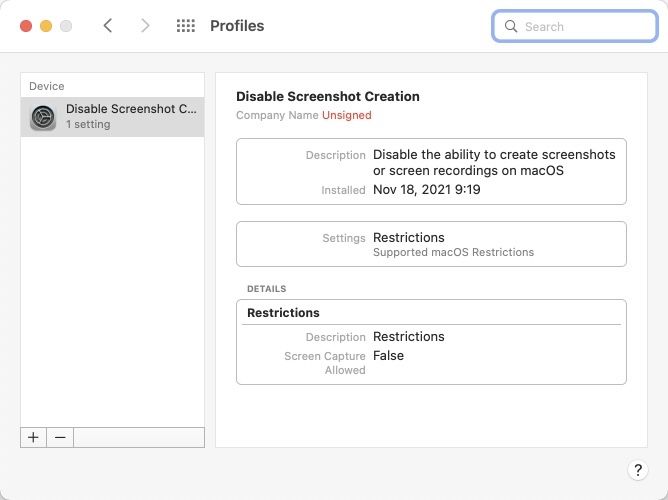
The profile-based screenshot prohibition settings introduced here are explained in detail in the following articles.


This is the end of “‘① Your screen shot can’t be saved.’ is displayed.”
② When there is no shutter sound
If you don’t hear the shutter sound when you take a screenshot, the keyboard shortcut keys may be disabled or the assignments may have changed.
The key bindings may be changed by the user himself, or they may change arbitrarily when installing some app.
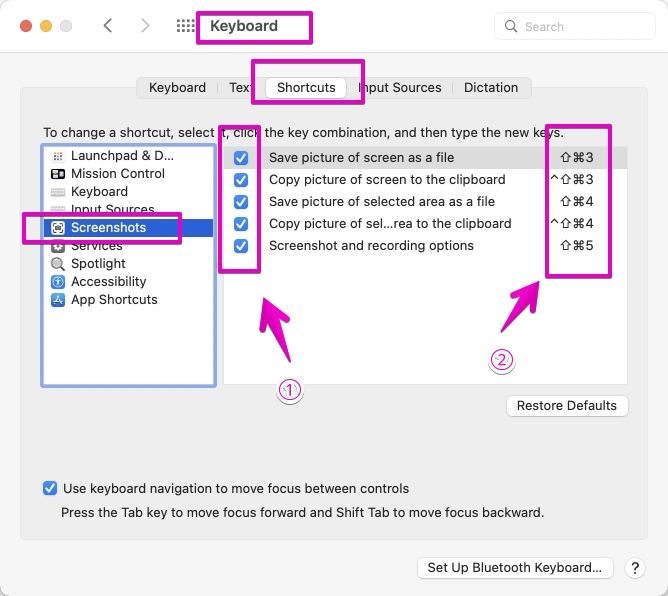
To check, start “System Preferences”, then follow “Keyboard”-> “Shortcuts”-> “Screenshots”.
If ① is unchecked in the figure below, the keyboard shortcut is disabled.
You can also check if the key assignment has been changed in ②.
The key assignments for keyboard shortcuts introduced here are explained in detail in the following articles.


This is the end of “② If there is no shutter sound.”
③ How to check the screenshot settings
If ① or ② does not apply, or if ① or ② does not solve the problem, use the genuine Mac app “Terminal” to check the screenshot settings.
The procedure is explained below.
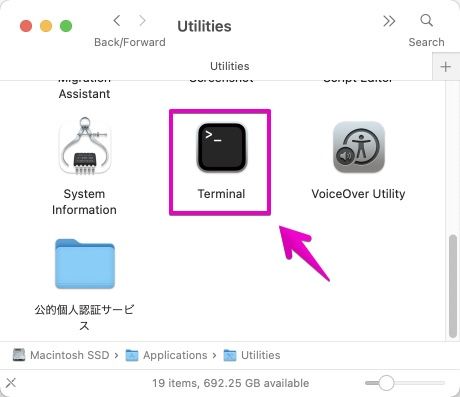
▶ In Finder, double-click “Terminal” in the folder “Applications”-> “Utilities” to start it.
▶ Once the Terminal is up, copy and paste the following command to see the screenshot settings.
defaults read com.apple.screencapture
The following is the result of the actual execution.
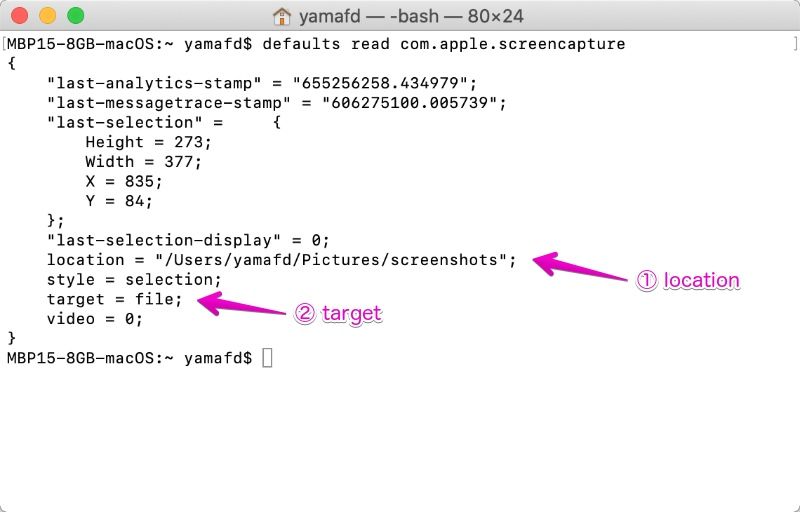

Various things were displayed, but where should I look?

There are two places to see, the location of ① and the target of ②.

Since the location of ① is the place to save the screenshot image, please open this place in Finder and check if the image is saved.

There are the following five targets for ②.
- file
- clipboard
- messages
- preview
Only the top file saves the screenshot image to a file.

So, to save the file, copy and paste the following command and execute it.
That will be the default file save.
defaults delete com.apple.screencapture target

There isn’t enough space to introduce screenshot settings using the terminal here, so if you want to know more, see the following link.
It explains in detail what you can do.


This is the end of “③ How to check the screenshot settings.”
Conclusion
I’ve explained what to do if you can’t use screenshots.
When searching the net, there are many sites that recommend OS reinstallation at the beginning, but first try the contents explained on this page.
By the way, this site has many articles about Mac screenshots.
First of all, please see the following [Summary] article.


コメント